
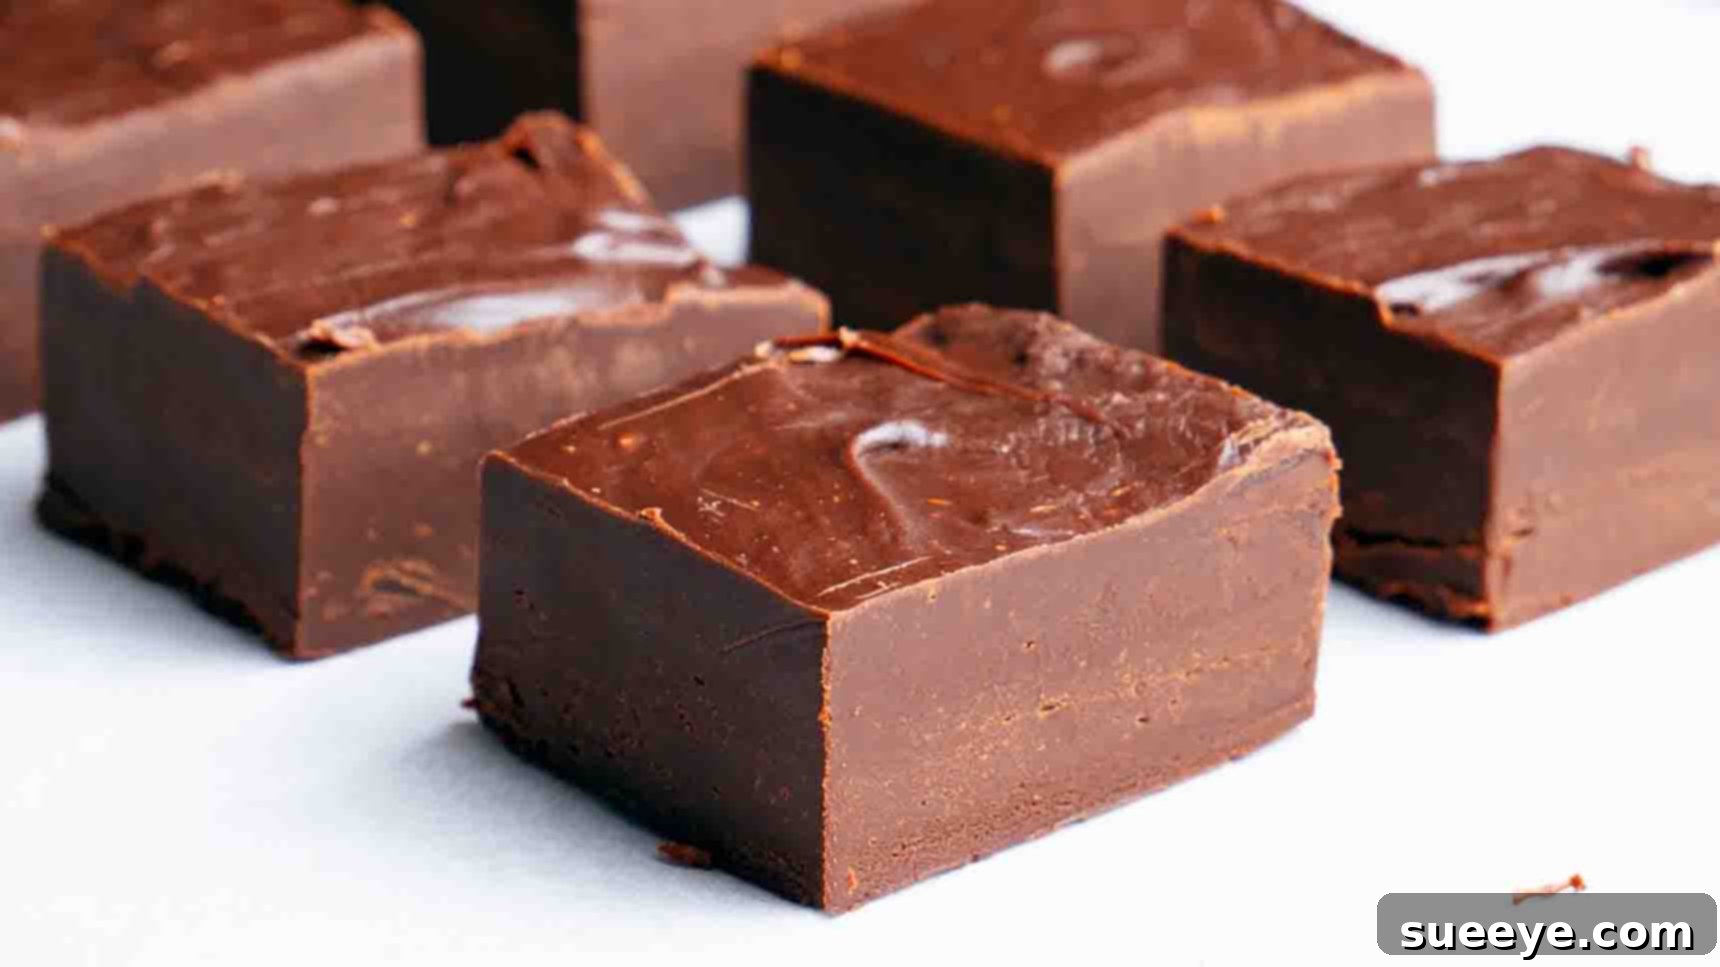
Are you on the hunt for an effortless yet utterly delicious chocolate dessert that will impress without demanding hours of your time? Look no further! This remarkable two-ingredient chocolate fudge recipe is a game-changer, promising a rich, velvety treat that’s unbelievably simple to prepare. Inspired by the genius creators at Spice Bangla on YouTube, this recipe distills the art of fudge-making down to its purest, most accessible form. Forget complex techniques or a lengthy list of obscure components; all you need are two staple ingredients to create a batch of decadent, melt-in-your-mouth chocolate fudge that tastes like it came from a gourmet confectionery.
Whether you’re a novice baker, a busy parent, or simply someone who appreciates a quick fix for a sweet craving, this recipe is designed for you. It’s not just easy; it’s incredibly quick, making it the perfect last-minute dessert for impromptu gatherings, a thoughtful homemade gift for friends and family, or simply a well-deserved indulgence after a long day. The balance of sweetness and deep chocolate flavor is just right, ensuring every bite is a delightful experience. Get ready to discover your new favorite go-to chocolate dessert – a simple pleasure that delivers big on taste and satisfaction. Dive into the full guide below and unlock the secret to perfect two-ingredient chocolate fudge.
The Easiest Two-Ingredient Chocolate Fudge Recipe: A Decadent Delight Made Simple
In the vast world of desserts, few can rival the universal appeal of chocolate fudge. Its dense, smooth texture and intense cocoa flavor make it a perennial favorite. However, traditional fudge recipes often involve precise temperature control, multiple steps, and a fair amount of patience. This is where the magic of our two-ingredient version shines through. We’re talking about a recipe that strips away the complexity, offering a foolproof method to achieve luscious fudge with minimal effort. This isn’t just a shortcut; it’s a culinary revelation that proves simplicity can indeed lead to extraordinary results.
Imagine being able to whip up a batch of rich, homemade chocolate fudge in minutes, with ingredients you likely already have in your pantry. That’s the promise of this recipe. It’s perfect for those moments when a chocolate craving strikes unexpectedly, or when you need a quick dessert solution that looks and tastes incredibly impressive. The beauty lies in the synergistic relationship between the two key components, which effortlessly combine to create that signature fudge consistency without the need for candy thermometers or complicated sugar stages. Prepare to redefine your understanding of easy baking and embrace the sheer delight of this accessible, irresistible chocolate treat.
Why This 2-Ingredient Chocolate Fudge is Your New Go-To Dessert
Beyond its incredibly short ingredient list, this chocolate fudge recipe boasts a myriad of advantages that make it an instant classic. First and foremost, its simplicity means it’s virtually impossible to mess up, making it ideal for beginners who might shy away from more intricate baking projects. There’s no need to worry about crystalizing sugar or reaching the perfect “soft ball stage” – the condensed milk does all the heavy lifting, providing both sweetness and the necessary emulsification for a smooth, stable fudge.
Furthermore, the speed at which this fudge comes together is a major bonus. From start to finish, the active preparation time is incredibly minimal, leaving you with more time to enjoy the fruits of your labor. The majority of the waiting period is dedicated to chilling, allowing the fudge to firm up beautifully in the refrigerator. This hands-off approach is perfect for busy schedules, ensuring you can still enjoy homemade treats without sacrificing precious time. It’s also incredibly versatile; while delicious on its own, this fudge serves as an excellent base for various flavor additions and textural enhancements, which we’ll explore later.
Finally, let’s talk about the taste. Despite its humble origins, this fudge delivers a profoundly satisfying chocolate experience. It’s rich, dense, and perfectly sweet, with a velvety texture that melts delightfully in your mouth. Whether you prefer the intense depth of dark chocolate or a slightly milder semi-sweet profile, this recipe adapts beautifully to your preference. It’s a testament to the fact that sometimes, the best things in life (and in the kitchen) are truly the simplest.
The Magic Duo: Unveiling the Two Simple Ingredients
The brilliance of this recipe lies in its minimalist approach, relying on just two powerhouse ingredients that work in perfect harmony to create a luxurious chocolate fudge. Understanding each component’s role will not only enhance your appreciation for this recipe but also empower you to make informed choices for the best possible outcome.
1. Premium Dark Chocolate (Semisweet)
- Quantity: 2 cups (approximately 300g)
- The Role: This is the star of your fudge, providing its signature flavor and much of its structure. Dark chocolate, or semisweet chocolate, is preferred for its balanced cocoa content, which prevents the fudge from becoming overly sweet when combined with condensed milk.
- Choosing the Best: Opt for high-quality chocolate chips, chunks, or a bar that you can chop yourself. The better the quality of your chocolate, the more superior your fudge will taste. A cocoa percentage between 50-70% is generally ideal for semisweet. Avoid using baking chocolate that contains excessive wax or very low cocoa solids, as it might affect the texture and flavor. Chopping your chocolate into smaller, uniform pieces is crucial for even and quick melting, preventing any scorching.
- Flavor Profile: Dark chocolate provides a rich, slightly bitter counterpoint to the sweetness of the condensed milk, resulting in a perfectly balanced flavor profile that appeals to a wide range of palates.
2. Sweetened Condensed Milk
- Quantity: 1 1/4 cups (approximately 400g), typically one standard can
- The Role: Sweetened condensed milk is the unsung hero of this recipe. It’s a thick, sugary milk product that is paramount for achieving the smooth, creamy texture and inherent sweetness of the fudge. It acts as both a sweetener and a binder, thanks to its high sugar content and viscosity.
- Why it Works: Unlike regular milk, condensed milk has had much of its water removed and sugar added, creating a stable, emulsified base that sets beautifully when chilled. It’s the key ingredient that allows for such a simple, no-fail method, eliminating the need for traditional sugar boiling and crystal formation management.
- Important Note: Ensure you are using sweetened condensed milk, not evaporated milk. Evaporated milk is unsweetened and will not yield the same results; your fudge will not set and will lack the required sweetness. Always double-check the label!
Crafting Perfection: Step-by-Step Directions for Your Chocolate Fudge
Creating this two-ingredient chocolate fudge is a straightforward process, but paying attention to a few details will ensure your results are consistently perfect. Follow these steps closely for a smooth, delicious, and easy-to-manage fudge experience.
Step 1: Preparing Your Pan and Melting the Mixture
The first crucial step is proper pan preparation. This ensures your fudge releases easily once set, maintaining its perfect shape. Begin by selecting a square or rectangular pan (an 8×8 inch or 9×9 inch pan is ideal for a good fudge thickness). Grease the pan thoroughly with a light coating of butter or oil. This initial greasing provides a base layer of non-stick protection. Next, line the greased pan with parchment paper, allowing an overhang on two opposite sides. These parchment “slings” will serve as handles to easily lift the hardened fudge out of the pan. For extra assurance, lightly grease the top surface of the parchment paper itself. This double-layer of non-stick protection is key.
Once your pan is ready, turn your attention to the chocolate. Using a sharp knife, finely chop the 2 cups (300g) of dark or semisweet chocolate into small, uniform pieces. Smaller pieces will melt more quickly and evenly, preventing any hot spots or burnt chocolate. Now, retrieve a medium-sized, heavy-bottomed pot and place it on your stovetop over very low heat. Add the 1 1/4 cups (400g) of sweetened condensed milk to the pot, followed by the chopped dark chocolate. The low heat is absolutely critical here; chocolate is delicate and can scorch or seize if exposed to high temperatures.
Begin stirring the mixture continuously with a heat-resistant spatula or wooden spoon. Patience is a virtue in this stage. It will take approximately four to five minutes for the chocolate to fully melt and combine with the condensed milk. Keep stirring gently but consistently, ensuring that no chocolate sticks to the bottom of the pot. As the chocolate melts, it will gradually incorporate into the condensed milk, transforming into a thick, glossy, and homogeneous mixture. The goal is a smooth, lump-free, intensely chocolatey paste. Once you achieve this beautiful, uniform consistency, immediately remove the pot from the heat to prevent overcooking.
Step 2: Setting and Slicing Your Irresistible Fudge
With the chocolate mixture perfectly melted and smooth, it’s time to transfer it to your prepared pan. Carefully pour the warm, thick chocolate mixture into the greased and parchment-lined pan. Use your spatula to spread the mixture evenly across the bottom of the pan, ensuring a consistent thickness throughout. For an extra smooth top, gently tap the pan on your counter a few times to release any trapped air bubbles and allow the mixture to settle. You can also lightly smooth the surface with the back of your spatula for a perfectly polished finish.
Once the fudge is spread, it needs ample time to chill and firm up. Place the pan in the refrigerator for a minimum of three to four hours. For the best results and a perfectly solid consistency, it’s highly recommended to refrigerate it overnight. The extended chilling period allows the chocolate to fully set and the fudge to achieve its characteristic dense, yet creamy texture. Resist the urge to peek or cut into it too early, as this can compromise its structure. A well-chilled fudge will be much easier to handle and cut cleanly.
After the chocolate has completely hardened, it’s time for the grand reveal! Use the parchment paper overhangs to carefully lift the block of fudge out of the pan and onto a clean cutting board. Peel away the parchment paper gently. Now, using a sharp knife that has been run under hot water and wiped dry (this helps achieve cleaner cuts), slice the fudge into bite-sized squares or your preferred size and shape. You can cut it into classic small squares, larger rectangles, or even use small cookie cutters for festive shapes. Enjoy your homemade, incredibly simple, and wonderfully delicious two-ingredient chocolate fudge!
Expert Tips for Flawless Two-Ingredient Fudge Every Time
While this recipe is incredibly forgiving, a few simple tips can elevate your chocolate fudge from delicious to absolutely divine. These insights will help you achieve the perfect texture and flavor with every batch.
- Mind the Heat: Always use very low heat when melting the chocolate and condensed milk. High heat can burn the chocolate, cause it to seize (become grainy and stiff), or evaporate too much moisture from the condensed milk, resulting in dry or crumbly fudge. Patience is key during the melting phase.
- Quality Matters: As with any simple recipe, the quality of your ingredients directly impacts the final taste. Invest in good quality dark or semisweet chocolate. A better chocolate will provide a richer, more complex flavor profile.
- Stir Constantly: Continuous stirring ensures even melting and prevents the mixture from sticking to the bottom of the pot and burning. It also helps combine the ingredients into a smooth, homogeneous mass.
- Don’t Overcook: Once the chocolate is fully melted and the mixture is smooth and glossy, remove it immediately from the heat. Continuing to cook it can lead to a fudge that is too hard or grainy.
- Parchment Paper is Your Friend: Don’t skip the parchment paper. It makes removing the fudge from the pan incredibly easy and mess-free, allowing for clean, intact squares. The slight overhang creates convenient “handles.”
- Chilling is Non-Negotiable: Allow ample time for the fudge to chill and set properly in the refrigerator. Rushing this step will result in a soft, sticky fudge that is difficult to cut and handle. Overnight chilling is always recommended for the best results.
- Clean Cuts: For perfectly neat squares, use a sharp knife. For even cleaner cuts, run your knife under hot water and wipe it dry between each slice. This warms the blade slightly, allowing it to glide through the fudge without dragging.
- Storage: Store your chocolate fudge in an airtight container at room temperature for up to a week, or in the refrigerator for up to two weeks. If refrigerated, allow it to come to room temperature for about 10-15 minutes before serving for the best texture.
Unleash Your Creativity: Exciting Variations and Add-Ins
While the classic two-ingredient chocolate fudge is sublime on its own, its simplicity makes it an ideal canvas for culinary creativity. You can easily customize this recipe with various add-ins and flavor enhancements to suit your taste or occasion. Here are some popular ideas to inspire you:
- Nuts: For added crunch and a nutty flavor, fold in 1/2 to 1 cup of chopped walnuts, pecans, almonds, or hazelnuts just before pouring the mixture into the pan. You can also sprinkle them on top.
- Dried Fruits: Enhance the texture and add a burst of fruity sweetness with dried cranberries, cherries, raisins, or chopped apricots. Mix them in during the final stirring stage.
- Flavor Extracts: A teaspoon of vanilla extract is a classic addition that deepens the chocolate flavor. For a refreshing twist, try peppermint extract (perfect for holidays!), almond extract for a marzipan-like note, or orange extract for a chocolate-orange delight. Add these after removing the pot from heat.
- A Touch of Salt: A sprinkle of flaky sea salt (like Maldon) on top of the unset fudge enhances the chocolate flavor beautifully and adds a sophisticated touch.
- Mini Marshmallows or Candies: For a rocky road-inspired fudge, gently fold in mini marshmallows. You can also add chocolate chips, chopped candy bars, or sprinkles for a fun, festive look.
- Coffee Infusion: To create a mocha-flavored fudge, dissolve 1-2 teaspoons of instant coffee or espresso powder into the warm condensed milk before adding the chocolate.
- Different Chocolates: Experiment with milk chocolate for a sweeter, creamier fudge, or white chocolate for a completely different flavor profile (though you might need to adjust sweetness with white chocolate).
- Spices: A pinch of cinnamon, chili powder, or nutmeg can add a surprising warmth and complexity to your chocolate fudge.
Remember to adjust the quantities of your add-ins to your personal preference. The key is to incorporate them gently once the chocolate mixture is fully melted and smooth, just before pouring it into the prepared pan.
Serving and Storage Suggestions
Once your exquisite two-ingredient chocolate fudge is perfectly set and sliced, it’s ready to be enjoyed! Here are some ideas for serving and storing this delightful treat:
- Serving Ideas:
- Standalone Treat: The fudge is rich and satisfying enough to be enjoyed on its own as an after-dinner treat or a mid-afternoon pick-me-up.
- Coffee or Tea Companion: A small square of chocolate fudge pairs wonderfully with a hot cup of coffee, espresso, or a comforting mug of tea.
- Dessert Platter: Arrange it alongside other small pastries, cookies, or fresh fruits for an impressive dessert platter, especially during gatherings or holidays.
- Homemade Gift: Package your fudge in decorative boxes or bags with ribbons for a thoughtful and much-appreciated homemade gift. It’s perfect for hostess gifts, holiday presents, or just a sweet gesture for a friend.
- Ice Cream Topping: Gently warm a piece of fudge and crumble it over a scoop of vanilla bean ice cream for an instant decadent sundae.
- Storage Guidelines:
- Room Temperature: Store the fudge in an airtight container at room temperature for up to 5-7 days. Keep it away from direct sunlight or heat sources, which could cause it to melt or become sticky.
- Refrigeration: For longer storage, or if your kitchen is particularly warm, place the airtight container of fudge in the refrigerator. It will keep well for up to 2 weeks. Allow the fudge to sit at room temperature for about 10-15 minutes before serving to soften slightly and enhance its texture and flavor.
- Freezing for Later:
- Method: Fudge freezes exceptionally well! Wrap individual pieces or small blocks of fudge tightly in plastic wrap, then place them in an airtight, freezer-safe container or freezer bag.
- Duration: It can be stored in the freezer for up to 3 months.
- Thawing: When you’re ready to enjoy it, simply transfer the frozen fudge to the refrigerator overnight or let it thaw at room temperature for a few hours.
Frequently Asked Questions About 2-Ingredient Chocolate Fudge
- Q: Can I use milk chocolate instead of dark chocolate?
- A: Yes, you certainly can! Using milk chocolate will result in a sweeter, milder, and often creamier fudge. Be aware that milk chocolate typically contains more sugar than dark chocolate, so the final product will be significantly sweeter. If you prefer a very sweet fudge, milk chocolate is a great choice. White chocolate can also be used, but it’s often more prone to seizing, so melt it even more gently.
- Q: Is a double boiler necessary for melting the chocolate?
- A: While a double boiler is a classic and safe method for melting chocolate, it is not strictly necessary for this recipe. Because you’re melting the chocolate with sweetened condensed milk over very low heat, the condensed milk acts as a buffer, helping to prevent the chocolate from seizing or burning. As long as you maintain very low heat and stir continuously, direct heat works perfectly fine. If you’re nervous, a double boiler can provide extra peace of mind.
- Q: Why did my fudge turn out grainy or oily?
- A: A grainy texture in fudge is often a sign of overcooking or too high heat, causing the sugar in the condensed milk to crystallize. Ensure you’re cooking over very low heat and remove it from the stove as soon as the mixture is smooth. If your fudge is oily, it could be due to separating chocolate (again, often from high heat or overcooking), or occasionally from using a chocolate with a very high fat content that separates upon melting. Proper temperature control is key.
- Q: How long does this chocolate fudge last?
- A: When stored properly in an airtight container, this chocolate fudge can last for about 5-7 days at room temperature or up to 2 weeks in the refrigerator. For longer storage, it can be frozen for up to 3 months. Always ensure it’s kept in a sealed container to prevent it from drying out or absorbing other odors.
- Q: Can I add butter to make it richer?
- A: While traditional fudge often contains butter, it’s not needed for this two-ingredient version. The fats in the chocolate and the richness of the condensed milk provide ample creaminess. Adding butter might make it overly greasy or alter the setting consistency. Stick to the simplicity of the two ingredients for the best results with this specific recipe.
Final Thoughts: Your Journey to Simple, Delicious Fudge
And there you have it – the ultimate guide to creating a truly spectacular, two-ingredient chocolate fudge. What started as a simple idea from Spice Bangla on YouTube has blossomed into a comprehensive exploration of why this recipe stands out as a beacon of ease and deliciousness in the world of desserts. We’ve covered everything from the humble yet powerful ingredients to the meticulous steps for preparation, offering invaluable tips for perfection and inspiring creative variations.
This recipe is more than just a quick fix; it’s an invitation to embrace the joy of homemade treats without the usual fuss. It proves that culinary magic doesn’t require an extensive pantry or advanced techniques. All it takes is a keen understanding of a few key components and a willingness to create something wonderful. So, whether you’re celebrating a special occasion, searching for a thoughtful gift, or simply indulging your own sweet tooth, this chocolate fudge is ready to deliver.
We encourage you to try this recipe, experiment with your favorite add-ins, and share the delight with those you love. Experience the satisfaction of crafting a rich, velvety chocolate fudge that’s as impressive in taste as it is simple to make. Happy fudge-making!