
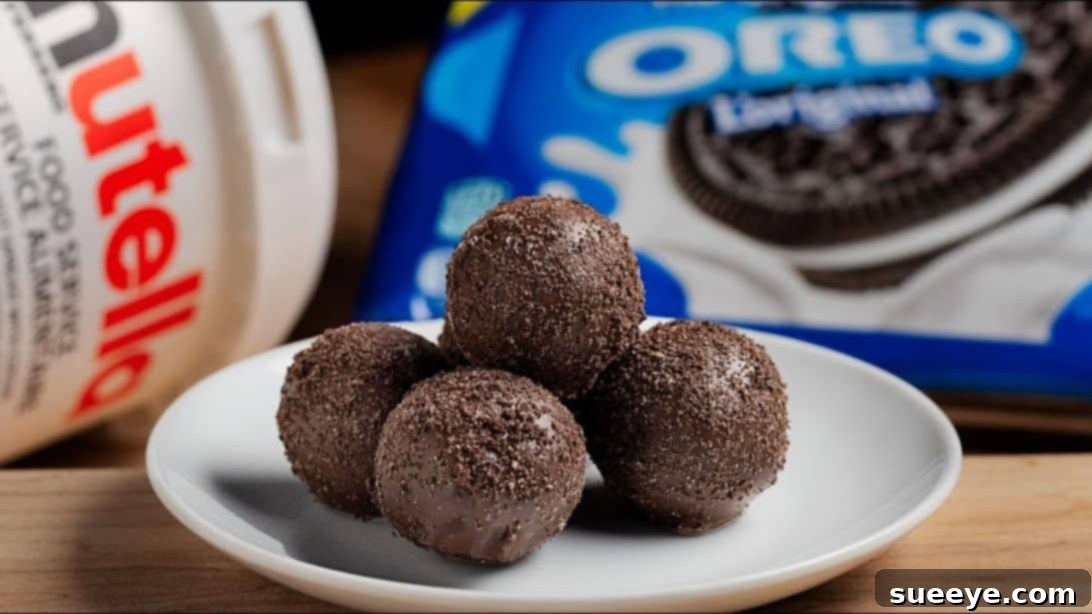
Welcome to the ultimate guide for creating irresistible 3-ingredient Nutella truffles! If you’re searching for an incredibly easy, no-bake dessert that promises to be a crowd-pleaser, look no further. This heavenly recipe, popularized by Dished Shorts, transforms simple ingredients into luxurious chocolate balls that melt in your mouth. Perfect for last-minute party preparations, delightful family treats, or a sweet indulgence after a long day, these Nutella truffles require minimal effort but deliver maximum flavor. Get ready to impress everyone with these delightful homemade confections that are guaranteed to become a new favorite in your recipe collection.
Why You’ll Love These Easy No-Bake Nutella Truffles
These Nutella chocolate truffles stand out for several compelling reasons, making them a go-to dessert for any occasion. Firstly, the “3-ingredient” aspect is a major draw. You won’t need a lengthy shopping list or exotic components; just three common pantry staples are enough to create magic. This simplicity not only saves time but also makes the recipe accessible to even the most novice bakers – or rather, *no-bakers*!
Secondly, the fact that these are no-bake chocolate truffles means you can completely skip the oven, saving energy and avoiding the hassle of preheating. This is especially convenient during hot summer months or when your oven is occupied with other culinary creations. The preparation process is incredibly fast, allowing you to whip up a batch in under an hour, including chilling time. From combining ingredients to forming balls and coating them in chocolate, each step is designed for ease and efficiency.
Lastly, the irresistible combination of creamy Nutella, crunchy Oreo cookies, and rich melted chocolate creates a flavor profile that is simply divine. The hazelnut spread adds a unique depth, while the cookies provide a delightful texture. Whether you’re making them for a special gathering, a birthday party, or just as a sweet treat for your family, these simple Nutella truffles are sure to be a hit with both adults and kids alike. They’re a fantastic way to satisfy chocolate cravings without spending hours in the kitchen.
RELATED: Explore More 3-Ingredient No-Bake Chocolate Balls Recipes
Essential Ingredients for Your Nutella Truffles
Crafting these delightful homemade Nutella truffles couldn’t be simpler, thanks to a concise list of ingredients. Each component plays a crucial role in achieving the perfect balance of flavor and texture.
- 20 Oreo Cookies (plus more for garnish): These iconic chocolate sandwich cookies form the base of our truffles. Their distinct flavor and crumbly texture provide the perfect foundation when mixed with Nutella. Having extra on hand for crushing and sprinkling adds an appealing visual and textural finish.
- 5 tablespoons of Nutella: The star of the show! This beloved hazelnut cocoa spread imparts a rich, creamy, and undeniably delicious flavor. Its smooth consistency also acts as a binding agent, holding the cookie crumbs together to form our truffle base.
- 6 oz Chocolate (your choice): This will be used for coating our truffles, adding a beautiful shell and an extra layer of chocolatey goodness. You can opt for semi-sweet, milk, or even dark chocolate, depending on your preference. High-quality chocolate will yield a smoother melt and a more luxurious finish.
That’s it! Just these three versatile ingredients are all you need to create a batch of decadent Oreo Nutella truffles that taste like they came straight from a gourmet bakery.
Equipment You’ll Need for These No-Bake Truffles
Making these easy chocolate truffles is not only about simple ingredients but also about using the right tools to make the process even smoother. Here’s a quick list of essential equipment that will help you achieve truffle perfection:
- Food Processor: This is a key piece of equipment for effortlessly crushing the Oreo cookies and blending them with the Nutella to create a smooth, consistent base mixture. A good food processor will ensure your truffle base is perfectly uniform.
- Baking Sheet: You’ll need this to place your formed truffle balls on while they chill and set.
- Parchment Paper: Lining your baking sheet with parchment paper is crucial to prevent the truffles from sticking, making them easy to remove once chilled and coated.
- Measuring Spoons: For accurately measuring the Nutella, ensuring the right ratio for the truffle mixture.
- Microwave-Safe Bowl (or Double Boiler setup): Essential for melting your chocolate. A microwave makes it quick, but a double boiler offers more precise temperature control, reducing the risk of burning the chocolate.
- Toothpicks or Small Forks: These are incredibly helpful for dipping the truffle balls into the melted chocolate, allowing for even coating and less mess.
Having these tools ready before you begin will streamline your truffle-making process, allowing you to focus on the fun part: creating delicious treats!
How to Make Nutella Chocolate Truffles: A Step-by-Step Guide
Follow these detailed instructions to create your own batch of delightful Nutella chocolate truffles. Each step is designed to be straightforward, ensuring perfect results every time.
Step 1: Prepare the Truffle Base
Begin by adding 20 Oreo cookies (without the cream filling if preferred, though it adds to the richness) into a food processor. Process the cookies until they are finely crushed into crumbs. Then, add 5 generous tablespoons of Nutella to the food processor. Blend the mixture thoroughly until it forms a very thick, cohesive dough-like consistency. It should be firm enough to hold its shape when pressed. Once combined, transfer the mixture to a bowl, cover, and let it chill in the refrigerator for at least 15 minutes. This chilling time is crucial as it firms up the mixture, making it much easier to handle and roll into balls.
Step 2: Prepare Your Garnish and Baking Sheet
While your truffle base is chilling, prepare your workstation. Line a baking sheet with parchment paper; this will be where your formed truffles will rest. Next, take additional Oreo cookies (or use any leftover crumbs from the initial batch) and place them in a clean and dry food processor. Pulse until they are crushed into fine crumbs. Pour these crushed crumbs onto a small, shallow plate or bowl and set them aside. These will be used later as a decorative and textural sprinkle for your finished truffles.
Step 3: Form the Truffle Balls
After the 15-minute chilling period, remove the Nutella-Oreo mixture from the refrigerator. Using a tablespoon as a measure, scoop out portions of the mixture. Roll each portion between your palms to form smooth, uniform balls. Aim for a consistent size to ensure even coating and presentation. Place each formed truffle ball onto the prepared baking sheet, ensuring they are spaced well apart. Repeat this process until all of the mixture has been used. Once all truffles are formed, place the entire baking sheet back into the refrigerator and chill for another 15 minutes. This second chill helps them firm up even more, making them ideal for dipping.
Step 4: Prepare for Dipping
Once the second chilling period is complete, remove the chocolate balls from the refrigerator. For easier handling during the dipping process, gently insert a toothpick or a small dessert fork into each truffle ball. This provides a convenient handle, keeping your fingers clean and ensuring an even chocolate coating. Be careful not to push the toothpick too far through, just enough to securely hold the truffle. Set them aside, ready for their chocolate bath.
Step 5: Melt the Chocolate
Now it’s time to prepare the chocolate coating. Break your 6 oz of chocolate into smaller pieces and place them in a microwave-safe bowl. Microwave on high in 30-second intervals, stirring well after each interval, until the chocolate is completely melted and smooth. Be careful not to overheat the chocolate, as it can burn easily. Alternatively, for a more controlled melt, you can use the double boiler method: place the chocolate in a heatproof bowl set over a saucepan of simmering water, ensuring the bowl does not touch the water, and stir until melted and glossy.
Step 6: Coat and Garnish the Truffles
Take one truffle ball by its toothpick handle and carefully dip it into the melted chocolate, rotating it to ensure it’s fully coated. Gently tap the toothpick against the edge of the bowl to remove any excess chocolate. Immediately, while the chocolate is still wet, sprinkle the crushed Oreo crumbs you prepared earlier over the coated truffle. Alternatively, you can gently roll the truffle in the crumbs. Place the coated truffle back onto the parchment-lined baking sheet. Repeat this process for all the remaining truffle balls, ensuring each one is beautifully coated and garnished.
Step 7: Chill and Serve
Once all the truffles are coated and garnished, return the baking sheet to the refrigerator. Allow them to chill for at least 30 minutes, or until the chocolate coating is completely set and firm. This final chill ensures the truffles hold their shape and have a delightful snap from the chocolate shell. Before serving, carefully remove the toothpicks. Arrange your beautiful homemade Nutella truffles on a serving platter and present them to your eager guests. Enjoy the rich, chocolatey, and utterly satisfying flavor!
Pro Tips for Perfect 3-Ingredient Nutella Truffles
Achieving the best results with your easy Nutella truffles is simple, but a few expert tips can elevate your homemade treats to gourmet status.
- Optimal Chilling is Key: Don’t rush the chilling process. A well-chilled base mixture is crucial for easy rolling, and fully chilled truffles before coating prevent the chocolate from melting them.
- Cookie Consistency Matters: Ensure your Oreo crumbs are very fine. Any larger pieces can make the truffles lumpy and harder to roll smoothly. A food processor is highly recommended for this.
- Nutella Temperature: If your Nutella is very cold and stiff, gently warm it slightly in the microwave for a few seconds to make it easier to blend with the cookie crumbs. Be careful not to make it too runny.
- Even Truffle Size: Use a small scoop or measuring spoon (like a tablespoon) to ensure all your truffle balls are roughly the same size. This ensures uniform appearance and consistent serving portions.
- Tempering Chocolate (Optional but Recommended): For a professional, glossy finish that resists melting at room temperature, consider tempering your chocolate. While not strictly necessary for this simple recipe, it significantly improves the truffles’ aesthetics and shelf life.
- Work Quickly with Melted Chocolate: Once your chocolate is melted, work swiftly to coat the truffles. If the chocolate starts to thicken, you can gently reheat it for a few seconds.
- Double Dip for Extra Indulgence: For an even thicker, richer chocolate shell, you can allow the first coating to set completely in the fridge, then dip the truffles a second time before adding the garnish.
- Creative Garnishes: While crushed Oreos are classic, feel free to experiment with other toppings like finely chopped nuts (hazelnuts, almonds), colorful sprinkles, cocoa powder, shredded coconut, or even a drizzle of white chocolate.
Delicious Variations to Elevate Your Nutella Truffles
While the classic 3-ingredient Nutella truffles are undeniably delicious, there’s always room for creativity! Here are some exciting variations to customize your homemade treats and impress your guests even further:
- Nutty Crunch: Before rolling the truffles, mix in a tablespoon or two of finely chopped roasted hazelnuts or almonds into the Nutella-Oreo base for an added layer of flavor and crunch.
- White Chocolate Dream: Instead of dark or milk chocolate, coat your truffles in melted white chocolate. You can even add a few drops of food coloring to the white chocolate for vibrant, festive truffles.
- Cocoa Powder Elegance: For a more sophisticated look and a less sweet profile, roll the chilled truffles in high-quality unsweetened cocoa powder before or instead of dipping them in melted chocolate.
- Sprinkle Fiesta: Ditch the crushed Oreos and use colorful sprinkles! This is especially fun for birthday parties or holiday celebrations, allowing you to match the sprinkles to your theme.
- Coconut Delight: Roll the chocolate-coated truffles in shredded coconut for a tropical twist. Toasted coconut adds an even deeper flavor.
- Coffee Kick: Add a teaspoon of instant espresso powder to the Nutella-Oreo mixture (or even into the melted chocolate) for a subtle coffee flavor that pairs wonderfully with chocolate and hazelnut.
- Peppermint Perfection: During the holiday season, add a few drops of peppermint extract to the melted chocolate or sprinkle crushed candy canes over the wet chocolate for a festive treat.
- Salted Caramel Drizzle: After the chocolate coating has set, drizzle a thin stream of store-bought or homemade salted caramel sauce over the truffles for an extra layer of indulgence.
These variations prove that while the base recipe is simple, the possibilities for customizing your no-bake chocolate truffles are endless. Don’t be afraid to experiment and find your favorite combination!
Storage and Shelf Life of Homemade Nutella Truffles
Once your delicious batch of homemade Nutella truffles is complete, proper storage is essential to maintain their freshness, texture, and flavor.
- Refrigeration: Always store your Nutella truffles in an airtight container in the refrigerator. This prevents them from becoming too soft, especially during warmer weather, and helps the chocolate coating remain firm. When stored correctly, they will stay fresh and delicious for up to 1-2 weeks.
- Freezing for Longer Storage: For extended enjoyment, these truffles can be frozen. Place the set truffles in a single layer on a parchment-lined baking sheet and freeze for about an hour until solid. Once firm, transfer them to a freezer-safe airtight container or a heavy-duty freezer bag, separating layers with parchment paper to prevent sticking. They can be stored in the freezer for up to 2-3 months.
- Thawing Frozen Truffles: When you’re ready to enjoy frozen truffles, simply transfer them from the freezer to the refrigerator and let them thaw for a few hours, or at room temperature for about 30 minutes, before serving.
- Serving Temperature: While they are delicious straight from the fridge, allowing them to sit at room temperature for 10-15 minutes before serving can slightly soften the center, enhancing their creamy texture.
With these storage tips, you can ensure your easy no-bake truffles are always ready to be enjoyed, whether it’s for a spontaneous treat or a planned gathering.
Frequently Asked Questions About Nutella Truffles
Here are some common questions about making and enjoying these delightful 3-ingredient Nutella truffles:
- Can I use other cookies instead of Oreos?
Absolutely! While Oreos provide a classic flavor, you can experiment with other types of cookies. Graham crackers, digestive biscuits, shortbread, or even chocolate chip cookies can be used. Just ensure they are finely crushed to create a smooth base. The amount of Nutella might need slight adjustment depending on the cookie’s absorbency and sweetness. - Do these truffles need to be refrigerated?
Yes, it is highly recommended to store these truffles in the refrigerator. The Nutella can soften at room temperature, making the truffles lose their firm shape. Refrigeration also helps the chocolate coating stay crisp and extends their shelf life. - How long do these Nutella truffles last?
When stored in an airtight container in the refrigerator, these truffles typically last for 1 to 2 weeks. If you choose to freeze them, they can last for up to 2-3 months. - Can I make these truffles ahead of time?
Yes, these are excellent for making ahead! They are actually better after chilling for a while, allowing the flavors to meld. You can prepare them a few days in advance or freeze them for longer-term storage, making them perfect for parties or holiday preparations. - My truffle mixture is too sticky/crumbly. What should I do?
If the mixture is too sticky, add a few more finely crushed cookie crumbs. If it’s too crumbly and not holding together, add a tiny bit more Nutella (half a teaspoon at a time) or a splash of milk until it reaches the desired consistency. Ensure it’s well-chilled, as warmth can make it sticky. - Can I use chocolate chips for the coating?
Yes, chocolate chips work well for melting and coating. For best results, choose good quality baking chocolate chips.
These FAQs should help you troubleshoot any issues and confidently make your batch of easy chocolate truffles!
Unleash Your Inner Chocolatier with 3-Ingredient Nutella Truffles
There you have it – a comprehensive guide to creating the most delectable 3-ingredient Nutella truffles. This recipe proves that you don’t need a lengthy ingredient list or complex techniques to produce an absolutely divine dessert. With just Oreos, Nutella, and chocolate, you can craft beautiful, rich, and intensely satisfying treats that are perfect for any occasion.
Whether you’re a seasoned baker or a complete novice, the ease of this no-bake recipe makes it accessible and enjoyable for everyone. These truffles are not just easy to make; they are a delightful experience, from the hands-on fun of rolling them to the blissful first bite. So go ahead, gather your ingredients, follow these simple steps, and prepare to indulge in the magic of these homemade Nutella truffles. Your taste buds (and your guests) will thank you!
Here’s another recipe for you: Discover Our Nutella Stuffed Cookies Recipe