
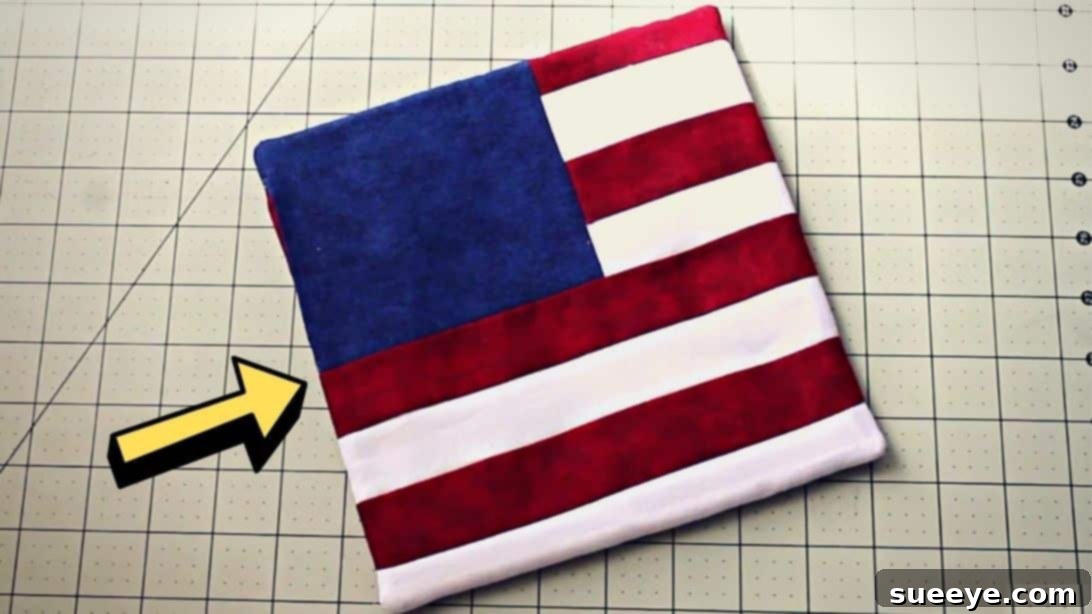
Sew a Patriotic Flag Potholder: An Easy DIY Project for Beginners
Are you looking for a fun, rewarding, and patriotic sewing project to tackle this weekend? Look no further! This comprehensive sewing tutorial, inspired by the creative insights of Debs Days on YouTube, guides you through creating a charming flag-themed potholder. It’s an ideal project for sewing enthusiasts of all skill levels, especially beginners, as it utilizes basic sewing techniques and can be made with readily available materials, including your collection of scrap fabrics.
Crafting your own flag potholder isn’t just a delightful way to spend your time; it also results in a functional and decorative item perfect for your kitchen, or as a thoughtful handmade gift. Imagine these vibrant flag potholders gracing your kitchen during national holidays like the Fourth of July, Memorial Day, or Veterans Day, adding a touch of homemade pride to your decor. This project is not only quick and straightforward but also a fantastic way to practice essential sewing skills such as cutting, piecing, pressing, and topstitching. Dive into the full instructions below and get ready to enjoy the satisfaction of sewing your very own patriotic masterpiece!
Materials You’ll Need: Crafting Your Flag Potholder
Before you begin your sewing adventure, gathering all the necessary materials is crucial for a smooth and enjoyable crafting experience. This project is designed to be accessible, often allowing you to use fabric scraps you already have on hand. Here’s a detailed list of what you’ll need:
- Red Fabric:
- Two (2) pieces, 1 ½” x 3 ½”: These will form the shorter red stripes of your flag design.
- Two (2) pieces, 1 ½” x 8 ½”: These will create the longer red stripes. Using high-quality cotton fabric is recommended for durability and heat resistance, especially for a functional potholder.
- White Fabric:
- Two (2) pieces, 1 ½” x 3 ½”: For the shorter white stripes.
- Two (2) pieces, 1 ½” x 8 ½”: For the longer white stripes. Ensure your white fabric is pre-washed to prevent any potential shrinkage or color bleeding when combined with the red and blue.
- Blue Fabric:
- One (1) piece, 4 ½” x 5 ¼”: This piece will form the blue field of your flag. A solid blue is traditional, but you could also use a subtle tone-on-tone blue print for added texture.
- Backing Fabric:
- One (1) piece, 8 ½” x 8 ½”: This fabric will form the back of your potholder. Choose a sturdy cotton fabric that complements your flag design or a contrasting color for a fun surprise.
- Cotton Batting or Insul-Bright:
- Two (2) pieces, 8 ½” x 8 ½” of cotton batting, OR one (1) piece of Insul-Bright: Cotton batting provides excellent insulation and thickness, making your potholder effective. If you intend for your potholder to handle high heat (e.g., directly from an oven), using Insul-Bright is highly recommended. Insul-Bright is a needle-punched, insulated lining that reflects heat or cold back to the source, offering superior heat resistance compared to regular cotton batting. Ensure you use two layers of cotton batting for comparable insulation if not using Insul-Bright.
- Essential Sewing Tools:
- Pins or Fabric Clips: For securing fabric layers accurately during sewing.
- Iron and Ironing Board: Crucial for pressing seams flat and crisp, which is vital for a professional finish in quilting and piecing projects.
- Sewing Machine: Any standard home sewing machine will work. Ensure it’s in good working order and threaded correctly.
- Matching Thread: A good quality polyester or cotton thread that matches your dominant fabric color (often white or a light neutral) will blend seamlessly.
- Rotary Cutter: For precise and efficient fabric cutting.
- Cutting Ruler: A clear acrylic ruler, preferably with ¼-inch markings, is indispensable for accurate measurements.
- Cutting Mat: Protects your work surface and provides a non-slip base for cutting.
Having these items ready before you start will help you maintain focus and flow, making the entire crafting process more enjoyable and less prone to interruptions.
Step-by-Step Directions: Sewing Your Flag Potholder
Follow these detailed instructions carefully to construct your patriotic flag potholder. Pay close attention to seam allowances and pressing, as these steps are critical for a polished final product.
Step 1: Preparing and Piecing the Flag Strips
Precision is key in this initial stage. Take your time to accurately cut your fabric pieces and assemble the striped sections of the flag.
1.1 Cutting Your Fabric
Begin by carefully cutting all your fabric pieces to the exact dimensions specified in the materials list. Use your rotary cutter, cutting ruler, and mat for the most accurate results. This precision will ensure your flag components align perfectly later on.
1.2 Assembling the Shorter Stripes Section
- Pair Red and White: Take one 1 ½” x 3 ½” white fabric piece and one 1 ½” x 3 ½” red fabric piece. Place them right sides together, aligning one of their 3 ½” long edges. Pin securely along this edge.
- Sew the First Pair: Using your sewing machine, stitch these two pieces together along the pinned 3 ½” edge with a consistent ¼-inch seam allowance. Backstitch at the beginning and end to secure your stitches.
- Repeat for Second Pair: Take the remaining 1 ½” x 3 ½” white and red fabric pieces and repeat the pinning and sewing process to create a second red and white stripe unit.
- Pressing for Flatness: After sewing each pair, take them to your ironing board. Press the seams open or towards the darker fabric (red, in this case) to reduce bulk and create a flatter finish. This step is crucial for a professional look.
- Join the Pairs: Now, place your two completed red and white stripe units right sides together, ensuring the colors alternate (e.g., red-white-red-white). Align the long edges you wish to join. Pin carefully, matching the seam lines of the previously sewn stripes for a seamless appearance. Stitch these two units together with a ¼-inch seam allowance.
- Final Press: Press the final seam open or to one side. This assembled piece represents the shorter, striped section of your flag. Set it aside.
1.3 Assembling the Longer Stripes Section
Repeat the exact same process (steps 1-6 above) for the longer red and white fabric pieces:
- Pair one 1 ½” x 8 ½” white fabric with one 1 ½” x 8 ½” red fabric, right sides together. Sew with a ¼-inch seam allowance.
- Repeat with the other two longer red and white fabric pieces.
- Press the seams of both pairs.
- Join the two longer stripe units, right sides together, ensuring alternating colors. Sew with a ¼-inch seam allowance.
- Press the final seam. This piece will form the longer striped section of your flag.
1.4 Attaching the Blue Field to the Shorter Stripes
Now, let’s bring the blue field into the design:
- Position Fabrics: Take your 4 ½” x 5 ¼” blue fabric piece. Place it right sides together with the shorter striped flag piece (the one you made in section 1.2). Align the 5 ¼” edge of the blue fabric with one of the 5 ¼” edges of the shorter striped piece.
- Pin and Sew: Pin these two pieces securely along the aligned edge. Stitch them together with a ¼-inch seam allowance.
- Press the Seam: Press the seam open or towards the blue fabric. This combined unit now features the blue field and the shorter stripes, forming the upper left portion of your flag.
Step 2: Assembling and Finishing the Potholder
This final stage brings all the components together, adding the necessary insulation and giving your potholder its final shape and professional look.
2.1 Joining the Flag Sections
- Combine Top and Bottom: You now have two main fabric pieces for the flag front: the blue-and-short-stripes piece, and the long-stripes piece. Place these two pieces right sides together, aligning the long edges where they will meet.
- Pin Carefully: Pin them together, paying extra attention to matching any seam lines where the stripes meet for a continuous look.
- Sew and Press: Stitch along the pinned edge with a ¼-inch seam allowance. Once sewn, press this final seam open or to one side. You should now have a complete flag design for the front of your potholder. Give it a good press to ensure it’s perfectly flat and crisp.
2.2 Layering and Stitching the Potholder
Now it’s time to layer all your components to create the potholder sandwich:
- Prepare the Layers: Lay your backing fabric flat on your work surface, with the right side facing up.
- Add Batting: Place your two pieces of cotton batting (or one piece of Insul-Bright) directly on top of the backing fabric.
- Place Flag Top: Finally, place your pieced flag fabric on top of the batting layers, with its right side facing down. All three layers should be stacked neatly, with the right sides of the backing fabric and the flag fabric facing each other.
- Secure Layers: Use pins or fabric clips to secure all three layers together around the edges. This prevents shifting during sewing.
- Stitch Around the Edge: Using a ½-inch seam allowance (this is slightly larger than your piecing seam allowance to ensure all layers are caught and to give ample turning room), stitch all the way around the perimeter of the stacked layers. Remember to leave a gap of about 3-4 inches unstitched along one side. This opening is essential for turning the potholder right side out later. Backstitch at the beginning and end of your stitching on either side of the gap to reinforce these points.
2.3 Refining and Turning the Potholder
- Trim Excess Fabric: Carefully trim off any excess fabric around the entire stitched piece, leaving about a ¼-inch allowance from your seam line. Be particularly meticulous when trimming around the unstitched gap; trim the seam allowances here very close to the edge. This small detail helps you avoid having to stitch them closed later, resulting in a cleaner finish.
- Notch the Corners: Clip the corners diagonally, without cutting through your stitches. This reduces bulk in the corners, allowing them to turn out sharply.
- Turn Right Side Out: Reach into the unstitched gap and carefully pull the entire potholder through, turning it right side out. Take your time with this step to avoid stressing the seams.
- Shape the Corners: Use a point turner, a chopstick, or the blunt end of a pencil to gently push out the corners, making them as sharp and crisp as possible. Be careful not to poke through the fabric.
2.4 The Finishing Touches: Topstitching
- Press Again: Once turned right side out and the corners are shaped, give the entire potholder a good press. Pay special attention to pressing the raw edges of the opening inward, aligning them with the sewn seam so they are flush.
- Topstitch All Around: Take your potholder back to the sewing machine. Starting near one corner (or at the closed edge of your gap for a less noticeable start), topstitch all around the entire perimeter of the potholder. Stitch about ⅛-inch to ¼-inch from the edge. This topstitching serves several purposes: it neatly closes the turning gap, secures all layers together, and adds a professional, finished look to your potholder.
- Final Press: Give your finished flag potholder one last press to ensure it’s perfectly flat and beautiful.
Care and Customization Tips for Your Flag Potholder
Caring for Your Handmade Potholder
To ensure your patriotic flag potholder remains vibrant and functional for years to come, proper care is essential. Since most potholders are made from cotton fabrics, they are generally easy to clean. We recommend machine washing your potholder in cold water on a gentle cycle. Use a mild detergent and avoid bleach to preserve the fabric colors. Tumble dry on low heat or, for best results, air dry to prevent shrinkage and maintain shape. Iron as needed to smooth out any wrinkles, taking care around any topstitching or embellishments.
If you used Insul-Bright, please note that it is not recommended for microwave use as it contains metalized polyester. Always check the manufacturer’s specific care instructions for any specialized materials you incorporate into your project.
Personalize Your Patriotic Project
While the classic red, white, and blue flag design is timeless, don’t hesitate to customize your potholder to reflect your personal style or to match your kitchen decor. Here are a few ideas:
- Vary the Size: Adjust the dimensions of your fabric pieces to create smaller coasters or larger trivets. Remember to scale all components proportionally.
- Color Palettes: Experiment with different color combinations. While a flag design is patriotic, you could adapt the stripe pattern with colors that match your kitchen or favorite seasonal themes. Think pastels for spring, autumnal hues for fall, or even a rainbow for a cheerful touch.
- Embellishments: Add small embroidered stars to the blue field, or consider appliqueing a decorative patch. You could also sew on a small fabric loop before the final topstitching step for easy hanging.
- Quilting: Beyond the initial topstitching around the edge, you could add decorative quilting lines across the flag design. Straight lines, cross-hatching, or even free-motion quilting could add texture and further secure the batting layers.
Why Sew Your Own Potholder? The Benefits of DIY Crafting
Embarking on a DIY project like this flag potholder offers more than just a functional kitchen accessory. It’s a journey of creativity, skill-building, and personal satisfaction.
- Skill Enhancement: For beginners, this project is a fantastic way to practice fundamental sewing techniques. You’ll gain confidence in fabric cutting, precise piecing, accurate seam allowances, and achieving a clean finish through pressing and topstitching.
- Personal Touch: Handmade items bring a unique charm that store-bought goods often lack. Your custom-made flag potholder will reflect your effort and style, making your kitchen feel more personal and inviting.
- Eco-Friendly: Utilizing scrap fabrics is a wonderful way to minimize waste and give new life to remnants from previous projects. It’s a sustainable approach to crafting that also helps clear out your fabric stash!
- Meaningful Gifts: A handcrafted potholder makes a thoughtful and practical gift for friends, family, or hosts. Perfect for housewarmings, holidays, or just because, a handmade gift carries a special sentiment that is always appreciated.
- Cost-Effective: By using materials you already own or inexpensive remnants, you can create beautiful and useful items without breaking the bank.
- Therapeutic Value: The rhythmic motion of sewing and the focus required can be incredibly relaxing and meditative. It’s a wonderful way to unwind and engage in a creative outlet that yields tangible results.
This quick and easy flag potholder sewing tutorial provides an excellent entry point into the world of quilting and home decor sewing. Whether you’re making one for yourself, as a gift, or simply for the joy of creating, the finished product will undoubtedly bring a touch of handmade charm and patriotic spirit to any setting.
We hope you enjoyed this detailed guide and feel inspired to start your own patriotic sewing adventure. Happy stitching!
*All images are credited to Debs Days via YouTube. We highly recommend visiting her channel and subscribing for more inspiring and easy-to-follow sewing tutorials!