
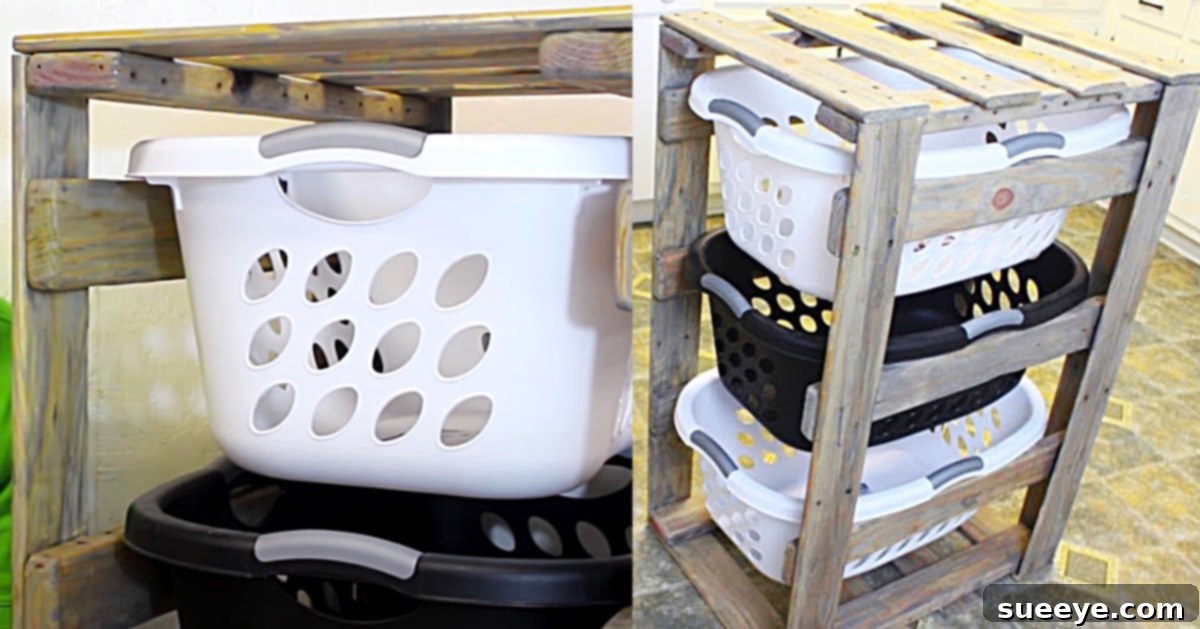
Transform Your Laundry Routine with a DIY Pallet 3-Tier Laundry Basket Holder
Are you tired of laundry piles taking over your floor space? Do you dream of a more efficient and organized laundry routine? If so, you’re in the right place! We’ve discovered an ingenious solution that not only declutters your home but also adds a touch of rustic charm: the DIY Pallet 3-Tier Laundry Basket Holder. Inspired by the brilliant video tutorial from Specific Love Creations on YouTube, this project leverages the power of recycled pallet wood to create a highly functional and aesthetically pleasing laundry organization system. It’s a fantastic way to keep your laundry neatly sorted, off the floor, and ready for washing, making laundry day less of a chore and more of a streamlined process.
The beauty of this DIY project lies in its simplicity and sustainability. By repurposing old pallet boards, you’re not only saving money but also contributing to a greener planet. This three-tier design is perfect for pre-sorting your laundry into categories such as whites, colors, and towels, or even delicates and everyday wear. Imagine a world where your laundry room (or even a corner of your bedroom) looks tidy and purposeful, free from the chaotic sprawl of clothes baskets. This holder doesn’t just contain laundry; it elevates your entire home organization game, proving that functional items can also be beautiful additions to your living space.
Why a DIY Pallet Laundry Basket Holder is a Game-Changer for Your Home
Beyond the immediate benefit of keeping laundry off the floor, a DIY pallet three-tier laundry basket holder offers a multitude of advantages that can significantly improve your home life and laundry efficiency:
- Unmatched Organization: The tiered design allows for immediate and convenient sorting. No more rummaging through a single, giant pile to separate whites from darks. Each basket has its dedicated spot, making pre-sorting a habit rather than an afterthought.
- Maximized Floor Space: By stacking laundry vertically, this holder frees up valuable floor space in your laundry room, bathroom, or bedroom. This is particularly beneficial for smaller homes or apartments where every square inch counts.
- Reduced Clutter and Improved Aesthetics: Let’s face it, even clean laundry can look messy when it’s strewn across the floor in multiple baskets. This holder creates a designated, tidy space for your laundry, transforming a potential eyesore into an organized feature.
- Cost-Effective Solution: Rather than spending a significant amount on commercial laundry sorters, this DIY project utilizes inexpensive (often free) reclaimed pallet wood, allowing you to create a robust and stylish solution on a budget.
- Eco-Friendly Upcycling: Giving old pallets a new life as a functional piece of furniture is a fantastic way to practice sustainability. You’re diverting waste from landfills and creating something valuable and beautiful in the process.
- Customization Potential: Unlike off-the-shelf products, a DIY holder can be customized to your exact specifications. You can choose the finish (stain, paint, distressed look), add caster wheels for mobility, or even integrate personalized labels for each basket.
- Empowering DIY Experience: There’s a unique sense of accomplishment that comes with building something with your own hands. This project is accessible even for novice DIYers and provides an excellent opportunity to hone your woodworking skills.
Essential Materials for Your DIY Pallet Laundry Basket Holder
Embarking on this rewarding DIY journey requires a few basic materials and tools. Most of these can be found around your home, borrowed, or purchased affordably. The core of this project revolves around the versatile pallet wood and three standard laundry baskets.
- Old Pallet Boards: The star of the show! Look for heat-treated (marked “HT”) pallets, as chemically treated ones (“MB” for Methyl Bromide) are not recommended for indoor projects due to potential chemical residue. You can often find free pallets behind local businesses or construction sites. Ensure they are clean and free from excessive damage or rot.
- Three Laundry Baskets: The number of tiers can be adjusted, but three is ideal for most sorting needs. Choose baskets of a consistent size and shape that you intend to use with the holder. Their dimensions will dictate the measurements for your wooden frame, so have them on hand during the planning phase.
- A Drill: Essential for pre-drilling holes and driving screws. A cordless drill offers greater flexibility. Make sure you have appropriate drill bits for wood.
- A Saw: A circular saw is ideal for straight, efficient cuts, but a jigsaw or even a hand saw can work for smaller projects. Safety is paramount when using any saw.
- A Sander: An orbital sander will make quick work of smoothing the pallet wood, which can often be rough. Alternatively, sandpaper (medium to fine grit) and some elbow grease can achieve the desired smoothness, preventing splinters.
- Wood Stain or Paint: Choose a color and finish that complements your home decor. A clear sealant is also recommended to protect the wood and make it easier to clean. Consider different types of stains for a rustic, natural, or modern look.
- Wood Screws (or Nails): Sufficiently long and sturdy to securely join the pallet pieces. Screws generally provide a stronger hold.
- Wood Glue: For added stability and durability at joints.
- Measuring Tape and Pencil: For accurate measurements and markings.
- Safety Gear: Always wear safety goggles and gloves when working with power tools and handling rough wood.
- Clamps (Optional but Recommended): To hold pieces steady during assembly.
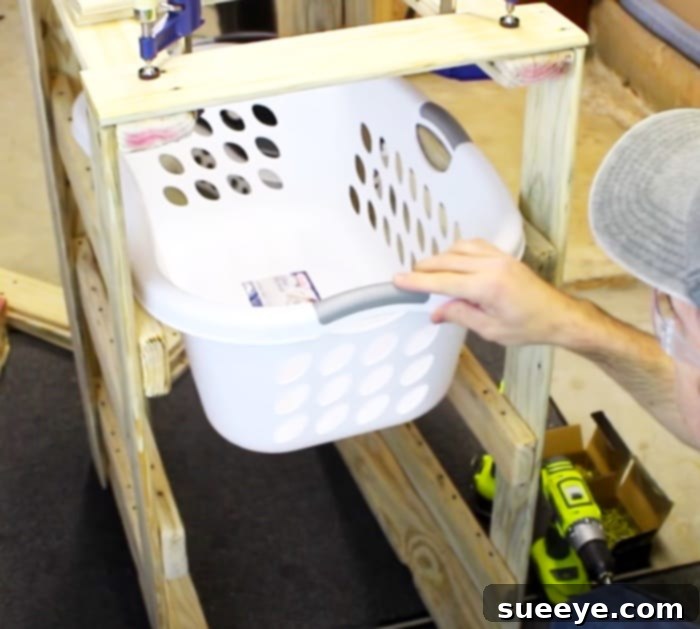
Step-by-Step Directions to Build Your DIY Pallet Laundry Basket Holder
As showcased in the insightful video tutorial by Specific Love Creations on YouTube, building this laundry basket holder is a straightforward process that yields impressive results. Here’s a detailed guide to help you construct your own organizational masterpiece:
Step 1: Disassemble and Prepare Your Pallets
Carefully disassemble your chosen pallet boards. This can be the most challenging part, but patience and the right tools (a pry bar, hammer, and reciprocating saw for stubborn nails) will make it easier. Once disassembled, remove all nails, staples, and any splintered wood. Inspect each board for integrity and discard any pieces that are rotten or severely damaged. Select the straightest and most visually appealing boards for your project.
Step 2: Measure and Cut Your Wood Pieces
This is where your laundry baskets come into play. Measure the length, width, and height of your baskets. You’ll need to cut pieces for:
- Four Vertical Support Posts: These will form the main upright structure. Their height will depend on the height of your baskets plus adequate spacing between tiers for easy access, and a bit of clearance at the bottom and top. Ensure all four are identical in length.
- Horizontal Support Beams (for depth): For each tier, you’ll need two shorter pieces to run front-to-back, defining the depth of the holder. These should be slightly longer than the depth of your baskets.
- Horizontal Support Beams (for width): For each tier, you’ll need two longer pieces to run side-to-side, defining the width. These should be slightly longer than the width of your baskets to allow the baskets to slide in and out easily without falling through.
- Basket Platform Slats (Optional): If you want solid shelves instead of just support beams, cut additional slats to fit within the width and depth of each tier.
Mark all your measurements clearly with a pencil and then use your saw to make precise cuts. Accuracy here is key for a stable and aesthetically pleasing holder.
Step 3: Sand All Wood Surfaces Smoothly
Pallet wood is notorious for splinters and rough patches. Sanding is crucial for safety and a professional finish. Start with a medium-grit sandpaper (e.g., 80-100 grit) to remove major imperfections and rough areas. Then, move to a finer grit (e.g., 150-220 grit) for a smooth, splinter-free surface. Pay extra attention to edges and areas that will be frequently touched. Sanding also prepares the wood for better stain or paint absorption.
Step 4: Assemble the Main Frame
Lay out your four vertical support posts and the horizontal support beams. Begin by attaching the horizontal beams to the vertical posts to create two side frames. Use wood glue at the joints for extra strength, then secure with screws. Pre-drill pilot holes to prevent the wood from splitting. Ensure that your side frames are square and sturdy. Once the two side frames are built, connect them with the remaining horizontal beams (front-to-back) to form the complete rectangular frame of the holder. Double-check that all connections are tight and the structure is stable.
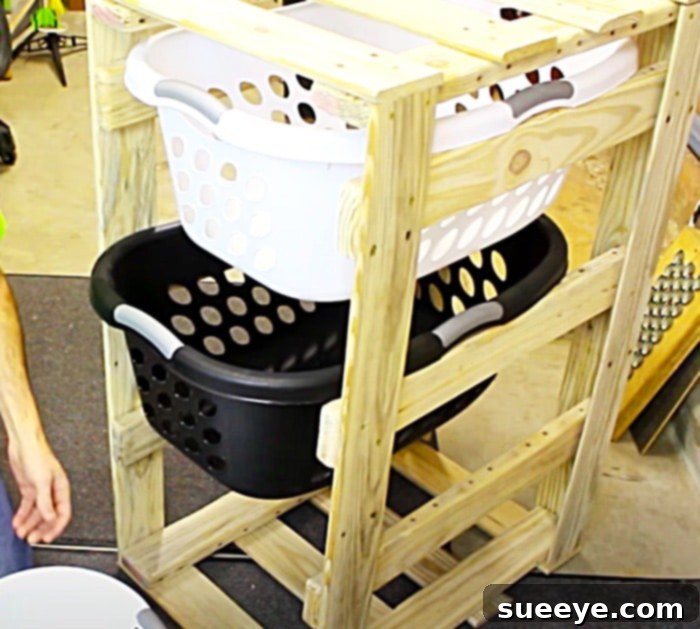
Step 5: Create the Basket Supports (Tiers)
Now it’s time to build the tiers where your laundry baskets will rest. For each tier, you’ll attach two horizontal pieces of wood (ledges) to the inside of the frame, ensuring they are level and spaced correctly to support the baskets. These ledges should be sturdy enough to hold the weight of full laundry baskets. If you opted for full platform slats, cut and install them at this stage for each tier. Measure carefully to ensure your baskets slide in and out smoothly without getting stuck or having too much wiggle room.
Step 6: Apply Your Chosen Finish
With the structure assembled, it’s time for the finishing touches. If you’re using stain, apply it evenly following the wood grain, wiping off excess as directed by the product. For paint, apply a primer first, then two coats of your chosen color. Once the stain or paint is dry, apply a protective sealant or clear coat. This will protect the wood from moisture, dirt, and wear, and make it easier to clean. Allow ample drying time between coats and before final use.
Step 7: Final Assembly and Customization
Once your holder is completely dry, slide in your three laundry baskets. You can now add optional enhancements like caster wheels to the bottom of the vertical posts for easy mobility, especially if you plan to move the holder frequently. Consider adding small labels to the front of each tier (e.g., “Whites,” “Colors,” “Towels”) for even clearer organization. Step back and admire your handiwork – your room will indeed never be messy again, at least not with laundry!
Design Considerations and Customization Tips
While the basic three-tier design is highly effective, this DIY pallet laundry basket holder offers incredible potential for customization to perfectly suit your needs and style:
- Number of Tiers: Adjust the design to have two, four, or even more tiers based on your family size and laundry sorting requirements.
- Mobility: Installing heavy-duty caster wheels to the bottom will make your laundry sorter incredibly portable, allowing you to easily move it between rooms or out of the way for cleaning.
- Finishing Touches: Experiment with different wood stains for a rich, natural look, or paint it to match your existing decor. A distressed paint finish can give it a chic, shabby-chic vibe, while a smooth, solid color can make it appear more modern.
- Integrated Labels: Beyond simple stick-on labels, consider stenciling, painting, or even routing labels directly into the wood for a permanent and stylish solution.
- Additional Storage: You could add a small shelf on top for laundry detergents, fabric softeners, or other essentials, maximizing vertical space even further.
- Side Hooks: Attach hooks to the sides of the holder for hanging delicates to air dry or for storing mesh laundry bags.
- Drawer Slides: For a more refined look and smoother operation, consider integrating drawer slides for each basket, allowing them to pull out fully. This would require more advanced woodworking skills but offers a premium feel.
Maintaining Your Pallet Laundry Basket Holder
Once built and customized, your DIY pallet laundry basket holder requires minimal maintenance. Periodically wipe down the wooden frame with a damp cloth to remove dust and lint. If you notice any signs of wear on the finish, a quick reapplication of stain or sealant can restore its protective qualities. Ensure that the screws remain tight to maintain the holder’s stability over time. By taking these simple steps, your pallet laundry organizer will remain a durable and attractive fixture in your home for years to come.
Conclusion: Embrace Organized Living
This DIY pallet 3-tier laundry basket holder is more than just a place to put your dirty clothes; it’s an investment in a more organized, efficient, and aesthetically pleasing home. It tackles one of the most common household challenges—laundry clutter—with a sustainable, cost-effective, and customizable solution. Inspired by the ingenuity of creators like Specific Love Creations, this project empowers you to transform everyday chores into a streamlined process. So gather your materials, roll up your sleeves, and get ready to build a piece of furniture that will truly change your laundry day for the better. Say goodbye to scattered baskets and hello to a beautifully organized laundry haven!