
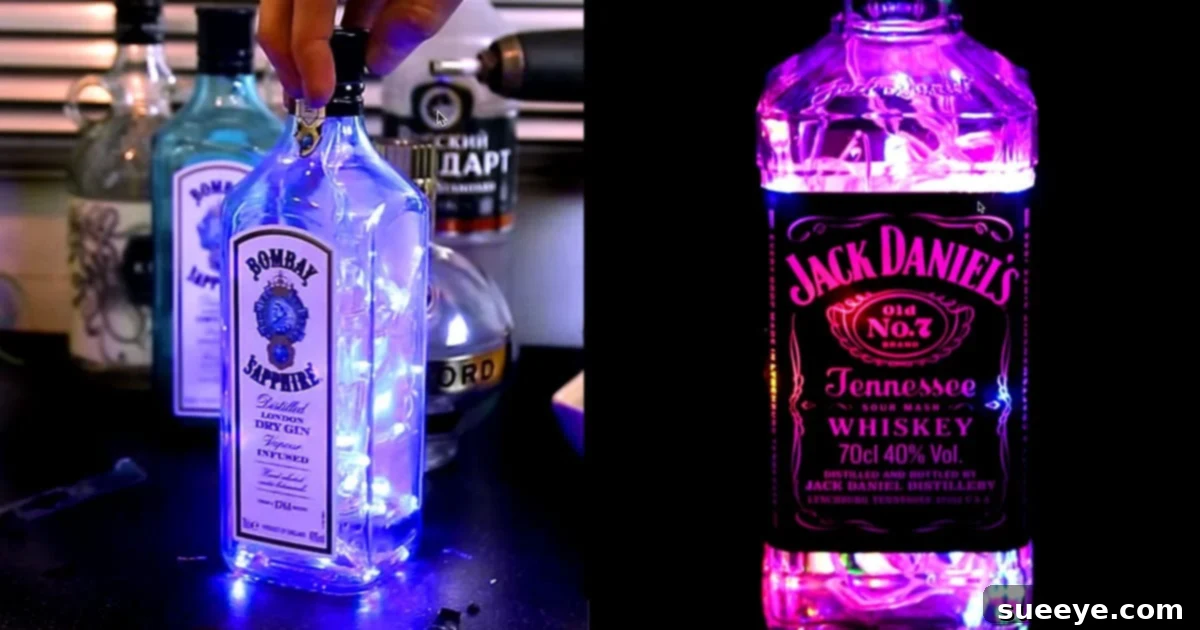
Transform Empty Bottles into Dazzling DIY Lights: The Ultimate Guide to Upcycled Decor
Are you searching for an innovative, budget-friendly home decor solution that instantly elevates the ambiance of any room? Or perhaps you need a truly unique, last-minute DIY gift for someone who seems to have everything? Look no further! This comprehensive guide will show you how to transform ordinary, empty liquor bottles into extraordinary, glowing ambient lights. Imagine a set of colorful, illuminated bottles casting a warm glow, perfect for adding a festive touch during the upcoming holiday season or special celebrations. This tutorial focuses on creating a permanent, corded light that doesn’t require batteries, ensuring a lasting addition to your home decor. However, we’ll also explore simpler, battery-powered alternatives for those seeking an even quicker craft.
The beauty of this project lies in its versatility and sustainability. Instead of discarding beautiful glass bottles, you can give them a second life, contributing to a more eco-friendly lifestyle. Each bottle, with its unique shape, color, and history, can become a personalized piece of art, reflecting your style and adding character to your space. Whether you opt for a sleek vodka bottle, a rustic whiskey flask, or a vibrant liqueur container, the possibilities for customization are endless.
Why Choose DIY Liquor Bottle Lights for Your Home?
The allure of DIY bottle lights extends beyond their aesthetic appeal. There are several compelling reasons why this project has become a favorite among crafters and home decor enthusiasts:
- Cost-Effectiveness: By repurposing empty bottles, you save significantly on decor expenses. The primary costs are for the lights themselves and a few simple tools, making this a highly economical project.
- Personalization: Unlike mass-produced items, your DIY bottle lights will be truly unique. You can choose bottles that resonate with your taste, select specific light colors, and even add external embellishments to match your interior design.
- Eco-Friendly Upcycling: This project is a fantastic example of upcycling, transforming waste materials into valuable new products. It reduces landfill waste and promotes sustainable living, giving a new purpose to items that would otherwise be thrown away.
- Thoughtful Gifts: Handmade gifts carry a special sentiment. A custom-made bottle light demonstrates care, effort, and creativity, making it a much more meaningful present than something store-bought.
- Versatile Decor: These lights are incredibly versatile. They can serve as cozy bedside lamps, striking centerpieces, subtle accent lighting on shelves, or festive decorations for parties and holidays.
Corded vs. Battery-Powered: Which DIY Bottle Light is Right for You?
When embarking on your bottle light journey, you have two main approaches: creating a corded light for a permanent fixture or opting for battery-powered lights for greater flexibility. Each method has its own set of advantages and considerations.
The Permanent Glow: Crafting Corded Bottle Lights
A corded bottle light offers a long-term, reliable lighting solution. This method involves drilling a small hole in the bottle to feed through an electrical cord, allowing the light to be plugged into an outlet. It’s perfect for creating a stationary lamp that provides consistent, bright illumination without the hassle of replacing batteries.
- Pros: Consistent power supply, brighter light output, no need for battery changes, ideal for permanent decor, a cleaner look without visible battery packs.
- Cons: Requires drilling into glass (which demands care and specific tools), limits placement to areas near outlets, less portable than battery-powered options.
The Flexible Sparkle: Easy Battery-Powered Fairy Lights
For those seeking a simpler, less labor-intensive project, battery-powered fairy lights are an excellent choice. These tiny LED strings, often found at dollar stores or craft shops, can be easily inserted into a bottle without any drilling. Just ensure the battery pack is small enough to fit discreetly inside or be hidden at the top of the bottle neck.
- Pros: Super easy and quick to assemble, no drilling required, highly portable for versatile placement anywhere, ideal for temporary displays or events.
- Cons: Requires battery replacement, light output may be less intense, battery pack might be visible if not carefully concealed, typically shorter run times.
The original article mentions glow sticks as an ultra-easy, temporary option – and indeed, for a truly last-minute, one-night effect, a few glow sticks could create a fun, albeit fleeting, light show!
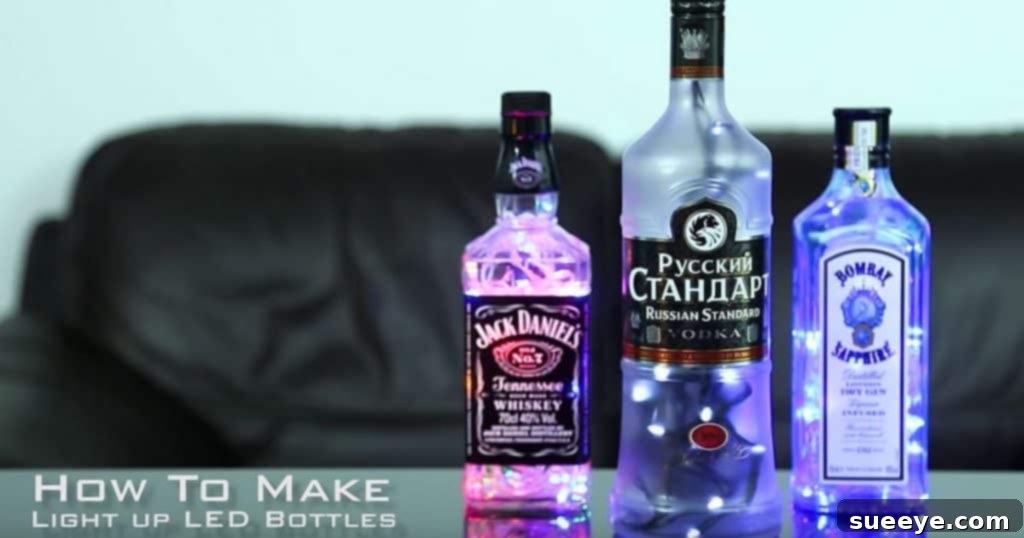
Selecting the Perfect Bottles for Your Project
The choice of bottle can significantly impact the final aesthetic of your DIY light. Consider the following when selecting your vessels:
- Shape and Size: Taller, slender bottles create elegant accents, while wider, rounder bottles offer a broader diffusion of light. Unique shapes, like those found in specialty spirits, can become striking focal points.
- Color: Clear bottles allow the full brilliance of the lights to shine through. Tinted bottles (green, amber, blue) add a colored glow, enhancing the mood of a room. For holiday themes, consider red or green bottles.
- Texture and Labels: Some bottles feature embossed designs or unique glass textures that can interact beautifully with the light. While many prefer to remove labels for a clean look, some iconic labels can be preserved for a specific aesthetic.
Of course, the first step is to ensure your chosen bottle is empty! This project provides a fun excuse to enjoy your favorite beverages. As the original piece playfully suggests, “What better way to spend a weekend than making sure that bottle is empty and crafting, right?” Remember to thoroughly clean the bottles inside and out before starting your project.
Step-by-Step Guide: Crafting Your Corded Liquor Bottle Light
For a durable and permanent lighting fixture, follow these detailed instructions for creating a corded bottle light.
Supplies You’ll Need for Each Light:
- Empty liquor bottle (thoroughly cleaned)
- Rubber grommet (sized to fit your chosen cord and drilled hole)
- LED fairy light string (corded, with a plug) in your color of choice
- Drill with a small circular glass drill bit (also known as a diamond-tipped core drill bit or tile bit)
- Safety glasses and gloves
- Water bottle or spray bottle (for cooling during drilling)
- Glue gun (optional, for securing the grommet)
- Masking tape (optional, for drilling)
Step 1: Preparation – Cleaning and Stripping Labels
Before anything else, ensure your bottle is impeccably clean. Rinse it thoroughly with hot, soapy water to remove any residue. For stubborn labels, soak the bottle in hot water for an hour or use a label remover product like Goo Gone. Scrape off any remaining adhesive with a plastic scraper to avoid scratching the glass. A clean bottle ensures clear, unobstructed light.
Step 2: The Crucial Step – Drilling the Hole Safely
This is the most critical part of the corded light process and requires caution. The hole needs to be large enough for your cord to pass through, but not so large that the grommet won’t seal it.
- Safety First: Always wear safety glasses and thick gloves to protect yourself from glass shards.
- Stable Surface: Place the bottle on a stable, non-slip surface. You might want to put a towel underneath it to prevent it from moving.
- Marking the Spot: Choose a spot near the bottom of the bottle, ideally on the back, where the hole will be discreet. You can place a piece of masking tape over the spot to help the drill bit from slipping initially.
- Cooling is Key: Glass heats up quickly during drilling, which can cause it to crack. Continuously squirt water onto the drill bit and drilling area while you work. This cools the glass and lubricates the bit, extending its life and preventing breakage.
- Drill Slowly and Steadily: Start drilling at a low speed, applying gentle, consistent pressure. Let the drill bit do the work. Avoid pressing too hard or drilling too fast, as this significantly increases the risk of cracking the bottle.
- Breakthrough: As you near the end, the glass will become thinner. Reduce pressure further to prevent chipping or cracking when the bit breaks through.
- Clean Up: Once the hole is drilled, carefully rinse away any glass dust or debris.
Step 3: Securing the Cord with a Rubber Grommet
A rubber grommet is essential for both safety and aesthetics. It protects the electrical cord from the sharp edges of the drilled hole, preventing fraying and short circuits. It also provides a neat, finished look.
Insert the rubber grommet into the drilled hole. It should fit snugly. If it’s a bit loose, a small amount of hot glue around the edges from the inside can help secure it, but typically a well-sized grommet will stay in place by friction.
Step 4: Installing the Lights
Now it’s time to bring your bottle to life! Carefully feed the end of the LED fairy light string, starting from the plug, through the grommet and into the bottle. Once the cord is securely in place, gently push the rest of the light string into the bottle. You can arrange the lights inside to create different effects – coiled at the bottom, spread throughout, or clustered in certain areas. Experiment to find the look you love.
Step 5: Testing Your New Light
Plug in your newly crafted bottle light and admire your handiwork! Check that all the lights are working and that the cord is secure and not pinched. You’ve just transformed an empty bottle into a beautiful, functional piece of decor!
Effortless Elegance: Making a Battery-Powered Bottle Light
For a quick, drill-free option, battery-powered lights are the way to go.
Supplies Needed (Simplified):
- Empty liquor bottle (thoroughly cleaned)
- Battery-powered LED fairy light string (choose one with a small, discreet battery pack)
- Cork stopper (optional, if you want to seal the top)
Quick Assembly:
- Clean Your Bottle: As with the corded version, ensure your bottle is perfectly clean and dry.
- Insert Lights: Gently feed the fairy light string into the bottle, leaving the battery pack outside or just at the top opening.
- Conceal the Battery Pack: For the neatest look, try to find fairy lights with a very small battery pack that can be carefully tucked inside the bottle neck, perhaps secured with a cork or hidden with a decorative stopper. Alternatively, if the battery pack is small enough, it can sometimes be gently pushed inside the bottle itself, especially for bottles with wider openings.
- Arrange and Enjoy: Arrange the lights inside the bottle to your liking. Since there’s no cord to worry about, you can place these lights anywhere – on shelves, in centerpieces, or even outdoors in a covered area.
Customization & Design Inspiration for Your Bottle Lights
The true magic of DIY lies in customization. Here are ideas to make your bottle lights truly unique:
Playing with Light Colors
LED fairy lights come in a spectrum of colors. Warm white creates a cozy, inviting glow, while cool white offers a modern, crisp look. Multi-colored lights are perfect for festive occasions. Consider matching the light color to the bottle’s tint or the room’s color scheme. For specific holidays, red and green lights, or even orange for Halloween, can transform your decor.
Adding Internal Fillers (Use Caution!)
For battery-powered bottle lights ONLY, you can add small, non-flammable fillers to enhance the visual effect. This is NOT recommended for corded lights due to potential heat buildup, even with LEDs, and the risk of interference with the cord.
- Pebbles or Sand: A layer of decorative pebbles, colored sand, or even glass beads at the bottom can add weight and visual interest.
- Glitter: A sprinkle of glitter inside the bottle can create a magical, shimmering effect when illuminated.
- Faux Flowers or Foliage: Small, artificial flowers or tiny sprigs can be placed inside (again, for battery-powered only) for a whimsical, botanical look.
External Embellishments
Don’t stop at just the lights! The exterior of your bottle offers another canvas for creativity.
- Paint: Use glass paint to add patterns, frosted effects, or even fully opaque designs to the bottle.
- Etching: Glass etching cream can create elegant, frosted designs or personalized messages.
- Ribbons and Twine: Wrap the bottle neck with decorative ribbons, jute twine, or fabric scraps for a rustic or elegant touch.
- Tags: If making a gift, attach a custom tag with a heartfelt message.
Where to Display Your Beautiful Bottle Creations
Once your DIY liquor bottle lights are complete, the possibilities for display are endless.
Home Decor:
- Shelves and Mantels: Arrange a collection of varying bottle sizes and colors to create a stunning focal point.
- Bedside Tables: A single bottle light can serve as a charming, soft night light.
- Bar Carts or Kitchen Islands: Enhance the ambiance of your entertaining spaces.
- Bookcases: Nestle them among your favorite books for a cozy reading nook.
- Entryways: Welcome guests with a warm, inviting glow.
Festive & Event Decor:
- Holiday Centerpieces: Perfect for Christmas, New Year’s, or any festive gathering.
- Party Lighting: Use battery-powered versions to illuminate pathways, buffet tables, or create mood lighting for indoor or outdoor parties (ensure they are protected from weather if outside).
- Wedding Accents: Elegant and cost-effective lighting for reception tables.
- Outdoor Patios: Battery-powered lights can add sparkle to your patio or deck for evening gatherings, provided they are not exposed to rain.
Important Safety Tips for DIY Bottle Lights
While this is a rewarding project, safety should always be your top priority, especially when working with glass and electricity.
- Glass Handling: Always wear gloves when handling broken glass or during the drilling process. Dispose of any chipped or cracked bottles safely.
- Drilling Safety: Use appropriate safety glasses. Keep fingers clear of the drill bit. Use water for cooling to prevent glass stress fractures.
- Electrical Safety (Corded Lights): Ensure your cord is intact and free of damage. The rubber grommet is crucial for protecting the cord from sharp glass edges. Never use a light with a damaged or frayed cord. If you’re unsure about electrical wiring, consult an expert or opt for battery-powered lights.
- Heat Considerations: While LED lights produce minimal heat, it’s always wise to ensure good ventilation within the bottle. Avoid stuffing the bottle too tightly with lights or placing flammable materials inside corded lights.
- Stable Placement: Always place your bottle lights on a stable, flat surface where they won’t easily tip over.
Troubleshooting Common DIY Bottle Light Issues
Even seasoned DIYers encounter hurdles. Here are a few common issues and their solutions:
- Drill Bit Slipping: Use masking tape on the drilling spot to provide initial grip for the bit. Start slowly at an angle, then gradually straighten the drill as a groove forms.
- Bottle Cracking During Drilling: This usually happens due to excessive pressure, drilling too fast, or insufficient cooling. Remember to use slow speed, gentle pressure, and constant water application.
- Lights Not Working: For corded lights, check the plug connection and ensure the outlet is functional. For battery-powered lights, check battery orientation, replace old batteries, or ensure the switch is on.
- Grommet Not Fitting: If the hole is too small, carefully enlarge it with the glass drill bit. If too large, you might need a bigger grommet or use a strong adhesive to secure the current one.
Conclusion: Light Up Your Life with Upcycled Creations
Transforming empty liquor bottles into charming lights is more than just a craft; it’s an opportunity to express your creativity, embrace sustainability, and add a truly personal touch to your surroundings. Whether you create a set of permanent, corded lamps or a collection of portable, battery-powered accents, these DIY bottle lights are guaranteed to spark conversation and admiration.
This project is perfect for beginners and experienced crafters alike, offering a rewarding experience with beautiful results. So, next time you finish a bottle, think twice before tossing it into the recycling bin. Instead, envision its potential as a glowing piece of art, a unique gift, or a festive decoration. Gather your supplies, choose your favorite empty bottles, and get ready to illuminate your world with your very own upcycled creations!
We can’t wait to see your dazzling DIY bottle lights! Share your creations and inspire others to light up their lives with upcycled charm.