
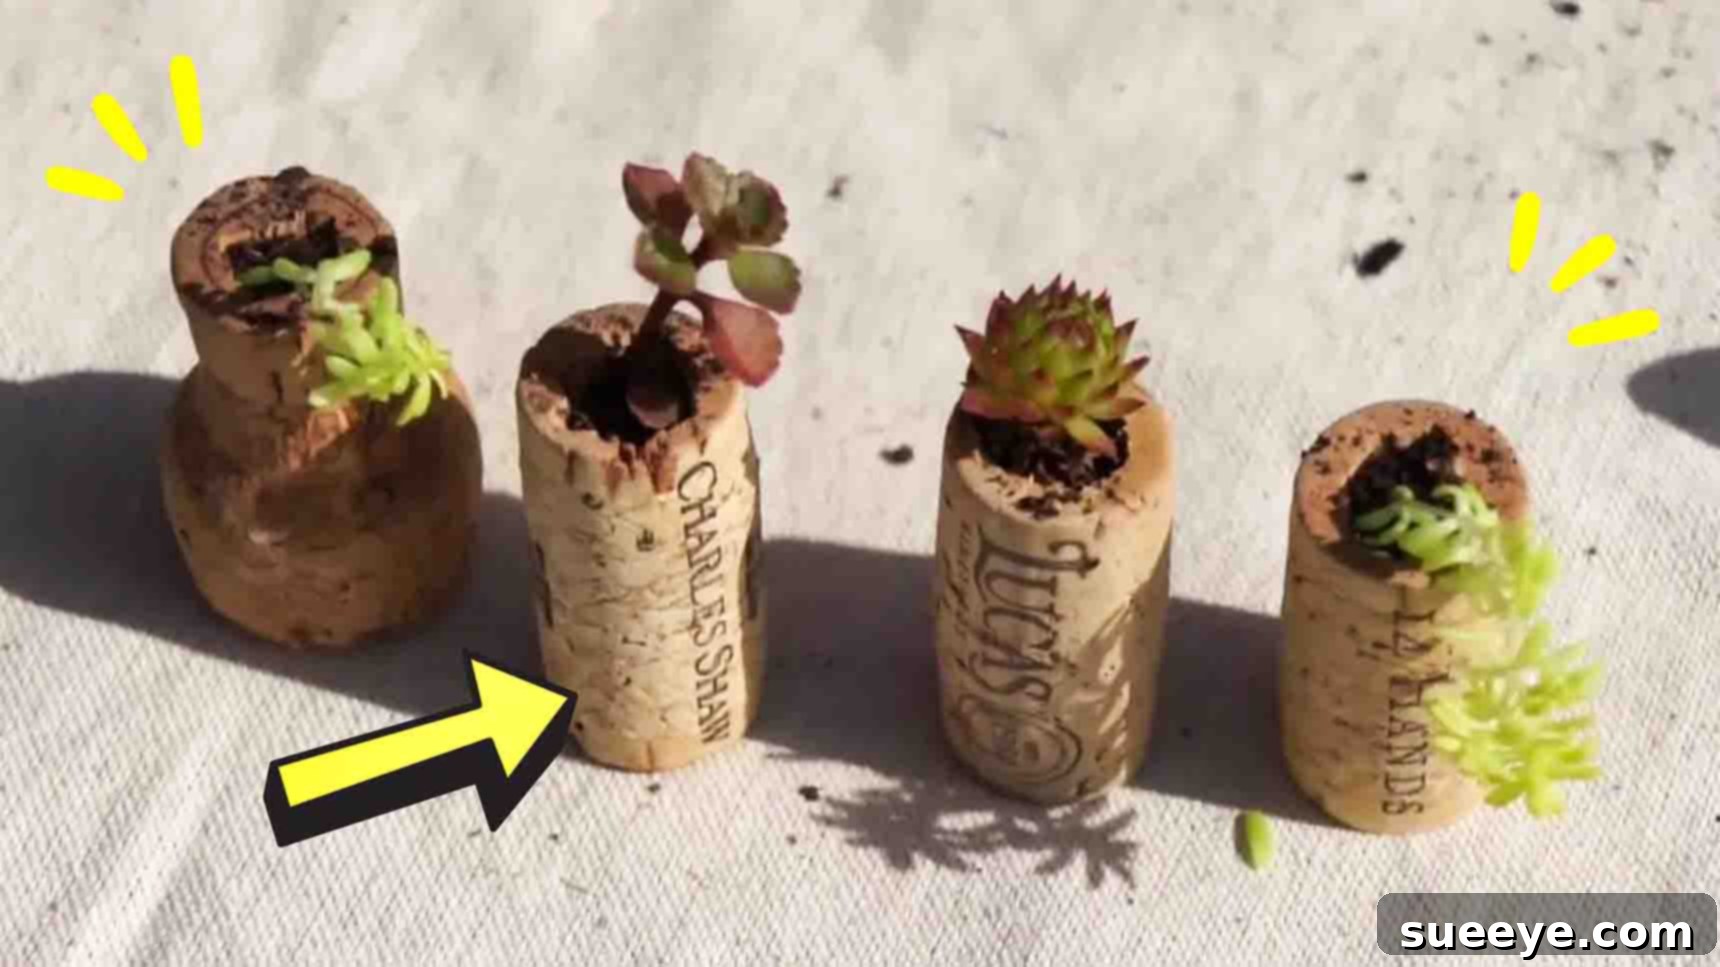
DIY Wine Cork Planters: Transform Upcycled Corks into Adorable Mini Succulent Pots
Are you searching for a delightful and straightforward crafting project to infuse some greenery into your home or office? Look no further! This comprehensive guide will walk you through creating charming DIY wine cork planters. Perfect for housing tiny succulents, air plants, or moss, these miniature masterpieces are not only incredibly easy to make but also offer a fantastic way to upcycle old wine corks into unique, eco-friendly decor. Whether you’re a seasoned crafter or a complete beginner, this project is designed to be quick, fun, and highly rewarding. Get ready to brighten your space with a touch of nature and a dash of your own creativity!
Inspired by clever tutorials like those from The Saturday Evening Post on YouTube, these miniature planters are perfect for adding a whimsical touch to any windowsill, desk, or even as unique refrigerator magnets. They make wonderful personalized gifts and are an excellent project to enjoy with family on a weekend. Dive into the simple steps below and discover how easily you can bring these adorable cork planters to life.
Why Create DIY Wine Cork Planters?
Beyond their undeniable charm, crafting wine cork planters offers a multitude of benefits. Firstly, it’s a fantastic way to practice sustainability by upcycling wine corks that would otherwise be discarded. This reduces waste and gives new life to materials. Secondly, these tiny planters are incredibly versatile. Their small size makes them ideal for homes with limited space, bringing a touch of nature without taking up much room. They are perfect for small apartments, dorm rooms, or as desk accessories. Thirdly, the project itself is simple, requiring minimal tools and materials, making it accessible to crafters of all skill levels. Finally, the ability to personalize each planter makes them unique decorative pieces or thoughtful, handmade gifts for any occasion.
Materials You’ll Need for Your Mini Planters:
Gathering your materials before you begin will ensure a smooth and enjoyable crafting experience. Most of these items are readily available, and you might even have some of them lying around your home!
- Wine corks: Collect clean, dry corks. The more you have, the more planters you can make!
- Drill: A standard electric drill or a Dremel tool with a drill attachment works best.
- Drill bits: You’ll need two sizes: a smaller 1/4-inch bit for the pilot hole and a larger 1/2-inch bit to create the main planting cavity. Ensure they are suitable for drilling through cork.
- Potting soil: A small amount of well-draining soil designed for succulents or cacti is ideal, as it prevents waterlogging.
- Small plants: Miniature succulents (like ‘Hen and Chicks’ chicks, small Echeverias, or Sedums), air plants (Tillandsia), or small pieces of moss are perfect due to their compact size and low water requirements. Consider creeping sedum varieties like ‘Angelina’ for vibrant green.
- Aquarium gravel: A tiny pinch for each planter serves as a decorative top dressing and can help secure the plant.
- Craft glue: A strong, quick-drying craft adhesive, such as E6000 or super glue.
- Small magnets (optional): If you plan to transform your cork planters into refrigerator magnets.
- Safety glasses (recommended): Always protect your eyes when using power tools.
- Small spoon or toothpick: For adding soil and positioning tiny plants.
Step-by-Step Directions for Creating Your Cork Planters:
Follow these simple instructions to craft your very own charming wine cork planters. Remember to take your time and enjoy the process!
Step 1: Preparing the Corks and Drilling the Cavity
The first crucial step is to create the perfect planting cavity within each wine cork. Start by securing a wine cork firmly on a stable surface. You can use a vise or simply hold it firmly. Put on your safety glasses.
- Drill a pilot hole: Attach the smaller 1/4-inch drill bit to your drill. Carefully drill a pilot hole into the top of each cork, aiming for the center. This initial, smaller hole will guide your larger drill bit and prevent the cork from splitting.
- Enlarge the hole: Switch to the larger 1/2-inch drill bit. Carefully enlarge the pilot hole, drilling down into the cork. The key here is to create a cavity that is deep enough for your plant’s roots (approximately 1 inch deep) but not so deep that you drill all the way through the bottom of the cork. Go slowly and check your depth frequently. The goal is to create a small “pocket” for the plant and soil.
- Clear debris: Once the cavity is drilled, gently tap the cork to remove any loose cork fragments or dust.
Step 2: Planting Your Miniature Greenery
Now comes the exciting part – adding your plants! Choosing the right plants is crucial for these tiny homes. Succulents and air plants are ideal as they require minimal watering and have small root systems.
- Add initial soil: Take a tiny pinch of potting soil (specifically formulated for succulents if possible) and place it at the bottom of the drilled cavity in the cork. This provides a soft bed for your plant’s roots.
- Prepare your plant clipping: If using a succulent like a ‘chick’ from a ‘Hen and Chicks’ plant or a piece of creeping sedum, gently snip a small clipping. Ensure it has a short stem or root system that can fit comfortably into the cork. For air plants, simply select a very small specimen.
- Insert the plant: Carefully place your plant clipping into the cork cavity. Use a toothpick or small tool to gently push the roots or base of the plant into the soil.
- Add more soil and tamp: Add a bit more potting soil around the plant, filling the cavity, if necessary. Gently tamp down the soil around the plant to secure it in place. Be careful not to damage the delicate plant.
- Finishing touch with gravel: As a final decorative and stabilizing touch, sprinkle a tiny amount of aquarium gravel on top of the soil. This not only looks appealing but can also help hold the plant upright and provide a clean finish.
Step 3: Display and Care for Your Mini Planters
Once your mini plants are snugly in their new cork homes, it’s time to decide how to display them and learn how to keep them thriving.
- Add a magnet (optional): If you want to create magnetic cork planters, apply a small dab of strong craft glue to the back (flat side) of each cork. Firmly press a small magnet onto the glue and hold it in place until it sets. Allow ample drying time according to the glue’s instructions before attaching them to any magnetic surface. These make fantastic refrigerator magnets or additions to magnetic memo boards.
- Alternative display options: If magnets aren’t your style, simply place your cork planters on a windowsill, desk, shelf, or arrange them in a small decorative tray. Their natural aesthetic blends well with various decor styles. You could also string several together to create a unique garland!
- Watering schedule: Due to their small size and lack of drainage, careful watering is key. For succulents, water your cork planters approximately every ten days to two weeks. Use a dropper or a fine mist spray bottle to add just a few drops of water, enough to moisten the soil without saturating the cork. For air plants, a light misting every few days is usually sufficient, or you can remove the plant and soak it in water for 20-30 minutes once every two weeks, allowing it to dry completely before returning it to the cork.
- Light requirements: Most succulents and air plants thrive in bright, indirect sunlight. Place your cork planters in a location where they receive adequate light but are protected from harsh, direct sun, which can scorch tiny plants.
- Observe and adjust: Pay attention to your plants. If the leaves start to shrivel, they might need a bit more water. If they turn yellow or mushy, they might be getting too much. Adjust your watering schedule as needed based on your environment and the specific plant.
Creative Variations and Display Ideas for Your Cork Planters
The beauty of DIY projects lies in their adaptability. Here are a few ideas to inspire you to take your wine cork planters to the next level:
- Magnetic Wall Gardens: Create an entire vertical garden on a magnetic strip or board in your kitchen or office. Arrange multiple cork planters to spell out words or create patterns.
- Hanging Planters: Thread a thin piece of twine or fishing line through the side of a cork (after drilling a small hole) to create tiny hanging planters. These look charming dangling in a window or from a small decorative branch.
- Desk Companions: Place them individually or in small clusters on your desk to add a touch of calming greenery to your workspace. They are excellent for small spaces and don’t require much attention.
- Gift Toppers & Party Favors: Attach a cork planter to a gift as a unique and personalized topper. They also make adorable, eco-friendly party favors for weddings, baby showers, or any celebration.
- Mini Terrarium Accents: Incorporate these cork planters into larger closed or open terrariums to add varying levels and textures to your miniature landscape.
- Decorative Trays: Arrange several cork planters on a decorative tray with pebbles, moss, or other natural elements to create a captivating centerpiece for a coffee table or dining table.
- Seasonal Decor: Decorate the corks themselves with small ribbons, paint, or glitter to match holiday themes or seasonal aesthetics.
Caring for Your Mini Succulents and Air Plants
While tiny, these plants still need proper care to thrive. Understanding their basic needs will ensure your cork planters remain vibrant for a long time.
- Watering: As mentioned, moderation is key. Succulents store water in their leaves, so they prefer dry conditions between waterings. Air plants absorb moisture through their leaves, so misting or occasional soaking is best. Avoid overwatering, as this is the most common killer of small plants, especially in containers without drainage.
- Light: Most succulents and air plants need bright light to maintain their vibrant colors and compact form. A south-facing window (in the Northern Hemisphere) or a spot with strong indirect light is ideal. If your plants start to stretch or lose color, they might need more light.
- Air Circulation: Air plants, in particular, benefit from good air circulation. Ensure they are not kept in enclosed, stagnant environments.
- Fertilization: Generally, these miniature plants in cork planters won’t need much, if any, fertilization. If you do choose to fertilize, use a highly diluted succulent or air plant-specific fertilizer very sparingly during their growing season.
- Longevity: Remember that cork planters are tiny homes. As your succulents grow, they may eventually outgrow their cork. This is a good opportunity to repot them into a slightly larger planter and start fresh with new cuttings in your corks!
Troubleshooting Common Issues
Even with careful crafting and care, you might encounter minor issues. Here are quick solutions to common problems:
- Cork splitting during drilling: This can happen if you drill too fast or don’t use a pilot hole. To prevent, always start with a smaller bit and apply steady, even pressure. If it splits slightly, a strong craft glue can sometimes repair it, or simply use it as a rustic feature.
- Plant wilting or shriveling: This usually indicates under-watering. Give your plant a few drops of water and observe. If it doesn’t perk up, check for root rot if applicable (though less likely in such small, well-draining setups).
- Plant turning yellow or mushy: A clear sign of overwatering. Allow the cork and soil to dry out completely before watering again. Reduce future watering frequency.
- Plant stretching (etiolation): If your succulent is stretching towards a light source and becoming leggy, it needs more light. Move it to a brighter location.
Final Thoughts on Your Easy DIY Wine Cork Planters Tutorial
Creating these easy DIY wine cork planters is more than just a craft project; it’s an opportunity to embrace sustainability, unleash your creativity, and bring a touch of living art into your everyday life. From the satisfying process of upcycling to the joy of watching tiny plants thrive, every step is rewarding. These miniature marvels prove that even the smallest projects can make a big impact on your home decor and your environmental footprint. So, gather your corks, get drilling, and start cultivating your own charming collection of mini succulent and air plant masterpieces. Enjoy the process, and delight in the unique beauty you’ve created!