
Effective Oil Stain Removal: Your Ultimate Guide to Restoring Clothes
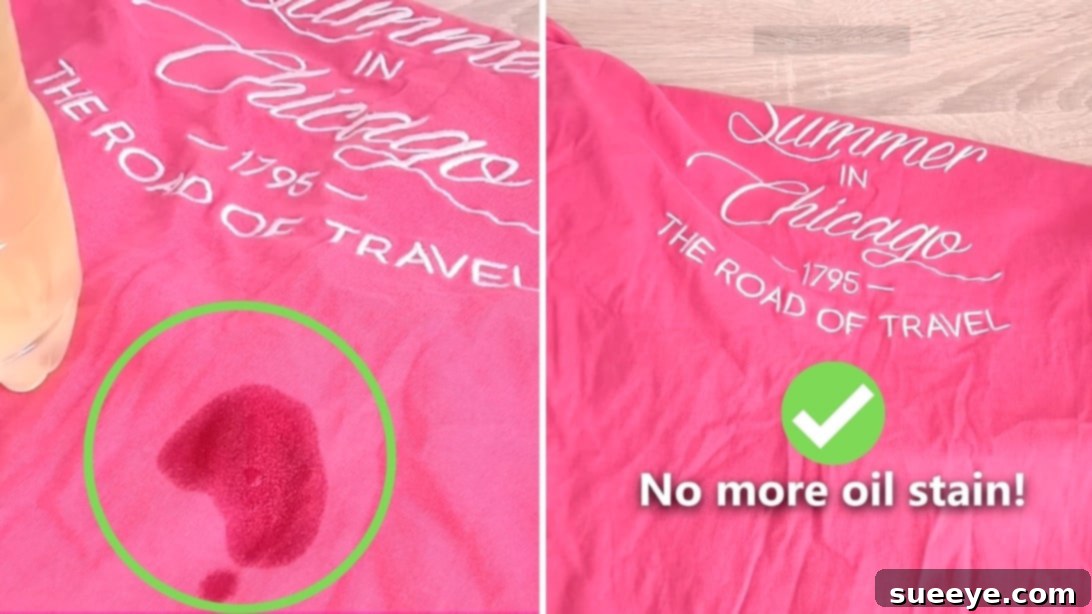
There’s nothing quite like the joy of a well-deserved vacation, especially when spent with cherished friends and family. Recently, I embarked on such an adventure, creating unforgettable memories. Upon returning home, filled with the excitement of unpacking souvenirs for my eager cousins, a common travel mishap quickly turned my delight into dismay. As I retrieved gifts from my luggage, I noticed a dreaded spill: oil from my cosmetic kit had escaped its container. My heart sank as I realized the potential damage, and unfortunately, my fears were confirmed. A prominent, unsightly oil stain had marred my favorite sweater, leaving a large, greasy blot that threatened to ruin a beloved garment.
Oil stains are notoriously challenging to remove. Unlike water-soluble spills, oil penetrates fabric fibers deeply, creating a persistent mark that often seems impossible to eliminate with regular washing. The thought of losing my cherished sweater was disheartening, but I wasn’t ready to give up. In today’s digital age, solutions are often just a few clicks away. I immediately turned to my phone, searching for effective methods to tackle these stubborn grease spots. It was then I stumbled upon an incredibly helpful video by RunmanReCords Design on YouTube. The simplicity and effectiveness of their technique intrigued me, so I decided to give it a try.
To my absolute surprise and immense relief, the method worked wonders! Every trace of the oil stain vanished completely, restoring my sweater to its original pristine condition. I was so grateful for this simple yet powerful laundry hack that I felt compelled to share it. This guide outlines the exact steps I followed, using common household items, to successfully remove oil stains from clothes. I sincerely hope this detailed approach proves as beneficial for you as it did for me, saving your garments from the same fate and providing a reliable solution for those frustrating oil spills.
Understanding Oil Stains and Why They’re Tricky
Before diving into the solution, it’s helpful to understand why oil stains pose such a challenge. Oil is hydrophobic, meaning it repels water. This characteristic prevents it from simply dissolving and washing away with water-based detergents. Instead, oil molecules bond with fabric fibers, creating a greasy residue that can be difficult to dislodge. Traditional washing methods often just spread the oil or set the stain further, making it permanent. This is why a multi-step approach involving absorbents and grease-cutting agents is essential for successful removal.
Preparation is Key: Before You Begin
Acting quickly is paramount when dealing with oil stains, but a few preliminary steps can significantly improve your chances of success. Always ensure you have all your materials ready before you start, as delays can allow the stain to set further. Additionally, it’s wise to perform a patch test on an inconspicuous area of the garment, especially if it’s a delicate fabric or a color that might bleed, to ensure none of the cleaning agents cause discoloration or damage. This method is generally safe for most washable fabrics, but caution is always recommended.
Materials You’ll Need: Simple Household Solutions
The beauty of this effective oil stain removal method lies in its reliance on everyday household items. You likely already have most, if not all, of these on hand, making it a cost-effective and immediate solution for those unexpected spills. Gather the following:
- **A Soft-Bristled Brush (like a toothbrush):** Essential for gently working the cleaning agents into the fabric without causing damage. An old toothbrush works perfectly, but any small, soft brush will do.
- **Absorbent Paper Towels or Tissue Paper:** Crucial for blotting away excess oil before treatment, preventing the stain from spreading.
- **Liquid Laundry Detergent:** Your standard detergent will be used in the final wash to thoroughly clean the garment.
- **Grease-Cutting Dish Soap:** This is a star player in oil stain removal. Its powerful degreasing properties help to break down the oil molecules, making them easier to lift from the fabric.
- **Baking Soda (Sodium Bicarbonate):** An excellent absorbent, baking soda will draw the oil out of the fabric fibers, acting as the primary pre-treatment agent.
Step-by-Step Instructions: Conquering Oil Stains
Follow these steps carefully to ensure the best results. Remember, patience and precision are your allies in the battle against stubborn oil stains.
Step 1: Blot Away Excess Oil Immediately
The very first action you should take is to remove as much surface oil as possible. Lay the stained garment flat on a clean surface. Using a clean paper towel or a stack of tissue paper, gently blot the oil stain. The key here is to blot, not rub. Rubbing can push the oil deeper into the fabric fibers or spread it to a larger area, making it harder to remove. Apply firm but gentle pressure, allowing the paper towel to absorb the visible excess oil. Repeat with fresh sections of paper towel until no more oil transfers to the paper. This preliminary step significantly reduces the amount of oil you’ll need to treat in subsequent steps.
Step 2: Apply a Generous Layer of Baking Soda
Once the initial blotting is complete, it’s time to apply your first powerful cleaning agent: baking soda. Generously spoon baking soda directly onto the entire oil stain, ensuring the spot is completely covered. The amount of baking soda will depend on the size and saturation of the stain; for a larger stain, don’t hesitate to use more. Baking soda is a natural absorbent, and its fine particles will work to draw out the oil from the fabric. Allow the baking soda to sit on the stain for at least 30 minutes. For particularly stubborn or old stains, you can let it sit for several hours, or even overnight, to maximize its oil-absorbing power.
Step 3: Gently Scrub with a Toothbrush
After the baking soda has had ample time to absorb the oil, it’s time for some gentle agitation. Using your toothbrush or preferred soft-bristled brush, carefully scrub the area where the baking soda is applied. The goal here is to work the baking soda into the fabric fibers and help dislodge the oil it has absorbed. Use small, circular motions, focusing on the stained spot. Be thorough, ensuring you scrub all areas affected by the oil, but avoid being too aggressive, especially on delicate fabrics, to prevent damage. You’ll likely see the baking soda start to clump or change color as it lifts the oil.
Step 4: Treat with Grease-Cutting Dish Soap
Once you’ve scrubbed with baking soda, brush off the excess powder. Now, apply a small amount of grease-cutting dish soap directly onto the stain. A few drops should suffice, enough to cover the stained area. Using your fingers, gently work the dish soap into the fabric. The surfactants in the dish soap are formulated to break down grease and oil, effectively lifting them from the textile fibers. Create a lather and ensure the soap thoroughly penetrates the stained area. This step is crucial for emulsifying the remaining oil, making it water-soluble and ready for the wash.
Step 5: Machine Wash and Inspect
With the dish soap worked in, your garment is ready for its final wash. Place the stained item into your washing machine along with your regular laundry. Add your usual amount of laundry detergent. It’s generally recommended to wash oil-stained items in the warmest water temperature safe for the fabric, as heat can help to further dissolve and remove oil. However, always check the garment’s care label to avoid shrinking or damage. Once the wash cycle is complete, the most important step is to inspect the garment *before* placing it in the dryer. Heat from a dryer can permanently set any remaining oil stain, making it nearly impossible to remove later. If you still see any trace of the stain, repeat the entire process from Step 1. Only when you are completely satisfied that the stain is gone should you proceed with drying.
What If the Stain Persists? Troubleshooting Tips
While this method is highly effective, some particularly stubborn or old stains might require extra attention. If the oil stain is still visible after the first attempt, do not despair! Simply repeat the entire process from the blotting stage (Step 1). Sometimes, multiple applications are necessary to fully draw out deeply embedded oil. For extremely persistent stains, you might consider pre-treating with an enzymatic stain remover designed for grease before starting this DIY method, or consult a professional cleaner. Always avoid machine drying until the stain is completely gone.
Preventative Measures and Quick Actions
The best defense against oil stains is often a good offense. Here are a few tips to help prevent future mishaps or deal with them promptly:
- **Act Fast:** The quicker you address an oil stain, the higher your chances of complete removal.
- **Protect Yourself:** When cooking or working with oily substances, wear an apron or old clothes.
- **Immediate Blotting:** Always carry a few tissues or paper towels for immediate blotting when spills occur outside the home.
- **Identify the Source:** Knowing the type of oil (e.g., cooking oil, motor oil, cosmetic oil) can sometimes help in choosing the most effective approach, though this general method works for many.
Embrace a Stain-Free Wardrobe
Battling oil stains on your favorite clothes can be incredibly frustrating, often leading many to prematurely discard garments they love. However, with this powerful yet simple DIY method, you now have a reliable weapon in your laundry arsenal. By utilizing common household items like baking soda and dish soap, you can effectively tackle even the most stubborn grease spots, saving your wardrobe and your budget. My favorite sweater was rescued, and yours can be too!
Don’t let an unfortunate spill dictate the fate of your cherished clothing. Empower yourself with this tried-and-true technique and enjoy the satisfaction of seeing those pesky oil stains disappear. Give it a try the next time you encounter an oily mishap, and prepare to be amazed by the results. Happy cleaning, and here’s to a future of beautifully restored garments!