
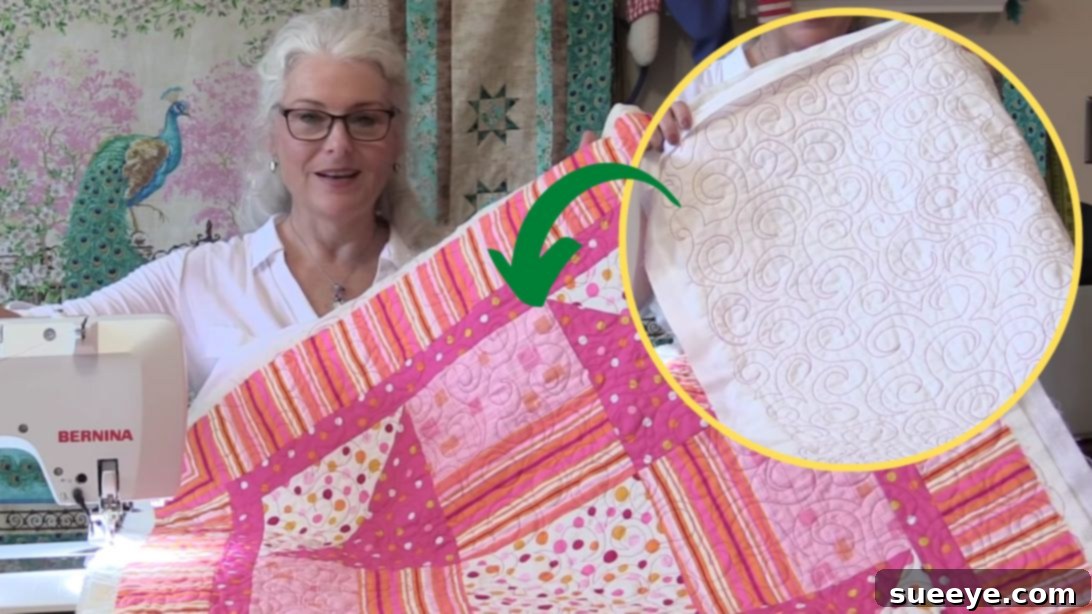
Transforming a simple quilt into a masterpiece of texture and visual appeal doesn’t require advanced techniques. Instead of merely finishing your quilt as is, consider enhancing it with beautiful, flowing swirl stitches. Many quilters might feel intimidated by free-motion quilting (FMQ), thinking it’s too difficult or requires years of practice. However, the “Double C” stitch, a technique brilliantly demonstrated by SewVeryEasy on YouTube, is surprisingly straightforward and accessible to beginners. This method allows you to infuse your quilt with a dynamic, elegant pattern using only a few simple and easy-to-master steps. Get ready to elevate your quilting projects and add a touch of professional artistry to your creations.
Mastering the Double C Stitch: An Easy Guide to Swirl Quilting
Free-motion quilting (FMQ) is a skill that can add incredible depth, texture, and personality to your quilts. While some FMQ patterns can be intricate, the “Double C” stitch stands out as an ideal starting point for anyone looking to dive into this rewarding technique. It’s a versatile pattern that mimics natural swirls and organic movement, making it perfect for filling large open spaces, borders, or even as an all-over design. This guide will walk you through everything you need to know, from preparing your materials and practicing the motion to flawlessly executing the stitch on your quilt. By following these steps, you’ll gain the confidence to embellish your quilts with beautiful, continuous swirls that look complex but are deceptively easy to achieve.
Essential Materials for Your Double C Swirl Quilt
Having the right tools is the first step towards a successful free-motion quilting experience. While the Double C stitch is simple in concept, the quality of your materials can significantly impact your results. Here’s a detailed look at what you’ll need and why each item is important:
- Marathon Thread: While the original tutorial mentions Marathon thread, it’s essential to understand thread choices. A high-quality polyester thread, often labeled as “quilting thread,” is generally recommended for FMQ due to its strength and low lint. You can also experiment with cotton or even rayon threads for different sheens and textures. The key is to choose a thread that is durable enough to withstand the machine’s speed and maintain consistent tension. Matching the thread color to your quilt fabric can make your stitches blend in, while a contrasting color can highlight the quilting pattern. Consider a medium weight (around 40wt or 50wt) for a good balance of visibility and ease of use.
- Paper Pad: This is an invaluable tool for practice. Any standard pad of paper, scratch paper, or even a notebook will suffice. The goal is to simulate the continuous motion of free-motion quilting without the added pressure of working on your actual fabric. Practicing on paper helps build muscle memory and allows you to refine your rhythm and consistency before moving to your quilt.
- Sharpie or Marker: A permanent marker like a Sharpie, or any dark pen, is perfect for your paper practice. The bold lines make it easy to see your progress and identify areas for improvement. You want a tool that glides smoothly and doesn’t skip, allowing you to focus purely on the motion.
- Sewing Machine: Your trusty sewing machine is the heart of this project. For free-motion quilting, your machine needs to have the ability to drop its feed dogs. The feed dogs are the teeth that normally pull your fabric through the machine. Dropping them gives you complete control over the fabric’s movement. You will also need a free-motion quilting foot, sometimes called a darning foot or hopping foot, which allows the fabric to move freely while still providing enough pressure to form stitches. Ensure your machine is clean, oiled, and in good working order before you begin.
- Free-Motion Quilting Foot: (Implicitly included with the sewing machine) This specialized foot is crucial. It hovers just above your fabric, allowing you to move the quilt in any direction. Some feet are open-toed for better visibility, while others are closed. Choose one that you find comfortable and provides a clear view of your stitching area.
- Quilting Gloves (Optional but Recommended): Gloves with rubberized fingertips can provide extra grip on your quilt fabric, making it easier to maneuver the quilt sandwich under the machine. This reduces hand fatigue and gives you greater control, leading to smoother stitches.
- Basting Spray or Pins: While not listed, preparing your quilt sandwich (top, batting, backing) is crucial. Basting spray offers a temporary adhesive hold, while curved safety pins are a traditional method to keep layers from shifting during quilting. Proper basting prevents puckering and ensures a smooth quilting surface.
Pre-Quilting Preparations: Setting the Stage for Success
Before you even touch your sewing machine with your quilt, a few essential preparations will ensure a smoother and more enjoyable free-motion quilting experience. Don’t skip these steps; they are fundamental to achieving professional-looking results.
Preparing Your Quilt Sandwich
The “quilt sandwich” refers to your quilt top, batting, and backing fabric layered together. These layers must be securely basted to prevent shifting, puckering, and uneven stitches during quilting. There are several popular basting methods:
- Pin Basting: This traditional method uses curved safety pins to secure the layers. Lay your backing fabric flat (wrong side up), tape it down gently to a clean surface, layer your batting smoothly on top, and then your quilt top (right side up). Begin pinning from the center, working outwards, placing pins about 4-6 inches apart.
- Spray Basting: A temporary fabric adhesive spray provides a smooth, continuous bond between layers. This method is often quicker and eliminates the need for pins, which can get in the way of your free-motion foot. Always spray in a well-ventilated area and follow product instructions carefully.
- Thread Basting: For larger quilts or those who prefer not to use pins or spray, thread basting involves hand-stitching long, loose stitches through all layers to hold them in place.
Whichever method you choose, ensure your quilt sandwich is taut but not stretched, and completely smooth, free from wrinkles or bubbles.
Setting Up Your Sewing Machine for Free-Motion Quilting
Proper machine setup is vital:
- Drop the Feed Dogs: Locate the lever or button on your machine that disengages the feed dogs. This is the most crucial step, as it allows you to move the fabric freely in any direction.
- Attach the Free-Motion Quilting Foot: Remove your regular presser foot and attach your FMQ foot. Ensure it’s correctly installed according to your machine’s manual.
- Insert a Fresh Needle: A new, sharp needle (a universal or quilting needle in size 80/12 or 90/14 works well) will prevent skipped stitches and thread breaks.
- Adjust Tension: Free-motion quilting often requires a slightly adjusted tension. Start with your machine’s standard settings (usually around 4-5) and test it on a scrap quilt sandwich. You want the top and bobbin threads to meet evenly between the layers. If the bobbin thread shows on top, loosen the top tension; if the top thread shows on the bottom, tighten the top tension.
- Load Your Bobbin: Wind a fresh bobbin with the same type of thread as your top thread. Ensure it’s evenly wound to prevent tension issues.
- Clear Your Workspace: Ensure you have ample clear space around your sewing machine to support the weight of your quilt. A quilting extension table can be incredibly helpful for managing larger quilts, preventing drag and strain on your arms.
Directions: Stitching Your Double C Swirls
The “Double C” stitch is all about continuous motion and fluid curves. Let’s break down the process into easy-to-follow steps.
Step 1: Practice Makes Perfect – Mastering the Motion on Paper
Before you commit needle to fabric, the most effective way to build confidence and muscle memory for the Double C stitch is to practice on paper. This crucial step allows you to develop the rhythm and coordination required for smooth free-motion quilting.
Grab a pad of paper and a Sharpie or marker. For this exercise, imagine that the paper, much like your quilt, is divided into small, manageable quarters or sections. You’ll be working within these areas, transitioning smoothly from one to the next. The Double C stitch is essentially a continuous series of overlapping “C” shapes. Begin by drawing a letter “C” in one of your imagined quarters. Now, without lifting your pen, go back over the “C” you just made, retracing part of its path, and then seamlessly extend into a new “C” in an adjacent direction. Think of it as a smooth, continuous ribbon of “C” shapes.
The key here is continuous motion. Your hand should move fluidly, guiding the pen (and later, the fabric) without hesitation. Repeat this “C” and retrace-and-extend motion, constantly changing the direction of your next “C” to fill the space. Some “C”s will face left, some right, some up, some down, all interconnected. This variation in direction is what creates the beautiful swirl effect. If you reach the edge of your imagined space, or if you feel you’ve filled an area, simply “travel” over the last “C” you’ve made. This means retracing your previous stitch path for a short distance to reach an open area, then seamlessly continue making your “C” pattern in that new space. This traveling technique is fundamental in free-motion quilting, allowing you to move around your quilt without stopping or breaking thread. Focus on maintaining an even speed and consistent shape as you practice. This paper exercise helps train your hands to work in sync, developing the steady flow needed for precise quilting.
Step 2: Applying the Double C Stitch to Your Quilt
With your confidence built from paper practice, it’s time to translate those smooth motions to your actual quilt. Remember, you can vary the size of your “C”s – large, flowing curves will cover space quickly and give a softer look, while smaller, tighter “C”s will create denser texture and a more intricate appearance. The choice depends entirely on your preference and the desired effect for your quilt.
Carefully position your basted quilt sandwich under the needle of your sewing machine, ensuring your free-motion foot is attached and feed dogs are dropped. Begin by lowering your needle into the quilt and pulling up the bobbin thread to the top. Take a few small stitches in place (or use a locking stitch feature if your machine has one) to secure your starting point. Now, applying the motion and direction you’ve practiced on paper, begin to move your quilt sandwich under the needle to create your continuous Double C pattern. It’s crucial to maintain a consistent speed between your hands (moving the quilt) and your sewing machine (stitching). If your hands move too fast for the machine, your stitches will be long and loose; too slow, and they’ll be tiny and bunched up. Aim for a smooth, steady rhythm.
Don’t be afraid to take it slow at first. Smooth, consistent motion is more important than speed. If you find yourself in a tight spot, or if you feel “stuck” with no clear path for your next “C,” simply retrace over the last “C” you made. This “traveling” allows you to maneuver to an open area where you can comfortably continue your pattern. Embrace the organic nature of free-motion quilting; slight variations in your “C”s only add to the charm and handmade appeal of your quilt. Continue this process, filling your quilt top with the flowing Double C swirls. Once your quilt is completely covered with these beautiful patterns, and you’re satisfied with the density and coverage, you can then proceed to the final finishing steps, which include squaring up the edges of your quilt and binding the seams. This final trimming ensures a neat, professional finish for your newly quilted masterpiece.
Tips for Successful Free-Motion Quilting
Achieving beautiful free-motion quilting, especially with a continuous pattern like the Double C stitch, often comes down to a few key practices and a generous dose of patience. Here are some additional tips to help you succeed:
- Start Small: Don’t jump straight to your queen-sized quilt. Begin by practicing on smaller quilt blocks or scrap fabric sandwiches. This allows you to experiment with tension, stitch length, and motion without the pressure of potentially marring a large project.
- Patience and Practice are Key: Free-motion quilting is a skill that improves with practice. Don’t get discouraged if your first attempts aren’t perfect. Each stitch is a learning experience. Set aside dedicated time for practice, even if it’s just 15-20 minutes a day.
- Good Lighting and Posture: Ensure your workspace is well-lit to clearly see your stitches and fabric. Maintain good posture to prevent fatigue and discomfort, which can affect your control over the quilt.
- Listen to Your Machine: Pay attention to the sound of your sewing machine. Unusual noises can indicate tension problems, a dull needle, or other issues. Stop and investigate if something sounds off.
- Manage Your Quilt: For larger quilts, rolling or scrunching parts of the quilt can help manage its bulk and weight, making it easier to maneuver under the machine. Avoid letting the quilt hang off the table, as its weight can create drag and affect your stitching.
- Embrace Imperfection: Hand-guided free-motion quilting will never look perfectly machine-generated. These slight variations are part of the charm and character of a handmade quilt. Don’t strive for flawless precision; aim for consistent flow and enjoyable process.
- Experiment with Thread Colors: While a matching thread color will make your quilting blend in, using a contrasting thread can really make your Double C swirls pop and become a prominent design element.
- Keep Your Machine Clean: Regularly clean out lint from your bobbin case and under the needle plate. Lint buildup can interfere with thread tension and stitch quality, especially during high-speed free-motion quilting.
The Enduring Appeal and Benefits of Free-Motion Quilting
Beyond simply finishing a quilt, free-motion quilting offers a multitude of benefits that enhance both the beauty and functionality of your textile art. Incorporating techniques like the Double C stitch transforms a flat fabric into a piece rich with dimension and character.
- Adds Texture and Dimension: The most immediate benefit of FMQ is the tactile and visual texture it introduces. The raised lines of the stitching create shadows and highlights, giving the quilt a luxurious, three-dimensional quality that cannot be achieved with piecing alone. The Double C stitch, with its continuous swirls, creates a beautiful ripple effect across the surface.
- Increases Durability and Longevity: Quilting stitches serve to hold the three layers of the quilt (top, batting, backing) together. This secures the batting, preventing it from shifting or bunching over time, especially through repeated washing and use. A well-quilted piece will last longer and withstand more wear and tear.
- Personalization and Artistic Expression: Free-motion quilting offers an unparalleled opportunity for artistic expression. Each stitch is guided by your hand, making every quilted piece unique. You can adapt patterns, vary sizes, and combine different motifs to reflect your personal style, turning a functional item into a work of art.
- Hides Imperfections: Believe it or not, well-executed free-motion quilting can often camouflage minor piecing imperfections in your quilt top. The texture and movement of the quilting draw the eye, making small misalignments less noticeable.
- Enhances Visual Interest: Even a simple quilt top can be dramatically elevated by intricate or eye-catching quilting patterns. The Double C stitch, while simple to execute, provides an elegant and continuous design that adds sophisticated visual interest without overpowering the quilt top.
- A Relaxing and Meditative Process: For many quilters, the rhythmic motion of free-motion quilting becomes a meditative and relaxing activity. It’s a chance to focus, be creative, and unwind, providing a satisfying sense of accomplishment as the pattern emerges.
The Double C stitch is an exceptional entry point into the world of free-motion quilting. It’s not only straightforward to learn but also incredibly versatile, allowing you to add elegant, continuous swirls to any quilt project. Don’t let the thought of free-motion quilting intimidate you; with a bit of practice on paper and adherence to these simple steps, you’ll be able to transform your quilts with beautiful texture and professional flair.
We extend our sincere thanks to SewVeryEasy via YouTube for this fantastic tutorial and for all images used here. If you found this guide helpful, we highly recommend visiting her channel and subscribing to explore her other insightful quilting videos. Happy quilting!