
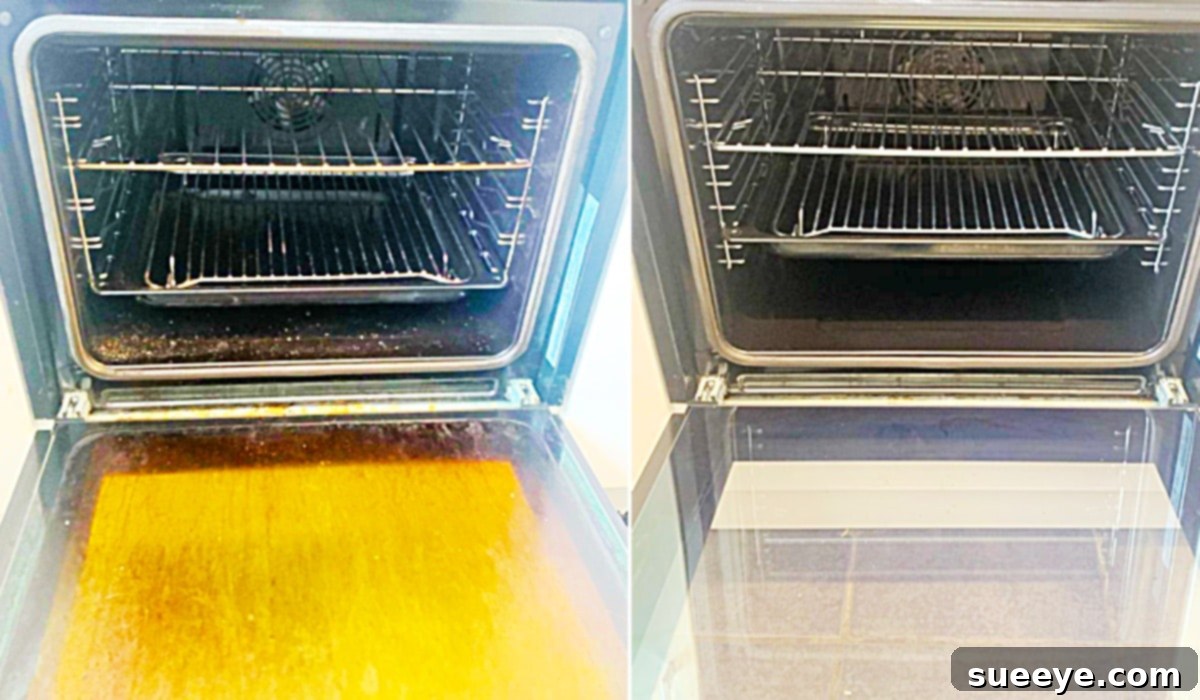
The Ultimate Guide to Effortless Oven Rack Cleaning: A Bathtub & Laundry Detergent Hack
Few kitchen chores are as daunting as tackling incredibly dirty oven racks. Caked with baked-on grease, burnt food residue, and stubborn grime, these essential components often get overlooked during regular cleaning routines. Many homeowners avoid using the self-cleaning feature for their oven racks, fearing it might strip away their protective chrome finish or damage vintage appliance parts. Whether you cherish your retro stove or simply prefer a gentler cleaning approach for your modern, non-self-cleaning model, discovering an efficient and safe method to restore your oven racks to their sparkling glory is a game-changer.
Fortunately, you don’t need harsh chemicals or endless scrubbing to achieve pristine results. We’ve uncovered a remarkable oven rack cleaning hack that utilizes everyday household items and minimal effort. Inspired by an ingenious video tutorial from Clean My Space on YouTube, this method promises to transform your oven racks with surprising ease. Say goodbye to strenuous scrubbing and hello to a brilliant solution that will have your oven looking immaculate in no time.
Before diving into this fantastic cleaning method, it’s crucial to understand a vital distinction: if you own a newer self-cleaning oven, it is generally recommended to only use its built-in self-cleaning function. Attempting to clean such an oven using conventional methods or harsh chemicals can void your warranty and potentially damage internal components like heating coils or fans. Always consult your appliance’s manual for specific cleaning instructions and warranty information. This particular hack is best suited for oven racks from older models, conventional ovens, or for those who wish to avoid the intense heat and fumes associated with the self-cleaning cycle.
Why Traditional Cleaning Methods Fall Short for Oven Racks
Oven racks endure extreme heat and persistent splatter, leading to layers of carbonized food and grease that seem impossible to remove. While many modern ovens boast a “self-cleaning” cycle, this feature often involves extreme temperatures (up to 900°F or 480°C) that incinerate residue. However, many manufacturers advise against leaving oven racks inside during this cycle. The intense heat can discolor or warp the racks, degrade their chrome plating, or even make them difficult to slide in and out over time. For those with vintage appliances, using a self-cleaning cycle is often not an option, making alternative cleaning strategies essential.
Traditional scrubbing with commercial oven cleaners, while effective, can be incredibly laborious, often requires protective gear, and leaves behind strong chemical fumes that can linger in your kitchen. This is where a clever, low-effort, and surprisingly effective DIY method truly shines, offering a gentler alternative that protects your racks while achieving stunning cleanliness.
Materials Needed for a Sparkling Transformation
Gathering your supplies is the first step towards remarkably clean oven racks. You’ll likely have most of these items already in your home, making this method not only effective but also incredibly cost-efficient. Here’s what you’ll need:
- An Old Towel: Essential for protecting your bathtub from scratches and providing a cushion for the racks. Choose a towel you don’t mind getting stained or one that’s nearing the end of its life.
- A Sturdy Scrub Brush or Toothbrush: For tackling stubborn spots. A toothbrush is excellent for intricate corners and tight spaces, while a larger brush works well for broader surfaces.
- A Non-Abrasive Sponge or Scouring Pad: Ideal for gentle yet effective scrubbing after the soaking process. Ensure it won’t scratch the rack’s finish.
- Laundry Detergent (Powdered or Liquid): This is the secret ingredient! The powerful enzymes and cleaning agents in laundry detergent are surprisingly effective at breaking down baked-on grease and food particles. Powdered detergent can be especially potent due to its concentrated nature, but liquid works equally well.
- A Bathtub: Your primary cleaning vessel. Ensure it’s clean before you start, and be prepared to give it a quick rinse afterward.
- Plenty of Hot Water: Heat is key to activating the detergent and helping to dissolve the grime.
- Rubber Gloves (Optional but Recommended): To protect your hands from hot water and detergent, especially if you have sensitive skin.
- Safety Glasses (Optional): To protect your eyes from splashes.
Step-by-Step Directions: How to Clean Oven Racks with Laundry Detergent
This ingenious method, inspired by the expertise of Clean My Space, simplifies what once seemed like an impossible task. Follow these steps for an effortless transformation:
Step 1: Prepare Your Cleaning Station
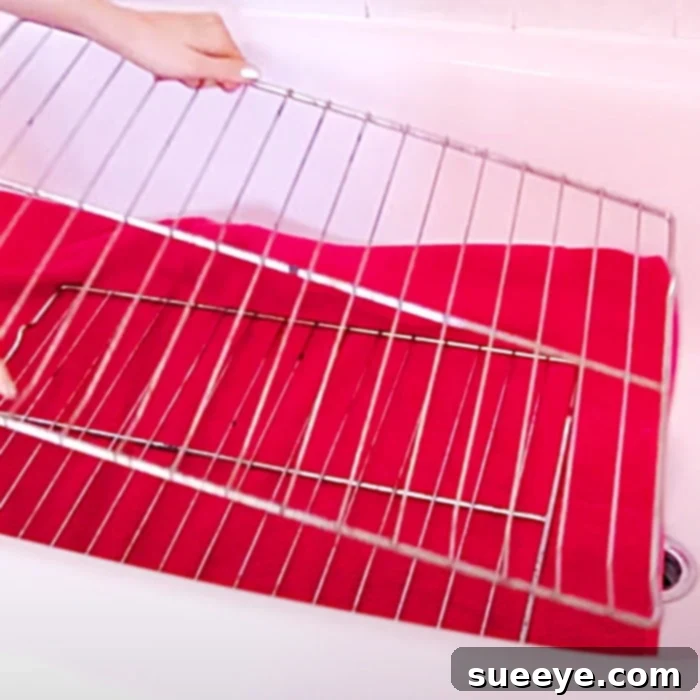
Begin by ensuring your bathtub is clean and ready for use. Lay an old towel flat on the bottom of the tub. This crucial step serves two purposes: it prevents your oven racks from scratching the delicate surface of your tub, and it provides a soft bed for the racks, minimizing any potential for damage during the soaking process. Carefully place your dirty oven racks on top of the towel in the bathtub, ensuring they are as flat as possible and don’t overlap too much, allowing for maximum exposure to the cleaning solution.
Step 2: Create the Soaking Solution
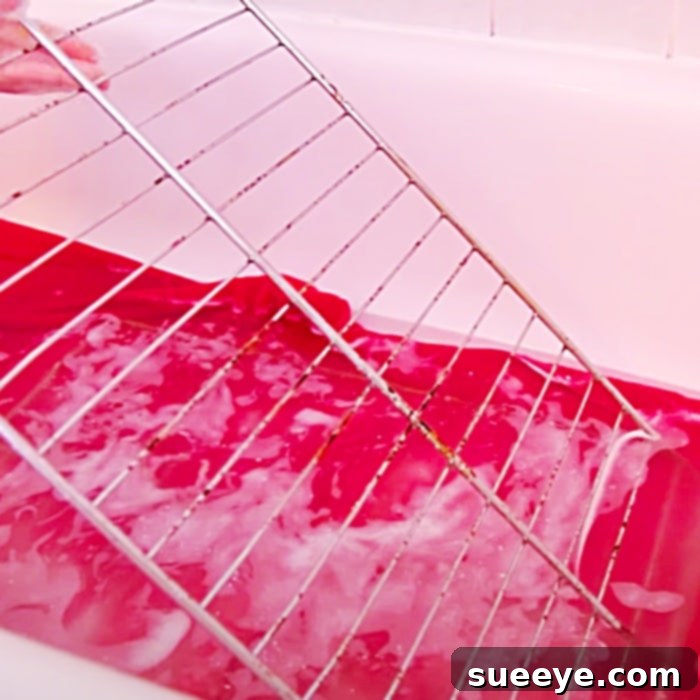
Now it’s time to add the magic ingredient: laundry detergent. Generously sprinkle or pour your chosen laundry detergent directly over the oven racks. The amount needed will depend on the size of your bathtub and the number of racks, but a good starting point is about half a cup to a full cup of powdered detergent, or an equivalent amount of liquid detergent. Aim for enough to create a potent cleaning bath. Next, fill the bathtub with very hot water, enough to completely submerge the oven racks. The hotter the water, the more effective the detergent will be at breaking down tough grease and grime. Watch as the water and detergent begin to create a powerful degreasing solution.
Step 3: The Soaking Period
This is where the “effortless” part truly comes in. Once the racks are fully submerged in the hot, soapy water, simply walk away! Let the oven racks soak for a minimum of 6 hours. For heavily soiled racks, an overnight soak (8-12 hours) will yield even better results. The prolonged contact with the hot water and powerful laundry detergent will work to soften, dissolve, and lift even the most stubborn baked-on grunge, making subsequent scrubbing incredibly easy.
Step 4: Light Scrubbing and Rinsing
After the soaking period, you’ll be amazed at how easily the grime comes off. Drain the dirty water from the tub. Using your toothbrush, sponge, or non-abrasive scouring pad, gently scrub away any remaining residue. You’ll find that what once required immense effort now comes off with minimal pressure. Pay attention to the corners and crevices. Once clean, thoroughly rinse the oven racks under clean running water. Ensure all detergent residue is completely washed away. Dry them completely with a clean towel before returning them to your oven.
Tips for Success and Advanced Cleaning
- Water Temperature is Key: Always use the hottest water possible for soaking. The heat helps the detergent to break down grease more effectively.
- Detergent Choice Matters: While most laundry detergents will work, those with strong degreasing agents or enzymatic cleaners might offer slightly better results.
- For Extra Tough Grime: If your racks are exceptionally dirty, consider adding a scoop of oxygen-based bleach (like OxiClean) to the hot water along with the laundry detergent. This can provide an extra boost in breaking down stubborn stains. Always ensure good ventilation if adding additional cleaning agents.
- Protect Your Skin: Wearing rubber gloves is highly recommended, especially when handling hot water and detergent for extended periods.
- Mind Your Bathtub: While the towel provides protection, some users might prefer to line their tub with a plastic sheet for added peace of mind, especially if they have an older, more porous tub surface. Always clean your tub immediately after to prevent any residue buildup.
- Regular Maintenance: To prevent extreme build-up, consider giving your oven racks a quick soak and wipe down every few months, rather than waiting until they become heavily soiled.
Why This Method is a Game-Changer
This bathtub and laundry detergent hack offers numerous advantages over traditional oven rack cleaning methods:
- Effortless Cleaning: The soaking process does most of the heavy lifting, significantly reducing the amount of manual scrubbing required.
- Cost-Effective: It uses common household items, eliminating the need for expensive, specialized oven cleaners.
- Safe for Racks: Unlike the harsh heat of self-cleaning cycles or abrasive chemicals, this method is gentle on your oven racks, preserving their chrome finish and structural integrity.
- No Harsh Fumes: You avoid the strong, often irritating chemical fumes associated with commercial oven cleaners, making for a more pleasant cleaning experience.
- Eco-Friendlier Option: While still using detergent, it often involves fewer harsh chemicals than dedicated oven cleaning sprays, and the solution can be safely drained.
- Achieves Professional Results: You’ll be amazed at how easily baked-on grime lifts away, leaving your racks looking almost brand new.
Important Safety and Warranty Considerations
While this method is wonderfully effective, it’s vital to reiterate a few safety and warranty points:
Self-Cleaning Ovens and Warranties: As mentioned, if you have a modern oven with a self-cleaning feature, using external cleaning products or methods on the oven interior (not just the racks) can void your manufacturer’s warranty. The self-cleaning function relies on specific design and material properties that can be compromised by chemical residues or non-approved cleaning agents. Always refer to your oven’s user manual for detailed cleaning instructions and warranty terms. This bathtub method is primarily for the removable racks, and it’s important not to apply this method to the interior of a self-cleaning oven itself.
Protecting Internal Components: When cleaning the oven interior (separately from the racks), always be careful not to get any cleaning products, water, or moisture into ventilation fans, heating coils, or electrical components. This can cause damage, create a fire hazard, or lead to electrical malfunctions. Disconnect power to your oven before cleaning its interior if you are unsure.
General Cleaning Safety: Always work in a well-ventilated area. If using very hot water, proceed with caution to avoid burns. Wear appropriate protective gear like rubber gloves and, if desired, safety glasses. Keep all cleaning products out of reach of children and pets.
Beyond Oven Racks: Maintaining a Sparkling Kitchen
Once your oven racks are gleaming, you might feel inspired to tackle other challenging kitchen cleaning tasks. This hack exemplifies the power of simple, effective solutions. Regular maintenance is key to preventing daunting clean-up jobs. Consider incorporating these habits:
- Wipe Spills Immediately: Address drips and splatters in your oven as soon as they cool to prevent them from baking on.
- Use Oven Liners: Silicone or disposable oven liners can catch spills and make interior cleaning much easier.
- Regular Deep Cleans: Schedule a deeper oven interior clean every few months, using appropriate methods for your oven type.
- Hood Filter Maintenance: Don’t forget to clean or replace your range hood filters regularly, as they trap grease and can become fire hazards.
Conclusion: Embrace the Easy Way to Clean Oven Racks
Cleaning oven racks no longer needs to be a dreaded chore. With this simple yet incredibly effective bathtub and laundry detergent hack, you can effortlessly remove even the most stubborn baked-on grease and grime. Say goodbye to harsh chemicals, endless scrubbing, and the worry of damaging your precious oven racks. Embrace this brilliant DIY solution to restore your racks to a pristine condition, enhancing the cleanliness and efficiency of your entire kitchen. Give it a try – you’ll be amazed by the sparkling results and the minimal effort required!
Remember to always prioritize safety and consult your appliance’s manual for specific instructions, especially concerning self-cleaning features. Happy cleaning!