
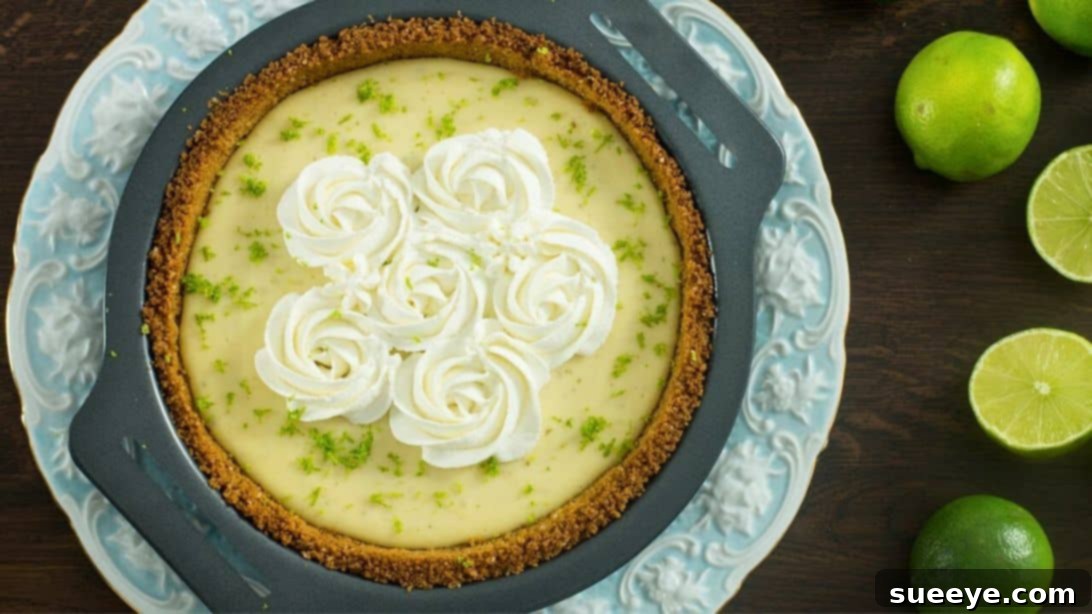
Few desserts capture the essence of sunshine and tropical bliss quite like a perfectly crafted Key Lime Pie. Its signature balance of tart, sweet, and creamy flavors, encased in a crisp, buttery crust, makes it an undeniable favorite. While many might assume this iconic dessert is complicated to create, the truth is, the best Key Lime Pie recipe doesn’t require an overwhelming list of ingredients or advanced culinary skills. It’s one of the most delightfully easy dessert recipes you can prepare right in your own kitchen!
You’re in for an exquisite treat with this incredibly straightforward yet utterly delicious recipe, inspired by the culinary experts at Home Cooking Adventure. This pie is a symphony of refreshing zest, rich buttery notes, and just the right amount of sweetness – guaranteed to leave you craving more after just one slice. Whether you’re a seasoned baker or a beginner eager to impress, this guide will walk you through every step to achieve Key Lime Pie perfection. Read on for the full instructions and secrets to creating a truly unforgettable dessert.
Essential Ingredients for Your Perfect Key Lime Pie
Crafting the perfect Key Lime Pie starts with selecting the right ingredients. This recipe prides itself on its simplicity, using a select few high-quality components to achieve maximum flavor and texture. Here’s what you’ll need to bring this refreshing dessert to life:
For the Buttery Graham Cracker Crust
- 7 oz (approximately 200g) Digestive Biscuits or Graham Crackers: These form the foundational crunch and flavor of your pie. Graham crackers offer a classic American taste, while digestive biscuits provide a slightly less sweet, more refined base. Either choice will yield a delicious result.
- 2 Tablespoons of Granulated Sugar: A touch of sugar enhances the sweetness of the crust, perfectly balancing the tartness of the filling.
- 5 Tablespoons (approximately 70g) Unsalted Butter (Melted): High-quality melted butter binds the crumbs together, ensuring a firm, rich, and flavorful crust that holds its shape beautifully.
For the Tangy Key Lime Filling
- 4 Large Egg Yolks: These yolks are crucial for the filling’s rich, creamy texture and contribute to its lovely pale yellow hue. They also help the filling set without the need for excessive baking.
- 1 Can (14 oz / 397g) Sweetened Condensed Milk: This is the magic ingredient that provides both sweetness and thickness to the filling. Its unique properties allow the lime juice to ‘cook’ and set the mixture without extensive baking.
- 1/2 Cup (approximately 120ml) Fresh Key Lime Juice: The star of the show! For the most authentic flavor, fresh Key lime juice is paramount. If Key limes are unavailable, regular Persian lime juice can be used, though the flavor profile will be slightly different (Key limes are more aromatic and less acidic).
- 1 Tablespoon of Fresh Lime Zest: Don’t skip the zest! It’s packed with essential oils that contribute a vibrant, intense lime aroma and flavor, elevating the pie beyond just tartness.
For the Fluffy Whipped Cream Topping
- 1 Cup (approximately 240ml) Cold Heavy Whipping Cream: Ensure your cream is very cold for optimal whipping. This creates a light, airy, and luxurious counterpoint to the pie’s tartness.
- 1 Tablespoon of Powdered Sugar (Confectioners’ Sugar): Powdered sugar not only sweetens the cream but also helps stabilize it, ensuring your topping stays fluffy and holds its shape beautifully.
Step-by-Step Guide to Crafting the Ultimate Key Lime Pie
Making this classic Key Lime Pie is a rewarding experience, and following these detailed steps will guarantee a picture-perfect and delicious outcome.
Step 1: Preparing the Irresistible Crust
Begin your Key Lime Pie adventure by laying the foundation: the crust. Preheat your oven to 350°F (175°C). This ensures your oven is at the correct temperature for even baking as soon as the crust is ready. Next, take your digestive biscuits or graham crackers and place them into the bowl of a food processor. Process them until they transform into fine, uniform crumbs. The finer the crumbs, the more cohesive and sturdy your crust will be. Once pulverized, transfer these crumbs into a medium-sized mixing bowl. Add the granulated sugar and the five tablespoons of melted butter. Stir thoroughly with a spoon or your hands until all the crumbs are evenly moistened and resemble wet sand. This ensures the crust will hold together beautifully after baking.
Step 2: Forming the Crust in Your Pie Pan
Carefully transfer the buttered crumb mixture into an 8-9 inch pie pan. For best results, use a pan with a removable bottom if you plan to unmold the pie. Begin by pressing the mixture firmly and evenly onto the bottom of the pan. Then, work your way up the sides, ensuring an even thickness throughout. You can use the bottom of a flat-bottomed glass or your knuckles to compact the crumbs firmly, creating a tight and uniform crust. A well-pressed crust is less likely to crumble when sliced.
Step 3: Baking and Cooling the Crust
Place your prepared pie crust in the preheated oven and bake for 8 to 10 minutes. This short bake time is crucial; it helps to toast the crumbs, making the crust crispier and preventing it from becoming soggy once the filling is added. Keep an eye on it to ensure it doesn’t over-brown. Once baked, remove the crust from the oven and place it on a wire rack to cool for at least 15 minutes. It’s essential for the crust to cool down significantly before pouring in the filling, as a hot crust can affect the setting of the lime mixture.
Step 4: Crafting the Silky, Tangy Filling
While your crust cools, it’s time to prepare the star of the show: the vibrant Key Lime filling. In a large mixing bowl, add the four egg yolks and the tablespoon of fresh lime zest. Using a whisk, beat these together vigorously until the mixture becomes creamy, light yellow in color, and slightly thickened. This aeration is key to a smooth filling. Next, pour in the entire can of sweetened condensed milk and the half cup of fresh lime juice. Continue to whisk until all ingredients are thoroughly combined and the mixture is smooth. You’ll notice the mixture starts to thicken almost immediately due to the acidic lime juice reacting with the condensed milk – this is perfectly normal and part of the magic of Key Lime Pie!
Step 5: Baking and Chilling for Perfect Setting
Once your crust has cooled, carefully pour the prepared lime filling over it, spreading it evenly with a spatula if needed. Gently place the pie back into the preheated oven and bake for an additional 15 minutes. The pie is done when the edges are set and firm, but the very center still has a slight, delicate jiggle (like a loose Jell-O). Be careful not to overbake, as this can lead to a dry, cracked filling. Once baked, remove the pie from the oven and let it cool completely at room temperature on a wire rack. This is a critical step; rushing it can lead to cracking. Once completely cooled, transfer the pie to the refrigerator and chill for a minimum of a few hours, or ideally, overnight. Thorough chilling allows the filling to fully set, develop its flavors, and ensures clean, beautiful slices.
Step 6: Whipping the Cream and Serving Your Masterpiece
Just before you’re ready to serve your perfectly chilled Key Lime Pie, prepare the luscious whipped cream topping. Ensure your whipping cream is very cold. In a cold mixing bowl (you can chill the bowl and whisk attachments in the freezer for 10-15 minutes beforehand), pour the heavy whipping cream. Beat on medium-high speed until soft peaks begin to form – this means when you lift the whisk, the cream forms gentle, drooping peaks. At this point, add the tablespoon of powdered sugar. Continue beating until stiff peaks form; the cream should now hold its shape firmly when the whisk is lifted. If desired, transfer the whipped cream to a piping bag fitted with a 1M star tip (or any decorative tip you prefer) and pipe beautiful rosettes or swirls over the entire surface of the pie. Alternatively, you can simply spread it evenly with a spoon or offset spatula for a rustic look. For an extra touch of elegance and flavor, sprinkle a little fresh lime zest on top. Now, slice your magnificent Key Lime Pie, serve, and prepare to be delighted!
Why This Key Lime Pie Recipe Stands Out as the Best
Among countless Key Lime Pie recipes, this particular rendition consistently earns rave reviews for several compelling reasons. Its genius lies in its simplicity, proving that you don’t need a complex ingredient list or an elaborate process to achieve extraordinary results. The balance of flavors is impeccable: the natural tartness of fresh lime juice is perfectly mellowed by the sweetness of condensed milk, creating a harmonious and refreshing bite. The rich egg yolks contribute a luxurious creaminess that elevates the texture, making each mouthful smooth and satisfying. Furthermore, the robust, buttery graham cracker (or digestive biscuit) crust provides a delightful counterpoint, offering a crucial textural crunch that complements the silky filling. This recipe also prioritizes ease, minimizing baking time and relying on the natural “cooking” properties of lime juice with condensed milk, making it accessible for home bakers of all skill levels. It’s truly a classic done right, delivering that authentic, sun-drenched Key Lime Pie experience every single time.
Expert Tips for Key Lime Pie Perfection
Achieving the ultimate Key Lime Pie is easier with a few insider tips:
- Fresh Limes are Non-Negotiable: While bottled lime juice can be tempting for convenience, fresh Key lime juice (or fresh Persian lime juice) is paramount for the authentic, vibrant flavor. Key limes are smaller, yellower, and have a more aromatic, less acidic taste than their green Persian counterparts. If using Persian limes, you might need slightly less juice or a touch more zest to compensate for the flavor difference.
- Don’t Overbake the Filling: Overbaking is the most common mistake. The pie is done when the edges are set, but the very center still has a slight wobble. It will continue to set as it cools and chills. An overbaked pie can develop cracks and a less creamy texture.
- Chill, Chill, Chill: Patience is a virtue here. Allowing the pie to chill for several hours, or ideally overnight, is crucial for the filling to fully set, firm up, and for the flavors to meld beautifully. Rushing this step will result in a runny or crumbly pie.
- Cold Cream for Whipping: For the best whipped cream, ensure your heavy cream, mixing bowl, and whisk attachments are all very cold. This helps the cream whip up faster and achieve stiffer, more stable peaks.
- Zest for Extra Zing: Don’t forget the lime zest! It contains essential oils that impart a powerful burst of lime aroma and flavor without adding extra tartness. Use a microplane zester for fine, flavorful zest, avoiding the bitter white pith.
Storage and Shelf Life of Your Homemade Key Lime Pie
Once baked and chilled, your delicious Key Lime Pie needs to be stored properly to maintain its freshness and flavor. Keep the pie covered loosely with plastic wrap or aluminum foil and store it in the refrigerator. It will remain fresh and delightful for up to 3-4 days. While the pie is at its best within the first two days, its refreshing qualities will still shine. If you’ve added the whipped cream topping, it’s generally best consumed within 2 days, as the cream can start to weep or lose its texture over time. For longer storage, you can freeze Key Lime Pie (without the whipped cream topping) for up to 1 month. To freeze, wrap individual slices or the whole pie tightly in several layers of plastic wrap, then a layer of aluminum foil. Thaw overnight in the refrigerator before serving. Add fresh whipped cream just before serving if freezing.
Key Lime Pie Variations and Creative Garnish Ideas
While this classic Key Lime Pie recipe is perfect as is, there are always opportunities to personalize it or add a creative touch:
- Crust Variations: Instead of graham crackers or digestive biscuits, try vanilla wafers, shortbread cookies, or even a pretzel crust for a sweet and salty twist.
- Topping Alternatives: Instead of whipped cream, consider a delicate meringue topping (baked until lightly golden), or a dollop of crème fraîche for a tangier finish.
- Flavor Boost: Infuse your whipped cream with a touch of lime zest or a hint of vanilla extract for an added layer of flavor.
- Colorful Garnishes: Beyond lime zest, consider fresh berries (raspberries or blueberries provide a lovely color contrast), thin slices of fresh lime, or even a sprinkle of toasted coconut flakes for a tropical flair.
Frequently Asked Questions About Key Lime Pie
- Q: Can I use bottled lime juice instead of fresh?
- A: While fresh lime juice (especially Key lime) offers the superior flavor and aroma, bottled 100% lime juice can be used in a pinch for convenience. Just be aware that the flavor profile might be slightly less vibrant and authentic.
- Q: My pie filling cracked after baking. What went wrong?
- A: Cracking usually indicates overbaking or too rapid a cooling. Ensure you remove the pie from the oven when the center is still slightly wobbly. Also, let it cool completely at room temperature before refrigerating to prevent sudden temperature shock.
- Q: How do I know when the Key Lime Pie is perfectly baked?
- A: The pie is done when the edges appear set and firm, but the very center (about 1-2 inches in diameter) still has a slight, delicate jiggle when gently shaken. It will firm up completely as it cools and chills.
- Q: What’s the difference between Key Limes and regular (Persian) limes?
- A: Key limes are smaller, rounder, and turn yellowish when ripe. They have a more aromatic, floral, and intensely tart flavor with a less acidic bite compared to larger, greener Persian limes. Key lime juice is traditionally used for authentic Key Lime Pie, though Persian limes are a common substitute.
- Q: Can I make this Key Lime Pie without baking it?
- A: This particular recipe requires baking both the crust and the filling. The egg yolks contribute to the set and richness, and while the lime juice does thicken the condensed milk, the brief bake ensures food safety and a firmer set. There are no-bake Key Lime Pie recipes that use cream cheese or gelatin for setting, but this is a baked version.
Conclusion: Your Ultimate Key Lime Pie Awaits!
Embarking on the journey to bake your own Key Lime Pie is a decision you won’t regret. With its irresistible blend of sweet and tart, and a texture that’s both creamy and crisp, this dessert promises to be a showstopper at any gathering or a delightful treat for a quiet evening. This recipe, inspired by Home Cooking Adventure, simplifies the process without compromising on flavor, ensuring that even novice bakers can achieve a truly professional-quality pie. So gather your ingredients, follow these clear instructions, and prepare to indulge in the refreshing, buttery, and utterly divine experience of the best homemade Key Lime Pie. Happy baking, and enjoy every single slice!