
Decadent Chocolate Brownie Cake Dessert: Your Go-To Easy & Quick Recipe for Unforgettable Indulgence
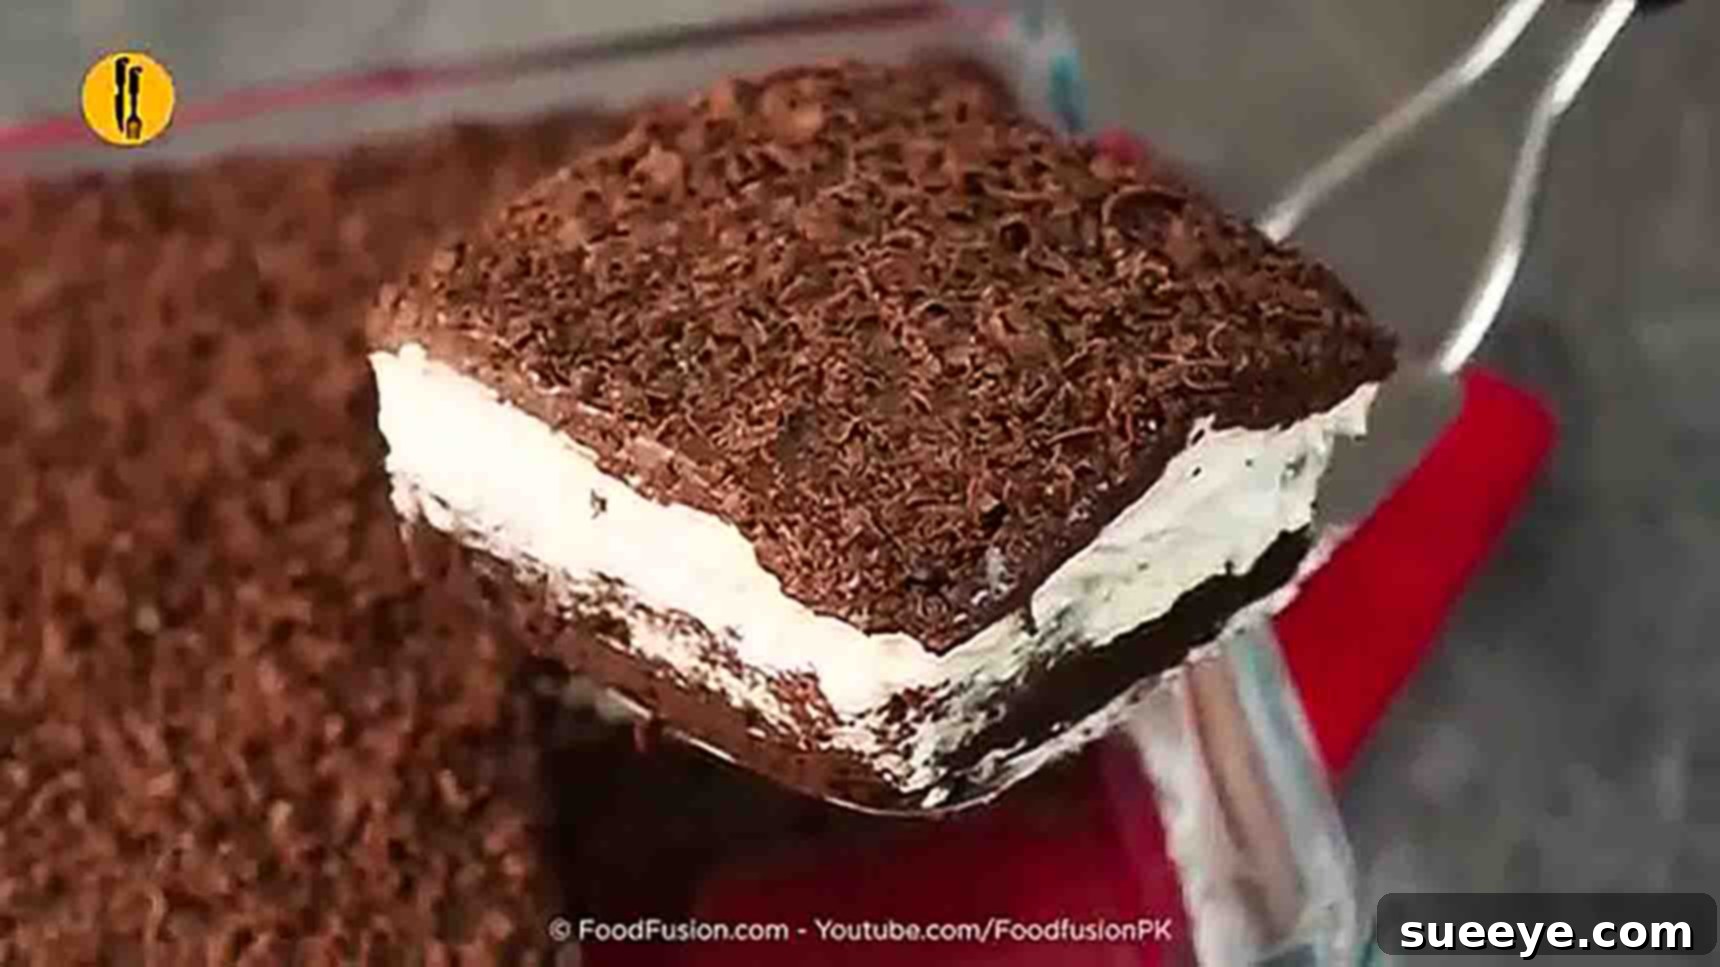
Are you on the hunt for that perfect chocolate dessert that combines speed, simplicity, and an unforgettable taste experience? Look no further! This spectacular Chocolate Brownie Cake Dessert, inspired by the culinary experts at Food Fusion, promises to tantalize your taste buds and effortlessly earn a spot as a cherished favorite in your recipe collection. Imagine a moist, intensely fudgy brownie base, crowned with a light, airy whipped cream layer, and gracefully draped in a glistening, rich chocolate ganache. It’s an absolute dream for any chocolate lover, designed to deliver maximum satisfaction with minimal fuss.
This isn’t just another dessert recipe; it’s a revelation in convenience and flavor. I still vividly remember the first time I whipped up this very dessert for my family; it quite literally vanished in a blink! Its irresistible charm lies in its perfect harmony of textures – from the dense, chewy brownie to the cloud-like cream and the smooth, setting ganache – coupled with an intense chocolate flavor, all while being surprisingly straightforward to prepare. Whether you’re a seasoned baker looking for a quick fix or just beginning your culinary journey, this comprehensive guide will walk you through every step, ensuring a flawless and impressive dessert every single time. Get ready to easily create a show-stopping treat that will leave everyone craving more.
Essential Ingredients for Your Ultimate Chocolate Brownie Cake Dessert
Crafting this delightful three-layered dessert begins with selecting the right, high-quality ingredients. Each component plays a vital role in achieving the perfect balance of flavor, texture, and overall decadent appeal. Here’s a detailed breakdown of everything you’ll need to create the fudgy brownie base, the creamy whipped topping, and the glossy, rich ganache.
For the Fudgy Brownie Layer:
- Compound Chocolate: Approximately 1 cup (170g). Opt for good quality compound chocolate. It melts incredibly smoothly, offers a stable texture, and provides that deep, rich chocolate flavor essential for a truly decadent brownie.
- 3/4 cup (170g) Unsalted Butter: Using unsalted butter allows you to control the overall salt content of your dessert. It contributes significantly to the brownie’s moistness, richness, and tender crumb.
- 1 1/2 cups (180g) All-Purpose Flour: This forms the structural foundation of your brownie. Sifting the flour is a crucial step that helps prevent lumps, aerates the flour, and contributes to a lighter, more uniform brownie texture.
- 1/4 cup (22g) Unsweetened Cocoa Powder: For an intensified chocolate flavor. Choose a high-quality unsweetened cocoa powder to ensure a deep, authentic chocolate taste.
- 1/4 tsp Salt: A non-negotiable ingredient! Salt is a crucial flavor enhancer that balances the sweetness and remarkably amplifies the chocolate notes, making them pop.
- 1 1/2 tsp Baking Powder: This acts as a leavening agent, giving the brownie a subtle lift and ensuring it’s not overly dense, without making it too much like a cake.
- 1 tsp Instant Coffee Granules: The secret weapon! Don’t worry, your brownie won’t taste like coffee. Instead, instant coffee is known for its ability to significantly deepen and amplify the chocolate flavor, making it richer and more profound.
- 1/2 cup (100g) Caster Sugar: Its fine granules dissolve easily and quickly into the batter, contributing to a wonderfully sweet taste and a smooth, consistent texture in the final brownie.
- 1 tsp Vanilla Essence (Extract): A classic flavor enhancer that beautifully complements and rounds out the chocolate profile, adding a warm, aromatic touch.
- 3/4 cup (180ml) Milk: Adds essential moisture to the batter, helping to bring all the ingredients together into the perfect pourable consistency for baking.
For the Velvety Whipped Cream Layer:
- 1 cup (240ml) Heavy Cream (or Whipping Cream), well-chilled: This is the star of your fluffy layer. It must be very cold to whip up properly and hold its stiff peaks.
- 1/4 cup (30g) Icing Sugar (also known as Powdered Sugar or Confectioners’ Sugar): Sweetens the cream perfectly and helps to stabilize it, ensuring a smooth, pipeable, and lasting consistency.
- 1/2 tsp Vanilla Essence (Extract): Adds a delicate and aromatic sweetness to the cream, enhancing its overall flavor and making it even more appealing.
For the Luxurious Chocolate Ganache:
- Compound Chocolate: Approximately 1/2 cup (85g). Once again, selecting a good quality compound chocolate is key for achieving a glossy, smooth, and easily pourable ganache that sets beautifully.
- 6 3/4 tbsp (approx. 100ml) Heavy Cream: The fat content in the cream is what gives ganache its characteristic rich, smooth, and pourable texture, which thickens as it cools to form a beautiful top layer.
Step-by-Step Directions: Crafting Your Decadent Brownie Masterpiece
Follow these detailed and precise instructions to create a visually stunning and incredibly delicious chocolate brownie cake dessert. Paying attention to each step will ensure your dessert turns out perfectly every time, from the fudgy base to the glossy finish.
Step 1: Preparing the Fudgy Brownie Base
Begin by preheating your oven to 350°F (175°C). This ensures the oven is at the correct temperature when your batter is ready, promoting even baking. Next, prepare your baking tray (an approximate 9×13 inch rectangular pan is ideal) by lining it generously with parchment paper. Leave a slight overhang on the sides – this is a crucial trick for easy removal of the baked brownie later, preventing any sticking and making your life much easier.
In a heatproof bowl, combine the compound chocolate and 3/4 cup of butter. Place this bowl over a saucepan of simmering water (ensuring the bottom of the bowl does not touch the water), creating a double boiler. Stir the mixture gently and continuously until both the chocolate and butter are completely melted and the mixture transforms into a smooth, glossy, and uniform liquid. The gentle heat of the double boiler prevents the chocolate from scorching, which can lead to a grainy texture. Once perfectly melted, remove the bowl from the heat and set it aside, allowing it to cool slightly while you prepare the dry ingredients.
Now, meticulously sift together the dry ingredients directly into the bowl of melted chocolate and butter. Add 1 1/2 cups of all-purpose flour, 1/4 cup cocoa powder, 1/4 teaspoon salt, 1 1/2 teaspoons baking powder, and 1 teaspoon instant coffee. Sifting these ingredients is a vital step; it not only removes any potential lumps but also aerates the flour, contributing to a lighter, more tender, and uniform brownie texture. After sifting, add 1/2 cup of caster sugar and 1 teaspoon of vanilla essence to the mixture.
Using a spatula or a whisk, gently mix all the ingredients together until they are just combined. Be extremely careful not to overmix at this stage; overmixing can develop the gluten in the flour, resulting in a tougher, more cake-like brownie rather than the desired fudgy texture. Once the dry ingredients are mostly incorporated, gradually add 3/4 cup of milk. Continue to mix gently until you achieve a smooth, homogenous batter that is rich and thick. A few small lumps are acceptable; perfection isn’t always about absolute smoothness.
Pour the prepared brownie batter evenly into your parchment paper-lined baking tray. Use an offset spatula or the back of a spoon to spread it out smoothly, ensuring the thickness is consistent across the entire tray for uniform baking. Place the tray in the preheated oven and bake for approximately 20 to 22 minutes. To test for doneness, insert a toothpick into the center of the brownie; it should come out with moist crumbs attached, but not wet batter. If it comes out completely clean, your brownie might be slightly overbaked, leading to a drier texture. Once baked, remove the brownie from the oven and transfer the entire tray to a wire rack, allowing it to cool down completely to room temperature. This patience is absolutely essential for easy handling and layering later on.
Step 2: Crafting the Whipped Cream and Luxurious Ganache Layers
While your freshly baked brownie continues to cool down completely, it’s the perfect opportunity to prepare the two exquisite layers that will crown your dessert: the delectable whipped cream and the smooth chocolate ganache. Ensuring the brownie is fully cooled is paramount, as any residual warmth will cause your cream to melt prematurely.
Preparing the Velvety Whipped Cream:
To achieve perfectly stable and fluffy whipped cream, begin by setting up an ice bath. Place a larger bowl filled with ice cubes and a small amount of cold water, then nestle a smaller, very well-chilled mixing bowl on top of the ice. This cold environment is absolutely crucial for the cream to whip up quickly and hold stiff peaks. Pour 1 cup of very cold heavy cream into the smaller, chilled bowl. Add 1/4 cup of icing sugar and 1/2 teaspoon of vanilla essence. Using a handheld electric mixer (or a stand mixer with a whisk attachment), beat the mixture on medium-high speed. Continue beating until the cream becomes thick, fluffy, and holds beautiful, stiff peaks. Be vigilant not to overbeat, as this can quickly turn your cream into butter. Once it reaches the desired consistency, carefully transfer the whipped cream into a piping bag fitted with your preferred nozzle (or simply snip the corner of a sturdy Ziploc bag for easy spreading). Keep it refrigerated until you are ready to assemble.
Creating the Glossy Chocolate Ganache:
For the luxurious chocolate ganache, place the compound chocolate in a microwave-safe mixing jug or bowl. Add 6 3/4 tablespoons of heavy cream. Microwave on high for an initial burst of 40 to 60 seconds. The exact heating time may vary depending on the wattage of your microwave, so it’s important to keep a close eye on it. The goal is to melt the chocolate just enough so it can be stirred smooth, not to boil the cream. Once heated, remove the jug from the microwave and let it sit undisturbed for about one minute. This allows the residual heat to further melt the chocolate. Then, stir vigorously with a spoon or a whisk until you achieve a perfectly smooth, glossy, and pourable ganache. If you still see any small lumps, microwave in short 10-second increments, stirring thoroughly after each, until it reaches that silky consistency. Allow the ganache to cool slightly, so it is warm to the touch but not hot, which will prevent it from melting your beautifully whipped cream layer.
Assembling Your Chocolate Brownie Cake Dessert:
Now comes the most exciting part – assembling your magnificent dessert! Once the brownie base is completely cool, gently lift it out of the baking tray using the parchment paper overhang and carefully place it on your desired serving platter or a sturdy cutting board. Evenly pipe or spread the prepared whipped cream mixture over the entire surface of the brownie. Use an offset spatula or the back of a spoon to smooth it out for a clean, professional finish that covers the brownie from edge to edge.
Next, carefully pour the slightly cooled chocolate ganache over the whipped cream layer. Gently tilt the platter or use the back of a spoon to spread the ganache evenly across the cream, ensuring it covers the layer completely and perhaps even drips attractively down the sides for an elegant look. For an extra touch of sophistication and an undeniable chocolatey flourish, grate some additional compound chocolate directly on top of the ganache while it’s still slightly wet. This adds wonderful texture and a beautiful visual appeal that signals pure indulgence.
Finally, carefully transfer your assembled chocolate brownie cake dessert to the refrigerator. Allow it to chill for at least 2-3 hours, or preferably overnight, until the ganache is fully set and the layers are firm. This crucial chilling time allows all the flavors to meld and deepen beautifully, resulting in a harmonious taste, and ensures the dessert slices cleanly and holds its stunning shape when served. Enjoy the anticipation!
Chocolate Brownie Cake Dessert Recipe: Expert Tips for Perfection
To ensure your chocolate brownie cake dessert turns out absolutely perfect every single time, from its fudgy base to its glossy top, keep these expert tips and tricks in mind:
- Quality Ingredients Make a Difference: Always use good quality chocolate and fresh dairy products. The better your ingredients, the more profound and delicious the final taste and texture of your dessert will be.
- Avoid Overmixing the Brownie Batter: When combining your wet and dry ingredients for the brownie, mix until just combined. Overmixing develops gluten in the flour, which can lead to a tougher, cake-like brownie instead of the desired rich, fudgy texture.
- Cool the Brownie Completely: This step is non-negotiable. Ensure your brownie is fully cooled to room temperature before attempting to add the whipped cream and ganache layers. Warm layers will cause the cream to melt and the ganache to run, ruining your beautiful presentation.
- Chilled Cream and Bowl for Whipping: For the best results when whipping cream, always use very cold heavy cream and a chilled mixing bowl and whisk attachment. This helps the cream whip up faster, achieve stiff peaks, and hold its shape for longer. An ice bath can be a great help here.
- Gentle Heat for Ganache: When melting chocolate for your ganache, whether in a double boiler or microwave, use gentle, controlled heat. If microwaving, stir frequently in short bursts to prevent scorching the chocolate. The ganache should be smooth and pourable, but not boiling hot.
- Patience with Chilling: The final chilling time in the refrigerator is not merely for firmness; it’s crucial for allowing all the distinct flavors of the brownie, cream, and ganache to meld and deepen, resulting in a more harmonious and satisfying dessert experience.
- Parchment Paper is Your Best Friend: Lining your baking tray with parchment paper that extends beyond the edges makes removing the baked brownie incredibly easy and mess-free. It’s a simple trick that saves a lot of hassle.
Delightful Variations and Customizations: Make This Dessert Uniquely Your Own!
While this chocolate brownie cake dessert recipe is spectacular as written, don’t hesitate to get creative and personalize it with these delightful variations and additions:
- Nutty Crunch: For an added layer of texture and flavor, fold in 1/2 cup of chopped walnuts, pecans, or almonds into the brownie batter before baking.
- Espresso Boost: Craving an even more intense chocolate flavor? Add an extra 1/2 teaspoon of instant coffee granules to the brownie batter; it will deepen the chocolate notes without tasting overtly like coffee.
- Minty Fresh Twist: Infuse the whipped cream layer with a few drops of peppermint extract for a refreshing and classic mint-chocolate combination.
- Berry Medley Delight: Garnish your chilled dessert with a generous handful of fresh raspberries, strawberries, or blueberries just before serving. The tartness of the berries beautifully cuts through the richness of the chocolate.
- Salted Caramel Drizzle: Elevate this dessert to new heights by adding a light drizzle of homemade or high-quality store-bought salted caramel over the ganache layer before it sets in the refrigerator.
- Festive Sprinkles: Instead of or in addition to grated chocolate, top your dessert with colorful sprinkles for a fun and festive look, perfect for birthdays and celebrations.
- Orange Zest Zing: Add a teaspoon of finely grated orange zest to the brownie batter or a pinch to the ganache for a bright, citrusy counterpoint to the rich chocolate.
Optimal Storage Instructions for Your Decadent Treat
This magnificent chocolate brownie cake dessert, once assembled, can be stored in an airtight container in the refrigerator for up to 3-4 days. For optimal taste, texture, and freshness, it is generally best enjoyed within the first two days of preparation. If you’re lucky enough to have any leftovers, ensure they are well-covered to prevent drying out or absorbing other refrigerator odors.
Frequently Asked Questions (FAQs) About This Chocolate Brownie Cake Dessert
Here are answers to some common questions you might have about making this delicious and easy chocolate brownie cake dessert:
- Can I use regular chocolate chips instead of compound chocolate?
- Yes, you can certainly use good quality regular chocolate chips. However, compound chocolate often melts more smoothly and sets with a firmer, glossier finish, especially beneficial for the ganache. If using chips, ensure they are high-quality for the best flavor outcome.
- My whipped cream isn’t thickening. What might have gone wrong?
- The most common reasons for whipped cream not thickening are that the heavy cream wasn’t cold enough, or the mixing bowl wasn’t chilled. Always ensure both your cream and the mixing bowl (and whisk) are straight from the refrigerator or even briefly from the freezer. Using an ice bath can also significantly help.
- How can I tell if my brownie is perfectly cooked through?
- To check for doneness, insert a toothpick into the center of the brownie. It should come out with moist crumbs attached, but not wet batter. If the toothpick comes out completely clean, it’s likely overbaked and might be a bit dry. A fudgy brownie is achieved when it’s just barely set.
- Can I prepare the ganache in advance?
- Absolutely! You can make the ganache a day ahead. Store it in an airtight container in the refrigerator. Before using, gently reheat it in the microwave in very short bursts (10-15 seconds), stirring thoroughly after each interval, until it returns to a smooth, pourable consistency.
- Is it possible to freeze this dessert?
- While the brownie base freezes well on its own, the whipped cream and ganache layers might experience a slight change in texture upon thawing (the cream can become a bit watery, and the ganache may lose some of its shine). It’s generally best enjoyed fresh or stored in the refrigerator. If you must freeze, slice into individual portions, wrap each piece tightly in plastic wrap, and then in aluminum foil. Thaw overnight in the refrigerator.
- What if I don’t have instant coffee?
- While instant coffee significantly enhances the chocolate flavor, you can omit it if you don’t have any. The brownie will still be delicious, just with a slightly less intense chocolate profile. You could also try substituting with a small amount of strong brewed espresso.
Conclusion: Indulge in the Ultimate Chocolate Brownie Cake Dessert Experience
This Chocolate Brownie Cake Dessert is truly more than just a recipe; it’s an experience waiting to unfold in your kitchen. It stands as a testament to how simple ingredients, when combined with a little care and attention, can transform into something truly extraordinary and profoundly satisfying. With its rich, incredibly fudgy brownie base, the contrasting lightness of the airy whipped cream, and the sophisticated finish of a glossy chocolate ganache, this dessert offers a symphony of textures and flavors that will captivate anyone who takes a bite. It’s perfect for elevating any special occasion, delighting family gatherings, or simply providing a moment of pure, unadulterated chocolate bliss after a long day.
So, why delay the joy? Gather your ingredients, confidently follow these easy-to-understand steps, and prepare to be utterly amazed by how quickly you can create such a spectacular and professional-looking treat. Your new favorite, utterly delicious, and surprisingly easy chocolate dessert awaits to become a cherished part of your culinary repertoire!