
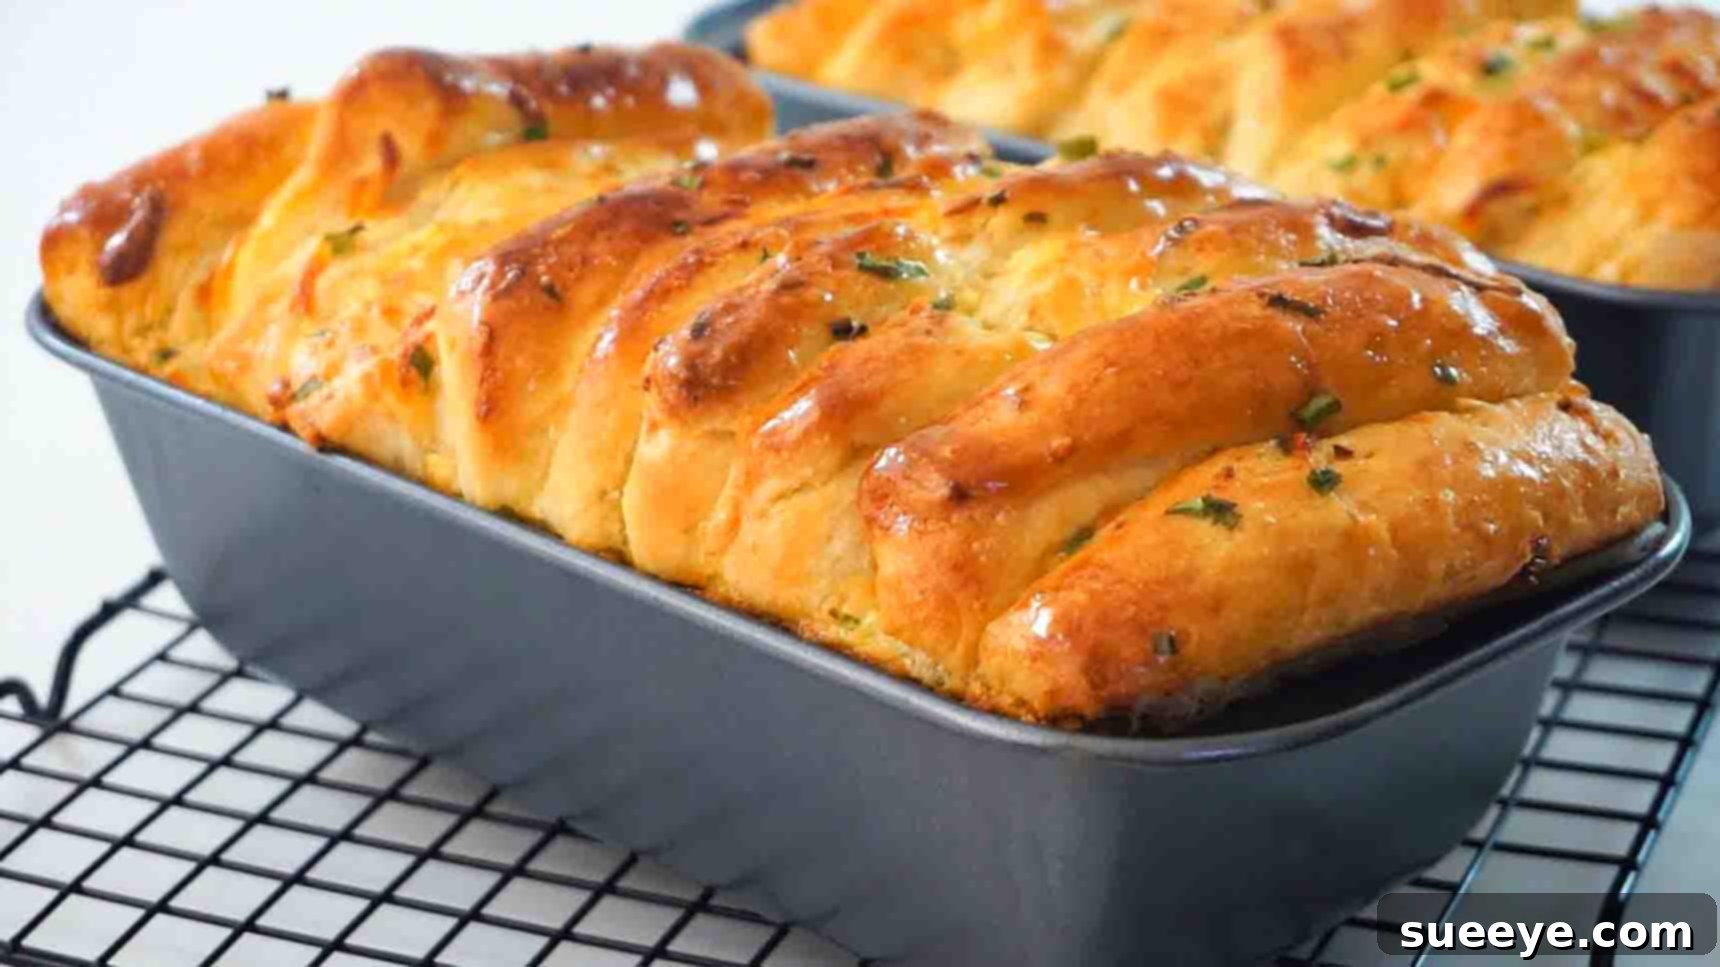
Irresistible Garlic and Scallions Cheese Pull-Apart Bread Recipe: Your New Favorite Comfort Food
For bread enthusiasts and comfort food connoisseurs alike, this Garlic and Scallions Cheese Pull-Apart Bread recipe is an absolute revelation. Inspired by the delightful creation from Savor Easy on YouTube, this bread is a true masterpiece of flavor and texture. Imagine a warm, golden-brown loaf, each piece infused with rich butter, pungent garlic, fresh scallions, and gooey, melted mozzarella cheese. It’s a symphony of tastes that will instantly make your mouth water and leave you craving more with every fragrant bite. What makes this recipe even more appealing is its surprising simplicity, making it perfectly achievable for even novice bakers. Prepare to impress yourself and your loved ones with this incredibly delicious and easy-to-make pull-apart bread.
This recipe elevates classic garlic bread to a whole new level. The “pull-apart” design ensures that every segment is generously coated with the flavorful garlic butter and studded with cheese, offering an interactive and satisfying eating experience. It’s ideal for family dinners, potlucks, or simply as a delightful snack that promises to disappear quickly. Follow our detailed instructions below to create this buttery, garlicky, and cheesy marvel right in your own kitchen.
Why You’ll Adore This Garlic and Scallion Pull-Apart Bread
There are countless reasons why this particular bread will become a staple in your recipe collection. Firstly, its incredible flavor profile is hard to beat. The combination of savory garlic, the mild oniony bite of fresh scallions, and the creamy richness of mozzarella cheese, all enveloped in a tender, fluffy bread, is simply divine. The butter plays a crucial role, not just in contributing to the bread’s tenderness but also in carrying the aromatic compounds of garlic and scallions throughout the loaf.
Secondly, the pull-apart format is not only fun but also practical. It makes serving effortless and encourages sharing, making it a fantastic centerpiece for any gathering. Each piece is perfectly portioned and ready to be enjoyed without the need for slicing. Thirdly, despite its gourmet appeal, the process is straightforward. We’ve broken down each step to ensure that even those new to bread making can achieve professional-looking and tasting results. The satisfaction of baking your own bread, especially one as magnificent as this, is immensely rewarding.
Ingredients: Essential Components for a Perfect Loaf
Crafting this amazing bread starts with high-quality ingredients. Here’s what you’ll need, along with a few tips for selection:
- 1 cup of milk (room temperature): Using room temperature milk is crucial as it helps activate the yeast more efficiently, leading to a better rise. Any type of milk (whole, 2%, or even non-dairy alternatives) will work, but whole milk often yields a richer flavor.
- 1 egg: A single egg adds richness, structure, and a beautiful golden hue to the bread. Ensure it’s at room temperature for better incorporation into the dough.
- 2 & 1/4 tsp instant yeast: Instant yeast is a baker’s best friend as it doesn’t require proofing before mixing with other ingredients. Make sure your yeast is fresh and active for the best rise.
- 1/4 cup sugar: Sugar not only adds a touch of sweetness that balances the savory flavors but also acts as food for the yeast, helping it to activate and grow.
- 3 & 1/4 cups all-purpose flour: All-purpose flour is versatile and provides a good balance of protein for structure and tenderness. For best results, measure by weight if possible (approximately 390-400 grams).
- 1 tsp salt: Salt is vital for flavor, enhancing the taste of all other ingredients, and also plays a role in controlling yeast activity.
- 1/4 cup unsalted butter: Unsalted butter allows you to control the salt content of your bread. Adding butter to the dough contributes to its tender crumb and rich flavor.
- 2 cups shredded mozzarella cheese: Mozzarella is the perfect choice for its excellent melting properties and mild, creamy flavor that complements the garlic and scallions without overpowering them. Freshly shredded cheese melts better than pre-shredded varieties.
- Egg wash (1 egg + 2 tbsp milk): This simple mixture brushed on top before baking gives the bread a beautiful golden crust and a slight sheen.
For the Irresistible Garlic Butter with Scallions Spread:
This flavorful spread is the heart of our pull-apart bread, infusing it with incredible aroma and taste.
- 1/2 cup softened butter: Softened butter is key for an even, smooth spread. Let it sit at room temperature for at least 30 minutes before use.
- 2 tbsp chopped garlic: Freshly chopped garlic provides the best, most potent flavor. Avoid pre-minced garlic for optimal results.
- 3 tbsp chopped scallions: Scallions (green onions) add a fresh, slightly pungent, and beautiful green element to the spread. Use both the white and green parts for maximum flavor.
Directions: Crafting Your Perfect Pull-Apart Bread
Step 1: Preparing the Dough – The Foundation of Flavor
Begin your bread-making journey by preparing the dough. In a large mixing bowl, combine 1 cup of room temperature milk, 1 egg, 2 and 1/4 teaspoons of instant yeast, and 1/4 cup of sugar. Whisk these ingredients thoroughly until they are well combined and the sugar has largely dissolved. This initial mixture creates a hospitable environment for the yeast to begin its work.
Next, gradually add 3 and 1/4 cups of all-purpose flour and 1 teaspoon of salt to the wet ingredients. Mix everything together, either with a sturdy spoon or a stand mixer fitted with a dough hook, until a shaggy dough begins to form. Once the ingredients are just combined and you have a cohesive, albeit rough, dough, cover the bowl with plastic wrap or a clean kitchen towel. Let the dough rest for about 10 to 20 minutes. This short resting period, known as autolyse, allows the flour to fully hydrate and gluten to start developing, which will make kneading easier and result in a more pliable dough.
After the resting period, uncover the dough and add 1/4 cup of softened unsalted butter. Begin to fold the butter into the dough. It might seem messy at first, but keep folding and gently kneading within the bowl until the butter is fully incorporated.
Transfer the dough to a lightly floured surface. Knead the dough for approximately 8-10 minutes. The goal is to develop the gluten, transforming the dough from sticky and rough to smooth, elastic, and springy. You’ll know it’s ready when it passes the “windowpane test” – you can gently stretch a small piece of dough thin enough to see light through it without tearing. Once kneaded to perfection, form the dough into a smooth ball and place it in a lightly oiled bowl, turning it once to coat all sides. Cover the bowl again and place it in a warm spot in your kitchen. Allow it to rise until it has doubled in size, which typically takes about 1 hour, depending on the warmth of your environment. This first rise is critical for developing flavor and texture.
While your dough is undergoing its first beautiful rise, it’s the perfect time to prepare the delectable garlic butter with scallions spread. This ensures it’s ready to go as soon as your dough has doubled.
Step 2: Assembling and Baking Your Cheesy Masterpiece
To create the star of our bread, the garlic butter with scallions spread, combine 1/2 cup of softened unsalted butter with 2 tablespoons of freshly chopped garlic and 3 tablespoons of finely chopped scallions in a small bowl. Mix these ingredients thoroughly until everything is evenly incorporated, creating an incredibly aromatic and vibrant green spread. Set this aside.
Once your dough has doubled in size, gently punch it down to release the air. Transfer the dough to a lightly floured surface. Using a rolling pin, roll the dough out into a large rectangular shape, approximately 18×12 inches, or to a thickness of about 1/4 inch. Aim for an even thickness across the entire rectangle to ensure consistent baking.
Now, generously spread the prepared garlic butter mixture evenly across the entire surface of the rolled-out dough, leaving a small border (about 1/2 inch) along one of the longer edges to help seal it later if needed. Then, sprinkle 2 cups of shredded mozzarella cheese uniformly over the buttered surface.
Next, using a sharp knife or a pizza cutter, cut the dough rectangle into 20 equal strips. You can achieve this by cutting the long side into roughly 1.5-inch wide strips. Precision isn’t paramount, but try to keep them as uniform as possible for consistent stacking.
Prepare a 7×4 inch (or similar size) loaf pan by lightly greasing it or lining it with parchment paper. Take three of the dough strips and stack them neatly on top of each other. Carefully transfer this stack of three into the prepared loaf pan, standing them upright against one of the short ends. Continue this process, stacking three strips at a time and placing them into the pan, until all the dough pieces are snugly fitted into the loaf pan. They should be arranged vertically, resembling a fan of accordion-folded dough.
Cover the loaf pan with plastic wrap or a clean kitchen towel and let it rise in a warm place for its second proofing. This usually takes about 45 minutes to 1 hour, or until the dough has again doubled in size and looks puffy, filling the pan. While the bread is rising, preheat your oven to 350 degrees F (175 degrees C).
Once the dough has completed its second rise, gently brush the top with the egg wash (1 egg whisked with 2 tablespoons of milk). This will give your bread a beautiful, glossy, golden-brown crust. Place the loaf pan into the preheated oven and bake for 25 to 30 minutes, or until the bread is deeply golden brown on top and cooked through. A thermometer inserted into the center should read around 200-210°F (93-99°C).
Remove the bread from the oven and let it cool in the pan for about 10-15 minutes before carefully transferring it to a wire rack to cool slightly further. This allows the cheese to set and prevents the bottom from becoming soggy. Serve warm and watch it disappear!
Expert Tips for a Flawless Pull-Apart Bread
- Room Temperature Ingredients: Always ensure your milk, egg, and butter are at room temperature. This helps with proper yeast activation and ensures ingredients combine smoothly, leading to a more consistent dough texture.
- Don’t Skimp on Kneading: Kneading is crucial for developing gluten, which gives the bread its structure and chewy texture. If using a stand mixer, knead for 8-10 minutes. By hand, it might take 15-20 minutes. The dough should be smooth and elastic.
- Warm Place for Rising: Yeast thrives in warm environments. A slightly warm oven (turned off, with the light on) or a sunny spot on your counter works well. Ensure it’s not too hot, as extreme heat can kill the yeast.
- Evenly Spread Flavors: When applying the garlic butter and cheese, aim for an even layer across the entire dough. This ensures every pull-apart piece is equally flavorful.
- Gentle Handling: After the first rise, handle the dough gently to avoid deflating it too much. Just a gentle punch down is enough.
- Preheat Your Oven Properly: A fully preheated oven ensures the bread starts baking immediately, resulting in a better rise and crust.
- Don’t Overbake: Overbaking can lead to a dry loaf. Keep an eye on the color and use a thermometer for perfect doneness.
Delicious Variations and Customizations
While this recipe is perfect as is, feel free to get creative and customize it to your liking:
- Cheese Choices: Experiment with different cheeses! A blend of mozzarella and cheddar, provolone, or even a touch of Parmesan could add new dimensions of flavor.
- Herb Infusion: Add finely chopped fresh herbs like parsley, chives, oregano, or a hint of rosemary to the garlic butter mixture for an herbal twist.
- Spicy Kick: For those who love a bit of heat, sprinkle some red pepper flakes along with the cheese.
- Savory Toppings: Consider adding a sprinkle of everything bagel seasoning or sesame seeds on top before baking for extra texture and flavor.
Serving Suggestions for Your Garlic & Scallion Bread
This versatile bread is more than just a side dish; it can be a meal in itself!
- Soup & Salad Companion: It’s the perfect accompaniment to a hearty bowl of soup or a fresh, crisp salad.
- Pasta Partner: Serve it alongside your favorite pasta dish to soak up all that delicious sauce.
- Appetizer Extravaganza: A fantastic starter for any dinner party or potluck, guaranteed to be a crowd-pleaser.
- Breakfast or Brunch: Yes, even for breakfast! Pair it with scrambled eggs or a frittata for a savory morning treat.
Storing and Reheating Your Leftovers
If by some miracle you have any leftovers, proper storage will keep your bread delicious. Store any remaining bread in an airtight container at room temperature for up to 2-3 days. For longer storage, you can freeze individual slices or the whole loaf in a freezer-safe bag for up to 2 months. To reheat, wrap the bread in foil and warm it in a preheated oven at 300°F (150°C) for 10-15 minutes, or until heated through and the cheese is gooey again. You can also quickly warm individual pieces in a toaster oven.
Frequently Asked Questions (FAQs)
Can I use active dry yeast instead of instant yeast?
Yes, you can! If using active dry yeast, you will need to activate it first. Dissolve the yeast and a pinch of sugar in the warm milk (ensure it’s around 105-115°F or 40-46°C) and let it sit for 5-10 minutes until it becomes frothy. Then proceed with the recipe as directed.
What if my dough isn’t rising?
Several factors can affect dough rising. Ensure your yeast is fresh and active (check the expiration date). The milk should be at room temperature, not too hot (which can kill yeast) or too cold (which can slow it down). Your rising environment should also be warm and draft-free. Give it more time if your kitchen is cool.
Can I prepare the dough ahead of time?
Absolutely! After the first rise, you can punch down the dough, place it in an oiled bowl, cover it tightly with plastic wrap, and refrigerate it overnight (up to 24 hours). The cold temperature slows down fermentation. The next day, let the dough come to room temperature for about 30-60 minutes before proceeding with rolling it out and assembling the bread.
Can I freeze the baked bread?
Yes, this bread freezes beautifully. Once completely cooled, wrap the entire loaf or individual slices tightly in plastic wrap, then place them in a freezer-safe bag or aluminum foil. It can be frozen for up to 2 months. Thaw at room temperature and reheat as described above.
Conclusion: Your New Favorite Bread Recipe Awaits!
This Garlic and Scallions Cheese Pull-Apart Bread is more than just a recipe; it’s an experience. From the delightful aroma that fills your kitchen as it bakes to the satisfying pull of each cheesy, garlicky segment, every step is a joy. It’s a testament to how simple ingredients can come together to create something truly extraordinary. Whether you’re a seasoned baker or just starting your journey into homemade bread, this recipe from Savor Easy offers a rewarding and incredibly delicious outcome. Don’t hesitate to give it a try – your taste buds will thank you!