
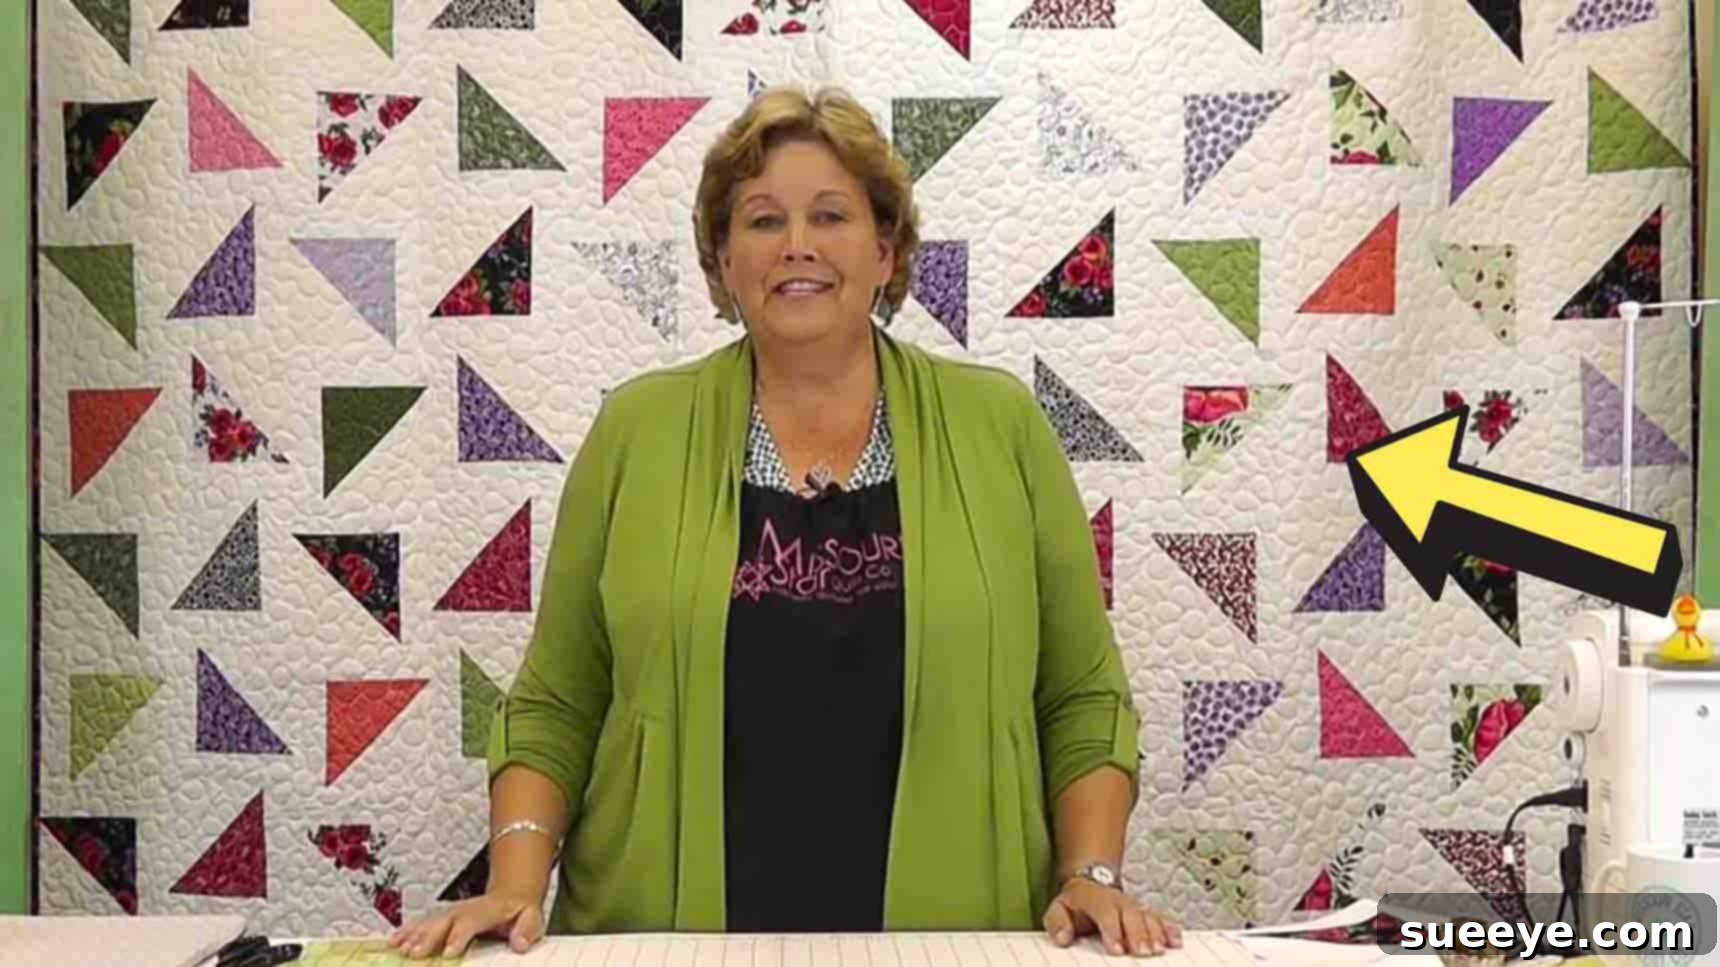
Master the Falling Triangles Quilt Pattern: Your Guide to a Stunning Project
Are you searching for the perfect quilt pattern to tackle a grand project? Look no further! The enchanting Falling Triangles Quilt pattern, popularized by the renowned Missouri Star Quilt Company, offers an ideal solution for creating magnificent, large-sized quilts. Whether you aspire to craft a luxurious king-size quilt or a cozy throw for your living room, this pattern is incredibly versatile and remarkably beginner-friendly. Its ingenious design allows for easy assembly, transforming simple fabric squares into a captivating geometric masterpiece. Dive into this comprehensive guide, where we’ll walk you through every step, ensuring your quilting journey is both rewarding and enjoyable.
The beauty of the Falling Triangles pattern lies in its simplicity and visual impact. Using fundamental quilting techniques like half-square triangles (HSTs) and strategic fabric placement, you can achieve a sophisticated look that appears much more complex than it actually is. This tutorial is designed to be clear, concise, and full of helpful tips to ensure your success, even if you’re new to the world of quilting. Get ready to transform your fabric stash into a cherished heirloom and create a quilt that will be admired for generations.
Why Choose the Falling Triangles Quilt Pattern for Your Next Project?
This particular pattern stands out for several compelling reasons, making it a fantastic choice for quilters of all skill levels:
- Highly Scalable for Any Quilt Size: One of the greatest advantages of the Falling Triangles design is its adaptability. You can easily adjust the number of blocks to create anything from a small baby quilt to an impressive king-size bedspread. This guide focuses on a larger project, perfect for those dreaming of a generously sized quilt.
- Perfect for Beginners: Despite its stunning appearance, the pattern primarily relies on the construction of half-square triangles (HSTs) – a foundational quilting technique. The clear, repetitive steps make it an excellent learning project for novices.
- Visually Striking and Dynamic: The cascading arrangement of the triangles creates a sense of movement and depth, resulting in a modern and eye-catching aesthetic. The contrast between colored and background fabric truly brings the design to life.
- Efficient Use of Pre-Cuts: This pattern is designed to work beautifully with pre-cut fabric bundles like 10″ squares (layer cakes) and 2.5″ strips (jelly rolls). This significantly reduces cutting time, allowing you to jump straight into the fun of sewing.
- Relatively Quick Assembly: Once you get into the rhythm of making half-square triangles and assembling the blocks, the quilt top comes together more quickly than many other complex patterns.
- Endless Customization Options: While a classic white background is featured, the pattern invites creativity. Experiment with different color palettes, gradient fabrics, or even a scrappy mix of prints to personalize your quilt.
Essential Materials: Preparing for Your Falling Triangles Quilt
Before you begin sewing, gathering all your materials is crucial. This pattern conveniently utilizes pre-cut fabrics, which are a favorite among quilters for their consistency and time-saving benefits. Here’s a detailed list of what you’ll need to create your magnificent Falling Triangles Quilt:
- 1 Packet of 10″ Squares (Layer Cake): This typically contains 40-42 squares, each measuring 10×10 inches. These will be your primary “colored” or patterned fabrics, forming the dynamic triangles in your quilt. Choose a layer cake with a variety of prints and colors that appeal to you, or a coordinated collection for a more harmonious look.
- 1 Solid White Layer Cake (10″ squares): This second packet of 10-inch squares will serve as your essential background fabric. The crisp white provides a beautiful, clean canvas that makes your patterned triangles pop and enhances the “falling” effect. Using a solid color ensures a consistent and cohesive background throughout your quilt.
- 2 Solid White Jelly Rolls: Each jelly roll contains 40 strips of fabric, 2.5 inches wide and approximately 42 inches long. You’ll use these strips to border your half-square triangle units, expanding them into larger blocks and adding a uniform white frame that ties into your background fabric.
- High-Quality Thread: A neutral color like white, cream, or light gray cotton thread is ideal, as it will blend seamlessly with your white background.
- Quilting Machine: Any sewing machine capable of a straight stitch will work, but a machine designed for quilting can offer enhanced features.
- Rotary Cutter and Self-Healing Mat: Essential tools for precise and efficient fabric cutting.
- Quilting Rulers: A large rectangular ruler (e.g., 6″x24″) and a smaller square ruler (e.g., 6.5″x6.5″ or 8.5″x8.5″) will be very helpful for cutting and trimming.
- Fabric Scissors: For snipping threads and occasional fabric adjustments.
- Iron and Ironing Board: Crucial for pressing seams flat, which contributes significantly to the accuracy and flatness of your finished quilt.
- Pins or Fabric Clips: To hold fabric pieces together securely while sewing.
- Seam Ripper: Every quilter needs one! Don’t be afraid to use it for perfect results.
Step-by-Step Directions: Crafting Your Falling Triangles Quilt
Now that you have all your materials, let’s embark on the exciting journey of piecing together your Falling Triangles Quilt. This detailed section will guide you through each stage, from creating individual units to assembling the full quilt top.
Step 1: Constructing Your Half-Square Triangle Units (HSTs)
The half-square triangle (HST) is the fundamental element of this quilt. You’ll be making a large quantity of these, so understanding the process thoroughly will ensure consistency and ease. We’ll use a highly efficient method to create two HSTs from two squares simultaneously.
- Pair Your Squares: Take one 10-inch colored or patterned square from your first layer cake and one 10-inch solid white background square from your second layer cake. Place them right sides together, ensuring all edges are perfectly aligned. Pin them together at the corners and possibly in the middle to prevent shifting.
- Sew the Perimeter: Using your sewing machine, stitch all the way around the outside edge of the joined squares. Maintain a precise 1/4-inch seam allowance. Accuracy here is paramount, as it directly impacts the final size and uniformity of your HSTs.
- Strategic Diagonal Cuts: Once sewn, carefully place the square unit onto your self-healing cutting mat. Position your quilting ruler diagonally from one corner to the opposite corner, making sure the ruler’s edge passes exactly through the center point where your stitch lines cross. This ensures you cut between the stitched lines. Using your rotary cutter, make a clean cut along this diagonal. Rotate the unit 90 degrees and repeat the diagonal cut from the other set of corners. You should now have two intersecting diagonal cuts.
- Separate into HSTs: You’ve successfully created four raw half-square triangle units from your initial two squares. Carefully separate them.
- Press Open and Trim: Take each of the four triangle units and press the seam open using your iron and ironing board. When pressing, always try to press towards the darker fabric to prevent the seam allowance from showing through lighter fabrics. If both fabrics are light, choose one direction to press. Once pressed, you’ll notice small fabric “ears” (tiny triangles of excess fabric) at the corners. Trim these off for a clean, sharp corner.
- Mass Production: Repeat this entire process – pairing, sewing, cutting, pressing, and trimming – for all your 10-inch colored and white squares. Your goal is to create a total of 168 pristine half-square triangle pieces. Working in an assembly line fashion for each step can significantly speed up this process.
Step 2: Assembling Your Quilt Blocks with Jelly Roll Strips
With your collection of half-square triangles ready, the next step is to transform them into the unique “falling triangles” quilt blocks by adding borders from your solid white jelly roll strips. This process adds definition and expands the size of each block.
- Attach the First Border Strip: Take one of your completed and pressed half-square triangle units. Orient it so that one of the colored fabric sides is along an edge you wish to border. Grab a strip from your solid white jelly roll (2.5 inches wide). Place the jelly roll strip and the HST unit right sides together, aligning the raw edge of the jelly roll strip with the raw edge of the colored side of the HST. Sew them together using a consistent 1/4-inch seam allowance.
- Trim and Press the First Strip: After sewing, carefully “clip off the bunny ear” – the small excess fabric triangle that protrudes at the corner where the strip meets the HST. This ensures a neat edge. Then, press the seam open or towards the jelly roll strip. Pressing consistently in one direction (e.g., towards the strip) often helps create flatter seams and easier alignment later.
- Attach the Second Border Strip: Now, take another strip from your solid white jelly roll. Locate the other colored side of your original half-square triangle. This side should be perpendicular to the first strip you just added. Align the raw edge of this second jelly roll strip with the raw edge of the colored fabric of the HST, ensuring right sides are together. Sew them together with a 1/4-inch seam allowance, just as you did before.
- Final Trim and Press for the Block: Once sewn, repeat the process of trimming any bunny ears from this second seam. Press the seam open or towards the jelly roll strip. Your individual quilt block is now complete! It should feature a colored triangle appearing to “fall” or cascade against a white background, framed by the white jelly roll strips. Each meticulous press and trim contributes to the overall flatness and professional appearance of your finished quilt.
- Complete All Blocks: Continue this process for all 168 of your half-square triangle units. You will now have 168 completed quilt blocks, each identical in construction, ready for the final assembly stage.
Step 3: Arranging and Assembling the Quilt Top
This is where your quilt truly comes to life, and the dynamic “falling” effect becomes apparent. Careful layout is critical to achieving the desired visual impact.
- Prepare Your Design Space: Find a large, clean area to lay out your blocks. A design wall (a flannel-covered board or wall) is ideal as blocks stick to it, allowing you to step back and view the entire pattern. Alternatively, a clean floor or even a large bed can work effectively.
- Layout Rows with Alternating Triangles: Begin laying out your blocks in rows. For a generously sized quilt, the pattern suggests creating rows that are 12 blocks wide. As you place each block, pay close attention to the orientation of the triangles. To achieve the signature “falling” effect, the triangles in adjacent blocks within a row should alternate in direction (e.g., one pointing up, the next pointing down, then up, then down, and so on). This alternating pattern creates the dynamic zig-zag or cascading visual.
- Determine Quilt Length: Continue laying out rows until you achieve the desired length for your quilt. The original pattern suggests 14 blocks down, meaning you will have 14 complete rows, each 12 blocks wide. This arrangement results in a substantial quilt, suitable for a king-size bed or a very generous throw.
- Sew Rows Together: Once you are completely satisfied with your layout, carefully gather the blocks from the first row, maintaining their precise order. Sew these 12 blocks together, end to end, using a consistent 1/4-inch seam allowance. It’s often helpful to press the seams of one row in one direction and the seams of the next row in the opposite direction. This technique, called “nesting seams,” helps the seams butt up against each other when joining rows, making it easier to match points and create a flatter quilt.
- Assemble All Rows: Repeat the process for all 14 rows, sewing each set of 12 blocks together. You will now have 14 long strips of sewn blocks.
- Join Rows to Form Quilt Top: Finally, sew these 14 completed rows together, one by one. Align the rows carefully, paying special attention to matching the points where the blocks meet. Pin extensively at these intersections to ensure your points align nicely. Sew with a 1/4-inch seam. Once all rows are joined, give your entire quilt top a final, thorough press. You might choose to press these final seams open to reduce bulk.
Finishing Your Quilt: Basting, Quilting, and Binding
Once your beautiful quilt top is complete, you’re on the home stretch! These final steps transform your pieced top into a functional, durable, and cozy quilt.
- Prepare Backing and Batting: For a large quilt, you’ll need a quilt backing fabric that is several inches larger than your quilt top on all sides (typically 4-6 inches larger). You’ll also need a layer of batting, which should be the same size as your backing fabric. You might need to piece together backing fabric to achieve the required size for a king quilt.
- Basting the Quilt Sandwich: This crucial step secures all three layers (backing, batting, and quilt top) together to prevent shifting during quilting. Lay your backing fabric right side down on a clean, flat surface, smoothing it out completely. Next, lay the batting smoothly on top of the backing. Finally, place your quilt top right side up on top of the batting. Secure all three layers using your preferred basting method: safety pins (spaced every 4-6 inches), spray basting adhesive, or hand basting stitches.
- Quilting the Layers: This is where you add the decorative stitching that holds the “quilt sandwich” together permanently. You can choose to machine quilt with a walking foot for straight lines, free-motion quilt intricate designs, or even hand quilt for a traditional look. Simple straight lines following the diagonal seams of the triangles or a gentle meandering pattern would complement the geometric nature of the Falling Triangles design beautifully.
- Binding for a Professional Finish: Once your quilt is quilted, carefully trim the edges of your quilt sandwich, squaring it up perfectly. Create binding strips (usually 2.5 inches wide, sewn together end-to-end to form one long continuous strip). Attach the binding to the front edge of the quilt, then fold it over to the back and hand-stitch or machine-stitch it down for a neat, durable, and attractive finish.
Expert Tips for Quilting Success
To ensure your quilting project is as smooth and enjoyable as possible, keep these valuable tips in mind:
- Maintain a Consistent 1/4-inch Seam Allowance: This is arguably the most critical skill in quilting. Inconsistent seams will result in blocks that don’t fit together precisely. Invest in a 1/4-inch presser foot for your sewing machine, and practice on scrap fabric until your seams are perfect.
- Pressing is Paramount: Never underestimate the power of careful pressing. Pressing seams after each step helps your blocks lie flat, match up accurately, and creates a more professional final product. Always press, don’t iron (ironing can stretch fabric, while pressing lifts and sets).
- Embrace Chain Piecing: For repetitive tasks like making HSTs or attaching strips, chain piecing is a massive time-saver. Sew multiple units one after another without lifting the presser foot or cutting threads between them. Snip them apart when finished.
- Stay Organized: With numerous blocks and units, keeping your pieces organized by step, color, and orientation is key. Use design boards, trays, or even labeled plastic bags to keep sets of blocks together and prevent confusion during assembly.
- Don’t Fear the Seam Ripper: Even experienced quilters make mistakes. A seam ripper is your friend! It’s always better to unpick a mistake and redo it than to try and force misaligned pieces together.
- Watch the Video Tutorial: While this written guide is comprehensive, seeing the techniques demonstrated visually can be incredibly helpful. The original Missouri Star Quilt Company video tutorial offers excellent visual reinforcement for each step.
- Enjoy the Process: Quilting is a journey of creativity and craftsmanship. Allow yourself to enjoy each step, from selecting fabrics to making the final stitch. Remember that handmade quilts carry the unique touch of their maker, and minor imperfections are part of their charm.
Creative Variations and Personalization for Your Quilt
The Falling Triangles quilt pattern offers a beautiful foundation, but don’t hesitate to infuse it with your personal style:
- Alternative Background Colors: Instead of classic solid white, consider using a light gray, a soft cream, a pale pastel, or even a subtle tone-on-tone print for your background and jelly roll strips. This can drastically change the mood of the quilt.
- Scrappy Delight: If you have a collection of 10-inch squares from various projects, this pattern is fantastic for a “scrappy” look. The diverse prints will add a wonderful element of surprise and charm to your “falling” triangles.
- Ombre or Gradient Effects: Arrange your colored 10-inch squares in an ombre or gradient sequence, moving from light to dark or one color family to another, to create a stunning visual transition across your quilt.
- Adjusting Quilt Size: To create a smaller quilt (e.g., a lap quilt or twin size), simply reduce the number of rows and columns. For example, 9 blocks across and 10 blocks down would yield a lovely throw quilt. Conversely, for an even larger project, you can always add more blocks.
- Experiment with Block Sizes: While this tutorial uses 10-inch squares, you could adapt the pattern by starting with smaller charm squares (5-inch) or larger squares (12-inch) to create different sized HSTs and blocks. Just remember to recalculate the number of units needed and the impact on the final quilt dimensions.
The Falling Triangles Quilt Tutorial: A Visual Aid
For those who prefer a visual learning experience or wish to see these techniques in action, we highly recommend consulting the original video tutorial. The experts at Missouri Star Quilt Company provide clear demonstrations that will complement this written guide, helping you visualize each stage of the quilting process and ensuring your confidence as you sew.
Embarking on a large quilting project like the Falling Triangles Quilt is a rewarding endeavor. With this detailed guide, your chosen fabrics, and a little patience, you will soon have a magnificent, handmade quilt that brings warmth, comfort, and beauty to your home for years to come. Happy quilting!