
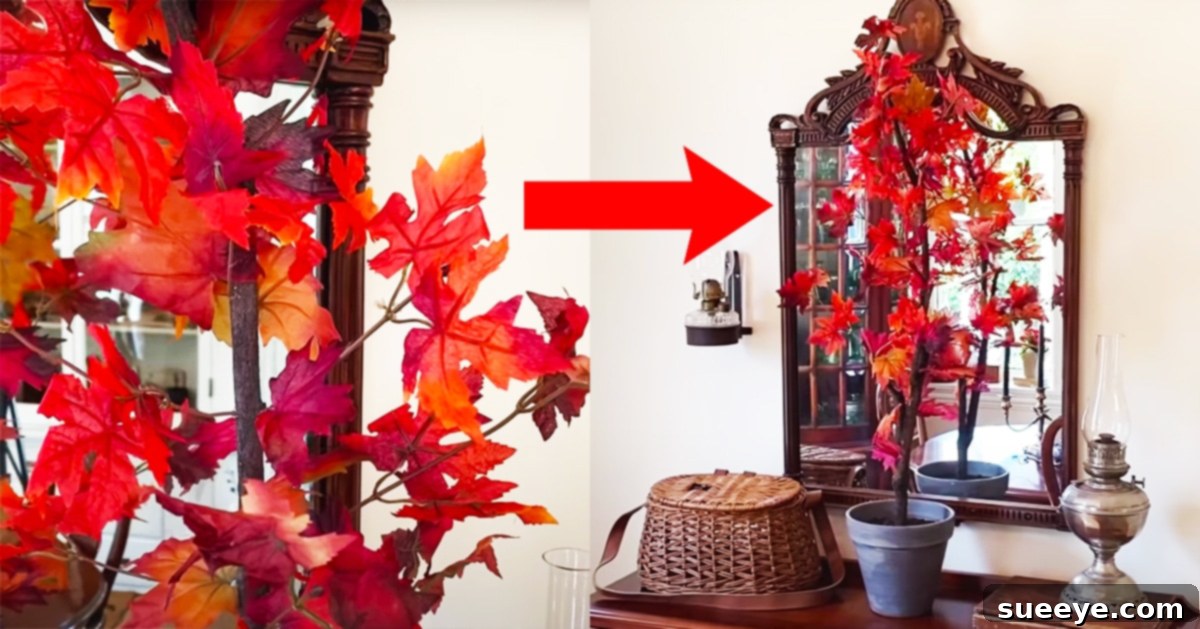
As the crisp air of autumn descends and leaves transform into a breathtaking tapestry of reds, oranges, and golds, many of us yearn to bring that enchanting beauty indoors. While real trees offer unparalleled charm, they often come with the hassle of falling leaves and limited reusability. This is where a captivating DIY Fall tree steps in – a stunning, customizable, and budget-friendly decor piece that captures the essence of the season without the mess. Inspired by the creative vision of Christopher Hiedeman on YouTube, this project allows you to craft a durable and beautiful autumn display largely from affordable Dollar Tree materials. Whether you’re looking to adorn your living room, entryway, or even your patio, this handmade Fall tree promises to be a vibrant focal point, celebrating the season’s splendor.
The allure of a DIY Fall tree extends beyond its aesthetic appeal; it’s an opportunity to infuse your home with personalized charm. Imagine a tree adorned with brilliant red leaves, perfectly mimicking nature’s artistry, yet remaining vibrant throughout the entire autumn season. Unlike real foliage, these leaves won’t wither or fall, ensuring your decor stays pristine and picturesque. This project is not just about making a decoration; it’s about crafting memories and expressing your unique style. Plus, the versatility is endless – you can easily integrate different colored leaves, twinkle lights, or even small seasonal ornaments to create a truly unique display that perfectly complements your home’s aesthetic. Let’s embark on this creative journey and bring the magic of fall indoors with a stunning, handcrafted tree.
Embracing the Autumn Spirit with a DIY Fall Tree
The changing leaves are undeniably one of the most beloved aspects of autumn. Their vibrant hues signal a time of cozy evenings, warm drinks, and festive gatherings. With this DIY Fall tree project, you can capture that ephemeral beauty and make it a lasting part of your seasonal home decor. This craft is especially appealing for those who appreciate budget-friendly decorating solutions without compromising on visual impact. By utilizing readily available and inexpensive materials, primarily from Dollar Tree, you can create a high-impact decorative piece that looks far more expensive than it actually is. It’s a fantastic way to stretch your decorating budget while still achieving a sophisticated and festive look.
Beyond its cost-effectiveness, the joy of crafting your own autumn tree lies in the personalization it offers. You have complete control over the design, from the density and color palette of the leaves to the overall shape and height of your tree. Want a striking display of fiery reds and deep oranges? Or perhaps a more subtle blend of rustic browns and muted golds? The choice is yours. This handmade approach ensures that your Fall tree is not just another mass-produced item but a unique reflection of your taste and creativity. It’s a wonderful opportunity to engage in a rewarding hands-on activity, resulting in a beautiful piece that you can proudly display year after year.
Essential Materials for Your Budget-Friendly Fall Tree
One of the most attractive aspects of this DIY project is its accessibility. Most of the required materials can be found at your local Dollar Tree, making it incredibly affordable. Gathering your supplies is the first exciting step towards bringing your autumn vision to life. Here’s a detailed look at what you’ll need:
- Dollar Tree Leaf Stems: These are the star of the show! Look for artificial leaf stems with a variety of autumn colors – reds, oranges, yellows, and even deep purples work beautifully. You’ll want to gather enough to create a full, lush canopy for your tree. Consider buying a few extra bundles to ensure you have enough leaves to achieve your desired density and cover any sparse areas.
- Dollar Tree Mod Podge: This versatile crafting adhesive will be used to create a realistic “soil” base that securely holds your branch in place. Mod Podge acts as both a glue and a sealant, providing a durable finish for your pot’s base. If you can’t find Mod Podge, a strong PVA glue (like Elmer’s Glue-All) mixed with a little water can serve as an alternative.
- Dollar Tree Floral Foam: This lightweight material is essential for anchoring your main branch firmly within the clay pot. Opt for a dense foam block that can be easily cut or shaped to fit snugly into your chosen pot. It provides excellent stability and is easy to pierce for inserting the tree’s trunk.
- Hot Glue Gun and Glue Sticks: A hot glue gun is indispensable for attaching the individual leaves to your branch securely and quickly. Ensure you have plenty of glue sticks on hand, as you’ll be doing a fair amount of gluing. A low-temperature glue gun is often safer for beginners, but a standard one works well too.
- Clay Pot: This will serve as the base and container for your Fall tree. Choose a pot size that is proportionate to the branch you intend to use. A standard terracotta pot works wonderfully, offering a rustic and natural look that complements the autumn theme. You can also find plastic pots at Dollar Tree or use any decorative pot you have on hand.
- Sturdy Branch: This will be the “trunk” and “branches” of your DIY tree. Head outside and find a dried, sturdy branch with an interesting natural shape and several smaller offshoots. The more naturalistic the branch, the more authentic your finished tree will appear. Ensure it’s clean and dry before use.
- Soil from Outside: A small amount of natural soil or dirt is needed to mix with the Mod Podge, creating a realistic, textured base in your pot. Make sure the soil is dry and free of debris.
Having all your materials prepared beforehand will ensure a smooth and enjoyable crafting experience. This comprehensive list helps you gather everything you need for a successful and stunning DIY Fall tree project.
Step-by-Step Guide to Crafting Your DIY Fall Tree
Creating your enchanting Fall tree is a rewarding process that combines a bit of ingenuity with simple crafting techniques. Follow these detailed steps to bring your vision to life:
Step 1: Preparing Your Tree Branch
Begin by preparing your chosen branch. If necessary, clean off any loose bark, dirt, or spiderwebs. Allow it to dry completely. Once clean and dry, use a drill to carefully create small holes along the main branch and its sub-branches. These holes will serve as insertion points for your artificial leaf stems. The size of the drill bit should be slightly smaller than the thickness of your leaf stems to ensure a snug fit. Space the holes strategically to mimic the natural growth pattern of leaves on a real tree, paying attention to areas where you want a fuller canopy. For a more detailed visual guide on branch preparation and drilling techniques, you can refer to Christopher Hiedeman’s tutorial on YouTube.
Step 2: Securing the Tree in its Pot
Next, take your clay pot and place a block of floral foam inside. The foam should fit snugly to prevent the branch from wobbling. You may need to cut or shape the floral foam to achieve a perfect fit. Once the foam is in place, carefully insert the thickest end of your prepared branch directly into the center of the floral foam. Push it down firmly until it feels stable and upright. The floral foam will provide the necessary support to hold your main stem securely in position, preventing it from tipping over as you add the leaves.
Step 3: Attaching the Autumn Leaves
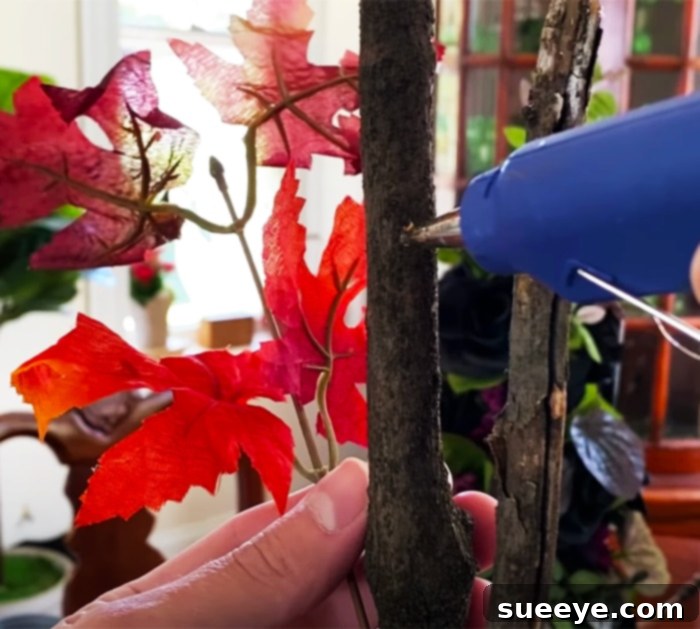
Now comes the most visually transformative part: adding the leaves! Take your Dollar Tree leaf stems and begin inserting them into the pre-drilled holes on your branch. Once a leaf stem is in place, use your hot glue gun to apply a small dab of hot glue at the base of the stem, securing it firmly to the branch. This prevents the leaves from falling out over time. Continue this process, working your way around the entire branch. Distribute the leaves evenly, creating a natural and full appearance. You can experiment with different angles and layers to add depth and realism to your tree. Don’t be afraid to mix and match different shades of leaves for a more vibrant and authentic autumnal effect. The goal is to build a lush canopy that captures the essence of a real Fall tree.
Step 4: Creating a Realistic Soil Base
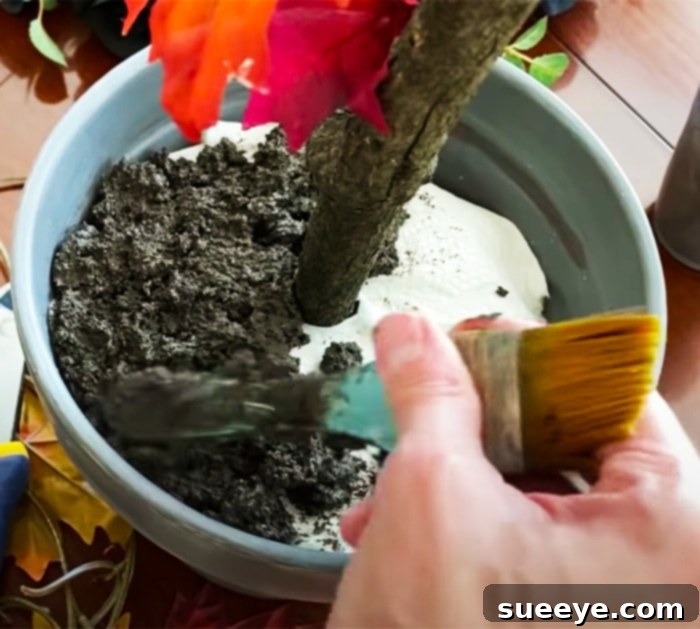
Once all your leaves are securely attached and your tree canopy looks full and vibrant, it’s time to finish the base. To conceal the floral foam and give your tree a more polished look, cover the exposed floral foam in the pot with paper towels. Crumple or tear the paper towels to create an even layer that hides the foam completely. This also acts as a barrier for the next step. In a separate cup or disposable container, mix your soil from outside with a generous amount of Mod Podge. Stir thoroughly until you achieve a thick, mud-like consistency. The Mod Podge will act as a binder, hardening the soil mixture into a solid, realistic-looking base.
Step 5: Applying and Setting the Soil Base
Carefully pour the soil and Mod Podge mixture on top of the paper towels, covering them completely and surrounding the base of your tree branch. Use a spoon or a crafting stick to spread the mixture evenly, creating a smooth and natural-looking ground. You can gently press down on the mixture to ensure it adheres well and fills any gaps. Allow the soil base to dry completely, which may take several hours, or even overnight, depending on the thickness of the layer and humidity. As it dries, the Mod Podge will harden, securely cementing the branch in place and providing a durable, realistic finish to your Fall tree’s base.
Enhancing Your DIY Fall Tree: Customization and Care
The beauty of a handmade Fall tree lies in its endless possibilities for customization. Once your basic tree is complete, you can truly make it your own. Consider weaving a string of battery-operated fairy lights through the branches for a magical glow, especially enchanting during evenings. Small, lightweight ornaments like mini pumpkins, acorns, or even handmade felt leaves can be hung to add extra charm. For a touch of sparkle, you could lightly spray the leaves with a clear glitter spray. This tree isn’t just for fall; with a change of leaves and decorations, it could potentially be adapted for other seasons, offering year-round decorative flexibility.
This project is not only an inexpensive and visually appealing craft but also a fantastic way to spend a chilly autumn afternoon. It’s an excellent activity to undertake with friends or family, transforming it into a fun, collaborative experience. While gluing the leaves can be a bit time-consuming, the process is straightforward and enjoyable, offering a relaxing escape from daily routines. The sense of accomplishment you’ll feel when your beautiful, custom Fall tree is complete is truly priceless. This durable and charming decoration will serve as a constant reminder of the season’s warmth and your own creative spirit, ready to brighten your home for many autumns to come. Plus, its robust construction means it can be safely displayed both indoors, enhancing your living spaces, or outdoors on a covered patio, adding curb appeal to your home.