
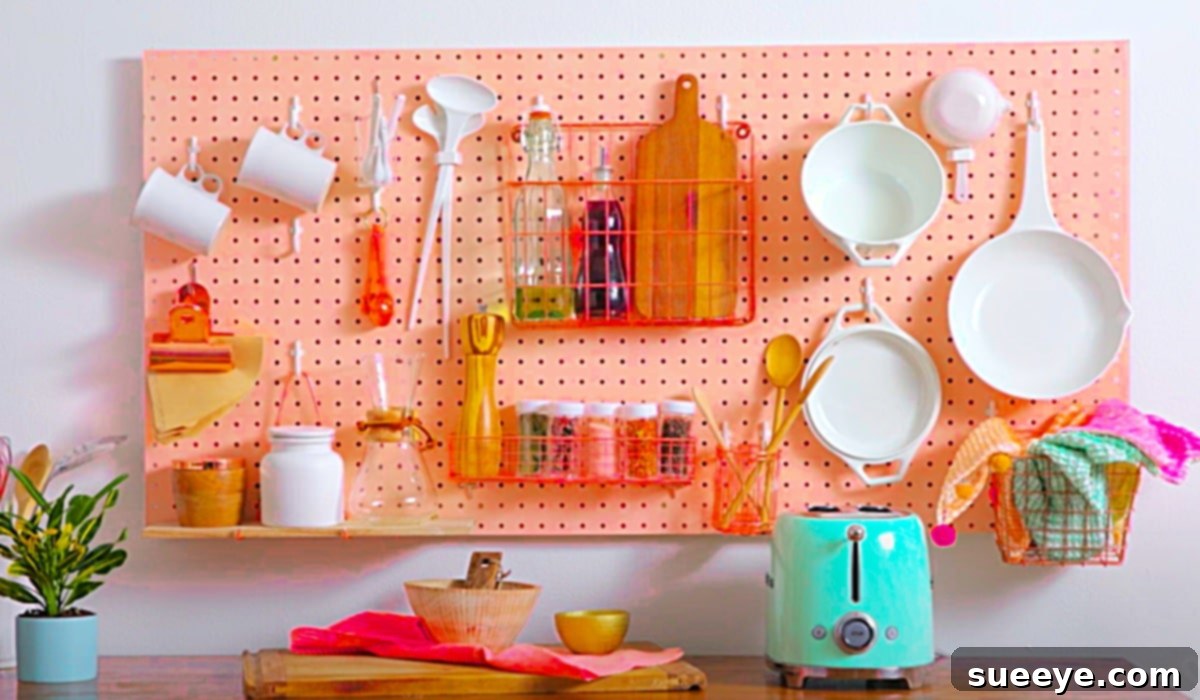
Are you tired of cluttered countertops, overflowing drawers, or a chaotic workspace? Imagine a world where every essential item has its designated place, readily accessible and beautifully displayed. That dream can become a reality with a DIY pegboard storage wall. This incredibly versatile and charming solution is perfect for tidying up kitchens, craft rooms, garages, or even home offices, bringing order and aesthetic appeal to any space.
We were utterly captivated by a super attractive pegboard idea showcased by Apartment Therapy on YouTube. Their ingenious storage concept immediately caught our eye, especially its natural alignment with a bohemian decor style. If you’re a fan of vibrant, eclectic, and cozy interiors, this pegboard project is an absolute must-try. One of its standout features, and perhaps the best part for many, is its ability to infuse a significant amount of color and personality into a room without the commitment or hassle of painting your walls. This makes the DIY pegboard exceptionally renter-friendly, allowing you to personalize your living space freely and reclaim your security deposit when you move!
Beyond its aesthetic appeal, a pegboard wall offers unparalleled functionality. It transforms unused vertical space into a highly organized and efficient storage system. No more rummaging through cabinets or digging for that elusive gadget. With a pegboard, everything is visible, within reach, and beautifully arranged, turning clutter into curated displays.
Why Pegboard Storage is a Game-Changer for Modern Homes
While often associated with garages and workshops, pegboard has evolved into a stylish and indispensable tool for home organization. Its inherent design offers numerous advantages over traditional storage methods, making it an ideal choice for various rooms and lifestyles.
Unmatched Versatility and Adaptability
One of the primary reasons to embrace pegboard is its incredible adaptability. Unlike fixed shelves or cabinets, a pegboard allows for dynamic organization. Hooks, shelves, and baskets can be repositioned in mere seconds, adapting to your changing storage needs. This flexibility means your pegboard can seamlessly transition from holding kitchen utensils to craft supplies, or from small tools to children’s art projects. It truly grows with your household and evolving interests.
The Ultimate Renter-Friendly Decor Solution
For those living in rented accommodations, personalizing a space often comes with restrictions. Painting walls or installing permanent fixtures can be a complicated affair, if not outright forbidden. This DIY pegboard project brilliantly sidesteps those limitations. By painting the pegboard itself rather than the wall, you introduce color and style without any permanent alterations. It’s a fantastic way to express your personal aesthetic, making your temporary living space feel more like home, with the peace of mind that it can be easily removed or relocated when needed.
A Canvas for Creativity and Style
Beyond its practical benefits, a pegboard wall serves as a blank canvas for your creative expression. Whether you’re aiming for a charming boho look, a minimalist aesthetic, or a vibrant pop of color, the pegboard can be customized to complement any decor theme. The choice of paint color, the type of accessories, and the arrangement of your items all contribute to creating a unique focal point that is both functional and decorative. It’s an opportunity to turn everyday items into an artful display.
Utilizing Vertical Space Efficiently
In smaller homes or apartments where floor space is a luxury, maximizing vertical space is crucial. A pegboard wall excels at this, transforming an otherwise unused wall into a powerful storage solution. By getting items off your counters and out of your drawers, you free up valuable horizontal surfaces, making your rooms feel more open, organized, and spacious.
Materials You’ll Need for Your DIY Pegboard Project
Gathering the right tools and materials is the first step towards a successful and satisfying DIY project. Here’s a detailed list to ensure you have everything on hand before you begin:
- A piece of pegboard: Choose a size appropriate for your space. Standard pegboard comes in various dimensions, often 2×4 feet or 4×8 feet. Consider the thickness and material (MDF, hardboard, or metal) based on what you plan to hang.
- Paint: Select a color that complements your existing decor or makes a bold statement. Latex or acrylic paints work well. Consider a semi-gloss or gloss finish for durability and easy cleaning, especially in a kitchen.
- A paint roller and tray: Essential for achieving a smooth, even finish on the pegboard surface. A small foam roller is often ideal for pegboard.
- A drill: Necessary for creating pilot holes for mounting hardware. Make sure you have the appropriate drill bits for your wall type and mounting hardware.
- Some hooks: A variety of pegboard hooks are available, including J-hooks, L-hooks, curved hooks, and specialized tool hooks. Choose based on the items you plan to store.
- Molly bolts (or other appropriate wall anchors): These are crucial for securely attaching the pegboard to your wall, especially if you’re drilling into drywall or plaster. Ensure they can support the weight of the pegboard and its contents.
- Attachable baskets and shelves: Expand your storage options with these accessories. They’re perfect for smaller items, spices, craft supplies, or decorative elements.
- A level: Absolutely essential for ensuring your pegboard is hung perfectly straight, preventing a crooked appearance.
- A mallet: Useful for gently tapping molly bolts or other anchors into place without damaging them or your wall.
- A measuring tape: For precise measurements of your wall space and the pegboard itself, ensuring accurate placement.
- Pencil: For marking drill points and measurements.
- Protective tarp or drop cloth: To protect your work area from paint drips.
- Optional: Stud finder: If you prefer to mount into wall studs for maximum security, a stud finder will be invaluable.
Directions: Step-by-Step Guide to Creating Your Stunning Pegboard Wall
This super attractive pegboard idea, inspired by Apartment Therapy, is surprisingly easy to create. Follow these steps to build a gorgeous and highly functional wall organizer in just a few simple stages.
Step 1: Prepare Your Pegboard Canvas
Begin by inspecting your chosen piece of pegboard. If it’s unfinished, a light sanding with fine-grit sandpaper can help ensure better paint adhesion and a smoother final look. Wipe it down thoroughly with a damp cloth to remove any dust or debris, then allow it to dry completely. This preparation ensures your paint job will look professional and last longer.
Step 2: Infuse Color – Painting Your Pegboard
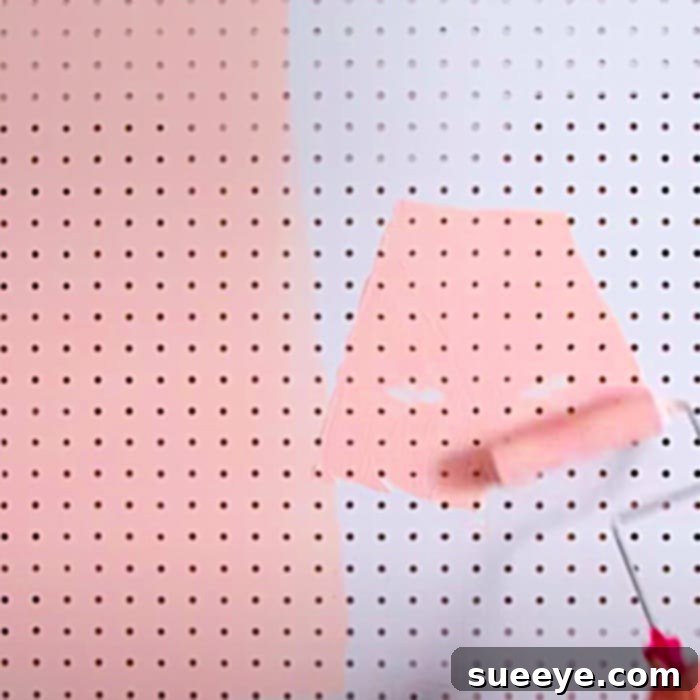
Now for the creative part: painting the pegboard itself! Choose the color that best suits your vision for the room. Lay down your protective tarp or drop cloth in a well-ventilated area. If your pegboard is made of MDF or hardboard, applying a primer first can help seal the surface and provide a better base for your chosen color, especially if you’re going from dark to light or using a vibrant hue. Using a paint roller, apply thin, even coats of paint to the entire surface of the pegboard. Avoid applying too much paint at once, as this can clog the peg holes. You’ll likely need two or three coats to achieve full, opaque coverage. Allow each coat to dry completely according to the paint manufacturer’s instructions before applying the next.
Step 3: Precise Measurement and Marking
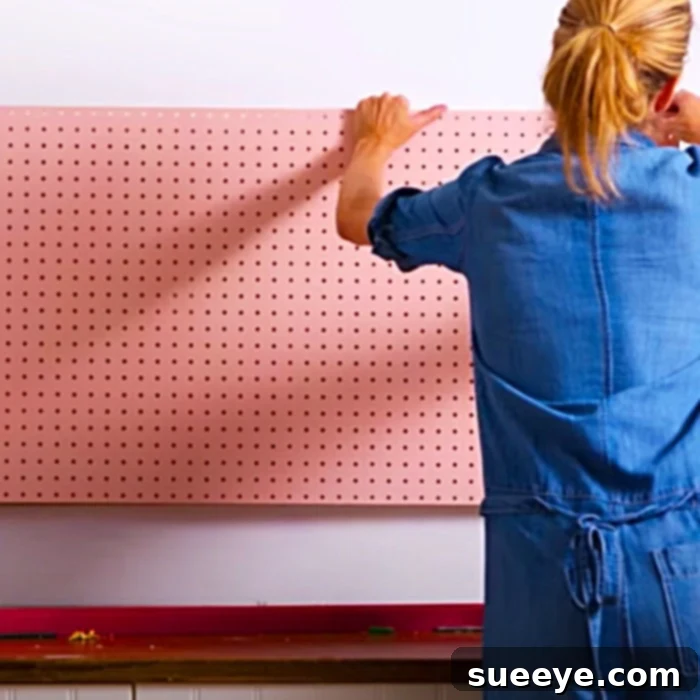
Once your painted pegboard is thoroughly dry, it’s time to mark its position on the wall. Decide where you want your pegboard to hang. Use your measuring tape and pencil to mark the desired height and width. Crucially, use a level to ensure your marked lines are perfectly horizontal and vertical. Mark the specific spots where you intend to drill for your mounting hardware. It’s a good practice to hold the pegboard against the wall at your desired height and lightly mark through the holes where you’ll place your anchors.
Step 4: Secure Installation – Mounting the Pegboard
With your drill, carefully create pilot holes at the marked points on your wall. The size of your drill bit should match the specifications for your molly bolts or chosen wall anchors. Insert the molly bolts or anchors into the drilled holes, using a mallet if necessary to gently tap them flush with the wall. Once the anchors are in place, align your pegboard and use the appropriate screws to securely fasten it to the wall. Double-check with your level one last time before fully tightening all screws to ensure it’s perfectly straight and stable. The pegboard should feel firmly attached and show no signs of wobbling.
Step 5: Personalize and Organize – Accessorizing Your Pegboard
Now for the most exciting part: decorating and organizing! This is where your pegboard truly comes to life. Start adding your hooks, attachable baskets, and shelves. There’s no right or wrong way to do this; experiment with different layouts until you find an arrangement that is both functional and aesthetically pleasing. Hang pots and pans in the kitchen, store craft supplies in a studio, or organize tools in a garage. You can add small shelves for decorative items, attach small bins for tiny essentials, or simply use a variety of hooks for anything you wish. This colorful blank slate is now a highly personalized storage unit that will bring you a lot of enjoyment and efficiency.
This is such an easy DIY project, and the impact it makes is incredible. It truly transforms a space, making it look cozy, warm, and wonderfully organized. Enjoy your newfound storage and the charming aesthetic it brings!
Maximizing Your Pegboard Storage: Tips and Tricks
Once your pegboard is installed, the real fun of customization begins. Here are some ideas to help you get the most out of your new organizational hub:
Choosing the Right Accessories for Your Needs
- Variety of Hooks: Don’t stick to just one type! Use J-hooks for cups or lightweight items, L-hooks for larger utensils, and curved hooks for pot handles or small bags.
- Specialized Bins and Cups: For small items like pens, markers, screws, or spices, pegboard bins and cups are invaluable. They keep tiny essentials contained and visible.
- Pegboard Shelves: Add small shelves for displaying decorative items, holding cookbooks, or storing frequently used ingredients.
- Magnetic Strips: Integrate a magnetic strip for knives or small metal tools directly onto or near your pegboard.
- Clip-on Lights: Enhance functionality and ambiance with small clip-on LED lights, perfect for illuminating a workspace or creating mood lighting.
Strategic Layout for Efficiency and Aesthetics
Think about how you use your space and what you need to store. Group similar items together to create zones (e.g., baking tools, art supplies, gardening gloves). Place frequently accessed items at eye level for maximum convenience. Consider weight distribution – heavier items should be mounted securely lower on the board, closer to strong anchors. Don’t be afraid to leave some empty space; it prevents a cluttered look and allows for future additions.
Beyond Kitchen Storage: Versatile Applications
While this guide focuses on the kitchen, the beauty of pegboard storage is its universal applicability:
- Craft Room: Organize ribbons, scissors, paints, brushes, and yarn.
- Garage/Workshop: Keep hand tools, gardening implements, and small hardware neatly arranged.
- Home Office: Store stationery, files, notes, and small electronic accessories.
- Kids’ Room: A fun way to organize art supplies, small toys, or display school projects.
- Entryway: Hang keys, hats, small bags, or even a compact mirror.
Maintaining Your Organized Pegboard System
To ensure your pegboard wall remains a functional and attractive asset, a little maintenance goes a long way:
- Regular Decluttering: Periodically review the items on your pegboard. Remove anything that is no longer needed or used to prevent it from becoming cluttered again.
- Cleaning: Wipe down the pegboard and its accessories regularly with a damp cloth to remove dust, grease, or grime, especially in the kitchen.
- Reorganize as Needed: Your storage needs may change over time. Don’t hesitate to rearrange hooks and accessories to better suit your current lifestyle or projects.
- Check Stability: Every few months, give your pegboard a gentle tug to ensure it’s still securely mounted to the wall. Tighten any loose screws if necessary.
Safety Considerations for Your DIY Project
While this is a straightforward DIY, always prioritize safety:
- Eye Protection: Always wear safety goggles when drilling to protect your eyes from debris.
- Ventilation: When painting, work in a well-ventilated area to avoid inhaling fumes.
- Secure Mounting: Ensure the pegboard is firmly attached to the wall using appropriate anchors for your wall type. An improperly mounted pegboard could fall, causing damage or injury.
- Weight Limits: Be mindful of the weight capacity of your pegboard and its accessories. Do not overload hooks or shelves, especially with heavy items, as this can lead to detachment or breakage.
Conclusion: Transform Your Space with a DIY Pegboard
DIY Kitchen Pegboard Storage Wall
A DIY pegboard storage wall is far more than just a practical organizational tool; it’s a design statement that adds character, functionality, and a personalized touch to any room. From its charming aesthetic appeal, particularly in a boho-chic style, to its incredible versatility and renter-friendly nature, this project offers immense value for minimal effort.
By following these easy steps and incorporating the tips for customization and maintenance, you can transform a cluttered area into an organized, inspiring, and beautiful space. Whether you’re a seasoned DIY enthusiast or a beginner looking for a rewarding project, creating your own pegboard wall is an accessible and enjoyable endeavor. Get started today and unleash your inner organizer and designer – you’ll be amazed at how this simple addition can dramatically improve the look and feel of your home!