
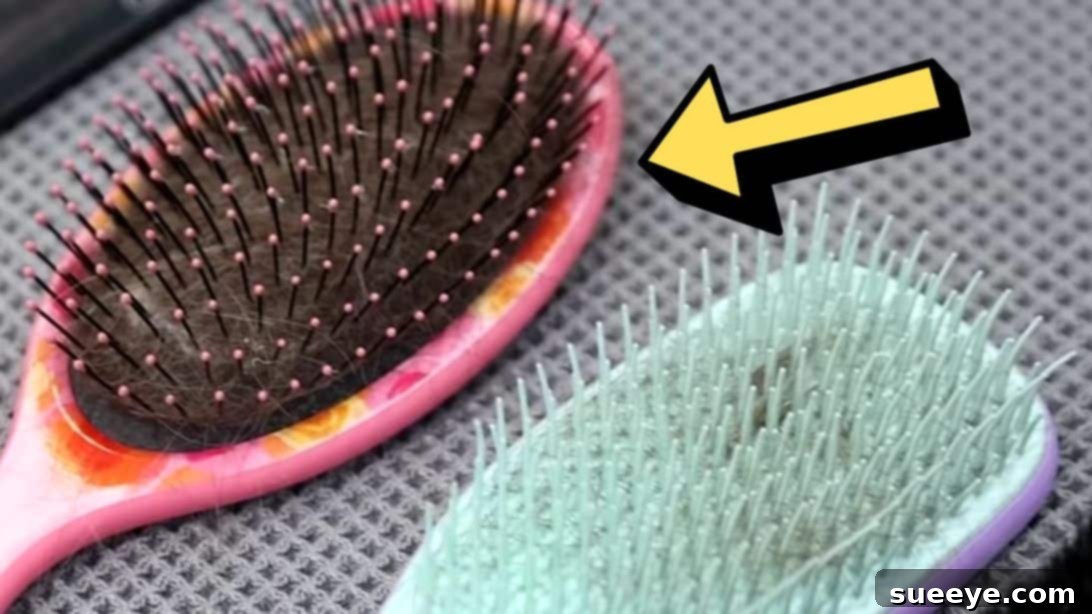
Achieve Sparkling Clean Hairbrushes: The Ultimate Guide for Healthy Hair and Scalp
Do you remember the last time you gave your hairbrush a thorough cleaning? If not, you’re likely using a tool that’s accumulated a surprising amount of grime, dead skin cells, product residue, and dust. This isn’t just unhygienic; it directly impacts the health and appearance of your hair and scalp. Regular hairbrush cleaning is a simple yet crucial step often overlooked in a comprehensive hair care routine. A dirty brush can transfer buildup back to your clean hair, making it look dull, greasy, and even leading to scalp irritation or issues. Fortunately, restoring your brush to its pristine condition is easier than you might think. This comprehensive guide, inspired by the effective methods shared by cleaning experts like Clean My Space on YouTube, will walk you through a quick and highly effective process to deeply clean your hairbrushes and combs, ensuring they support your hair’s health, not detract from it.
Why a Clean Hairbrush is Non-Negotiable for Healthy Hair
Many people underestimate the profound impact a clean hairbrush has on their overall hair and scalp health. Your hairbrush is an essential tool, but without proper maintenance, it can become a breeding ground for bacteria and a repository for all sorts of unwanted debris. Here’s why regular cleaning should be an integral part of your beauty regimen:
- Prevents Product Buildup Transfer: Every time you apply styling products, dry shampoo, or even conditioner, a small amount transfers to your brush. Over time, this sticky residue accumulates, becoming a haven for dust and grime. A dirty brush will then transfer this buildup back to your freshly washed hair, making it feel heavy, look greasy, and potentially dulling its shine.
- Promotes Scalp Health: Your scalp produces natural oils (sebum) and sheds dead skin cells. These naturally transfer to your brush. Combined with dirt and product, this creates a fertile environment for bacteria, which can lead to itchy scalp, irritation, and even exacerbate conditions like dandruff or folliculitis. A clean brush helps keep your scalp cleaner and healthier.
- Enhances Hair Health and Shine: When your brush is clean, it can effectively distribute natural oils from your scalp down the hair shaft, which is crucial for natural conditioning and adding shine. A dirty brush, however, just clogs pores and deposits old gunk, hindering healthy hair growth and making hair appear lackluster.
- Improves Detangling Efficiency: Bristles matted with hair and product residue lose their ability to glide smoothly through your hair. This can lead to more tugging, breakage, and damage during brushing. A clean brush with unobstructed bristles detangles more efficiently and gently.
- Extends Brush Lifespan: Regular cleaning removes corrosive product buildup and prevents bristles from becoming permanently bent or damaged by tangled hair. This ensures your high-quality brushes last longer, saving you money in the long run.
- Better Hygiene: Simply put, a clean brush is more hygienic. It feels better to use and ensures you’re not introducing unwanted contaminants to your hair and scalp.
Essential Materials for Hairbrush Cleaning
Gathering the right tools beforehand will make the cleaning process smooth and efficient. You likely already have most of these items around your home:
- Rat Tail Comb: The pointed end of this comb is indispensable for lifting and removing stubborn hair strands caught deep within the brush bristles. Its slender design allows it to navigate tight spaces effectively.
- Your Dirty Hairbrush(es) and Comb(s): The stars of our cleaning project! Gather all the brushes and combs you intend to clean.
- Old Toothbrush: An old toothbrush with firm bristles is perfect for scrubbing away trapped dirt, product residue, and dead skin cells from the base and individual bristles of your brush without causing damage. Dedicate one specifically for cleaning tasks.
- Clean Spoolie (Optional but Recommended): A clean mascara wand or a dedicated spoolie brush can be incredibly effective. Its small, tightly packed bristles can reach into crevices and extract more hair and debris than a comb end, especially for brushes with dense bristles.
- Gentle Baby Soap or Mild Shampoo: Baby soap is ideal because it’s formulated to be gentle and free from harsh chemicals that could damage brush materials or irritate your skin. A mild shampoo, preferably one without heavy conditioners, also works well.
- Warm Water: Warm water helps to loosen product buildup and dissolve grime more effectively than cold water.
- Clean Towel: A soft, absorbent towel is needed for blotting and air-drying your brushes, preventing water spots and ensuring proper drying.
- Basin or Sink: A clean basin or a stoppered sink will serve as your soaking station for the brushes.
Step-by-Step Guide to Deep Clean Your Hairbrush
Follow these detailed steps to transform your dirty hairbrushes into hygienic tools that promote healthier hair:
Step 1: Initial Hair Removal – The First Sweep
The very first and most crucial step is to meticulously remove as much loose hair as possible. This prevents hair from clogging your drain and allows the cleaning solution to penetrate effectively. Begin by taking your rat tail comb. Use the pointed, skinny end to gently lift and separate the matted hair strands from the base of the brush bristles. Work in sections, starting from one edge and moving across. Try to get under the hair and lift it as high as possible. Once the hair is sufficiently loosened and lifted, use your fingers to pull out the large clumps. Don’t be shy; a surprising amount of hair can accumulate! Repeat this process until you’ve removed the majority of the visible hair. For brushes with very dense bristles or those where hair is exceptionally tangled, a clean spoolie can be invaluable. Its bristles can hook onto more strands and pull them out efficiently, reaching deeper into the brush bed than a comb end. You might also find a pair of small scissors helpful for cutting through extremely matted hair before attempting to pull it out, being careful not to cut the brush bristles or cushion.
Step 2: The Deep Soak and Scrub
Once you’ve cleared most of the hair, it’s time for the deep cleaning. Prepare your cleaning solution in a basin or a clean sink. Fill it with warm water – not boiling hot, as extreme heat can damage some brush materials, especially plastic or glued components. Add a few generous pumps of baby soap or a mild shampoo to the warm water, creating a soapy mixture. Swish it around to ensure the soap is fully dissolved and creates light suds. Now, submerge your hairbrushes and combs completely into this solution. For optimal results, allow them to soak for approximately 20 to 30 minutes. This soaking time is crucial as it helps to loosen stubborn product buildup, dissolve grease, and soften any remaining debris, making it much easier to remove. After soaking, retrieve your brushes and grab your old toothbrush. Gently but firmly scrub the base of each brush, paying close attention to the area where the bristles meet the cushion, as this is where most gunk accumulates. Work around each bristle, scrubbing both sides and the tips. For combs, scrub along the teeth and the spine. You’ll be surprised at how much dirt comes off! Repeat this scrubbing for all brushes and combs until you see that the gunk and residue are visibly gone. The toothbrush bristles are perfect for reaching into those tight spaces where dirt loves to hide.
Step 3: Thorough Rinsing
After scrubbing, it’s essential to thoroughly rinse all traces of soap and loosened debris from your brushes. Hold each brush under clean, running warm water. Make sure the water flows through the bristles and over the base, washing away all suds and any remaining particles. You can gently run your fingers through the bristles or even use the toothbrush again under running water to ensure all residue is gone. For brushes with a cushion base, try to avoid soaking the cushion directly under a strong stream for too long, as excess water can get trapped inside and lead to mold or mildew. Instead, rinse the bristles thoroughly and then shake out any excess water.
Step 4: Proper Drying for Longevity and Hygiene
Once rinsed, it’s time to dry your brushes properly. This step is critical to prevent mildew growth and extend the life of your brushes. First, blot the brushes vigorously with a clean, dry towel to remove as much surface water as possible. For brushes with cushion bases, gently press the bristles into the towel to help absorb water from the cushion. Next, lay your brushes bristle-side down on a clean, dry towel. This position allows any remaining water to drain away from the cushion and prevents it from pooling. Allow them to air dry completely, which can take several hours or even overnight, depending on the brush type and humidity. Avoid using heat sources like hair dryers, as extreme heat can damage the bristles or the plastic components of the brush. Ensure your brushes are completely dry before storing or using them again to maintain optimal hygiene.
Tips for Cleaning Different Hairbrush Types
While the general steps apply to most brushes, some materials require specific considerations:
- Boar Bristle Brushes: These brushes are excellent for distributing natural oils but can trap product easily. Be extra gentle during scrubbing to avoid damaging the delicate bristles. Avoid harsh detergents; a mild shampoo is best. Ensure they are completely dry, as natural bristles can be prone to mildew.
- Wooden Brushes: Wooden handles and bases should not be submerged in water for extended periods, as this can cause the wood to swell, crack, or warp. Focus on cleaning the bristles and the base with the soapy toothbrush, then rinse quickly and thoroughly under running water, avoiding direct contact with the wooden handle. Blot dry immediately and let air dry face down.
- Paddle and Plastic Brushes: These are generally the most durable and can withstand longer soaking times. You can be a bit more vigorous with the scrubbing. Ensure the cushion base is thoroughly dried, as water can get trapped underneath.
- Round Brushes: The cylindrical shape of round brushes can make hair removal tricky. Use the rat tail comb to work around the barrel, lifting hair from all angles. The soaking and scrubbing steps remain the same, but pay extra attention to rinsing all sides.
How Often Should You Clean Your Hairbrush?
The frequency of cleaning depends on several factors, including how often you use your brush, your hair type, and how many styling products you use. As a general guideline:
- Remove hair daily or weekly: At a minimum, pull out the loose hair from your brush after each use or at least once a week to prevent excessive buildup.
- Deep clean monthly: Aim for a thorough deep clean, following all the steps in this guide, once a month. If you use a lot of styling products, have oily hair, or share brushes, you might need to do this every two weeks.
- When to replace: Even with regular cleaning, brushes don’t last forever. If the bristles are bent, broken, or missing, if the cushion is torn, or if the brush simply feels ineffective, it’s time to invest in a new one. Typically, a good quality brush can last anywhere from 6 months to several years with proper care.
Conclusion: The Secret to Healthier Hair Starts with a Clean Brush
Maintaining clean hairbrushes and combs is a fundamental yet often neglected aspect of hair care. By regularly removing hair and deeply cleaning your tools, you’re not just ensuring better hygiene; you’re actively contributing to healthier hair, a happier scalp, and extending the lifespan of your valuable styling accessories. This simple routine, as demonstrated by effective cleaning hacks like those from Clean My Space, takes minimal effort but yields significant benefits. Make it a habit to keep your brushes sparkling clean, and you’ll notice a remarkable difference in how your hair looks and feels. A clean brush isn’t just a tool; it’s an investment in your hair’s vitality.
*A special thank you to Clean My Space via YouTube for the insightful video tutorial that inspired this detailed guide and for all images used here. If you found this information helpful, be sure to visit her channel for more excellent cleaning tips and hacks, and consider subscribing!