
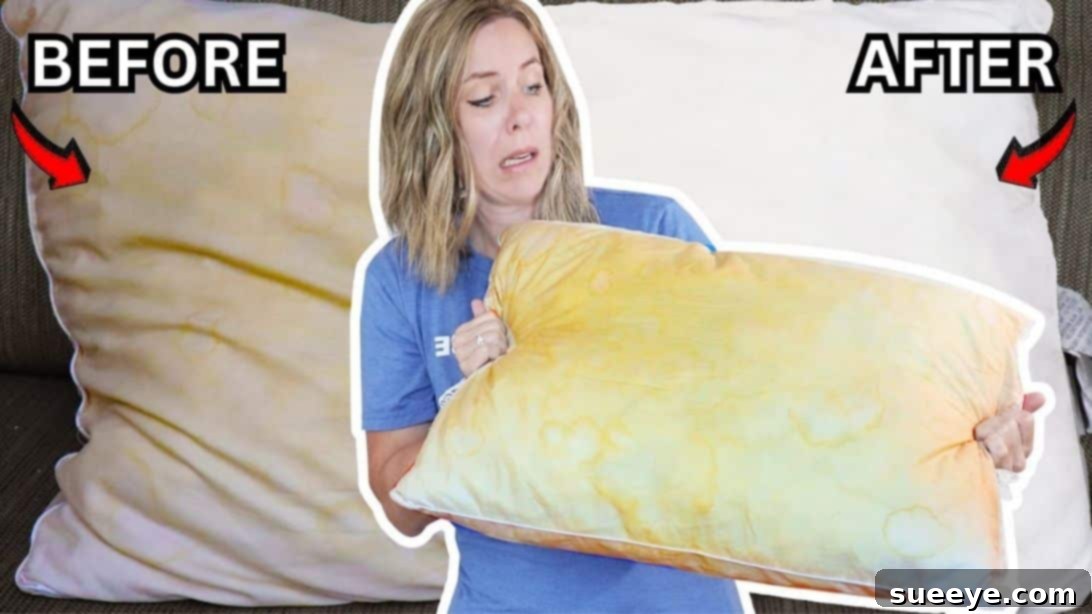
Waking up to discover yellow stains on your once pristine white pillows can be incredibly frustrating. Despite regular washing, these stubborn discolorations often persist, making your bedding look unappealing and feel less inviting. You’re not alone in facing this common household challenge; pillows tend to yellow over time due to a variety of factors. But the good news is, achieving that fresh, bright white look for your pillows again is entirely possible with the right approach.
For years, many have struggled with how to effectively tackle these unsightly yellow marks. The secret lies not just in washing, but in understanding the specific methods and products that can reverse the yellowing process. Inspired by the effective and straightforward tips from experts like Clean Freak & Germaphobe on YouTube, we’ve compiled a comprehensive guide to help you restore your pillows to their original glory. Their detailed and informative hacks are designed to be simple to follow, ensuring anyone can achieve fantastic results. Say goodbye to dingy pillows and hello to a comfortable, clean, and fresh-smelling sleep sanctuary.
Why Do Pillows Turn Yellow? Understanding the Culprits
Before diving into the cleaning process, it’s helpful to understand why pillows turn yellow in the first place. This discoloration isn’t just dirt; it’s a combination of bodily fluids and products that accumulate over time. The primary culprits include:
- Sweat and Body Oils: As we sleep, our bodies naturally produce sweat and oils. These are absorbed by the pillow fabric and, over time, can oxidize, leading to yellow stains.
- Drool: Saliva, especially if you’re a side or stomach sleeper, can also contribute to yellowing.
- Hair Products and Skincare: Lotions, creams, hair oils, and other beauty products transferred from your skin and hair to the pillow can leave residues that stain the fabric.
- Dampness: If pillows aren’t dried properly, moisture can encourage mildew or other microbial growth, sometimes manifesting as yellow or brown stains.
- Dust Mites and Allergens: While not directly causing yellowing, the presence of dust mites and their waste can exacerbate existing stains or create an environment where stains are more noticeable.
Understanding these causes emphasizes the importance of a thorough and effective cleaning routine, not just for aesthetics but also for hygiene and longevity of your pillows.
Preparation is Key: What You Need Before You Start
Before you begin the transformation, a little preparation will go a long way in ensuring success and protecting your pillows. Gathering the right supplies and checking crucial details will make the process smooth and effective.
Gather Your Supplies:
- High-Efficiency Washing Machine: While traditional machines can work, top-loading machines without an agitator or front-loading machines are ideal for washing pillows as they provide more space and reduce wear and tear.
- Laundry Detergent: Your regular detergent will do, but consider one with enzymatic cleaners for better stain removal.
- OxiClean or Similar Oxygen-Based Bleach: This is a powerful ally against yellow stains. Unlike chlorine bleach, it’s safer for most fabrics and colors (though we’re dealing with white, it’s still gentler). It works by releasing oxygen to break down stains.
- Dryer Balls or Clean Tennis Balls: These are essential for fluffing pillows in the dryer and preventing lumps.
- Optional Pre-Treatment (for stubborn stains): A paste of OxiClean and water, or a specialized stain remover.
Check the Pillow’s Care Label:
This is arguably the most critical step. Almost all pillows come with a care label that specifies washing instructions. While many common pillow types (down, feather, synthetic fiberfill) are machine washable, some, like memory foam or solid foam pillows, generally are not. Washing a non-washable pillow can damage its integrity and filling, making it unusable.
- Look for symbols indicating machine washability, water temperature, and drying instructions.
- If the label says “dry clean only” or “spot clean only,” do not machine wash.
- Ensure your pillow doesn’t have any tears or loose seams that could worsen during washing.
Once you’ve confirmed your pillow is machine washable and you have your supplies ready, you’re all set to begin the rejuvenation process!
Step-by-Step Guide to Washing Yellow Pillows White Again
Now, let’s get to the core of the problem: effectively washing those yellow stains away. This method is designed to be gentle on your pillows while being tough on stains, ensuring they come out sparkling white and fluffy.
Step 1: The Washing Cycle – Deep Cleaning for Brightness
The washing machine is where the magic begins. Proper settings and additives are crucial for lifting those stubborn yellow stains.
Once you’ve verified your pillow is machine washable, carefully place it into your washing machine. For optimal results, it’s best to wash two pillows at a time, if possible. This helps balance the load, allowing the machine to spin more effectively and ensuring both pillows get thoroughly cleaned without clumping.
- Setting the Cycle: Select a gentle or delicate cycle. Pillows, especially those with down or feather fillings, can be quite fragile. A gentle cycle minimizes stress on the fabric and stitching, preventing damage.
- Water Temperature: Use warm water. Warm water is more effective than cold water at dissolving detergents and breaking down the oils and bodily fluids that cause yellowing, without being so hot as to potentially damage synthetic fillings.
- Detergent and OxiClean: Add your regular laundry detergent as usual. Alongside it, add a generous scoop of OxiClean (or your preferred oxygen-based brightener) directly into the detergent dispenser or drum, following the product’s instructions for heavily soiled items. OxiClean is a powerhouse for lifting stains and brightening whites without the harshness of chlorine bleach, which can actually degrade pillow fibers over time and leave a yellow residue.
- Longest Wash Cycle: Set your machine to the longest wash cycle available. This allows ample time for the OxiClean and detergent to penetrate the pillow fibers, dissolving stains and grime effectively.
- Repeat if Necessary: After the first cycle, if you still notice significant yellowing, don’t hesitate to repeat the wash cycle. Sometimes, very stubborn stains require a second round of deep cleaning to fully disappear. Patience here will pay off in dazzling white pillows.
Step 2: Rinsing and Drying – The Final Touch for Fluffiness and Freshness
Proper rinsing and drying are just as important as washing. Incomplete rinsing can leave detergent residue, while improper drying can lead to mildew, odor, or lumpy pillows.
- Extra Rinse Cycle: Once the wash cycle is complete, select an extra rinse cycle. This ensures all traces of detergent and OxiClean are thoroughly flushed out of the pillow filling. Any leftover soap can attract dirt faster and lead to clumping, and can also irritate sensitive skin.
- Draining Excess Water: After rinsing, a good spin cycle is essential to extract as much water as possible. This significantly reduces drying time and prevents mildew formation.
- Drying with Dryer Balls: Transfer your pillows to the dryer. This is where dryer balls or clean tennis balls come in handy. Place two or three dryer balls (or tennis balls, wrapped in clean socks to prevent tennis ball fuzz transfer) with your pillows. As they tumble, these balls will repeatedly hit the pillows, breaking up clumps of filling and ensuring even drying and fluffiness.
- Low Heat or Air Dry Setting: Set your dryer to a very low heat setting, or ideally, use an “air fluff” or “air dry” setting. High heat can damage the delicate fibers of pillow fillings, especially synthetic ones, and can even shrink or scorch certain materials. Patience is key here; it’s better to dry slowly and thoroughly.
- Multiple Drying Cycles: Pillows hold a lot of moisture, so they often require multiple drying cycles to become completely dry. Periodically remove the pillows from the dryer, fluff them by hand, and feel for any damp spots. If you feel any moisture, put them back in for another cycle. This step is crucial; a pillow that isn’t completely dry is prone to mildew and unpleasant odors.
- Final Fluff and Enjoy: Once your pillows are thoroughly dry and wonderfully fluffy, slip them into fresh pillowcases. You’ll be amazed at the transformation! You can now enjoy a cleaner, fresher, and more comfortable night’s sleep.
Advanced Tips for Pillow Care and Maintenance
While the steps above are highly effective for bringing yellowed pillows back to life, a few additional tips can help maintain their pristine condition and prolong their lifespan.
Pre-Treating Stubborn Stains:
For particularly dark or set-in yellow stains, consider pre-treating before washing. You can create a paste with OxiClean and a little water, apply it directly to the stain, and let it sit for 15-30 minutes before washing. For protein-based stains (like blood or sweat), a paste of baking soda and a bit of hydrogen peroxide can also be very effective.
The Role of Vinegar:
While not mentioned in the core steps, some people like to add a cup of distilled white vinegar to the rinse cycle. Vinegar acts as a natural fabric softener, helps remove any residual detergent, and can also brighten whites. It’s a natural deodorizer too, which is a bonus for fresh-smelling pillows.
Prevention is Better Than Cure:
To prevent future yellowing, invest in high-quality pillow protectors. These zippered covers go under your pillowcases and create a barrier against sweat, oils, and drool, significantly reducing the amount of moisture and residue that reaches the pillow itself. Washing pillow protectors regularly (every 2-4 weeks) along with your pillowcases will keep your pillows fresher for longer.
Regular Washing Schedule:
Aim to wash your pillows every 3 to 6 months. This routine maintenance helps prevent the buildup of oils, sweat, and allergens, keeping them white and hygienic. Pillowcases, on the other hand, should be washed weekly.
When to Replace Your Pillows:
Even with the best care, pillows don’t last forever. A good rule of thumb is to replace pillows every 1-2 years. You’ll know it’s time when they lose their loft, become lumpy, or no longer provide adequate support. If you fold your pillow in half and it doesn’t spring back, it’s definitely time for a new one.
Frequently Asked Questions About Washing Pillows
Q1: Can I use bleach to whiten my yellow pillows?
While chlorine bleach is known for its whitening properties, it’s generally not recommended for pillows, especially those with down or feather fillings. Chlorine bleach can damage delicate fibers, making them brittle and potentially causing further yellowing over time as it reacts with the pillow’s stuffing. Oxygen-based brighteners like OxiClean are a much safer and equally effective alternative for restoring brightness without compromising pillow integrity.
Q2: How often should I wash my pillows?
For optimal hygiene and to prevent significant yellowing, it’s recommended to wash your pillows every 3 to 6 months. Pillow protectors and pillowcases should be washed more frequently, ideally once a week, as they bear the brunt of direct contact with your body and products.
Q3: Can I wash memory foam pillows?
Most memory foam pillows are not designed to be machine washable. Submerging them in water can damage the foam’s structure, causing it to disintegrate or lose its supportive properties. Always check the care label; typically, memory foam pillows should be spot cleaned with a mild detergent and allowed to air dry completely. Some newer memory foam options might have removable, washable covers, but the foam core itself usually isn’t washable.
Q4: My pillow still smells after washing. What can I do?
A lingering smell often indicates that the pillow wasn’t completely dry, which can lead to mildew or a musty odor. Ensure the pillow is thoroughly dried, even if it requires multiple cycles in the dryer or extended air drying. Adding a cup of white distilled vinegar to the rinse cycle can also help neutralize odors. For particularly stubborn smells, sprinkling baking soda on the dry pillow and letting it sit for a few hours (or even overnight) before vacuuming it off can absorb odors.
Q5: Is it safe to put tennis balls in the dryer with pillows?
Yes, it is generally safe to use clean tennis balls in the dryer with pillows. They serve the same purpose as dryer balls, helping to fluff the pillows and prevent clumping of the filling. To avoid any transfer of fuzz or dye from the tennis balls to your pillows, you can place each tennis ball inside a clean white sock before adding them to the dryer.
Q6: What if my pillow label says “dry clean only”?
If your pillow’s care label explicitly states “dry clean only,” it’s best to follow that instruction. Attempting to machine wash such pillows could cause irreparable damage to the filling or fabric. Take them to a professional dry cleaner who has the expertise to handle them safely.
Conclusion: Embrace a Brighter, Cleaner Sleep
There’s truly nothing quite like sinking into a bed with fresh, clean, and bright white pillows. The transformation from yellowed and dingy to sparkling white not only enhances the aesthetics of your bedroom but also contributes to a healthier and more comfortable sleep environment. By following these simple yet effective steps, you can confidently tackle even the most stubborn yellow stains and bring your pillows back to life. Remember the importance of checking care labels, using the right products like OxiClean, and ensuring thorough drying to prevent future issues.
We extend our gratitude to Clean Freak & Germaphobe via YouTube for their inspiring and practical tips that form the foundation of this guide. Their expertise makes complex cleaning tasks feel effortless and achievable. If you found this guide helpful, we highly recommend visiting their YouTube channel for more insightful hacks and cleaning solutions to simplify your household chores and keep your home sparkling.