
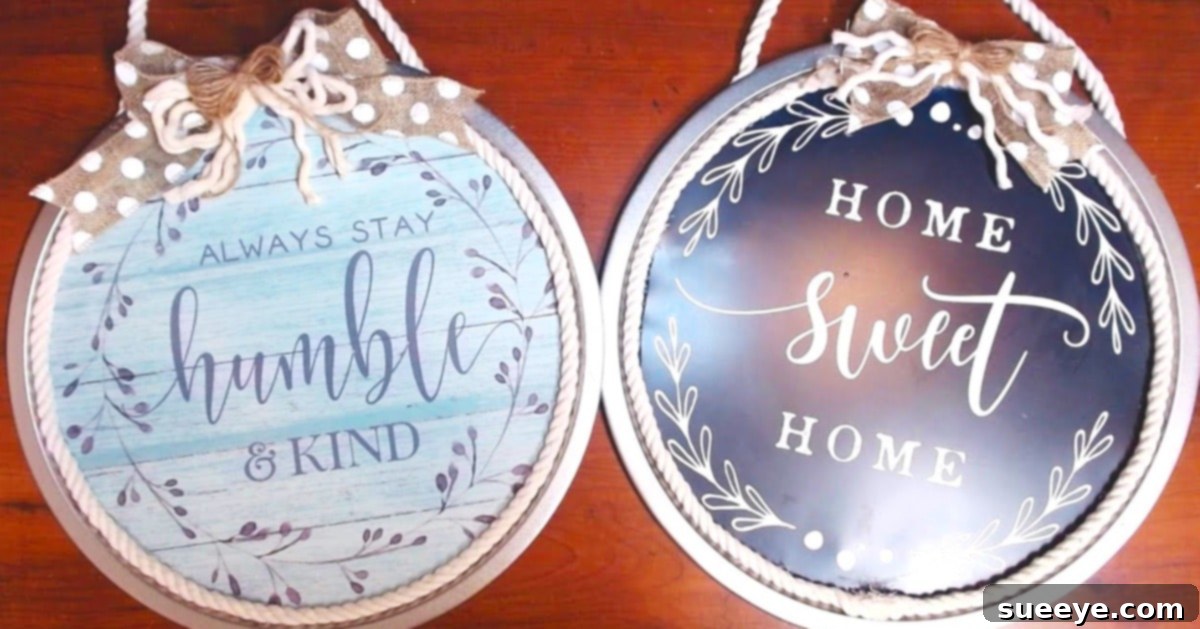
Transform Your Kitchen with DIY Dollar Tree Pizza Pan Signs: Easy & Affordable Home Decor
Finding creative ways to personalize your living space doesn’t have to break the bank. When I first stumbled upon this ingenious Dollar Tree pizza pan sign idea by Whimsy Wonderland on YouTube, I was immediately captivated. The simplicity, affordability, and immense potential for customization made it an irresistible project. I knew instantly that these charming signs were precisely what my kitchen needed to infuse a touch of warmth and positive energy.
My vision is to adorn the blank space above my stove area with a trio of these delightful signs, each carrying uplifting messages. Imagine starting your day with gentle reminders to “Be Grateful” or “Always Be Thankful.” These affirmations are not just decorative elements; they’re daily nudges towards a more positive mindset, capable of making a tangible difference in the morale of everyone in the household. The best part? This entire endeavor is incredibly budget-friendly, with most materials sourced from Dollar Tree, and remarkably simple to execute, even for novice crafters.
Why Choose DIY Pizza Pan Signs for Your Home Decor?
In a world of mass-produced decor, handmade items offer a unique charm and personal touch. Crafting your own pizza pan signs provides numerous benefits beyond just aesthetics:
- Unbeatable Affordability: With the majority of supplies coming from Dollar Tree, this project is one of the most budget-friendly ways to update your home decor. You can create multiple signs for the cost of a single store-bought item.
- Limitless Customization: From inspirational quotes to seasonal themes, family names, or even abstract designs, the possibilities for personalization are endless. Tailor each sign to perfectly match your existing decor or create a unique focal point.
- Easy & Accessible Crafting: This project is perfect for all skill levels. Basic cutting and gluing techniques are all that’s required, making it an ideal craft for a relaxing afternoon or a fun activity with friends and family.
- Repurposing & Sustainability: By transforming an inexpensive pizza pan into a beautiful piece of art, you’re embracing the concept of repurposing, contributing to a more sustainable approach to home decorating.
- Positive Ambiance: Strategically placed signs with uplifting messages can significantly enhance the atmosphere of your home, promoting a sense of gratitude, joy, and encouragement for everyone who sees them.
Essential Materials for Your Pizza Pan Signs
Gathering your supplies is the first exciting step in bringing these charming signs to life. The beauty of this project lies in its simplicity and the readily available nature of the materials, especially from Dollar Tree.
- Pizza Pan: The fundamental canvas for your sign. Dollar Tree offers various sizes, so you can choose one that fits your space perfectly. Ensure it’s clean and free of any labels.
- Cotton Rope: Ideal for creating a rustic and sturdy hanger. While Dollar Tree often carries suitable options, Hobby Lobby (don’t forget your coupon!) or other craft stores might offer a wider selection of thicknesses and colors.
- Braided Clothesline: This will be used to create a decorative border around your sign, adding texture and a finished look. Dollar Tree or Walmart are great sources for this inexpensive item.
- Placemat with a Message: This is where the magic of personalization truly begins! Dollar Tree frequently stocks placemats with delightful quotes, seasonal patterns, or simple textures that can serve as the backdrop for your sign. Look for designs that inspire you.
- Tissue Paper or Vellum: Essential for creating your initial round pattern. Its translucency makes it easy to trace, ensuring a perfect circle for your design insert.
- Marker: For tracing your pattern onto the placemat. Any standard marker will do.
- Scissors: A sharp pair of scissors will make cutting out your perfect circle much easier.
- Hot Glue Gun & Glue Sticks: Your primary tool for assembly. A hot glue gun ensures quick and strong adhesion, which is crucial for a durable sign. Always have extra glue sticks on hand!
Step-by-Step Directions to Craft Your Pizza Pan Signs
Creating your Dollar Tree pizza pan sign is a straightforward process, broken down into manageable steps. Following these instructions will guide you from a simple pan to a beautiful piece of personalized decor. For a visual guide, the Whimsy Wonderland YouTube tutorial offers excellent insights.
Step 1: Prepare Your Round Design Insert
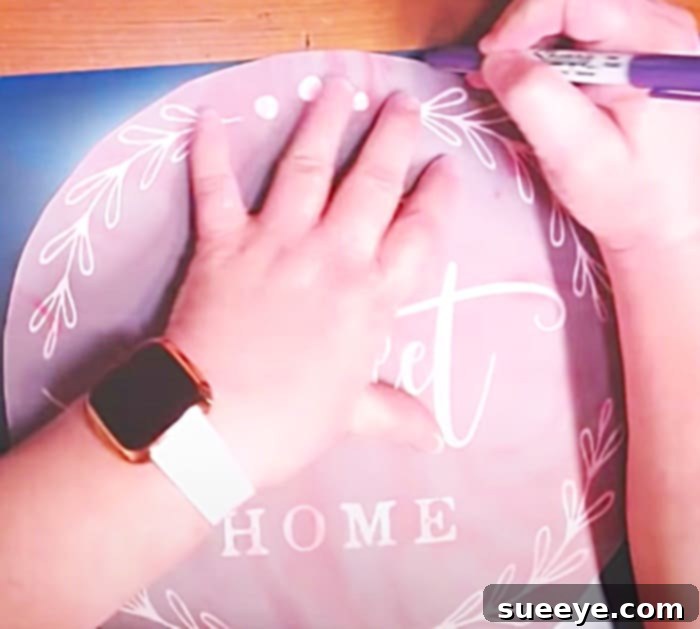
Begin by creating a perfect circular template. Place a piece of tissue paper or vellum over the inside of your pizza pan and trace the inner circumference with your marker. This will be the exact size of your sign’s main design. Carefully cut out this paper circle with your scissors. This template ensures your design fits snugly within the pan’s rim.
Step 2: Transfer and Cut Your Placemat Design
Now, take your paper template and place it on the chosen section of your placemat. If your placemat has a specific message or pattern you want to feature, position the template carefully to center it. Trace around the template with your marker, then meticulously cut out the placemat circle. Take your time with this step to ensure clean edges, as this will be the face of your sign.
Step 3: Secure the Design to the Pizza Pan
With your hot glue gun ready and heated, apply a generous amount of hot glue to the back of your placemat circle. Working quickly, center the placemat circle inside the pizza pan and press down firmly. Ensure all edges are securely adhered to prevent lifting. Smooth out any bubbles or wrinkles from the center outwards for a flawless finish.
Step 4: Add the Decorative Braided Border
Enhance the visual appeal of your sign by adding a braided clothesline border. Start by applying a thin line of hot glue around the inner edge of the pizza pan, where the placemat meets the metal. Carefully press the braided clothesline into the glue, working in small sections. Continue until you’ve gone all the way around the circle, neatly trimming any excess clothesline and securing the ends seamlessly.
Step 5: Create a Sturdy Hanger
To hang your beautiful sign, cut a piece of cotton rope to your desired length for a hanger. Form a loop with the rope and securely hot glue each end to the back of the pizza pan, near the top edge. Ensure the glue is applied generously and that the rope is firmly attached to withstand the sign’s weight. You can reinforce this with a second layer of glue for extra security.
Step 6: Final Touches and Inspection
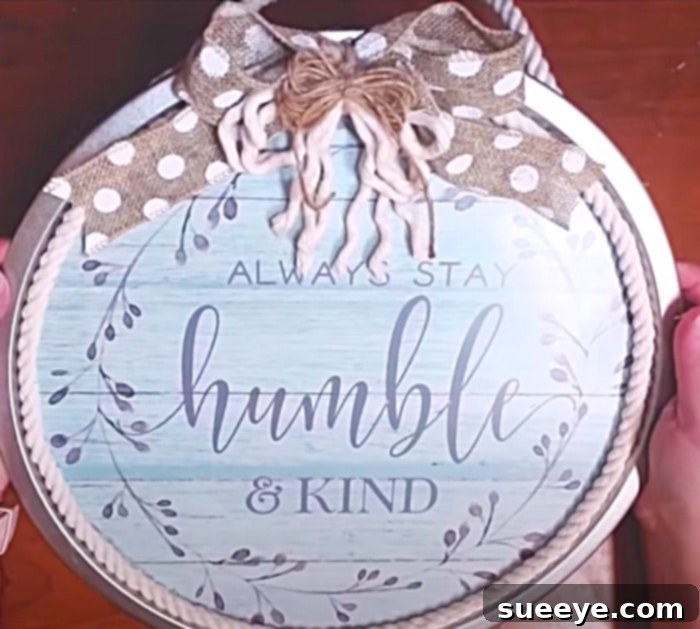
Allow all the glue to dry completely, which usually takes only a few minutes for hot glue. Once dry, inspect your sign for any loose edges or glue strings. Trim them away for a clean, professional finish. Your cute, custom-made pizza pan sign is now ready to adorn your walls!
Personalizing Your Pizza Pan Signs: Endless Creativity
While the placemat method is wonderfully simple, the beauty of DIY lies in its adaptability. Don’t limit yourself to just placemats! Here are more ideas to make your signs truly unique:
- Fabric Scraps: Use leftover fabric from old projects or clothing. Floral patterns, geometric prints, or even denim can create diverse aesthetics.
- Scrapbook Paper: With an incredible array of patterns and textures, scrapbook paper opens up countless design possibilities. You can layer different papers for a decoupage effect.
- Printed Images or Quotes: Design your own quotes or graphics on a computer, print them out, and use them as your sign’s centerpiece. This offers the ultimate personalization.
- Hand-Painted Designs: If you’re artistically inclined, paint directly onto a plain placemat or a piece of cardstock cut to size. This allows for truly original artwork.
- Stencils: Use stencils to add letters, numbers, or decorative patterns onto a plain background.
- Embellishments: Elevate your signs with additional decorative elements like faux flowers, small buttons, twine bows, or even a light dusting of glitter for a touch of sparkle.
- Seasonal Themes: Create a collection of signs for different seasons and holidays – pumpkins for fall, snowflakes for winter, flowers for spring, and patriotic themes for summer.
- Family & Home Themes: Incorporate family names, significant dates, or symbols that represent your household’s values.
Tips for Crafting Success
To ensure your pizza pan sign project goes smoothly and yields beautiful results, keep these tips in mind:
- Safety First: Always exercise caution when using a hot glue gun. Ensure children are supervised if they are participating.
- Pre-Planning is Key: Before gluing, lay out all your components to visualize the final design. This helps prevent mistakes and ensures your message is centered.
- Even Glue Application: Apply hot glue evenly to avoid bumps or areas where the material might lift later. Working in small sections for the border is helpful.
- Cleanliness: A clean pizza pan ensures better adhesion. Wipe it down before you start.
- Patience with Placement: Once the hot glue touches, it sets quickly. Be precise when placing your placemat circle inside the pan.
- Experiment with Rope: Try different colors or textures of rope for the hanger and border to match your specific style.
Where to Display Your Wonderful Creations
While initially envisioned for the kitchen, these versatile DIY pizza pan signs can brighten almost any room in your home or even make heartfelt gifts:
- Kitchen: As planned, above the stove, on an empty wall, or leaning on a shelf.
- Entryway: A welcoming message to greet guests.
- Living Room: A cozy, inspirational quote above a bookshelf or fireplace.
- Bedroom: A calming or encouraging message above your bed or dresser.
- Kids’ Rooms: Fun, educational, or motivational signs tailored to their interests.
- Home Office: A boost of motivation to stay focused and creative.
- Gifts: These personalized signs make thoughtful, handmade gifts for housewarmings, birthdays, holidays, or just because.
I’ve truly been on the lookout for a project that combines such charm with incredible ease and affordability, and I can confidently say I’ve finally found it in these Dollar Tree pizza pan signs. The satisfaction of transforming simple, inexpensive materials into something beautiful and meaningful for my home is immeasurable. This project is a testament to the idea that stunning home decor doesn’t require a hefty budget or advanced crafting skills. So, grab your Dollar Tree finds, ignite your creativity, and start making these adorable signs. You’ll be amazed at what you can achieve!