
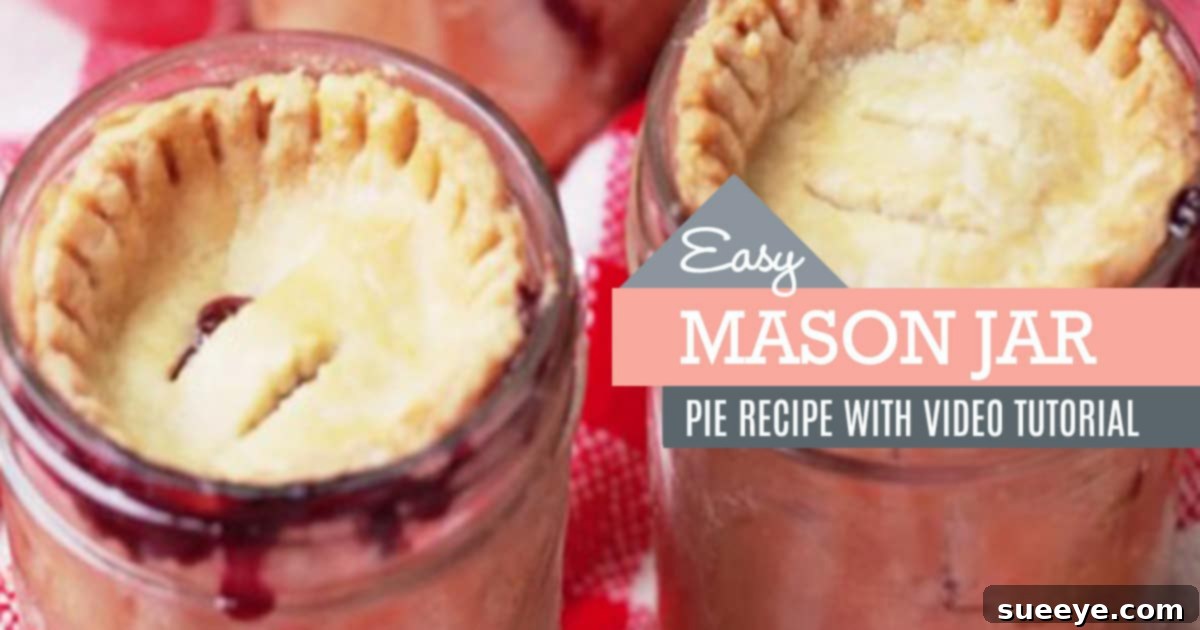
Delightful Mason Jar Pies: Your Ultimate Guide to Portable Party Treats
Imagine a dessert that’s not only utterly delicious but also perfectly portioned, incredibly cute, and wonderfully portable. Enter the charming world of Mason Jar Pies! These individual treats are revolutionizing how we enjoy classic pies, making them an ideal choice for picnics, parties, family gatherings, or simply a sweet indulgence at home. Gone are the days of struggling to slice a perfect piece of pie; with mason jar pies, everyone gets their own adorable, self-contained delight, brimming with flavor and homemade goodness.
This fantastic concept, made effortlessly achievable, is brought to life through the clear and engaging tutorial by TheOfficialHungry. Their approach simplifies the baking process into easy-to-follow steps: “lay ’em, bake ’em, and freeze ’em,” promising a stress-free experience even for novice bakers. Get ready to transform your ordinary mason jars into spectacular party poppers filled with yummy, customizable fillings, guaranteed to impress your guests and satisfy every sweet tooth with minimal fuss.
Why Choose Mason Jar Pies? The Unbeatable Benefits of Individual Desserts
Beyond their undeniable charm and aesthetic appeal, mason jar pies offer a plethora of practical advantages that make them a superior choice for a wide array of occasions. Their convenience and versatility elevate them from a simple dessert to a truly smart entertaining solution:
- Unmatched Portability: This is arguably their biggest selling point. Sealed mason jars are inherently sturdy and perfect for transporting to picnics, potlucks, camping trips, school events, or a friend’s house. The robust jar design protects delicate crusts and fillings from shifting or getting crushed during transit, ensuring your dessert arrives in perfect condition. Just grab and go!
- Perfect Portion Control: Each jar contains a single, perfectly sized serving, eliminating the guesswork and potential mess of slicing a large pie. This also aids significantly in portion management, making it easier to enjoy a delicious treat without overindulging, catering to health-conscious guests or those simply preferring a moderate serving.
- Hygienic and Individual Servings: Especially in larger group settings or during flu season, individual desserts are often preferred. Mason jar pies ensure each person has their own untouched dessert, enhancing hygiene and providing peace of mind for guests. No more communal serving utensils!
- Stunning Presentation: There’s something inherently rustic, charming, and appealing about food served in a mason jar. These individual pies look incredibly appealing, adding a touch of homemade elegance and rustic charm to any table setting or dessert bar. They are undeniably Instagram-worthy treats that will spark conversation.
- Exceptional Make-Ahead Convenience: Mason jar pies are an excellent option for meal prepping desserts or planning ahead for special events. You can bake them days in advance and store them safely in the refrigerator, or even freeze them for longer storage, making entertaining a breeze and reducing last-minute stress.
- Endless Customization and Variety: Want to offer a diverse range of flavors to cater to different tastes or dietary preferences? With individual jars, you can easily bake a variety of different fillings simultaneously. This allows you to create a dessert spread that truly has something for everyone, from classic apple to decadent chocolate.
- Reduced Mess and Easy Cleanup: Eating a pie directly out of a jar is often less messy than trying to balance a slice on a plate, especially at casual gatherings where traditional cutlery might be limited. The jar itself contains any crumbs or drips, simplifying cleanup.
- Thoughtful Gifts: Baked mason jar pies make delightful, personalized gifts for neighbors, teachers, or hosts. Add a decorative ribbon and a custom tag for an extra special touch.
Essential Ingredients & Equipment for Your Mason Jar Pie Adventure
Embarking on your mason jar pie journey is surprisingly straightforward and doesn’t require a specialty kitchen. Here’s a comprehensive rundown of what you’ll likely need to create these delightful mini pies:
Key Ingredients:
- Pie Crust:
- Store-Bought Dough: For ultimate convenience, refrigerated pie dough or frozen pie crusts are excellent choices. They save time and ensure a consistent result.
- Homemade Crust: If you enjoy baking from scratch, your favorite homemade flaky pie crust recipe will elevate these mini pies.
- Alternative Crusts: Consider graham cracker crusts or cookie crusts (e.g., crushed Oreos or shortbread) for no-bake fillings or specific dessert profiles like key lime or S’mores pies.
- Pie Filling: This is where your creativity truly shines! The possibilities are virtually limitless:
- Classic Fruit Fillings: Timeless favorites such as apple, cherry, blueberry, peach, strawberry-rhubarb, or mixed berry. Both fresh and frozen fruits work wonderfully, just ensure frozen fruits are properly thawed and drained if necessary.
- Decadent Cream Fillings: Indulge in options like chocolate cream, banana cream, coconut cream, or tangy key lime. These often don’t require baking the filling itself, just a pre-baked crust.
- Rich Custard Fillings: Pumpkin, sweet potato, or lemon meringue offer a smooth, comforting texture perfect for individual servings.
- Savory Options: Don’t limit yourself to sweet! Mini quiches, chicken pot pies, or shepherd’s pies can also be beautifully assembled and baked in jars for a savory twist on the “pie in a jar” concept.
- Sweeteners & Spices: Granulated sugar, brown sugar, maple syrup, honey, cinnamon, nutmeg, allspice, vanilla extract, almond extract – select these based on your chosen filling to enhance its flavor profile.
- Thickening Agent: Cornstarch, flour, or tapioca are typically used for fruit fillings to prevent them from becoming too watery and ensure a spoonable consistency.
- Fats: Butter or cooking oil for greasing jars and enriching fillings, adding moisture and flavor.
- Egg Wash (Optional): A mixture of beaten egg with a touch of water or milk, brushed onto the top crust, provides a beautiful golden-brown, shiny finish.
Essential Equipment:
- Mason Jars: The stars of the show! Wide-mouth jars (4 oz, 8 oz, or 12 oz are common, depending on desired serving size) are highly recommended as they make it significantly easier to press in crusts and spoon in fillings. Ensure your jars are canning-safe and specifically labeled as oven-safe if baking directly in them.
- Mixing Bowls: Various sizes for preparing fillings, mixing dough, and combining ingredients.
- Rolling Pin: Indispensable if you’re making homemade crust or rolling out store-bought dough to fit your jars.
- Cookie Cutters: Essential for cutting crust circles to line the bottoms of the jars and smaller shapes for decorative tops (e.g., stars, leaves, hearts). A round cutter slightly larger than the jar’s opening is ideal for the bottom crusts.
- Baking Sheets: Crucial for holding the jars securely in the oven, preventing them from tipping, and catching any potential spills or overflow from bubbly fillings, keeping your oven clean.
- Oven: A reliable, preheated oven is key for even baking and achieving that perfectly golden crust.
- Cooling Rack: For proper air circulation, allowing your mason jar pies to cool completely and preventing soggy bottoms after baking.
- Pastry Brush (Optional): For applying egg wash or melted butter.
- Jar Funnel (Optional): A helpful tool for cleanly adding fillings into narrow-necked jars.
The “Lay ‘Em, Bake ‘Em, Freeze ‘Em” Method: A Simple Tutorial
Inspired by TheOfficialHungry’s straightforward approach, here’s a detailed, step-by-step breakdown of how to create your own delicious, individual mason jar pies with ease, ensuring perfect results every time:
Step 1: Preparation – Getting All Your Components Ready
- Prepare Your Mason Jars: Begin by washing your mason jars thoroughly with warm, soapy water and drying them completely. This ensures cleanliness and prepares them for baking. Next, lightly grease the inside of each jar with butter, vegetable shortening, or cooking spray. This crucial step prevents the crust from sticking and helps it bake to a beautiful golden brown.
- Prepare Your Pie Crust:
- If using store-bought refrigerated pie dough, remove it from the packaging and let it sit at room temperature for 10-15 minutes. This makes it more pliable and easier to work with.
- Roll out the dough on a lightly floured surface to your desired thickness, typically between 1/8 to 1/4 inch.
- Using a round cookie cutter or the jar’s lid as a template, cut circles large enough to line the bottom and extend slightly up the sides of each jar. You’ll also need smaller circles, strips, or decorative cut-outs for the top crusts.
- Prepare Your Filling: Follow your favorite pie filling recipe.
- For Fruit Pies: Combine your chosen fruit (fresh or thawed), sugar, spices (like cinnamon or nutmeg), and a thickening agent (such as cornstarch or flour) in a bowl. Stir gently to coat the fruit evenly.
- For Cream/Custard Pies: Prepare your filling according to the recipe’s instructions. Many cream fillings are cooked on the stovetop and allowed to cool slightly before assembly.
Step 2: Assembly – Building Your Mini Masterpieces
- Line the Jars with Crust: Carefully press a larger crust circle into the bottom and gently up the sides of each greased mason jar. Ensure there are no large air bubbles underneath and that the crust is evenly distributed. You can gently crimp the top edges of the crust for a decorative touch, or leave them for a rustic, homemade look.
- Add the Filling: Spoon your prepared pie filling into the crust-lined jars. It’s important not to overfill! Leave about 1/2 to 3/4 inch of space from the top rim of the jar. This headspace is essential to prevent the filling from bubbling over during baking and creating a mess.
- Top It Off with Flair: Now for the top crust, where you can get creative:
- Full Crust: Place a smaller crust circle directly on top of the filling. Remember to make a few small slits in the center of the top crust using a knife to allow steam to escape during baking, preventing it from becoming soggy or bursting.
- Lattice Top: Cut thin strips of dough and weave them into a charming lattice pattern over the filling. This not only looks elegant but also allows steam to escape.
- Crumble Topping: If you’re making a crumble-style pie (e.g., apple crumble), generously sprinkle your prepared crumble mixture evenly over the filling.
- Decorative Cut-outs: Use small cookie cutters (stars, leaves, hearts, etc.) to create fun, festive shapes for the top, adding a personalized touch.
- Egg Wash (Optional but Recommended): For a beautiful golden-brown and slightly shiny crust, lightly brush the top crust (if using) with an egg wash (one egg beaten with a tablespoon of water or milk).
Step 3: Baking – Bringing Them to Golden Perfection
- Preheat Your Oven: Preheat your oven to the temperature specified in your pie recipe, which is typically between 375°F (190°C) and 425°F (220°C). Accurate oven temperature is crucial for even baking.
- Arrange on Baking Sheet: Carefully place the assembled mason jars on a sturdy baking sheet. This ensures easy handling when putting them into and taking them out of the oven, and more importantly, it will catch any potential overflow or drips from the filling, keeping your oven clean.
- Bake Until Golden: Bake for the recommended time for your specific pie recipe, usually 30-45 minutes. The pies are done when the crust is beautifully golden brown, and the filling is bubbly and tender when gently poked. If you notice the crust browning too quickly, you can loosely tent the tops of the jars with aluminum foil to prevent over-browning.
- Cool Completely: Once baked, carefully remove the baking sheet from the oven. Let the mason jar pies cool on a wire rack completely before sealing them with lids or serving. This cooling period is absolutely crucial for the filling to set properly and prevent a runny pie.
Step 4: Freezing & Storage – The “Freeze ‘Em” Advantage for Future Enjoyment
The “freeze ’em” tip from TheOfficialHungry is a game-changer for make-ahead convenience and ensuring you always have a delicious dessert on hand. Proper storage extends the life of your delightful mason jar pies:
- Refrigeration for Short-Term: Once completely cooled to room temperature, you can screw on the lids tightly and refrigerate baked fruit pies for up to 3-4 days. Cream-based pies, due to their ingredients, might have a shorter shelf life, typically 1-2 days. Always check your specific filling’s recommendations.
- Freezing Baked Pies for Long-Term: For extended storage, ensure the pies are fully cooled. Then, place the sealed jars (with lids securely on) into the freezer. They can be stored effectively for up to 2-3 months without significant loss of quality. To enjoy a frozen pie, thaw it overnight in the refrigerator, then you can warm it gently in a preheated oven (around 300°F/150°C) until heated through, or simply enjoy it at room temperature, depending on the filling.
- Freezing Unbaked Pies (Less Common for Jars): While technically possible for full-sized pies, freezing unbaked pies directly in jars can sometimes lead to a soggy crust upon baking, due to moisture condensation. For the best results, it’s generally recommended to bake the pies first, then freeze them.
Creative Flavor Combinations and Variations for Your Mason Jar Pies
The true beauty of mason jar pies lies in their incredible versatility. They serve as a perfect canvas for countless flavor combinations, allowing you to tailor them to any season, occasion, or personal preference. Here are some inspiring ideas to get your creative juices flowing and expand your mini pie repertoire:
Classic Fruit Favorites (Perfect for Any Season):
- Apple Crumble Pie: A timeless, comforting classic featuring tender, cinnamon-spiced apples beneath a buttery, crumbly oat topping. Serve warm with a scoop of vanilla ice cream.
- Cherry Pie: A delightful balance of sweet and tart cherries, often enhanced with a hint of almond extract, beautifully showcased under a charming lattice crust.
- Blueberry Lemon Pie: Bursting blueberries infused with the bright, zesty notes of lemon, offering a refreshing twist on a classic.
- Peach Melba Pie: Sliced ripe peaches combined with vibrant raspberries, creating a truly delightful summer treat that’s both sweet and slightly tangy.
- Strawberry Rhubarb Pie: A quintessential spring and early summer favorite, balancing the sweetness of strawberries with the tartness of rhubarb for a uniquely refreshing flavor.
Decadent Cream & Custard Pies (Indulgent and Luxurious):
- S’mores Pie: A playful and irresistible combination featuring a crunchy graham cracker crust, a rich chocolate ganache filling, and a crowning layer of perfectly toasted mini marshmallows.
- Key Lime Pie: Tangy, zesty lime custard nestled in a buttery graham cracker crust. Serve chilled, perhaps with a dollop of fresh whipped cream after baking and cooling.
- Banana Cream Pie: Layers of smooth vanilla custard, freshly sliced bananas, and a generous topping of whipped cream. For optimal freshness, consider adding the fresh bananas and whipped cream closer to serving time.
- Chocolate Silk Pie: A truly rich and smooth chocolate filling, often made with a blend of dark and semi-sweet chocolate, in a crisp cookie or chocolate crust. Pure decadence!
- Pumpkin Spice Pie: The quintessential autumn dessert, featuring a creamy, aromatic pumpkin pie filling generously spiced with cinnamon, nutmeg, ginger, and cloves. Perfect for holiday gatherings.
Savory Twists (Mini Meal Jars for Breakfast, Lunch, or Dinner):
- Chicken Pot Pie in a Jar: A comforting, hearty meal featuring a creamy chicken and mixed vegetable filling (carrots, peas, potatoes) topped with a flaky, golden pastry crust.
- Mini Quiche Jars: Versatile and delicious, these can be filled with a variety of combinations like spinach and feta, ham and cheese, or mushroom and Swiss, making them perfect for breakfast, brunch, or a light lunch.
- Shepherd’s Pie in a Jar: A savory ground beef or lamb filling topped with creamy mashed potatoes, baked until golden brown.
Expert Tips for Mason Jar Pie Success Every Time
To ensure your mason jar pie creations are consistently perfect and stress-free, keep these expert tips in mind. They address common challenges and help you achieve delicious results:
- Choose Wide-Mouth Jars for Ease: While regular mouth jars can work, wide-mouth mason jars are strongly recommended. Their wider opening makes it significantly easier to press in the crust without tearing it, neatly spoon in the filling, and apply the top crust or decorations.
- Never Overfill Your Jars: Always leave adequate headspace – about 1/2 to 3/4 inch from the top rim of the jar – when adding your filling. Overfilling can lead to the pie bubbling over during baking, creating a messy oven and potentially a less attractive finished product.
- Always Vent Your Top Crusts: If you opt for a full top crust, it is crucial to cut a few small slits in the center using a sharp knife. These vents allow steam to escape during baking, preventing the crust from becoming soggy, bubbling excessively, or even bursting.
- Grease Jars Generously for Easy Removal: A well-greased jar interior is key. Use butter, shortening, or cooking spray to coat the inside surfaces thoroughly. This step is vital to prevent the crust from sticking to the glass, ensuring that your pies bake evenly and are easy to scoop out or eat directly from the jar.
- Prevent Soggy Bottoms with Smart Techniques: For very juicy fruit fillings, a common issue can be a soggy bottom crust. To combat this, you have a few options:
- Blind-Baking: Consider blind-baking your bottom crust for 10-15 minutes before adding the filling. This partially cooks the crust, making it more resistant to moisture.
- Moisture Barrier: A thin sprinkle of dry breadcrumbs, crushed cornflakes, or even a tablespoon of instant tapioca pearls (often used in fruit pies) on the bottom crust before adding the filling can help absorb excess moisture.
- Decorate with Flair and Personalization: Don’t underestimate the power of presentation! Get creative with your top crusts using decorative cookie cutters for festive shapes. For gifts, tie a pretty ribbon around the jar or attach a personalized tag with the flavor and baking date.
- Serve at the Optimal Temperature: Consider the best serving temperature for your specific pie. Fruit pies are often delightful when warmed slightly, enhancing their aroma and flavor. Cream and custard pies, however, are typically best served chilled to maintain their creamy texture.
- Use Quality Ingredients: While convenience is great, using fresh, high-quality fruits and good pie crust will significantly impact the overall taste of your mason jar pies.
Conclusion: Your New Go-To Portable Dessert Solution!
Mason jar pies are truly a brilliant solution for anyone looking to combine convenience, undeniable charm, and incredible flavor in one delightful package. Whether you’re hosting a grand party, packing a simple picnic lunch, or just craving a perfectly portioned, single-serving dessert at home, these individual treats are guaranteed to be an absolute hit. They offer a unique blend of rustic elegance and practical design, making them versatile for nearly any occasion.
With the easy-to-follow, stress-free guidance inspired by TheOfficialHungry – simply “lay ’em, bake ’em, and freeze ’em” – you’re well on your way to becoming a mason jar pie master. This comprehensive guide provides you with all the knowledge and tips you need to confidently create a range of delicious mini pies that will impress everyone.
So, gather your ingredients, choose your favorite fillings (or experiment with several!), and get ready to transform humble mason jars into irresistible, edible works of art. Happy baking, and enjoy the ease and delight of your new go-to portable dessert!