
Mastering Ice Cream Storage: Prevent Freezer Burn and Enjoy Every Scoop
Few things bring as much joy as a perfect scoop of ice cream. That moment of creamy bliss, the rich flavor melting on your tongue – it’s a simple pleasure universally adored. However, if you’re like most people, you’ve probably encountered the ultimate disappointment: reaching for your favorite frozen treat only to find it riddled with icy crystals and an unappetizing texture. This common kitchen woe is known as freezer burn, and it has likely been ruining your ice cream experience for years.
Ice cream is at its peak quality and delightful softness immediately after opening. The moment it’s exposed to air and then returned to the freezer, its delicate balance begins to change. The air, combined with fluctuating temperatures, leads to moisture evaporation and the formation of those undesirable ice crystals. This process drastically alters both the taste and texture, turning your smooth, creamy dessert into a grainy, icy shadow of its former self. But what if we told you there are simple, ingenious tricks to prevent this culinary tragedy? Prepare to revolutionize your ice cream storage habits as we reveal the proper techniques to keep your frozen treats perfect, scoop after scoop.
Understanding the Enemy: What is Ice Cream Freezer Burn?
Before we dive into the solutions, let’s truly understand what freezer burn is and why it’s such a menace to your ice cream. At its core, freezer burn is a form of dehydration. When air comes into contact with frozen food, the moisture within the food sublimates – meaning it turns directly from ice to vapor, bypassing the liquid state. This moisture then refreezes on the surface of the food or the container as larger, unwelcome ice crystals. For ice cream, this means the smooth, emulsified fat and water mixture loses its delicate structure, leading to that unpleasantly icy, somewhat stale texture and diminished flavor.
Several factors contribute to freezer burn: exposure to air, temperature fluctuations within your freezer, and the amount of space around the ice cream. Even slight changes in temperature can cause the ice cream to partially melt and then refreeze, encouraging the growth of larger ice crystals. The good news? With a few smart storage hacks, you can significantly mitigate these effects and enjoy perfectly preserved ice cream every single time.
The Ultimate Guide to Preventing Freezer Burn on Ice Cream
These expert-backed methods, championed by culinary experts and shared by sources like Mashed, will transform your ice cream experience. Say goodbye to icy, bland scoops and hello to creamy perfection.
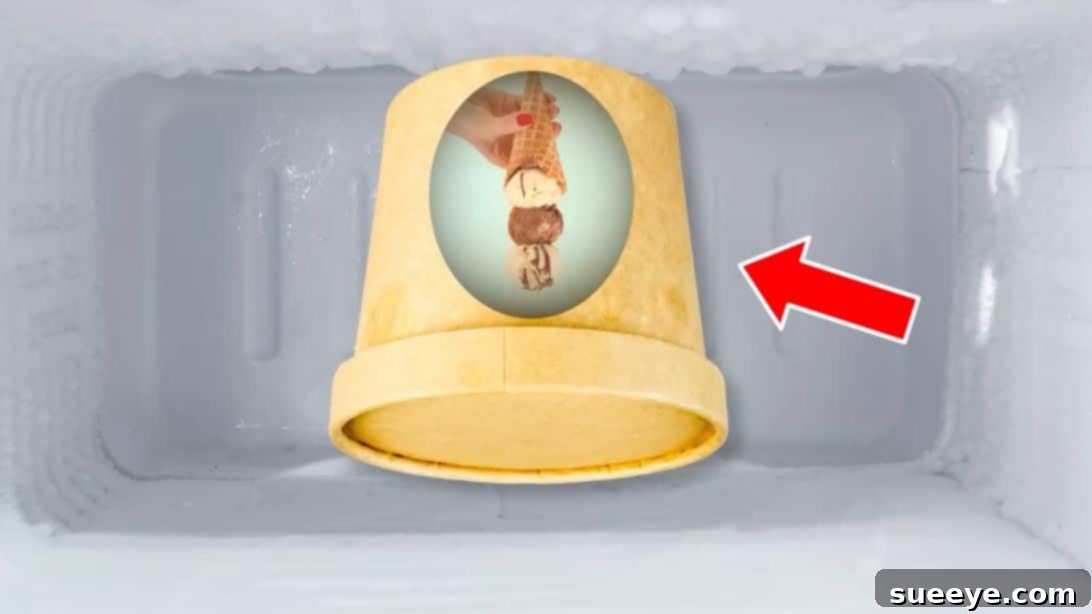
1. The Upside-Down Revolution: Flip Your Carton
This might sound counter-intuitive, but it’s a game-changer. Here’s why it works: during the short time ice cream is out of the freezer – whether for scooping or just while you’re deciding on toppings – the top layer is the most exposed and therefore the first to begin melting. When you place it back in the freezer right-side up, this slightly melted liquid refreezes into larger, crunchy ice crystals right on the surface you’ll scoop from next. This is the prime area for freezer burn to develop.
By simply storing your ice cream container upside down, any ice cream that slightly melts will drip down onto the lid, rather than sitting on the surface of the remaining ice cream. When it refreezes, those ice crystals will form on the lid, keeping the main body of your ice cream smooth and crystal-free. When you open it again, you can simply scrape off any icy build-up from the lid, leaving the delicious ice cream beneath untouched. This brilliant trick is also highly effective for keeping natural peanut butter from separating!
2. Be Swift: Mitigate Time Out of the Freezer
This rule is straightforward but often overlooked: the less time your ice cream spends outside the freezer, the better. Every moment it’s exposed to warmer ambient air, it begins to soften and melt. Even a slight softening and refreezing cycle can lead to the formation of ice crystals. To minimize this, practice efficient scooping. Take your desired portion, then immediately return the container to the freezer. Resist the temptation to leave it on the counter while you enjoy your first few bites or prepare toppings.
Consider scooping individual portions into bowls and then putting the main carton back into the freezer before you sit down to eat. This significantly reduces the window of exposure, preserving the creamy texture for future servings. The less opportunity it has to warm up, the less melting occurs, and consequently, the less freezer burn develops.
3. Optimal Environment: Check Your Freezer’s Temperature
The temperature of your freezer plays a critical role in ice cream preservation. For optimal storage, your freezer should consistently be at or below 0 degrees Fahrenheit (-18 degrees Celsius). Temperatures above this threshold can lead to softer ice cream, which is more prone to melting and recrystallization. A colder, more stable temperature ensures that ice cream remains solidly frozen, minimizing the microscopic melting and refreezing cycles that cause ice crystals to form.
Regularly check your freezer’s temperature with a thermometer. If it’s too warm, adjust the settings. Also, avoid storing ice cream in the freezer door, as this area experiences the most significant temperature fluctuations every time the door is opened. The back of the freezer is generally the coldest and most stable spot, making it the ideal location for your precious pints.
4. Airtight Armor: Use Plastic Wrap or Wax Paper Directly on the Surface
Air is the primary culprit behind freezer burn. When ice cream is exposed to air, moisture evaporates from its surface, which then refreezes as crunchy ice crystals. To combat this, create an impenetrable barrier between the ice cream and the air in the carton. After scooping, press a piece of plastic wrap or wax paper directly onto the surface of the remaining ice cream, ensuring there are no air bubbles trapped underneath.
This is crucial: don’t just drape it over the rim of the carton. The goal is to create a tight seal that prevents air from evaporating the moisture inside the ice cream itself. If you don’t have plastic wrap or wax paper, an airtight container can also work wonders, especially if you transfer the ice cream into a container that matches the current volume of the ice cream, minimizing airspace.
5. Specialized Care: Storing Homemade Ice Cream
Homemade ice cream often lacks the stabilizers and emulsifiers found in commercial varieties, making it even more susceptible to ice crystal formation. Therefore, proper storage is paramount. When storing homemade ice cream, choose the smallest possible container that fits the volume of your creation. The less empty space in the container, the less air is trapped, which translates to fewer ice crystals forming.
Additionally, aim for the quickest possible freeze. Place your homemade ice cream in the coldest part of your freezer (usually the very back) as soon as it’s churned and ready for hardening. A rapid freeze prevents the formation of large ice crystals, ensuring your homemade treat maintains its smooth, luxurious texture. Don’t forget to press plastic wrap directly onto the surface of your homemade ice cream too!
Additional Pro Tips for Ice Cream Longevity
Don’t Store in the Freezer Door
As mentioned earlier, the door of your freezer is the most inconsistent temperature zone. Every time the door opens, the ice cream there is exposed to warmer air, leading to repeated thawing and refreezing. For optimal preservation, always place your ice cream deep inside the main freezer compartment where temperatures are most stable.
Warm Your Scoop
While not strictly a storage tip, warming your ice cream scoop under hot water before digging in can make a huge difference. A warm scoop glides effortlessly through even rock-solid ice cream, allowing you to get your portion quickly and return the carton to the freezer faster, thus reducing its exposure to air. This technique pairs perfectly with our tip to minimize out-of-freezer time. For more detailed advice on this, you might find our related guide helpful: How to Scoop Ice Cream When It’s Frozen Solid.
Consume Sooner Rather Than Later
Even with the most meticulous storage practices, ice cream quality does degrade over time. While it can remain safe to eat for several months, its peak flavor and texture are best enjoyed within a few weeks of opening. Think of it as a perishable delight – the sooner you enjoy it, the better the experience will be. Don’t hoard your ice cream; savor it!
Avoid Refreezing Melted Ice Cream
If your ice cream has completely melted, it’s best not to refreeze it. The structure of the ice cream will be compromised, resulting in a grainy, unappetizing consistency. While it might still be safe to eat, the quality will be severely diminished, and you won’t get that dreamy, creamy texture you desire. It’s a sad truth, but sometimes, a melted pint is best enjoyed as a milkshake or simply discarded.
You’ve Probably Been Storing Ice Cream Wrong – Until Now!
The quest for the perfect scoop of ice cream is a shared journey, and freezer burn has been a formidable foe for too long. By implementing these simple yet effective storage techniques, you can banish icy crystals and preserve the delightful creaminess of your favorite frozen dessert. From the clever trick of storing your carton upside down to ensuring an airtight seal and maintaining an optimal freezer temperature, each tip contributes to a superior ice cream experience.
No longer will you have to compromise on taste or texture. Embrace these expert insights and transform the way you enjoy ice cream. Go ahead, open that pint with confidence, knowing that every scoop will be as fresh, soft, and delicious as the first. Happy scooping!