
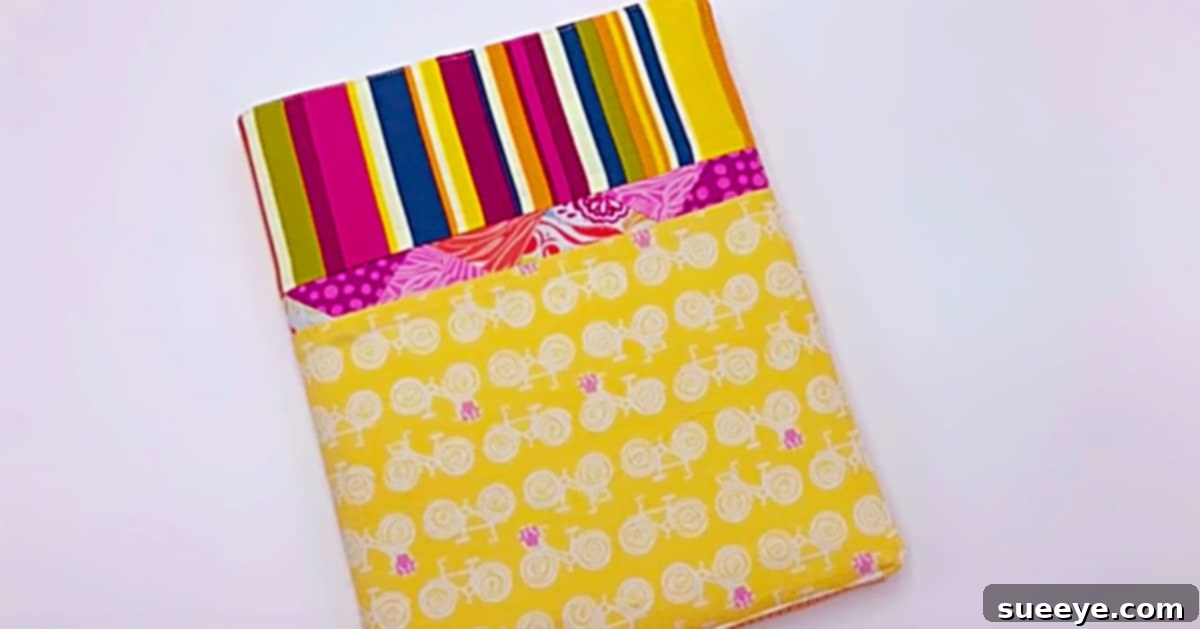
DIY Patchwork Notebook Cover: Craft a Unique & Artistic Statement for Your Journal
Imagine transforming an ordinary notebook or sketchbook into a personalized work of art that not only looks stunning but also offers practical protection. The **DIY Patchwork Notebook Cover** is a sewing project that effortlessly combines aesthetics with utility, making it a perfect accessory for students, artists, writers, and anyone who appreciates a touch of handmade charm. This cover goes straight from your bag to your desktop, making all your journaling or sketching activities feel more artistic and inspiring. What’s more, it’s surprisingly simple to create, even for those new to sewing, and offers a fantastic way to utilize leftover fabric scraps.
The Inspiration Behind This Artistic Creation
My journey to crafting this delightful patchwork notebook cover began with my daughter, who recently embarked on an exciting new drawing class at The Dougherty Arts Center in Austin, Texas. As any parent supporting a budding artist knows, these creative pursuits often come with a significant investment in specialized supplies. For her class, we acquired a comprehensive set of charcoal pencils, a vibrant collection of Copic markers, and a variety of fine Prism Color drawing markers. These were not inexpensive items; they were precious tools crucial for her artistic development, and I was keen to protect them and her accompanying art journal from the inevitable wear and tear of being carried daily.
The thought of these valuable supplies, alongside her burgeoning portfolio of sketches, simply existing unprotected in her book bag was a concern. I wanted a solution that would not only provide a safe haven for her materials but also reflect her artistic spirit. A plain, generic notebook cover felt inadequate for a journal that would soon be filled with her hard work and imaginative creations. I envisioned something vibrant, unique, and clearly artistic – a cover that would hint at the beauty contained within.
My search led me to the wonderful world of DIY projects on YouTube, where I discovered the concept of a patchwork notebook cover. It was an instant match for what I had in mind! Not only did it promise a beautiful, artistic outcome, but it also presented a perfect opportunity to use some gorgeous fabric scraps I had bought on sale at Joann’s Fabrics the previous month. This made the project incredibly affordable and satisfying, giving new life to fabrics that might otherwise have gone unused. With the design chosen, I eagerly began by taking precise measurements of her notebook, ready to embark on this creative endeavor.
Why a DIY Patchwork Notebook Cover is a Must-Have
Beyond my personal story, there are compelling reasons why this project should be on your crafting list:
- **Ultimate Personalization:** Unlike mass-produced covers, a DIY patchwork cover allows for unparalleled customization. You can select fabric scraps that tell a story, match your personal aesthetic, or incorporate colors and patterns that bring you joy. It makes your notebook uniquely yours, a reflection of your individuality.
- **Enhanced Protection:** A sturdy fabric cover provides a vital layer of defense against spills, bumps, scratches, and the general wear and tear that notebooks endure in daily use. This extends the life of your journal and protects the valuable contents within, whether they are notes, drawings, or cherished memories.
- **Eco-Friendly and Sustainable Crafting:** This project is a fantastic opportunity for upcycling. By repurposing fabric scraps from old clothing, previous sewing projects, or thrift store finds, you’re actively reducing textile waste and contributing to a more sustainable lifestyle. It’s crafting with a conscience!
- **Cost-Effective Solution:** Why buy an expensive cover when you can create a beautiful one for a fraction of the cost, often using materials you already own? This project proves that stunning results don’t have to break the bank.
- **A Thoughtful & Unique Gift:** A handmade patchwork notebook cover makes an incredibly heartfelt and memorable gift. It shows care, effort, and a personal touch that store-bought items simply cannot replicate, perfect for any student, artist, writer, or planner enthusiast in your life.
- **Develop New Skills & Enjoy Therapeutic Benefits:** Sewing, especially patchwork, is a wonderfully meditative and satisfying hobby. It allows you to practice precision, learn basic sewing techniques, and experience the immense satisfaction of creating something beautiful and functional with your own hands.
Gathering Your Creative Arsenal: Materials You’ll Need
One of the beauties of this project is its accessibility. Most of the materials are common sewing staples, and the use of scraps makes it even more economical. Here’s a detailed list to ensure you’re well-equipped:
- **Your Target Notebook or Sketchbook:** This is the foundation of your project. Ensure it’s the exact one you intend to cover, as precise measurements are crucial for a perfect fit.
- **Assorted Fabric Scraps for Patchwork:** This is where the magic happens! Gather a variety of small to medium-sized pieces of cotton fabric. Quilting cottons are ideal due to their stable weave and ease of handling, but you can experiment with other non-stretch fabrics. Think about complementary colors, contrasting patterns, or even a monochromatic theme.
- **Main Outer Fabric:** A larger piece of fabric (matching your cover dimensions) that will form the main body of the cover. This can be a solid color to highlight your patchwork or a coordinating pattern.
- **Lining Fabric:** A piece of fabric for the inside of the cover. This helps protect your notebook, provides a neat finish, and adds an extra layer of durability. Cotton or a light canvas works well.
- **Lightweight Fusible Interfacing (Highly Recommended):** This iron-on material adds structure, body, and durability to your fabric cover, preventing it from feeling flimsy and helping it maintain its shape.
- **Standard Sewing Machine:** While hand-sewing is possible, a machine will ensure straight stitches and a much quicker, more professional finish.
- **All-Purpose Polyester Thread:** Choose a color that either matches your dominant fabric or is neutral enough to blend with all your patchwork pieces.
- **Fabric Scissors or Rotary Cutter and Mat:** Essential for precise, clean cuts, especially when dealing with multiple small patchwork pieces.
- **Quilting Ruler and Fabric Marker/Chalk:** For accurate measuring and marking cut lines.
- **Plenty of Pins or Fabric Clips:** To hold fabric layers securely in place during stitching.
- **Iron and Ironing Board:** Indispensable for pressing seams flat. This step cannot be overstated for achieving a crisp, professional-looking patchwork and overall finish.
The Crafting Journey: Step-by-Step Guide to Your Patchwork Cover
The process of creating this notebook cover is straightforward and immensely satisfying. I started by meticulously measuring my daughter’s notebook to guarantee a perfect, snug fit.
1. Precision in Measurement: The Foundation
This is the most critical first step. You’ll need to measure your notebook carefully:
- **Height:** Measure the vertical dimension of your notebook.
- **Width of Front Cover:** Measure the horizontal dimension of the front cover.
- **Width of Back Cover:** Measure the horizontal dimension of the back cover.
- **Spine Width:** Measure the width of the notebook’s spine.
To these measurements, you’ll add seam allowances. A common allowance is 1/2 inch (1.25 cm) on all sides. For your main outer fabric and lining, you will cut one large rectangle. Its height will be your notebook’s height plus seam allowances. Its width will be (front cover width + back cover width + spine width + extra for snugness, typically 1/2″ to 1″ + seam allowances).
2. Designing and Cutting Your Patchwork Elements
Now, unleash your creativity! Decide on the design for your patchwork. Will it be a simple strip across the center, a border, or more intricate blocks? Cut your chosen fabric scraps into the desired shapes and sizes. Remember to include a seam allowance for each individual piece (e.g., if you want a finished 2-inch square, cut a 2.5-inch square if using 1/4-inch seam allowances). Arrange them to visualize your final design.
3. Assembling the Patchwork Trim
With your fabric pieces cut, it’s time to sew them together. Place two pieces right sides together, align the edges, and stitch them with your chosen seam allowance (e.g., 1/4 inch). After each seam, press it open or to one side with your iron. This step is crucial for creating flat, crisp seams and ensuring your patchwork lies smoothly. Continue joining pieces until your patchwork panel is the desired size for your cover design.
4. Preparing Main Fabrics and Interfacing
Cut your main outer fabric and lining fabric to the precise dimensions calculated in Step 1. If you’re using fusible interfacing, cut it slightly smaller than your main outer fabric piece (usually 1/2 inch smaller all around to avoid stitching through glue on the edges). Following the manufacturer’s instructions, iron the interfacing to the wrong side of your main outer fabric. This adds essential body and stability to your finished cover.
5. Constructing the Outer Cover with Patchwork
This is where the main body of the cover takes shape. My next step involved piecing together the outer parts of her gorgeous artistic notebook. Take your main outer fabric piece. If your patchwork element is meant to be a central band or a distinct section, sew it onto your main outer fabric, right sides together, carefully aligning the edges. Press the seams open or to one side for a neat finish.
6. Crafting the Inner Flaps
To securely hold your notebook, you’ll need two inner flaps. These are typically rectangular pieces of fabric (you can use your lining fabric or a complementary solid). Measure the desired depth of your flaps (usually about one-third to half the width of your notebook cover) and cut two pieces according to this dimension and the height of your main cover. Hem one long edge of each flap. These will be the visible, finished edges that tuck into your notebook covers.
7. Final Assembly of the Cover
Lay your assembled outer cover piece (with patchwork) right side up. Place your two hemmed inner flap pieces on top, raw edges aligned with the raw short ends of the outer cover, and finished edges pointing inwards towards the center. Pin them securely. Finally, place your lining fabric piece right side down on top of everything, sandwiching the flaps in between. Pin all layers together around the entire perimeter.
8. Stitching and Finishing Touches
Stitch around the entire perimeter using your chosen seam allowance, leaving a 3-4 inch (7.5-10 cm) opening along one of the bottom edges. This opening is crucial for turning the cover right side out. Clip the corners diagonally to reduce bulk and ensure crisp points. Carefully turn the entire cover right side out through the opening. Use a point turner or a dull pencil to gently push out the corners, achieving neat, sharp angles. Press the entire cover flat, ensuring the raw edges of the opening are neatly tucked inwards. Finish by topstitching all the way around the perimeter, which not only closes the opening but also gives your cover a polished, professional edge.
Expert Tips for a Flawless Finish
- **Pressing is Your Best Friend:** I cannot stress this enough. Pressing your seams after every stitch line makes an enormous difference in the quality and professionalism of your finished project. It ensures flatness and precision.
- **Sharp Tools Make Sharp Work:** Always use sharp fabric scissors or a fresh rotary cutter blade. Dull tools can fray fabric and lead to inaccurate cuts, which are detrimental in patchwork.
- **Take Your Time:** Sewing is not a race. Go slowly, especially when stitching curves or topstitching, to ensure neat, even stitches.
- **Test Your Stitch Settings:** Before sewing on your main project, always test your stitch length and tension on a scrap piece of the same fabric.
- **Embrace Imperfection:** If a seam isn’t perfectly straight, don’t fret! The beauty of patchwork is its unique, handcrafted nature. Embrace it!
The Stunning Results: A Glimpse of Joy and Admiration
This notebook cover was an absolute breeze to make, and the gratification from the finished product was immediate and immense. When my daughter proudly took it to her drawing class, the reaction was exactly what I had hoped for, and even more delightful. From the minute she pulled it out of her book bag, it commanded attention. She excitedly recounted that “the entire class gasped in unison!” – a truly heartwarming testament to its unique charm and artistic appeal.
Seeing the pride on her face and hearing about the admiration from her classmates made every stitch worthwhile. It wasn’t just a cover; it was a conversation starter, a symbol of her individuality, and a beautiful reflection of the creative journey she was embarking upon. I couldn’t be more happy with the stunning results of this fantastic project. It beautifully illustrates the power of handmade items – they carry a story, a touch of love, and an unparalleled uniqueness that mass-produced goods simply cannot replicate.
So, if you’re searching for a simple, cost-effective, and incredibly rewarding sewing project, I wholeheartedly encourage you to try creating your own **DIY Patchwork Notebook Cover**. It’s perfect for adding a personal flourish to your own journals, protecting valuable sketchbooks, or crafting a heartfelt gift that will be cherished for years to come. Dive into your fabric stash and happy sewing!