
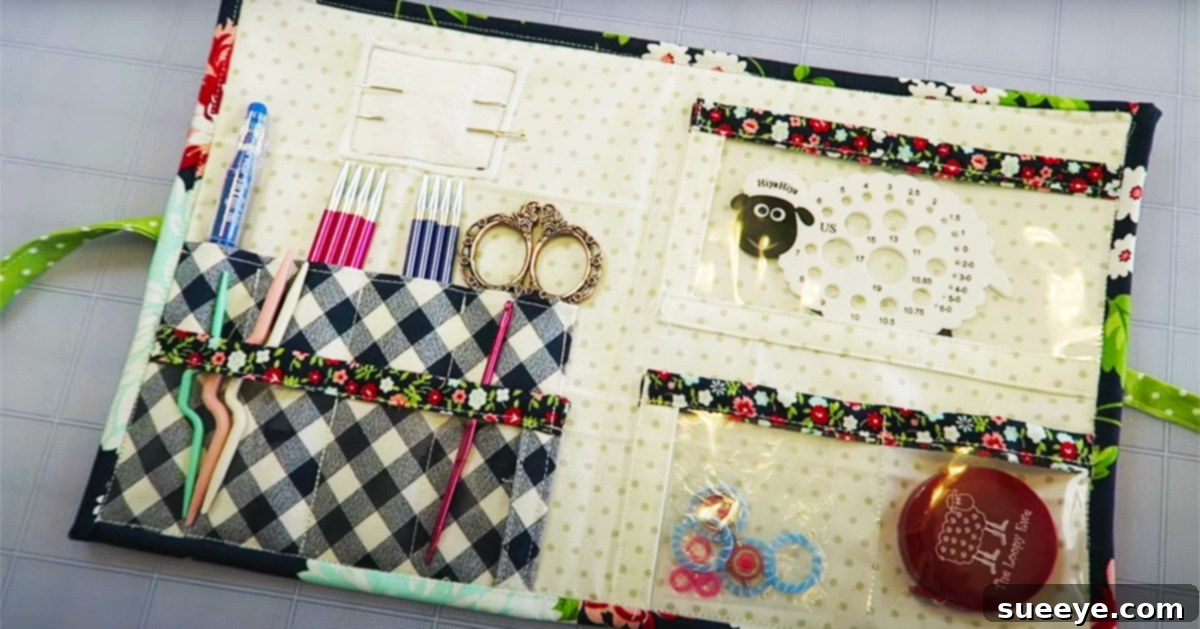
DIY Craft Supply Caddy: Organize Your Essentials with This Beginner-Friendly Sewing Project
Are you tired of rummaging through cluttered drawers and bags to find your knitting needles, sewing notions, or embroidery floss? Imagine having all your essential craft supplies neatly organized in one portable, stylish pouch. A DIY supply caddy is the perfect solution, offering both convenience and a delightful crafting experience. This charming project not only helps you keep your creative space tidy but also makes a fantastic handmade gift for fellow crafters.
Whether you’re an experienced seamstress or just starting your sewing journey, crafting your own sewing supply caddy is incredibly rewarding. This particular project, guided by the talented Erica Arndt on YouTube, is specifically designed to be accessible for beginners, yet satisfying for all skill levels. Erica breaks down each step with exceptional clarity and detail, ensuring you won’t feel overwhelmed. Her comprehensive instructions, coupled with precise fabric measurements provided in the video’s description box, make this an achievable and enjoyable endeavor.
Why Every Crafter Needs a DIY Supply Caddy
A well-organized workspace is the foundation of any successful creative project. A custom-made supply caddy goes beyond simple storage; it transforms how you interact with your tools and materials. Here’s why this DIY project is a game-changer for any craft enthusiast:
- Unmatched Organization: Designed with multiple pockets and compartments, a supply caddy ensures that every needle, bobbin, thimble, and scissor has its designated place. No more lost items or tangled threads!
- Effortless Portability: Love to craft on the go? This caddy is ingeniously designed to fold up compactly, securing all your tools inside. It’s perfect for taking to classes, craft groups, or simply moving your project from one room to another without leaving anything behind.
- Personalized Style: Unlike generic store-bought organizers, a DIY caddy allows you to infuse your personal style into its design. Choose fabrics that reflect your personality, match your craft room decor, or incorporate themes that inspire your creativity.
- Durability and Protection: Made from sturdy fabrics and featuring thoughtful construction, your handmade caddy will protect your valuable tools from damage and dust, prolonging their lifespan.
- Beginner-Friendly Project: Despite its professional appearance, this caddy project is surprisingly simple. Erica Arndt’s tutorial is a masterclass in breaking down complex tasks into manageable steps, making it an ideal first project for new sewers looking to build confidence and skills.
Embark on Your Crafting Journey with Erica Arndt’s Tutorial
The beauty of this DIY supply caddy lies in its approachable design and the exceptional guidance provided by Erica Arndt. Her YouTube tutorial is a treasure trove of tips and techniques that make the sewing process smooth and enjoyable. Erica’s teaching style is patient and thorough, ensuring that even those new to sewing can follow along with confidence. She covers everything from preparing your fabrics to executing the finishing touches, making sure you understand the ‘why’ behind each step, not just the ‘how’.
Many beginner sewing projects can be daunting, but Erica’s method minimizes complexity while maximizing the quality of the finished product. The video’s clear visuals complement her verbal instructions perfectly, allowing you to pause, review, and master each technique at your own pace. By the end of the tutorial, you’ll not only have a functional and beautiful supply caddy but also a newfound confidence in your sewing abilities. Don’t hesitate to visit her channel to access the full, detailed instructions and bring this fantastic project to life.
Essential Supplies for Your Craft Caddy
Before diving into the sewing process, gathering all your materials is crucial for a seamless crafting experience. Most of these items are standard sewing supplies, making it easy to get started if you already have a basic kit. Here’s a detailed list of what you’ll need:
- Fusible Fleece: This material provides structure and padding to your caddy, giving it a soft yet firm feel. It’s fused to the outer fabric using an iron, simplifying the process of adding body.
- Outside Fabric: This will be the main visible fabric of your caddy. Choose a durable cotton or canvas in a print or color that you love, as it will define the aesthetic of your finished project.
- Lining Fabric: Used for the inside of the caddy, this fabric helps create a neat finish and can add a contrasting pop of color or pattern. Cotton is generally a good choice for its workability.
- Fabric for Pockets: You’ll need various fabric pieces for the different internal pockets. These can be coordinated with your lining or outside fabric, or you can use contrasting scraps for a more eclectic look.
- Binding Fabric: This fabric is used to finish the raw edges of your caddy and pockets, providing a clean, professional look and added durability. Choose a complementary color or pattern.
- Fabric Strips to Bind the Pockets: Smaller strips specifically for binding the individual pockets, ensuring all internal seams are neatly enclosed.
- Fabric Scraps: Perfect for smaller details or accent pieces, especially if you want to create a patchwork effect or use up remnants from previous projects.
- Cotton Batting or Fleece for Pin Holder: A small piece of soft, dense material needed to create the internal pin cushion, allowing you to safely store your pins and needles.
- Clear Lightweight Vinyl: Essential for creating clear pockets, which are fantastic for visible storage of small items like buttons, clips, or measuring tapes. Choose a lightweight, flexible vinyl for easy sewing.
- Soft Healing Mat: A self-healing mat is indispensable for protecting your work surface and providing an accurate cutting base when using a rotary trimmer.
- Rotary Trimmer: This tool, combined with a clear acrylic ruler, allows for precise, clean cuts of fabric, significantly speeding up the cutting process compared to scissors.
- Clear Acrylic Ruler: Necessary for accurate measuring and straight cuts with your rotary trimmer. Look for one with clear markings for various measurements.
- Sewing Machine: A standard sewing machine is required for all the stitching work. Ensure it’s in good working order and threaded correctly.
- Erasable Pens: Fabric-specific pens (like Frixion pens or tailor’s chalk) are great for marking your fabric for cutting or stitching lines, as they can be easily removed with heat or water.
- 100 percent Cotton Thread: High-quality cotton thread in a color that matches or complements your fabrics is recommended for strong, durable seams.
- Iron: An iron is vital for pressing seams, fusing the fleece, and ensuring crisp, professional-looking finishes throughout the project.
Step-by-Step Guide to Crafting Your Supply Caddy
While Erica Arndt’s video provides the ultimate visual and detailed instruction, understanding the general flow of the project can help you prepare. The process involves several key stages, each building upon the last to create a functional and beautiful organizer.
Step 1: Fabric Preparation and Fusing
The journey begins with preparing your fabrics. The first crucial step is to cut all your fabric pieces according to the measurements provided in Erica’s tutorial description. Precision here is key for a well-aligned final product. Once cut, you will take your outside fabric and carefully fuse the fusible fleece to its wrong side using a hot iron. This step adds necessary body and stability to the caddy, preventing it from collapsing and protecting its contents. Pressing the fabrics together ensures a strong bond, and then this main piece is set aside while you work on the interior components.
Step 2: Constructing Pockets and Internal Features
With the main caddy body prepared, attention shifts to creating the functional interior. This involves laying out all your pocket pieces and other internal elements where they will eventually be sewn. This pre-planning allows you to visualize the arrangement and ensure everything fits perfectly. You’ll construct various types of pockets, including those made from fabric scraps and potentially clear vinyl for easy visibility of smaller items. Additionally, you’ll create the small pin holder using cotton batting or fleece, securely attaching it to one of the interior panels. Each pocket is carefully sewn and bound with fabric strips to create clean edges and robust construction, ready to hold all your tools.
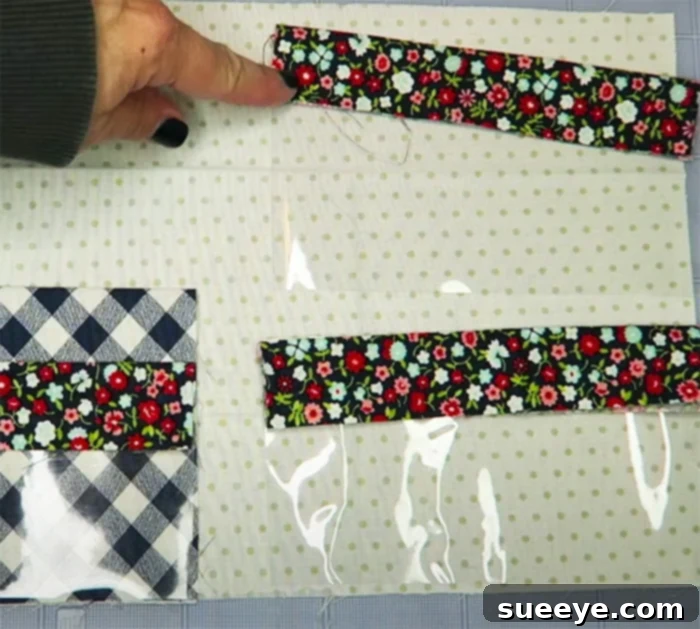
Step 3: Assembling the Caddy Body
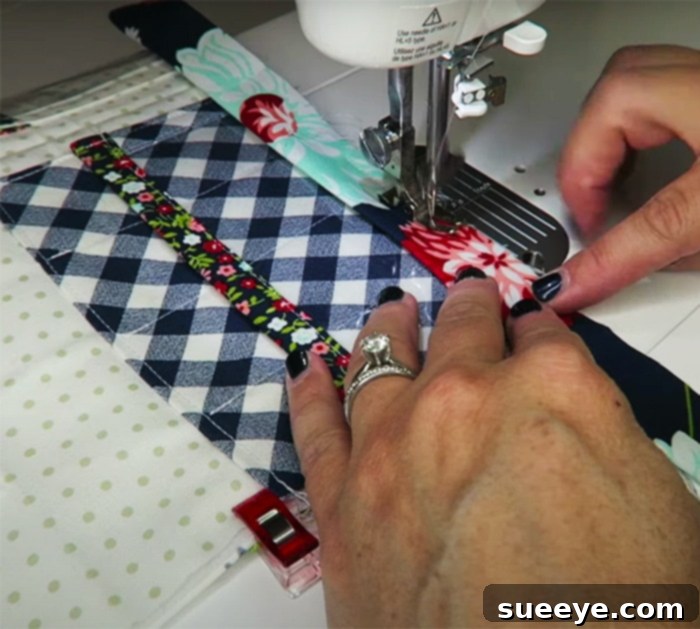
Once all the individual pockets and internal features are complete and attached to the lining fabric, it’s time to bring the entire caddy together. This involves carefully aligning the prepared lining piece (with all its pockets) with the fused outer fabric. You’ll then sew these main pieces together, typically along the perimeter, leaving an opening for turning. The raw edges are then neatly enclosed using binding fabric. This step creates the essential structure of the caddy, ensuring all interior elements are securely in place and the overall form takes shape. Precision in sewing during this stage is important for a polished final look.
Step 4: The Finishing Touches and Closure
The final stage focuses on completing the caddy and adding its unique closing mechanism. This often involves applying the remaining binding fabric to all external raw edges, which not only gives a professional finish but also reinforces the structure. You’ll also create and attach the fabric ties that allow the caddy to be neatly rolled up and secured, resembling a charming little notebook. This last step is where all your hard work comes together, transforming individual fabric pieces into a fully functional and aesthetically pleasing craft organizer.
For the most precise and detailed instructions, including visual demonstrations of each stitch and technique, continue to watch Erica Arndt’s tutorial on YouTube. Her video is an invaluable resource that ensures you achieve a beautiful, professional-looking result.
Customization and Personalization: Make It Yours!
One of the most exciting aspects of a DIY project is the ability to infuse your personal style. This supply caddy offers endless opportunities for customization, allowing you to create something truly unique. Consider these ideas to make your caddy truly your own:
- Fabric Choices: The possibilities are limitless! Choose fabrics that reflect your favorite colors, patterns, or even themes. Opt for whimsical prints for a fun touch, elegant florals for a sophisticated look, or solid colors for a minimalist aesthetic. You could even use themed fabrics – think cute sheep for a knitting caddy, or vintage sewing notions for a sewing organizer.
- Embellishments: Add small details like decorative stitching, fabric labels, or even small embroidered motifs. A personalized patch with your initial or a small charm can also elevate the design.
- Pocket Modifications: While the tutorial provides a great layout, feel free to adapt the pocket sizes and configurations to suit your specific tools. Need more space for long knitting needles? Adjust a pocket. Want smaller slots for embroidery floss bobbins? Customize accordingly.
- Closure Variations: Instead of ties, you could explore other closures like a magnetic snap, a simple button and loop, or even a zipper if you’re feeling adventurous.
- Purpose-Specific Design: While excellent for sewing, knitting, and embroidery, this versatile caddy can be adapted for other hobbies. Use it for journaling supplies, art pencils and brushes, small beading tools, or even as a travel organizer for toiletries or tech gadgets.
The ability to select your fabrics and tailor the design truly makes this DIY craft organizer a reflection of your creativity and needs. It’s not just a tool; it’s an extension of your artistic expression.
The Perfect Handmade Gift for Every Crafter
Even if you don’t frequently sew or knit yourself, this DIY supply caddy makes an incredibly thoughtful and practical gift for anyone passionate about crafts. Imagine the delight on a friend’s face when they receive a handmade item specifically tailored to their hobby. It shows immense care and effort, far surpassing the value of a store-bought item.
Here’s why it’s an ideal gift:
- Thoughtful and Personal: You can choose fabrics that match their favorite colors, their craft room decor, or reflect their unique personality and interests. This level of personalization makes the gift truly special.
- Highly Functional: Crafters are always looking for better ways to organize their tools. This caddy solves a common problem by providing a portable, efficient, and attractive storage solution.
- Inspires Creativity: A beautiful new organizer can often spark new creative projects, making it a gift that keeps on giving.
- Portable and Practical: For friends who attend craft workshops, travel with their projects, or simply enjoy crafting in different rooms of their home, the caddy’s portability is an invaluable feature.
- Suitable for Various Crafts: While perfect for knitting, sewing, or embroidery, it can also be used for scrapbooking tools, art supplies, or even as a versatile travel case for other small essentials.
The compact design, which ties up neatly like a little notebook, adds to its charm and makes it an absolute joy to give and receive. It’s a gift that says, “I understand your passion, and I want to help you enjoy it even more.”
Conclusion: Start Your Creative Journey Today!
Crafting a DIY supply caddy is more than just a sewing project; it’s an investment in organization, a burst of personal style, and a testament to the joy of handmade goods. From its practical benefits of keeping your craft supplies tidy and portable, to its potential as a heartfelt, customized gift, this project offers immense value. Erica Arndt’s beginner-friendly tutorial ensures that anyone, regardless of their sewing experience, can successfully complete this charming and useful organizer.
So, gather your fabrics, fire up your sewing machine, and embark on this delightful creative adventure. You’ll not only end up with a beautiful and functional craft organizer but also gain valuable sewing skills and the immense satisfaction of creating something wonderful with your own hands. Don’t wait – dive into the world of organized crafting and make your very own DIY supply caddy today!