
Ultimate Guide to Creating a Scrappy Quilted Zipper Pouch: Your Next Favorite DIY Project
Every crafter knows the dilemma: a growing stash of beautiful fabric scraps, too precious to discard, yet seemingly too small for significant projects. But what if those seemingly insignificant pieces could be transformed into something truly spectacular and wonderfully functional? We are constantly seeking out inventive ways to breathe new life into these textile treasures, not just for their inherent charm and whimsical design potential, but also because embracing sustainable practices in our crafting journeys just makes good sense. Letting nothing go to waste is a principle that resonates deeply within the creative community, offering both economic and environmental benefits.
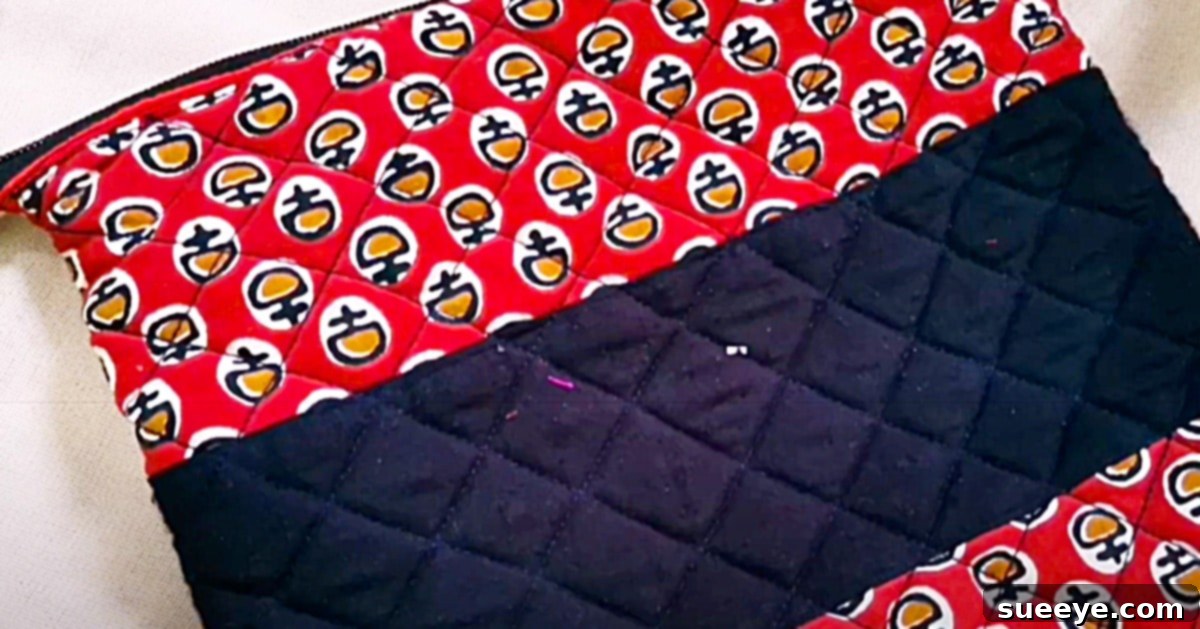
It was precisely this mindset that led us to a delightful discovery: the ingenious scrappy quilted zipper pouch tutorial by Mr. & Mrs. Thowsif on YouTube. From the moment we laid eyes on it, we knew we had stumbled upon a true gem. This project is not only incredibly versatile – requiring no rigid pattern and offering complete freedom to customize its size – but it also beautifully highlights the unique character that only a collection of diverse fabric scraps can provide. Whether you envision a compact coin purse, a stylish makeup bag, a handy pencil case, or a spacious travel organizer, this DIY zipper pouch project adapts effortlessly to your needs. The basic construction involves creating two lining fabric pieces, a top piece (which can be any quilted block design you prefer, allowing for endless creative expression), and a layer of batting. The magic truly comes alive as these layers are quilted together, typically with a simple yet elegant horizontal top stitch, transforming humble scraps into a cohesive and durable accessory. This makes it an ideal quilting for beginners project, offering a manageable scale to learn essential techniques.
Essential Materials for Your Scrappy Quilted Zipper Pouch Adventure
Embarking on this fun and rewarding sewing journey requires a few key components. The beauty of a “scrappy” project lies in its flexibility; you might already have most of these items in your existing craft supply, making it an incredibly budget-friendly endeavor!
- Assorted Fabric Scraps: This is where the personality of your pouch truly shines! Gather a vibrant collection of various sizes, patterns, and colors. These will form the creative patchwork quilt block for the exterior of your pouch. Consider combining different fabric types like cotton, linen, or even lightweight denim for added texture, ensuring they are all machine washable and compatible in terms of care. Aim for pieces that can be easily cut into strips, squares, triangles, or irregular shapes that can be pieced together. Think about a cohesive color scheme, or embrace a truly eclectic, “anything goes” approach for a uniquely charming finish.
- Backing and Lining Fabric: You’ll need two pieces of fabric for the interior lining of your pouch, which also effectively serves as the backing for your quilted front panel. Choose a fabric that complements your scrap collection, perhaps a solid color that picks up a hue from your scraps, or a subtle print that doesn’t compete. Cotton quilting fabric is an excellent choice for its durability, ease of handling, and wide range of available designs. Ensure it’s sturdy enough to give structure but not overly thick, which could add unnecessary bulk to your seams.
- Batting or Fusible Interfacing: This crucial layer provides structure, softness, and that signature quilted look.
- Batting: A thin layer of cotton, polyester, or bamboo batting will give your pouch a plush, padded feel and make it ideal for traditional quilting. It’s excellent for absorbing slight impacts and giving the pouch a robust, tactile form, making it perfect for protecting contents.
- Fusible Fleece or Interfacing: If you prefer a stiffer, more structured pouch without traditional quilting stitches, fusible fleece is a fantastic alternative. It’s ironed onto the wrong side of one of your fabric layers, instantly adding body, stability, and a soft padding. A medium-weight fusible interfacing can also be used for a less bulky, yet still structured, finish, ideal for flatter pouches.
- Zipper: The practical and stylish closure for your pouch! Select a zipper that is at least 1-2 inches longer than the desired width of your finished pouch. This extra length allows for easier installation, as you can trim the excess later. Nylon coil zippers are often recommended for pouches due to their flexibility, ease of sewing, and ability to be cut without fraying, but a metal zipper can add a chic, professional, and slightly more robust touch. Choose a color that either blends seamlessly or provides a striking contrast with your chosen fabrics to make a statement.
- Coordinating Thread: High-quality polyester all-purpose thread is usually best for its strength and durability. Choose a color that matches or subtly contrasts with your lining fabric and the general tone of your scrap fabric design. You might even opt for a contrasting thread for your topstitching to make the quilting lines stand out as a design element.
- Sewing Machine: A standard home sewing machine capable of a straight stitch is all you need for this project. Ensure it’s in good working order, regularly cleaned, and you have a zipper foot attachment (often included with machines), which is invaluable for installing zippers neatly and close to the teeth.
- Cutting Mat & Rotary Cutter: These tools are indispensable for precise and efficient fabric cutting, especially when working with many small pieces for patchwork. A self-healing cutting mat protects your work surface, and a sharp rotary cutter allows for quick, clean cuts, essential for accurate piecing.
- Fabric Scissors: A good pair of sharp fabric scissors is essential for trimming threads, clipping curves, and making those initial rough cuts of fabric. Reserve them solely for fabric to keep them exceptionally sharp and prevent dulling.
- Iron and Ironing Board: Pressing seams open or to one side is critical for neat patchwork, accurate construction, and achieving a professional finish. A well-pressed project always looks significantly better and is easier to sew.
- Pins or Fabric Clips: To hold fabric layers together securely before sewing, preventing shifting and ensuring accurate seams. Fabric clips are particularly useful when working with thicker layers.
- Fabric Marker or Chalk: Useful for marking cutting lines, quilting lines, or placement guides directly onto your fabric without leaving permanent marks.
- Seam Ripper: Every sewer, regardless of experience, needs one! For those inevitable moments when a stitch needs to be unpicked – it’s a tool for correction, not a sign of failure.
Step-by-Step Guide: Crafting Your Scrappy Quilted Zipper Pouch
This comprehensive guide will walk you through the process of creating your very own scrappy quilted zipper pouch, drawing inspiration from the clear techniques demonstrated by Mr. & Mrs. Thowsif. Get ready to transform your fabric remnants into a beautiful and functional accessory!
Step 1: Planning Your Pouch and Preparing Your Scraps
Begin by envisioning the final size and shape of your finished pouch. The beauty of this project is its adaptability; whether you want a small coin purse or a larger travel bag, the fundamental construction principles remain the same. Once you have a rough idea of your desired dimensions, start gathering your fabric scraps. There’s no right or wrong way to choose them – mix and match colors, patterns, and textures for an eclectic look, or stick to a specific color palette for a more cohesive design. Iron all your scraps thoroughly to remove any wrinkles and make them easier to work with. Trim any loose threads or selvedges to prepare them for piecing.
Step 2: Constructing Your Patchwork Quilted Panel
This is where the magic of “scrappy” truly comes alive. You will create a patchwork panel that will form the exterior front (and potentially back) of your pouch.
- Piece Your Scraps: Using your rotary cutter and cutting mat, cut your fabric scraps into manageable shapes – strips, squares, or even irregular pieces. Arrange them on a flat surface to visualize your design, experimenting with different layouts until you’re satisfied. Once satisfied, begin sewing them together using a consistent ¼-inch seam allowance. Press each seam open or to one side as you go, which helps reduce bulk and ensures a flatter, neater finish. Continue piecing until you have a fabric block that is slightly larger (e.g., 1-2 inches larger on all sides) than your desired finished pouch dimensions. This extra allowance gives you room to trim and square up later.
- Create the Quilt Sandwich: Lay your chosen backing fabric (one of your lining pieces) wrong side up on your work surface. Smooth it out completely, ensuring there are no wrinkles. Next, place your batting (or fusible fleece, if using) evenly on top of the backing fabric. Finally, center your patchwork fabric block right side up on top of the batting. If you’re using fusible fleece, iron it directly to the wrong side of your patchwork fabric before creating the sandwich, omitting the separate batting layer. This creates your “quilt sandwich.”
- Quilt Your Panel: Secure the layers together with plenty of safety pins, basting pins, or basting spray. This prevents shifting during quilting. Now, it’s time to quilt! The original tutorial suggests a basic horizontal top stitch, which is a fantastic starting point for beginners. Use your sewing machine to stitch parallel lines across your patchwork panel. You can vary the spacing of these lines for different effects (e.g., ½-inch apart, 1-inch apart), or experiment with vertical lines, diagonal lines, or even simple free-motion quilting if you feel adventurous. The quilting process not only adds beautiful texture and dimension but also securely binds all three layers together, giving your pouch essential structure and durability.
- Trim to Size: Once your panel is thoroughly quilted and secured, use your rotary cutter and a long ruler to square it up and trim it to your exact desired dimensions for the pouch front. For instance, if you want a finished pouch that is 9 inches wide by 6 inches tall, cut your quilted panel to these exact measurements. If your pouch design includes a quilted back, repeat this entire process (Steps 2.1-2.4) for the back panel. Otherwise, simply cut a plain fabric piece to the same dimensions for the back.
Step 3: Preparing the Lining and Installing the Zipper
This step brings the main components together, integrating the zipper smoothly and professionally – a key element for any functional pouch.
- Cut Lining Pieces: Cut your two remaining lining fabric pieces to the exact same dimensions as your trimmed quilted panel. Precision here ensures everything aligns perfectly later on.
- Attach Zipper to Front Panel: Place your quilted exterior panel right side up on your work surface. Lay your zipper on top of the upper edge of the panel, with the zipper right side down, aligning the top raw edges of the zipper tape with the top raw edge of the fabric panel. Then, take one of your lining pieces and place it right side down on top of the zipper and the exterior panel, creating a three-layer sandwich: exterior fabric (right side up), zipper (right side down), lining fabric (right side down). Ensure all raw edges are aligned. Pin generously to secure all three layers. Using your sewing machine and a zipper foot, sew a straight line along this edge, as close to the zipper teeth as possible.
- Press and Topstitch: Fold both the exterior fabric and the lining fabric away from the zipper, so their wrong sides are together, and the zipper is now exposed and centered. Press this seam flat and crisp. Topstitch along the fabric edge, next to the zipper teeth, approximately ⅛ inch from the zipper. This step is crucial; it gives it a neat, professional finish and prevents the lining fabric from getting caught in the zipper when opening and closing the pouch.
- Attach Zipper to Back Panel: Now, take your remaining exterior fabric panel (or the second quilted panel if you made one) and place it right side up. Lay the unsewn side of the zipper on top of its upper edge, with the zipper right side down, aligning the raw edges. Place your second lining piece right side down on top of the zipper and the back panel, creating another sandwich. Pin and sew as before, using your zipper foot.
- Press and Topstitch (Second Side): Again, fold both exterior and lining fabrics away from the zipper and press them flat. Topstitch along this second edge of the zipper for symmetry and a polished look.
- Open Zipper: Crucially, partially open your zipper at this stage (at least halfway). This will allow you to turn the pouch right side out later, which is impossible if the zipper is fully closed.
Step 4: Assembling the Pouch
With the zipper skillfully in place, the pouch rapidly takes its final, three-dimensional form, revealing the culmination of your sewing with scraps efforts.
- Align and Pin Layers: Lay your project flat, carefully aligning the exterior fabrics right sides together and the lining fabrics right sides together. Ensure the zipper teeth are pointing towards the exterior fabric. Critically, align the zipper ends perfectly at the center where the exterior and lining meet. Pin generously all around the perimeter, especially around the zipper area to keep it from shifting. Make sure to leave a 3-4 inch opening along the bottom edge of the *lining fabric* – this unstitched gap is crucial for turning your pouch right side out later.
- Sew Around the Perimeter: Using a consistent ½-inch seam allowance (or whatever you prefer, but consistency is key for a well-shaped pouch), start sewing from one side of the opening in the lining, sew all around the exterior layers, carefully continuing across the zipper, and back down the other side of the lining, stopping at the other side of the opening. Remember to backstitch securely at the beginning and end of your stitching to reinforce the seams. Be particularly careful when sewing over the zipper teeth; you might want to hand-crank your machine over this thick section to prevent needle breakage and ensure smooth stitching.
- Create Boxed Corners (Optional but Recommended): For a more structured, three-dimensional pouch with a flat bottom, you’ll create boxed corners. At each of the four corners (two exterior, two lining), measure and cut out a square from the corner. The size of this square determines the depth of your pouch (e.g., a 1.5-inch square will result in a 3-inch deep box when opened). Then, carefully align the raw edges of the cut-out corner, bringing the side seam and bottom seam together to form a straight line. Sew across this new seam, backstitching at both ends. Repeat for all four corners. This method effectively creates a flat bottom and adds volume to your pouch.
- Trim Seams and Clip Corners: To reduce bulk and ensure crisp edges, trim the seam allowances around the pouch to about ¼ inch, especially if you didn’t create boxed corners. If you have curves, clip into the seam allowance (without cutting through your stitches). For corners, snip off the excess fabric diagonally at the very tip to reduce bulk when turning.
- Turn Right Side Out: Reach through the opening you left in the lining. Gently pull the entire pouch right side out through this opening. Take your time with this step. Use a blunt tool (like a chopstick, a turning tool, or the blunt end of a pencil) to carefully push out all the corners so they are crisp and well-defined, giving your pouch its final shape.
- Close the Lining Opening: Once your pouch is fully turned and shaped, press the raw edges of the opening in the lining inward so they are neatly folded under. Stitch this opening closed either by machine (topstitching very close to the edge for speed) or by hand using a ladder stitch for an almost invisible finish. Gently push the lining fully into the pouch, smooth it out, and give the entire pouch a final press with your iron.
Congratulations! You now have a beautifully crafted scrappy quilted zipper pouch, ready for use! This is such a versatile project. For instance, I found mine so indispensable that I added a simple fabric strap to one side, transforming it into a charming little wristlet or mini-purse – perfect for quick errands or as an elegant clutch. The possibilities for customization are truly endless with this fantastic handmade gift idea!
Tips for Success & Creative Variations
To ensure your scrappy quilted zipper pouch is not only functional but also a true reflection of your personal style, consider these additional expert tips and creative variations:
- Pre-Wash Fabrics: Always pre-wash and press all your fabrics before starting, especially if you’re mixing different types of scraps. This crucial step prevents future shrinkage, dye bleeding, and helps ensure your finished pouch retains its shape and vibrant colors after washing.
- Precision Matters: While working with scraps encourages a free-form, artistic approach to fabric selection, precise cutting and consistent seam allowances are paramount for a well-assembled and symmetrical pouch. Invest in good quality cutting tools (sharp rotary cutter, accurate ruler) and use them carefully.
- Zipper Foot is Your Friend: Do not skip using a zipper foot attachment on your sewing machine. It is specifically designed to allow you to sew much closer to the zipper teeth, resulting in a cleaner, more professional finish and preventing your needle from hitting the zipper coils.
- Practice Makes Perfect: If you’re new to zipper installation or quilting, consider doing a small practice run with some spare fabric first. This low-stakes practice builds confidence, helps you get familiar with the steps, and allows you to troubleshoot any potential issues before working on your main project.
- Adding a Wrist Strap or Handle: As mentioned, a strap can convert your pouch into a mini-purse or wristlet. To add one, create a fabric loop (e.g., a strip of fabric folded and sewn into a loop), and sandwich it between the exterior and lining layers on one side of the pouch before sewing the perimeter seams in Step 4.1. Ensure the loop points inwards towards the center of the pouch so it’s safely tucked away when you turn the pouch right side out. You can also use D-rings or swivel clips for a detachable strap.
- Embellishments: Consider adding a decorative charm to your zipper pull, a small fabric label sewn onto the side seam, or even some decorative stitching (like embroidery or Sashiko) to your quilted panel for an extra unique touch of flair.
- Different Sizes & Shapes: Experiment with dimensions! Make a tiny pouch for coins or earbuds, a medium one for cosmetics or tech accessories, or a large one for travel essentials. Simply adjust the dimensions of your fabric panels and zipper accordingly. For a flat pouch, simply skip the boxed corners in Step 4.3.
- Gift Giving: These handmade pouches make incredibly thoughtful and personalized gifts for friends, family, or teachers. Fill them with small treats, jewelry, stationery, or a gift card for a truly unique and cherished present.
- Care Instructions: Since your pouch is likely made from cotton, it will be machine washable. Gentle cycle, cold water, and air drying will help maintain its shape and colors.
Embrace Creativity and Sustainability with Your Handmade Pouch
Crafting a scrappy quilted zipper pouch is more than just a sewing project; it’s an ode to sustainability, a canvas for boundless creativity, and an inspiring opportunity to transform overlooked remnants into cherished, functional items. The entire journey, from carefully selecting a motley assortment of fabric scraps to seeing your finished, perfectly structured pouch emerge, is incredibly rewarding. It’s a powerful testament to how practical sewing skills can intertwine seamlessly with artistic expression, resulting in something both beautiful and profoundly useful in your daily life.
Inspired by the fantastic and clear tutorial from Mr. & Mrs. Thowsif on YouTube, this project is designed to be accessible to sewers of all skill levels, offering endless possibilities for personalization and creative exploration. So, we encourage you to raid your fabric stash, unleash your inner designer, and get ready to create a unique, handmade accessory that you’ll be proud to use, gift, and perhaps even sell. Happy sewing, and enjoy the satisfaction of bringing your fabric scraps to life!