
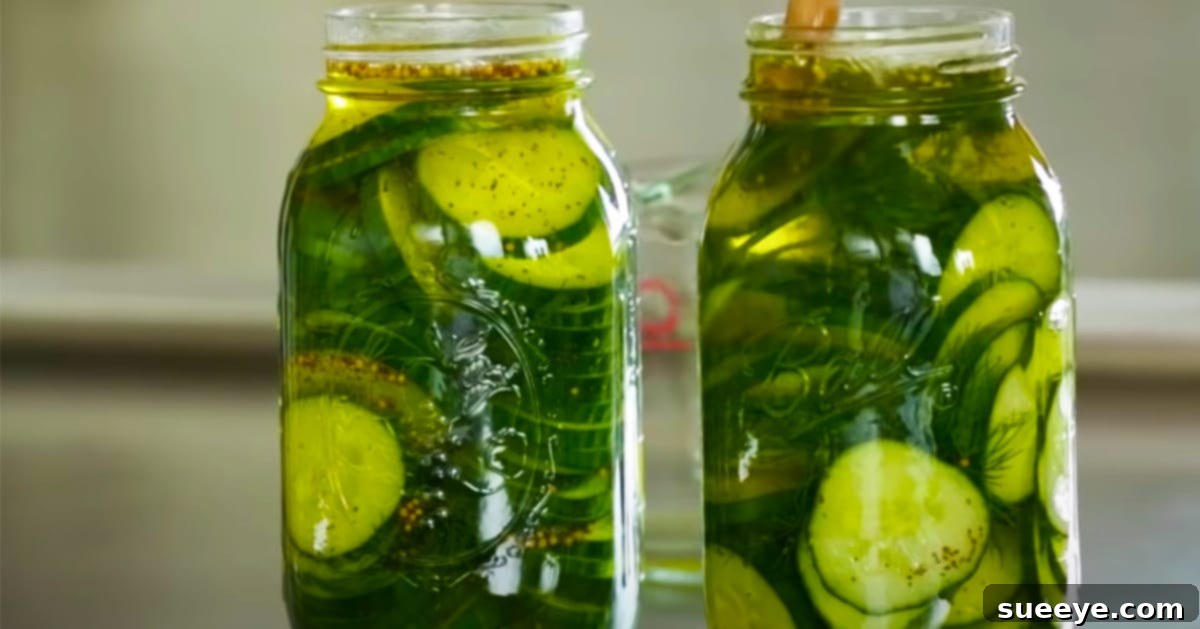
Crafting Crispy Perfection: The Ultimate Guide to Quick & Easy Homemade Pickles
There’s nothing quite like the crisp, tangy burst of a perfect pickle. While store-bought options are readily available, the satisfaction and superior flavor of homemade pickles are truly unmatched. Forget complicated canning processes; learning how to make quick and easy pickles is an incredibly simple culinary adventure, allowing you to enjoy fresh, vibrant flavors with minimal effort. This comprehensive guide will walk you through every step, from selecting the ideal cucumbers to crafting a perfectly balanced brine, ensuring your homemade pickles are ready to delight your taste buds in mere minutes.
Many people believe pickling is an intricate art, but with a few simple ingredients and clear instructions, anyone can master it. As demonstrated by Everyday Food in their insightful tutorial, creating your own jar of delectable pickles doesn’t require hours in the kitchen. Not only is it a fun and rewarding experience, but making pickles at home also offers significant benefits over purchasing them from the grocery store. You’ll save money, enjoy unparalleled freshness, and have complete control over the taste and texture, tailoring every batch precisely to your preferences.
Why Make Your Own Pickles? Beyond the Brine
While convenience often steers us towards store shelves, the advantages of making your own pickles extend far beyond a simple desire to cook. For starters, the cost savings can be considerable. Cucumbers are often inexpensive, especially when in season, and basic pickling ingredients are pantry staples. You’ll quickly find that a homemade batch yields far more pickles for a fraction of the price of equivalent store-bought jars.
More importantly, homemade pickles offer superior freshness and flavor. You control the quality of every ingredient, from the crispness of the cucumbers to the potency of the dill and spices. There are no artificial preservatives or unpronounceable additives – just pure, natural goodness. This freshness translates into a noticeably better crunch and a more vibrant, authentic taste that simply can’t be replicated by mass-produced varieties.
Perhaps the most appealing aspect of DIY pickling is the freedom of customization. Do you prefer your pickles extra garlicky, intensely spicy, or perhaps with a hint of sweetness? You decide! You can experiment with different spice blends, adjust the sugar and salt levels, and even choose your preferred cucumber size and shape. Whether you love elegant pear halves, classic spears, or adorable baby dill pickles, the power to create your ideal pickle is entirely in your hands. This level of personalization ensures every bite is exactly what you crave.
Choosing Your Cucumber Champions: The Secret to Supreme Crunch
The foundation of any great pickle is, of course, the cucumber. But not all cucumbers are created equal when it comes to pickling. The type of cucumber you choose significantly impacts the final texture and flavor of your pickles. For the crispiest, most satisfying results, selecting the right variety is paramount.
Kirby cucumbers are widely considered the gold standard for pickling. These firm, short, bumpy cucumbers have thin skins and minimal seeds, making them ideal for absorbing the brine while retaining their satisfying crunch. Their dense flesh holds up exceptionally well during the pickling process, preventing them from becoming mushy. If you can find them, always reach for Kirbys.
While I personally adore English cucumbers for fresh salads due to their seedless nature and mild flavor, they are generally not recommended for pickling. Their high water content and delicate texture mean they can become soft and less desirable when brined. Similarly, common large slicing cucumbers, often found in supermarkets, tend to have thick skins and a lot of seeds, which can lead to a watery and less appealing pickle.
The crunchier and crisper the cucumber you start with, the better your pickles will be. Always opt for firm, blemish-free cucumbers. Avoid any that feel soft, appear shriveled, or have visible signs of spoilage. Freshness directly translates to a superior pickled product, so pick them straight from the garden if possible, or choose the freshest available at your local market.
Essential Ingredients for Your Quick Pickle Masterpiece
Crafting the perfect pickle brine is an art, but it’s an art built on a simple foundation of core ingredients. These components work together to preserve the cucumbers, impart flavor, and create that irresistible tangy profile. Here’s what you’ll need for a classic quick pickle recipe:
- 3 cups white vinegar
- 1 1/2 cups sugar
- 2 tsp coarse salt
- 1/2 tsp mustard seed
- 1/2 tsp celery seed
- 2 to 4 small red chilies (optional, for a kick)
- 1/8 tsp ground turmeric (for color and subtle earthy notes)
- 1 1/2 cups fresh dill fronds (about 1 bunch)
- Prepared Vegetables (primarily cucumbers, but feel free to experiment with others!)
Understanding the Role of Each Ingredient:
- White Vinegar: This is the backbone of your brine. Its acidity is crucial for preserving the cucumbers and giving pickles their characteristic tang. You can experiment with other vinegars like apple cider vinegar for different flavor profiles, but white vinegar offers a clean, classic taste.
- Sugar: Sugar balances the acidity of the vinegar, preventing the pickles from being overly sharp. The amount can be adjusted to your preference – less sugar for a more sour pickle, more for a bread-and-butter style.
- Coarse Salt: Essential for drawing out excess water from the cucumbers, which helps maintain their crispness. It also contributes significantly to the overall flavor. Avoid iodized table salt, as it can make the brine cloudy and sometimes impact flavor. Pickling salt or kosher salt is ideal.
- Mustard Seed & Celery Seed: These classic pickling spices provide a warm, earthy, and slightly pungent flavor that is quintessential to traditional pickles.
- Red Chilies: Entirely optional, these add a gentle heat that can elevate the flavor without overwhelming it. Adjust the quantity based on your spice tolerance.
- Ground Turmeric: While a small amount, turmeric gives your pickles a beautiful golden hue and adds a subtle, slightly earthy undertone.
- Fresh Dill Fronds: Fresh dill is the star of many pickle recipes, imparting a wonderfully aromatic and herbaceous flavor. Ensure your dill is fresh and vibrant for the best results.
Feel free to get creative with your spices! Bay leaves, whole black peppercorns, garlic cloves, coriander seeds, or even a pinch of red pepper flakes can all add exciting dimensions to your pickle brine.
Step-by-Step Pickling Process: From Garden to Jar in Minutes
With your ingredients gathered and your cucumbers chosen, it’s time to bring your quick pickles to life. This process is surprisingly straightforward and incredibly rewarding.
Preparing Your Cucumbers for Peak Performance
The first crucial step is to prepare your cucumbers. Begin by washing them thoroughly under cold running water. Then, decide on your preferred shape and size. This is where customization truly begins! You can slice them into thin rounds, cut them into spears (perfect for sandwiches), halve them, or even leave small gherkins whole. The key is to ensure consistent sizing for even pickling.
Once cut, place your cucumber pieces in a colander or strainer. Sprinkle them generously with about a tablespoon of coarse salt, tossing them gently to ensure an even coating. This salting process is vital. It works through osmosis, drawing out excess water from the cucumbers. This not only concentrates their flavor but, more importantly, helps them retain their satisfying crunch. Allow the salted cucumbers to sit in the refrigerator for up to 3 hours, letting the excess water drip away. You might be surprised by how much liquid accumulates!
Crafting the Perfect Brine: A Symphony of Flavors
While your cucumbers are chilling, it’s time to prepare the flavorful brine. In a medium saucepan, combine the 3 cups of white vinegar. Place the saucepan over medium heat and bring the vinegar to a gentle boil. Once boiling, add the sugar, coarse salt, mustard seed, celery seed, optional red chilies, and ground turmeric to the liquid. Stir well until the sugar and salt have completely dissolved.
Allow the brine to simmer for a few minutes. This gentle simmering allows the spices to infuse their flavors into the liquid, creating a rich and aromatic base for your pickles. Remember, this is your chance to adjust the flavor profile! If you, like me, prefer a less sweet pickle, now is the time to reduce the amount of sugar. Taste a small amount of the cooled brine (carefully, it’s hot!) and adjust as needed. Once you’re happy with the flavor, remove the brine from the heat.
The Grand Assembly: Combining Cucumbers and Brine
After the cucumbers have sufficiently drained and the brine has simmered, it’s time for the final assembly. Remove the cucumbers from the refrigerator and give them a quick rinse under cold water to remove any excess surface salt, then pat them dry with a clean towel. This step helps prevent your pickles from being overly salty.
Carefully pack your prepared cucumbers (or other vegetables) into clean, heat-proof glass jars. For quick pickles that will be stored in the refrigerator, extensive sterilization isn’t strictly necessary, but using clean jars is always good practice. Tuck the fresh dill fronds in amongst the cucumbers. Once the jars are packed, immediately pour the hot brine over the vegetables, ensuring they are completely submerged. This hot brine will begin the pickling process right away, infusing flavor and preserving the vegetables.
Tap the jars gently on the counter to release any trapped air bubbles. If necessary, add a little more brine to ensure full coverage. Allow the jars to cool to room temperature on your counter. Once cool, seal them tightly with lids and transfer them to the refrigerator. Your quick pickles will be ready to eat in as little as an hour, but their flavors will deepen and meld beautifully after 24 hours.
Beyond Cucumbers: Expanding Your Pickling Horizons
The beauty of quick pickling is that it’s not limited to just cucumbers. This versatile technique can be applied to a wide array of vegetables, offering an exciting way to enjoy fresh produce year-round. My dad often pickles various vegetables, and I’ve seen firsthand how delicious they can be!
Consider trying this recipe with:
- Carrots: Sliced into coins or sticks, they become delightfully sweet and tangy.
- Red Onions: Thinly sliced, pickled red onions are a fantastic garnish for tacos, salads, and sandwiches, adding a beautiful color and sharp flavor.
- Green Beans: These make excellent dilly beans, perfect for snacking or adding to a Bloody Mary.
- Bell Peppers: Sliced strips of bell peppers (any color) offer a sweet and zesty crunch.
- Cauliflower Florets: Pickled cauliflower has a wonderful texture and absorbs the brine beautifully.
- Asparagus: A gourmet addition, pickled asparagus spears are elegant and delicious.
The general principle remains the same: prepare your vegetables (often by slicing or chopping them), salt them if they have high water content, and then combine them with the hot brine. Experimenting with different vegetables allows you to create a vibrant pantry of homemade pickled delights.
Storing Your Homemade Delights: Freshness That Lasts
Unlike traditional canning methods that create shelf-stable products, quick pickles are meant for refrigerator storage. Because they haven’t undergone a full canning process to create a vacuum seal, they rely on refrigeration to keep them fresh and safe to eat. Properly stored in clean jars in the refrigerator, your quick pickles will maintain their quality and crispness for up to 2-3 weeks, sometimes even longer.
Always ensure the vegetables are fully submerged in the brine, as any exposed pieces can spoil more quickly. If you notice any signs of spoilage, such as mold, off-smells, or a slimy texture, it’s best to discard the batch to ensure food safety. While quick pickles are simple to make, a little care in storage ensures you can enjoy them for weeks to come.
Serving Suggestions: Enjoying Your Quick Pickles
Now that your quick pickles are ready, it’s time for the best part: enjoying them! The versatility of homemade pickles means they can elevate almost any meal or serve as a delicious snack on their own. Here are just a few ideas:
- Sandwiches and Burgers: A classic pairing! The tanginess of pickles cuts through the richness of meats and cheeses, adding a delightful crunch.
- Salad Toppers: Dice them up and add them to green salads, potato salads, or pasta salads for an extra burst of flavor and texture.
- Charcuterie Boards: Pickles are a fantastic addition to cheese and charcuterie boards, offering a bright, acidic contrast to cured meats and creamy cheeses.
- Snack Time: Straight from the jar! A crisp pickle can be a refreshing and satisfying low-calorie snack.
- Garnish: Use spears in a Bloody Mary or chop them finely to add to tartar sauce or other condiments.
Troubleshooting Common Pickling Pitfalls
While quick pickling is generally straightforward, occasionally you might encounter a minor issue. Here are some common problems and how to address them:
- Soggy Pickles: This is often due to using cucumbers that weren’t fresh enough, had too much water content (like regular slicing cucumbers), or weren’t properly salted before brining. Always choose firm, fresh pickling cucumbers and don’t skip the salting step.
- Too Sour/Sweet Brine: The beauty of homemade is that you can adjust! Next time, simply alter the sugar-to-vinegar ratio to better suit your palate. If they’re too sweet, add a splash more vinegar or a pinch of salt. If too sour, a tiny bit of sugar can balance it.
- Lack of Flavor: Ensure your spices are fresh and potent. Allowing the brine to simmer for a few minutes helps infuse flavor. You can also add more fresh dill, garlic cloves, or other favorite spices directly to the jar with the cucumbers.
- Cloudy Brine: While not usually a sign of spoilage in quick pickles (unless accompanied by off-smells or mold), a cloudy brine can sometimes be caused by using iodized salt or impurities in your water. Stick to pickling or kosher salt.
Making quick pickles at home is an incredibly rewarding culinary experience. It’s a simple process that yields deliciously fresh, customizable, and cost-effective results. With this guide, you have all the knowledge to create your own crispy perfection, ready to be enjoyed throughout the summer and beyond. So go ahead, grab some fresh cucumbers, whip up that brine, and get ready to savor the incredible taste of homemade quick pickles!