
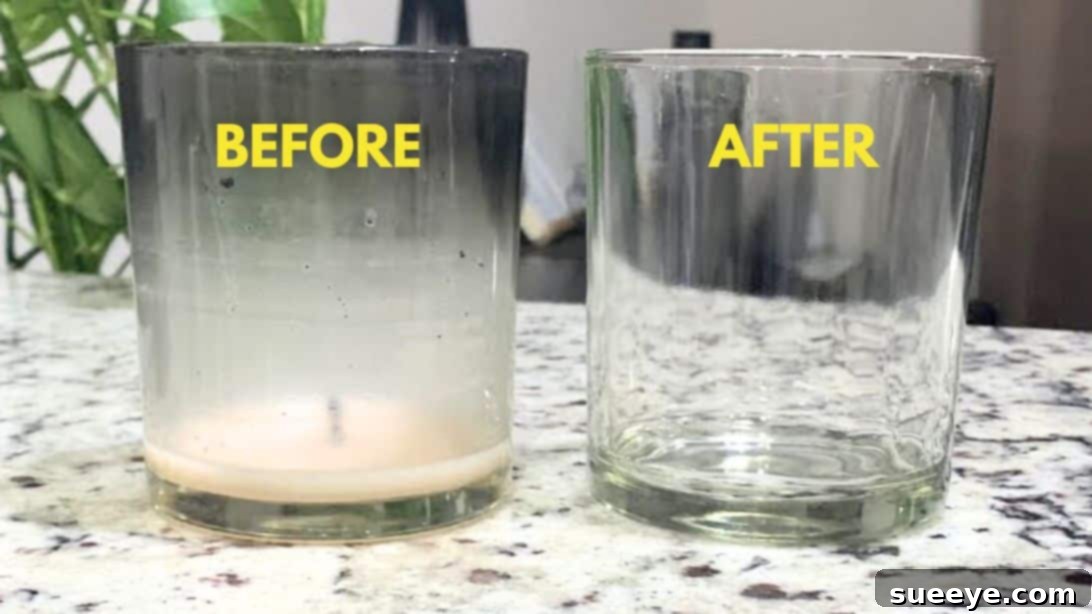
Candles hold a unique power to transform any space, instantly infusing it with warmth, serenity, and a captivating aroma. Whether you’re unwinding after a long day, setting the mood for a special occasion, or simply enjoying a quiet moment, the soft glow and gentle fragrance of a candle create an atmosphere of unparalleled comfort and relaxation. But what happens once the flame has flickered its last, leaving behind a beautiful, yet seemingly empty, glass jar? Too often, these lovely vessels are discarded, destined for landfills. However, with a few simple steps, you can give your spent candle jars a new lease on life, turning them into versatile, stylish, and sustainable additions to your home.
Many assume that cleaning candle jars is a tedious and messy chore, leading them to simply toss these perfectly good containers into the trash. The truth is, repurposing candle jars is surprisingly easy, making it an ideal project for anyone looking to embrace more eco-conscious living without sacrificing style or convenience. From organizing small household items to crafting unique decorative pieces, the possibilities are endless once your jars are sparkling clean. This comprehensive guide will walk you through the simplest and most effective methods for cleaning candle jars, offering practical tips and inspiring ideas to help you unlock their full potential. Let’s dive in and transform those forgotten jars into functional works of art, starting with this easy tutorial from Personal Powerhouse.
RELATED: How to Separate Stuck Glass Cups
Why Repurpose Your Used Candle Jars? A Sustainable Choice
Choosing to repurpose your candle jars is more than just a clever DIY hack; it’s a conscious step towards a more sustainable and mindful lifestyle. In an era where reducing waste and embracing circular economy principles are paramount, giving new life to items that would otherwise be discarded is incredibly impactful. Here are compelling reasons to start repurposing your candle jars today:
- Environmental Stewardship: Every jar you clean and reuse is one less item contributing to landfill waste. Glass, while recyclable, requires energy to process. By directly reusing jars, you minimize your environmental footprint and conserve resources.
- Cost-Effective Solutions: Why buy new storage containers or decorative items when you have perfectly good ones waiting to be cleaned? Repurposing saves you money, allowing you to allocate your budget to other needs or wants.
- Unique Home Decor: Candle jars are often designed with aesthetics in mind, featuring beautiful shapes, colors, and textures. Once clean, they can add a touch of elegant simplicity or rustic charm to any room, often serving as more unique pieces than mass-produced alternatives.
- Versatile Storage Options: From tiny beads and craft supplies to office clips, cotton swabs, and spices, these jars are ideal for organizing a myriad of small items, helping to declutter your home in style.
- Personal Satisfaction & Creativity: There’s immense joy and satisfaction in creating something new from something old. Repurposing allows you to unleash your creativity, personalize your living space, and contribute to a more sustainable world, one jar at a time.
Before you embark on your repurposing journey, it’s crucial to consider the origin of your candles. While the jars themselves are generally safe for reuse, the contents can sometimes pose a concern. Ensure that the candles you purchase are made with non-toxic ingredients. Some conventional candles can contain paraffin wax (a petroleum byproduct), synthetic fragrances with phthalates, or wicks with lead cores, which can release harmful chemicals into the air when burned. Always check labels diligently and conduct a quick online search for brand transparency regarding ingredients. Opting for candles made with natural waxes like soy, beeswax, or coconut wax, and scented with pure essential oils, not only promotes a healthier home environment but also ensures that any residual traces in the jar are benign. Your health and safety, and that of your loved ones, should always be the priority.
Here’s another fantastic hack to spark your creativity: How to Make an Insect Repellent Coffee Candle
What You Need to Clean a Candle Jar: Simple Supplies for Sparkling Results
The beauty of cleaning candle jars lies in its simplicity. You won’t need any specialized tools or harsh chemicals. Most of the items required are likely already staples in your kitchen or utility closet. Gathering your supplies beforehand will make the process even smoother and more efficient.
- Boiling Water: This is the hero ingredient that melts stubborn wax, making it easy to separate from the glass. Ensure you have access to a kettle or a pot to heat water.
- Dawn Dish Soap (or your preferred dish soap): Essential for cutting through any remaining waxy residue, oils, or soot, leaving your jars squeaky clean.
- Sponge or Soft Brush: For scrubbing away any lingering grime without scratching the glass.
- Paper Towels or Clean Cloth: For drying the jars thoroughly after washing.
- Optional (but recommended): A butter knife or old spoon for gently prying out solidified wax or wick tabs, and a heat-resistant surface (like a trivet or cutting board) to place hot jars on.
How to Clean a Candle Jar: The Easiest and Most Effective Method
This method, often referred to as the “boiling water” technique, is widely regarded as the most straightforward and effective way to remove wax from candle jars. It leverages the properties of hot water to melt the wax, allowing it to float to the surface and solidify into a manageable disc.
Step 1: Fill the Jar with Boiling Water
Carefully place your used candle jar on a heat-resistant surface. Slowly and cautiously pour boiling water directly into the jar, filling it almost to the rim. The hot water will immediately begin to melt the residual wax at the bottom. As the wax melts, it will separate from the glass and float to the surface of the water. This process may take anywhere from a few hours for smaller jars or softer waxes (like soy) to overnight for larger jars or harder waxes (like paraffin). Patience is key here; allow ample time for the wax to fully solidify into a firm disc at the water’s surface. Ensure the jar is left undisturbed during this cooling period.
Step 2: Remove the Solidified Wax Disc
Once the water has completely cooled and the wax has solidified into a distinct disc on top, it’s time for removal. Gently push on one side of the wax disc with your finger or a dull utensil like a butter knife. It should pop out easily in one piece, resembling a perfect wax hockey puck. This separated wax can either be discarded (it’s best not to pour it down the drain as it can solidify and clog pipes) or saved for future DIY projects, such as making new candles, wax melts, or fire starters. After removing the wax, carefully pour out the cooled water. You might notice a thin, greasy film clinging to the inside of the jar; this is normal and will be addressed in the final cleaning step.
Step 3: Detach the Wick Tab
The wick tab, usually a small metal disc glued to the bottom of the jar, can sometimes be stubborn. If it doesn’t easily peel off after the first wax removal, don’t fret. A quick trick is to pour a small amount of fresh boiling water into the jar again, just enough to cover the bottom where the wick tab is located. Let it sit for about half an hour. The heat will soften the adhesive, making it much easier to scrape off the tab with a butter knife or the edge of an old spoon. Be gentle to avoid scratching the glass. Once the wick tab is removed, discard it properly.
Step 4: Final Wash and Dry
With the wax and wick tab gone, the jar needs a thorough cleaning to remove any lingering wax residue, soot, or greasy film. Wash the inside and outside of the jar meticulously with hot water and Dawn dish soap (or your preferred dishwashing liquid) using a sponge or soft brush. Pay special attention to the bottom and sides where wax or soot might have accumulated. For particularly sticky adhesive residue from labels or stubborn wax films, a small amount of rubbing alcohol or a specialized Goo Gone product can work wonders. Rinse the jar thoroughly under running water until all soap bubbles are gone and the glass is sparkling clean. Finally, dry the jar completely with a clean paper towel or cloth. Now, your beautiful, like-new glass jar is ready for its next chapter of usefulness and creativity!
Alternative Cleaning Methods and Troubleshooting Tips
While the boiling water method is highly effective, there are other approaches you might consider, especially for different types of wax or stubborn residue. It’s also helpful to have a few troubleshooting tips up your sleeve.
The Freezer Method
An excellent alternative, particularly for harder waxes or if you prefer not to use boiling water, is the freezer method. Simply place your candle jar in the freezer overnight. The cold temperature will cause the wax to contract and shrink, making it easier to separate from the glass. The next morning, use a butter knife or spoon to gently pry out the hardened wax. It should pop out quite easily. This method is generally less messy than boiling water but requires more planning due to the overnight freezing period.
Dealing with Stubborn Labels
Often, the most challenging part of repurposing a candle jar isn’t the wax, but the sticky labels. Here are a few ways to tackle them:
- Soaking: Fill a sink with warm, soapy water and submerge the jars. Let them soak for an hour or two (or even overnight). Many labels will then peel off easily.
- Hairdryer: Apply heat from a hairdryer to the label for about 30-60 seconds. The heat softens the adhesive, allowing you to peel the label off. Any remaining residue can be wiped with a cloth dampened with rubbing alcohol or Goo Gone.
- Rubbing Alcohol/Goo Gone: For stubborn, sticky residue that won’t budge, a small amount of rubbing alcohol, nail polish remover (acetone), or a commercial adhesive remover like Goo Gone, applied to a paper towel, can effectively dissolve the stickiness. Always test in an inconspicuous area first, especially with painted jars.
Safety Precautions
- Hot Water and Glass: Always handle boiling water with extreme caution. Use oven mitts or tongs when handling hot jars. While most candle jars are designed to withstand heat, rapid temperature changes can cause glass to crack or shatter. Pour boiling water slowly and avoid placing extremely hot jars directly onto cold surfaces.
- Sharp Tools: Be careful when using knives or scraping tools to remove wicks or wax, as they can slip and cause injury.
- Ventilation: When using cleaning agents like Goo Gone or rubbing alcohol, ensure you are in a well-ventilated area.
When Not to Reuse
While repurposing is fantastic, there are instances when a jar might not be suitable for reuse. If a jar has any cracks, chips, or signs of stress, especially if it was exposed to high heat (e.g., from a candle burning down too far), it’s best to discard it safely to prevent breakage and potential injury. Always inspect your jars thoroughly before repurposing them.
Creative Ways to Repurpose Your Spotless Candle Jars: Endless Possibilities
Now that your candle jars are pristine, the fun truly begins! Their versatility allows them to seamlessly integrate into various aspects of your home decor and organization. Here are just a few inspiring ideas:
Home Organization & Storage
- Desk Organizer: Perfect for pens, pencils, markers, paper clips, rubber bands, or thumbtacks.
- Bathroom Essentials: Store cotton balls, Q-tips, hair ties, makeup brushes, or small soaps.
- Craft Supplies: Organize beads, buttons, glitter, sewing needles, or small spools of thread.
- Kitchen Pantry: Store spices, tea bags, coffee beans, small dry goods, or even homemade jams (ensure lids are airtight if needed).
- Tool Bench: Keep screws, nails, washers, or other small hardware neatly categorized.
Decorative & Ambiance Enhancers
- Votive Holders: Place smaller tea lights or flameless LED candles inside for a renewed, gentle glow.
- Mini Vases: Showcase fresh flowers, dried botanicals, or small succulent arrangements.
- Fairy Light Jars: Fill with battery-operated fairy lights for a magical, ambient display.
- DIY Terrariums: Create a miniature ecosystem with small plants, pebbles, and moss.
- Painted or Decorated Jars: Customize them with paint, glitter, ribbon, or twine to match your home decor or for seasonal themes.
- Photo Holders: Fill with sand or small pebbles and place a treasured photo inside or attach it to the outside.
Unique Gifting & Special Occasions
- Gift Packaging: Fill with homemade treats (cookies, candies), bath salts, or small gifts for a personalized touch.
- Party Favors: Ideal for holding small goodies or as decorative elements at events.
- Planters: Use them as small planters for herbs, succulents, or propagating plant cuttings.
Embrace Sustainable Living, One Clean Candle Jar at a Time
Cleaning and repurposing your candle jars is a small yet significant step towards a more sustainable and creative lifestyle. It’s a testament to the idea that beauty and utility can be found in the most unexpected places, often hiding in plain sight. By extending the life of these charming containers, you not only reduce waste and save money but also infuse your home with personalized touches that tell a story of resourcefulness and care.
So, the next time your favorite candle burns down, don’t reach for the trash can. Instead, gather your simple supplies, follow these easy steps, and unlock the endless possibilities that await. From practical storage solutions to enchanting decorative accents, your cleaned candle jars are ready to embark on their second life, proving that being eco-friendly can also be effortlessly stylish and incredibly rewarding. Start transforming your home and contributing to a greener planet today, one beautifully repurposed jar at a time!