
The Ultimate Guide to a Sparkling Clean Oven: Harnessing the Power of Baking Soda and Vinegar
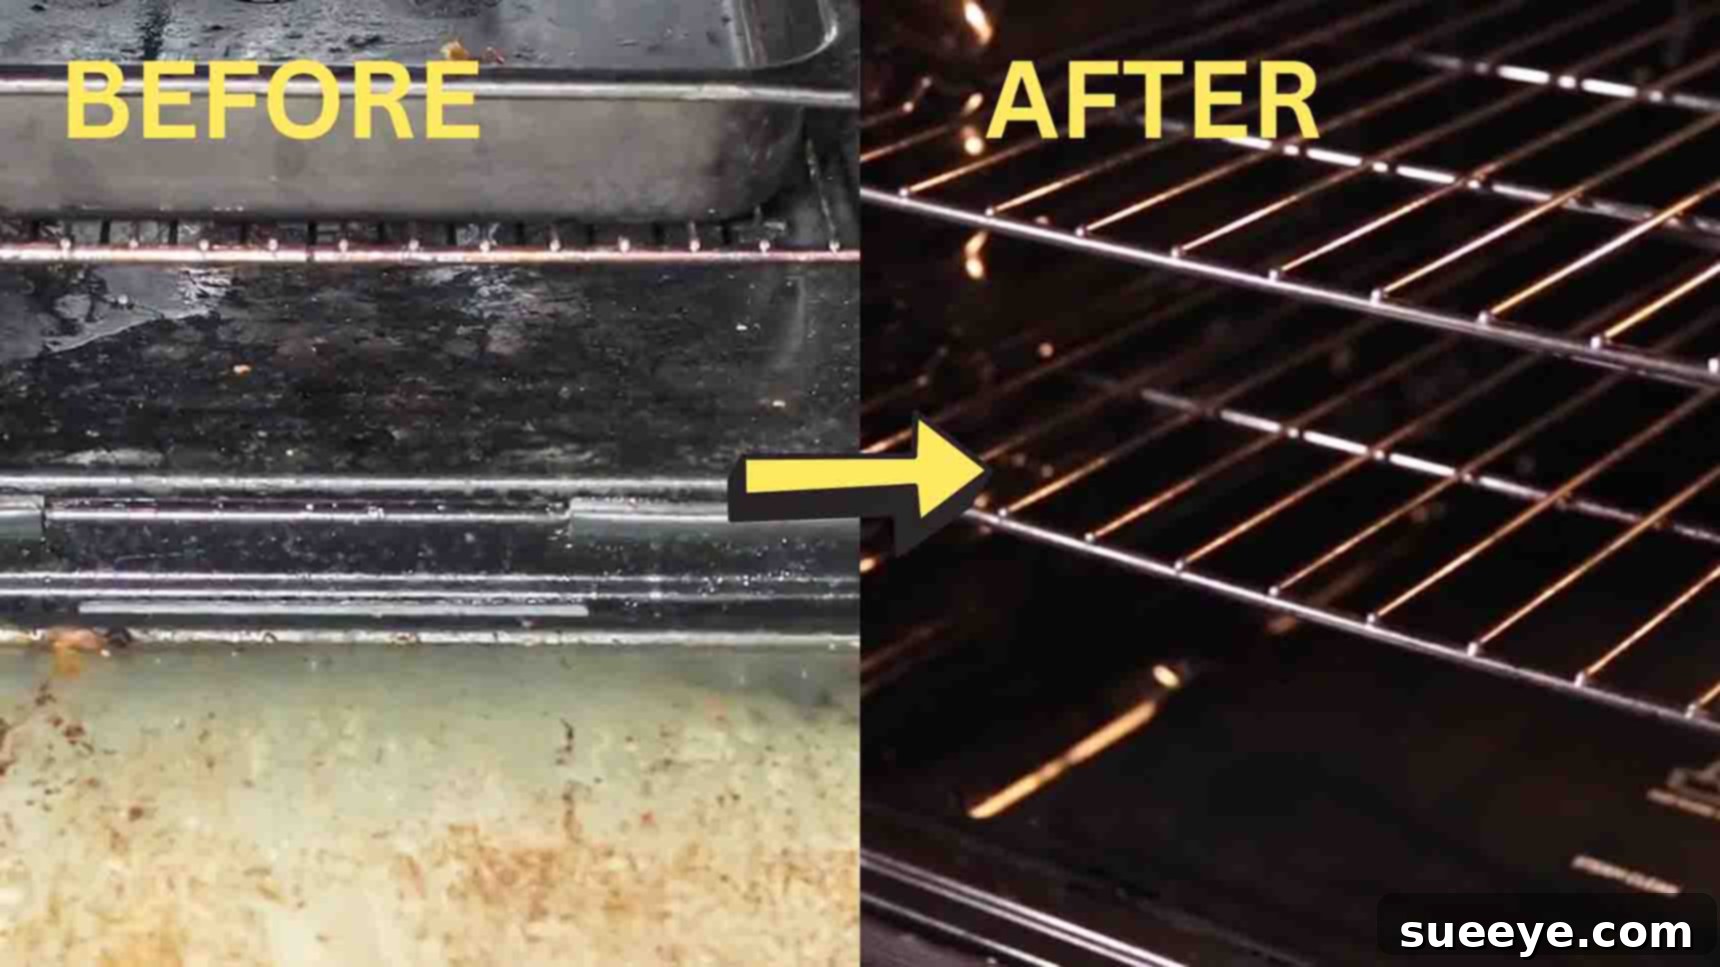
Is a less-than-pleasant odor wafting from your oven during cooking? Does lingering grease and baked-on food make you hesitate before opening the door? If so, it’s a clear sign your oven is due for a thorough cleaning. Forget harsh chemicals and expensive solutions; this comprehensive guide will show you how to achieve a brilliantly clean oven using just two simple, natural ingredients: baking soda and vinegar. This method is not only incredibly effective but also safe, eco-friendly, and budget-conscious. Prepare to transform your oven from grimy to gleaming with a simple, quick, and easy approach that will become your new go-to cleaning ritual.
A clean oven isn’t just about aesthetics; it significantly impacts your cooking. Residue from old food can burn, causing smoke and off-flavors that transfer to your fresh meals. Moreover, a buildup of grease can even become a fire hazard. Regular cleaning ensures your oven operates efficiently, your food tastes its best, and your kitchen remains a safe and pleasant environment. Let’s dive into how you can achieve this with everyday household items.
Why Baking Soda and Vinegar for Oven Cleaning?
The combination of baking soda and vinegar is a powerhouse for natural cleaning, particularly effective against stubborn oven grime. Here’s why this dynamic duo works wonders:
- Baking Soda (Sodium Bicarbonate): This mild alkali acts as a gentle abrasive, helping to scrub away dried-on food and grease without scratching surfaces. When mixed with water, it forms a paste that adheres to grime, softening it over time. Its alkaline nature helps to break down acidic grease and food residues.
- Vinegar (Acetic Acid): White distilled vinegar is acidic, and when it comes into contact with baking soda, a chemical reaction occurs, producing carbon dioxide gas. This fizzing action helps to lift and loosen stubborn dirt, making it easier to wipe away. Vinegar also acts as a natural disinfectant and deodorizer, neutralizing odors left by burnt food.
Together, they create a non-toxic, potent cleaning solution that penetrates and breaks down even the most challenging baked-on messes, making your oven sparkle without the fumes associated with commercial oven cleaners.
Gather Your Essentials: Ingredients and Materials
Before you begin your oven cleaning journey, ensure you have all the necessary items at hand. Having everything ready will streamline the process and make it much more efficient.
Ingredients:
- Baking Soda: You’ll need a generous amount, typically 1 to 2 cups, depending on the size and dirtiness of your oven.
- Distilled White Vinegar: A spray bottle filled with white vinegar will be essential for activating the baking soda and wiping away residue.
Materials:
- Large Bowl: For mixing your baking soda paste.
- Old Pastry Brush or Spatula: Ideal for spreading the baking soda paste evenly across all oven surfaces.
- Rubber Gloves: While these ingredients are natural, wearing gloves protects your hands from drying out and keeps them clean.
- Paper Towels or Old Newspapers: To protect your kitchen floor from spills and drips during the cleaning process.
- Spray Bottle: Essential for applying vinegar in a fine mist.
- Magic Eraser (Melamine Foam Sponge): Highly effective for tackling tough, localized spots and lifting stubborn grime.
- Several Microfiber Cloths: For wiping, scrubbing, and polishing your oven’s interior. These are highly absorbent and won’t leave lint.
- Bucket of Warm Water: For rinsing your cloths and ensuring a thorough clean.
- Optional: Large Trash Bag or Bathtub stopper: For soaking oven racks.
Your Step-by-Step Guide to a Spotless Oven
Follow these detailed steps to achieve a perfectly clean oven, from the interior walls to the racks and door.
Step 1: Preparing the Oven and Applying the Baking Soda Paste
The first step involves preparing your oven and applying the powerful baking soda paste that will work its magic overnight.
- Remove Racks and Debris: Begin by completely emptying your oven. Carefully remove all oven racks, baking sheets, and any other items stored inside. Use a dry paper towel or a vacuum cleaner attachment to remove any loose food crumbs or debris from the oven floor. This initial sweep makes the subsequent cleaning much easier.
- Protect Your Floor: Lay down a generous layer of old newspapers or paper towels on the floor directly in front of your oven. This will catch any drips or spills from the cleaning paste, protecting your kitchen floor.
- Prepare the Baking Soda Paste: In your large bowl, combine 1 cup of baking soda with 2 tablespoons of water. Mix thoroughly with a spoon or spatula. The goal is to achieve a thick, spreadable paste consistency – similar to frosting. If it’s too thick, add water a teaspoon at a time. If too thin, add a bit more baking soda. The ideal consistency will cling to the oven walls without dripping.
- Spread the Paste Evenly: Donning your rubber gloves, use your old pastry brush, spatula, or even your hands, to spread the baking soda paste evenly over every interior surface of your oven. Pay special attention to areas with heavy grease and baked-on food. Gently work the paste into the grime.
- Important Safety Note: Avoid applying the paste directly onto electrical heating elements (in both electric and gas ovens), gas vents, pilot lights, or the oven light bulb. These components can be damaged by moisture or abrasive particles. Focus solely on the enamel-lined surfaces.
- Don’t Forget the Door: Extend your application to the inside of the oven door glass and frame. These areas often accumulate significant splatter and grease, which the baking soda paste will effectively break down.
- The Waiting Game: Once the paste is thoroughly applied, close your oven door. Now comes the waiting period – and it’s crucial for the baking soda to do its work. Let the paste sit and penetrate the grime for a minimum of 8 hours, or ideally, overnight (10-12 hours). This extended soaking time allows the baking soda to soften and loosen even the most stubborn, baked-on messes, making them much easier to remove.
Step 2: Tackling Oven Racks and the Big Reveal
While the baking soda paste is working its magic inside the oven, you can turn your attention to the often-neglected oven racks. This step also covers the exciting moment of removing the softened grime.
- Prepare for Rack Soaking: For your oven racks, find a large basin, a utility sink, or even a bathtub (ensure it’s clean beforehand). Line the bottom with an old towel to prevent scratching. Place the greasy oven racks inside.
- Rack Cleaning Solution: Generously spray the racks with distilled white vinegar from your spray bottle. Ensure all surfaces are thoroughly misted. Immediately after spraying, sprinkle a liberal amount of dried baking soda over the vinegar-soaked racks.
- Observe the Reaction: You’ll notice an immediate fizzing and foaming reaction as the baking soda and vinegar interact. This effervescence is a positive sign – it means the mixture is actively breaking down the baked-on grease and food particles. Let it foam for a few minutes.
- Submerge and Soak Racks: Once the initial foaming subsides, fill the bathtub or sink with very hot water until the oven racks are completely submerged. The hotter the water, the more effective it will be in helping to loosen the grime. Let the racks soak for at least 8 hours, or even overnight, alongside your oven interior. For extremely stubborn racks, some people add a few drops of dish soap to the water for extra degreasing power. Alternatively, for a completely sealed soak, you can place the racks in a large, heavy-duty trash bag, add the vinegar and baking soda, seal it, and let it sit outside or in a tub.
- Remove Baking Soda Paste from Oven: After the designated waiting period, it’s time for the big reveal! Open your oven door. Much of the dried baking soda paste will now look discolored, having absorbed the grease and grime. Using a damp microfiber cloth, begin to wipe away the paste from the oven interior. You’ll be amazed at how easily the grime comes off.
- Rinsing as You Go: Keep a bucket of warm, clean water nearby to frequently rinse your microfiber cloth. As the cloth becomes saturated with paste and dirt, rinse it thoroughly in the bucket, wring it out, and continue wiping. You may need to change the water in your bucket multiple times to ensure you’re always using clean water for rinsing.
- Tackling Stubborn Residue: For any leftover grime, residue, or particularly stubborn spots that didn’t come off with the initial wipe, don’t despair! Grab your spray bottle of vinegar and mist the area generously. Immediately sprinkle a small amount of baking soda over the vinegar.
- Reactivating the Cleaning Power: Watch as the mixture fizzes up again. Let it foam for a few seconds, then gently scrub the spot with your magic eraser or a clean, damp microfiber cloth. The magic eraser is particularly effective for lifting those last bits of burnt-on food. The renewed chemical reaction will help to lift even the most entrenched stains.
- Final Oven Wipe-Down: Continue wiping and rinsing with clean, damp microfiber cloths until all traces of baking soda paste and grime are gone, and your oven interior is sparkling clean. Ensure no baking soda residue remains, as it can create smoke when the oven is next used.
- Clean and Dry Oven Racks: Return to your soaking oven racks. Drain the hot water from the sink or tub. Using a clean microfiber cloth or a sponge, wipe down each rack. The grime should now be significantly loosened and easy to remove. For any remaining tough spots, use a magic eraser or a gentle scrub brush. Rinse the racks thoroughly under running water to remove all baking soda and vinegar residue.
- Dry and Reinstall: Use a clean, dry microfiber cloth to thoroughly dry the oven racks. Ensure they are completely dry before placing them back into your gleaming oven.
Tips for Maintaining a Clean Oven
Now that your oven is sparkling, here are a few tips to keep it that way for longer:
- Wipe Up Spills Immediately: The best way to prevent baked-on messes is to tackle them as soon as they happen, once the oven has cooled. Fresh spills are much easier to clean than those that have cooked on multiple times.
- Use Oven Liners: Consider placing an oven liner (silicone or aluminum foil) on the bottom rack to catch drips and spills before they reach the oven floor.
- Regular Quick Cleans: Don’t wait until your oven is heavily soiled. A quick wipe-down with a damp cloth after cooling can prevent significant buildup.
- Deep Clean Frequency: Depending on how often you use your oven, aim for a deep clean every 3-6 months. More frequent use might warrant a quarterly clean.
- Ventilation: Always ensure good ventilation when cleaning, even with natural ingredients. Open a window or turn on your kitchen exhaust fan.
Troubleshooting Common Oven Cleaning Issues
Even with the best methods, you might encounter a few challenges. Here’s how to address them:
- Persistent Smudges on Glass: For stubborn spots on the oven door glass, try making a slightly thicker baking soda paste and letting it sit on the glass for an hour before scrubbing with a magic eraser.
- White Residue After Cleaning: If you notice a white, powdery residue after wiping, it means some baking soda remains. This is usually harmless but can cause a slight smoky smell when you next use the oven. Simply wipe it down again with a very damp cloth, followed by a dry one, until all residue is gone.
- Rust on Racks: If your racks show signs of rust, a light scrub with a wire brush (if they are robust enough) and a bit more baking soda paste can help, but severe rust may require professional re-enameling or replacement.
Enjoy Your Pristine Oven!
Congratulations! You’ve successfully deep-cleaned your oven using simple, natural ingredients. This method is a testament to the power of baking soda and vinegar, proving that you don’t need harsh chemicals for a truly clean and hygienic cooking space. Not only is your oven now sparkling, but you’ve also avoided exposing yourself and your home to potentially harmful fumes. Enjoy the peace of mind that comes with a fresh, clean oven, ready for your next culinary adventure. Happy cooking!