
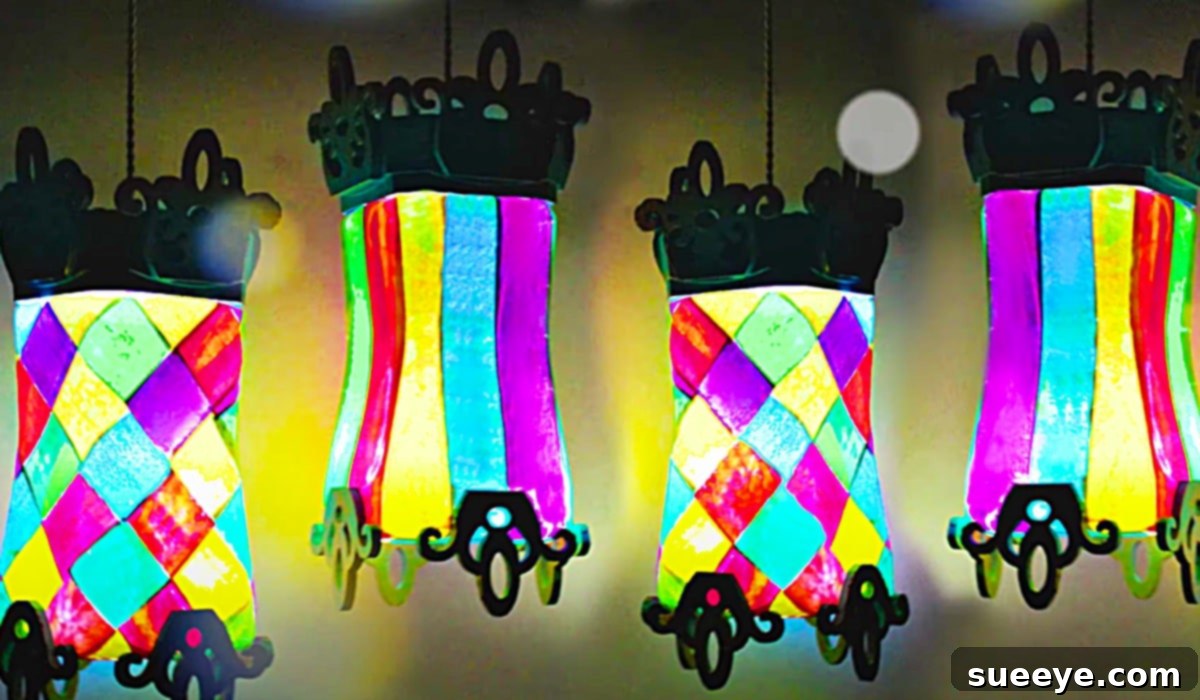
There’s an undeniable magic that ambient lighting brings to any space, transforming ordinary moments into extraordinary memories. Imagine basking in the soft, multicolored glow of enchanting lanterns, adding a touch of whimsy and warmth to your evenings. What if we told you that creating such captivating luminaries is not only incredibly simple but also remarkably budget-friendly? Prepare to unleash your inner artisan as we dive into a delightful DIY project inspired by the ingenious Mark Montano on YouTube: crafting stunning carnival lanterns from everyday glass jars.
This project is a testament to the power of upcycling and creative vision. With just a few basic materials like glass jars, colorful paper, and the versatile Mod Podge, you can create luminous decor that casts a soft, atmospheric light. Perfect for adding a vibrant, bohemian flair to your back porch, garden, or any indoor setting, these lanterns are a delightful way to personalize your living spaces. The beauty lies in their simplicity and the incredible impact they make, proving that exquisite decor doesn’t have to come with a hefty price tag.
Turn Glass Jars Into Carnival Lanterns: Your Ultimate Guide to DIY Ambient Lighting
Why Embrace the DIY Carnival Lantern Project?
In a world increasingly conscious of sustainability and personalized aesthetics, DIY projects like these carnival lanterns offer a multitude of benefits:
- Cost-Effective Decor: Forget expensive store-bought lanterns. This project utilizes readily available, often recycled, materials, making it incredibly budget-friendly. You can transform old pickle jars, jam jars, or even simple canning jars into decorative masterpieces for a fraction of the cost.
- Sustainable & Eco-Friendly: Upcycling glass jars not only reduces waste but also promotes a greener lifestyle. Giving new life to discarded items is a rewarding way to contribute to environmental conservation while beautifying your home.
- Unleash Your Creativity: From selecting unique paper patterns to experimenting with different paint colors and embellishments, this project offers endless possibilities for personalization. You can tailor your lanterns to match any theme, season, or personal style, ensuring they are truly one-of-a-kind.
- Create Magical Ambiance: The soft, diffused light emitted by these lanterns is perfect for setting a relaxed and inviting mood. Whether you’re hosting a garden party, enjoying a quiet evening on the patio, or simply adding a cozy touch to your bedroom, these luminaries provide a warm, enchanting glow.
- Simple & Rewarding: This craft is straightforward enough for beginners yet satisfying for seasoned DIY enthusiasts. The steps are easy to follow, and the results are consistently beautiful, providing a great sense of accomplishment.
Gathering Your Crafting Arsenal: Materials Explained
Before you begin your creative journey, let’s ensure you have all the necessary components. Each material plays a crucial role in bringing your carnival lanterns to life:
- Glass Jars (Any Kind): The star of our show! Collect jars of various shapes and sizes for an eclectic display. Mason jars, old pasta sauce jars, pickle jars, or even glass bottles can be transformed. Ensure they are thoroughly cleaned, with labels removed, and completely dry before use. This provides a smooth, adhesive-ready surface.
- Colored Paper (Cut into Squares or Various Shapes): This is where the magic of color comes in. Tissue paper, scrapbook paper, construction paper, or even magazine cutouts can be used. For a classic carnival look, think vibrant, jewel-toned hues. Cut your paper into squares, strips, circles, or irregular shapes – the more varied, the more dynamic your lantern will appear. Experiment with different transparencies for varied light effects.
- Mod Podge (All-in-One Glue, Sealer, & Finish): This craft essential will act as both the adhesive for your paper and a protective sealant for the finished design. Choose between a matte, glossy, or satin finish based on your desired aesthetic. Mod Podge ensures your paper adheres smoothly and provides a durable, water-resistant coating once dry.
- Wood Trim (From the Craft Store): This optional but recommended element adds a charming, rustic touch to the top or bottom of your lanterns. Look for thin, flexible wood strips or craft sticks that can be easily cut and shaped. Don’t forget to use your coupons at stores like Michael’s or Hobby Lobby to grab these at a great price!
- Chalk Paint: Ideal for painting the wood trim, chalk paint offers a beautiful matte finish and excellent adhesion without much primer. It’s also perfect for achieving a slightly distressed, vintage look. You might even find affordable options at dollar stores like Dollar Tree, making this project even more budget-friendly. Choose colors that complement your paper choices or add a contrasting pop.
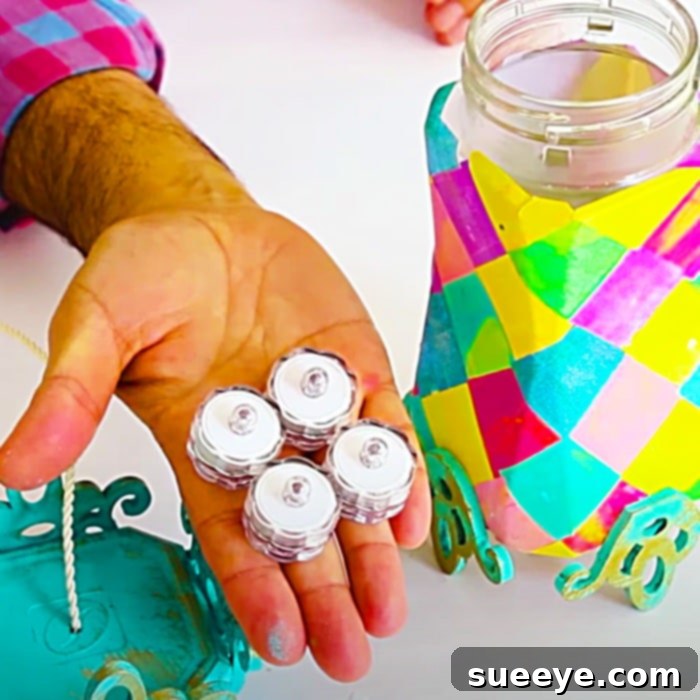
- Battery-Operated Tea Lights: For safety and convenience, battery-operated tea lights are the perfect illumination source. They provide a warm, flickering glow similar to real candles without any fire hazards, making your lanterns safe for indoor and outdoor use, even around children and pets. Consider getting ones with timers for effortless ambiance.
- Scissors or Craft Knife: Essential for precise cutting of your colored paper and wood trim. A sharp pair of scissors will ensure clean edges for your paper pieces.
- Paint Brushes/Sponge Applicators: For applying Mod Podge smoothly and evenly, and for painting your wood trim. Have a few different sizes on hand for versatility.
Step-by-Step Guide: Crafting Your Enchanting Carnival Lanterns
Now that you have all your materials ready, let’s dive into the creative process. This detailed guide will walk you through each step to ensure your lanterns turn out beautifully.
Step 1: Prepare Your Jars and Paper
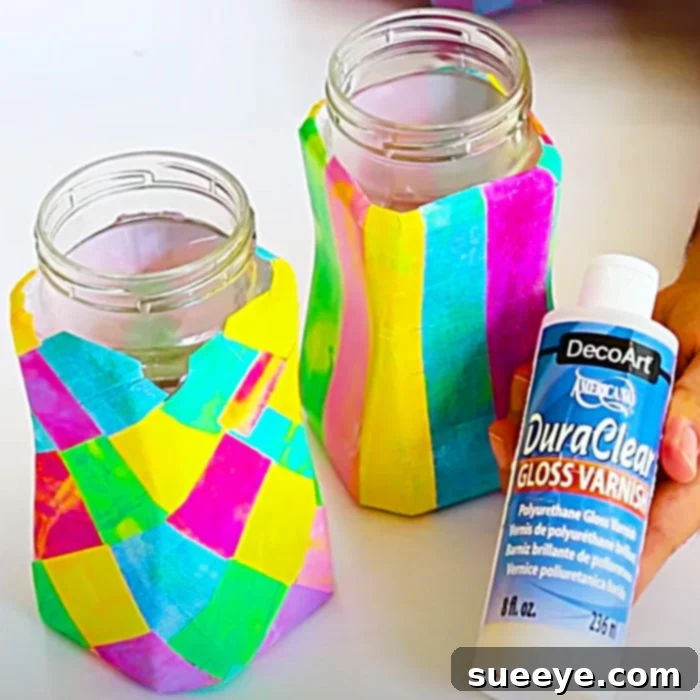
Begin by ensuring your glass jars are immaculately clean and completely dry. Any residue or moisture can prevent the Mod Podge from adhering properly. Next, prepare your colored paper. Cut it into the desired shapes – squares are easy, but feel free to experiment with rectangles, triangles, or even organic torn pieces for a unique mosaic effect. The size of your paper pieces will depend on the size of your jars and the look you’re aiming for. Smaller pieces often create a more detailed, stained-glass appearance.
Step 2: Apply Paper with Mod Podge
This is where your lantern truly begins to take shape. Using a clean paintbrush or sponge applicator, apply a thin, even layer of Mod Podge directly onto a small section of your glass jar. Immediately place one of your cut paper pieces onto the wet Mod Podge, pressing it down gently to remove any air bubbles. Work in small sections, overlapping the paper pieces slightly as you go. You can create a random collage or a more structured pattern. Once a section is covered with paper, apply another thin layer of Mod Podge over the top of the paper to seal it. This top coat will create a smooth, durable finish and enhance the colors of your paper. Continue this process around the entire jar until it is fully covered. Allow the first coat to dry completely before adding additional layers if desired, especially for a more opaque look or if you’re using very thin paper like tissue paper. This step is crucial for both adhesion and creating that beautiful, translucent effect.
Step 3: Add the Decorative Trim
Once your Mod Podge and paper layers are completely dry and cured (this might take several hours or even overnight), it’s time to add the charming wood trim. First, paint your wood trim pieces with your chosen chalk paint color. You may need two coats for full coverage, allowing each coat to dry thoroughly. If you want a distressed look, lightly sand parts of the dried paint with fine-grit sandpaper. Once the paint is dry, carefully glue the wood trim around the top rim or the base of your jar. Strong craft glue or hot glue works well for this step. Ensure the trim is level and securely attached. This trim not only adds an aesthetic detail but also gives your lantern a more finished, polished appearance.
Step 4: Illuminate Your Creation
The final and most exciting step is to add your battery-operated tea lights. Simply drop one or more tea lights into each finished jar. For a brighter glow, you can use multiple tea lights or even small strands of battery-operated fairy lights. These provide a safe, convenient, and beautiful light source that will bring your carnival lanterns to life. The soft, flickering light will dance through the colored paper, creating captivating patterns and an inviting atmosphere.
Creative Variations and Personalization Tips
While the basic steps are simple, the true joy of DIY lies in customization. Here are some ideas to make your carnival lanterns uniquely yours:
- Theme and Color Palettes: Experiment with different color schemes. For a nautical theme, use blues and whites with twine trim. For a romantic touch, opt for pastels and lace. Seasonal themes like autumnal oranges and browns or festive reds and greens for holidays are also fantastic.
- Paper Textures and Patterns: Instead of plain colored paper, try patterned scrapbook paper, vintage newspaper clippings for an antique look, or even pressed dried flowers for a natural aesthetic. Tissue paper creates a very translucent, glowing effect, while thicker paper offers more defined color blocks.
- Additional Embellishments: Consider adding glitter to the Mod Podge, beads glued around the trim, stenciled designs on the painted wood, or even small charms tied with twine. For hanging lanterns, attach a sturdy wire handle to the jar’s neck before applying paper.
- Different Light Sources: While tea lights are great, small battery-operated fairy light strings (often called “firefly lights”) can fill a taller jar with a more distributed glow. Just ensure they are suitable for indoor/outdoor use if your lanterns will be exposed to elements.
Where to Display Your Enchanting Lanterns
Once your carnival lanterns are complete, the possibilities for display are endless:
- Outdoor Oasis: Adorn your patio, deck, or garden path. Place them on outdoor tables, hang them from shepherd’s hooks, or line them along a wall. They create a festive and inviting atmosphere for evening gatherings or quiet reflection. Remember to bring them indoors during harsh weather to protect the paper and Mod Podge.
- Indoor Ambiance: Brighten up your living room, bedroom, or entryway. Place them on shelves, mantels, windowsills, or as a vibrant centerpiece on your dining table. They offer a soft glow that can replace harsh overhead lighting, contributing to a more relaxed home environment.
- Special Events: These lanterns are perfect for adding a charming touch to parties, weddings, baby showers, or holiday celebrations. Arrange them in clusters, scatter them strategically, or use them to highlight specific areas.
- Children’s Rooms: As a safe, no-flame alternative to nightlights, these colorful lanterns can provide a comforting glow in a child’s bedroom. The playful colors can also inspire creativity.
Maintenance and Care for Your Handmade Luminaries
To ensure your beautiful carnival lanterns last for many seasons, a little care goes a long way:
- Cleaning: Gently wipe the exterior of your lanterns with a soft, damp cloth if they accumulate dust. Avoid harsh chemicals or excessive scrubbing, as this could damage the Mod Podge seal and paper.
- Outdoor Exposure: While Mod Podge offers some water resistance, prolonged exposure to heavy rain or direct sunlight can degrade the paper and adhesive over time. If using outdoors, consider placing them in sheltered areas or bringing them inside during inclement weather.
- Battery Replacement: Keep an eye on the brightness of your tea lights. When they start to dim, it’s time to replace the batteries to keep your lanterns glowing brilliantly.
- Storage: When not in use, store your lanterns in a dry, cool place away from direct sunlight to prevent fading or warping.
These DIY carnival lanterns are more than just a craft; they’re a statement of creativity, sustainability, and personal style. Easy to make and endlessly customizable, they offer a radiant solution for adding charm and warmth to any corner of your life. Whether gracing your garden with a bohemian glow or illuminating your indoor spaces with a cozy light, these upcycled glass jar lanterns are sure to captivate and inspire. So gather your materials, let your imagination take flight, and transform simple jars into sources of pure, delightful luminescence. Happy crafting!