
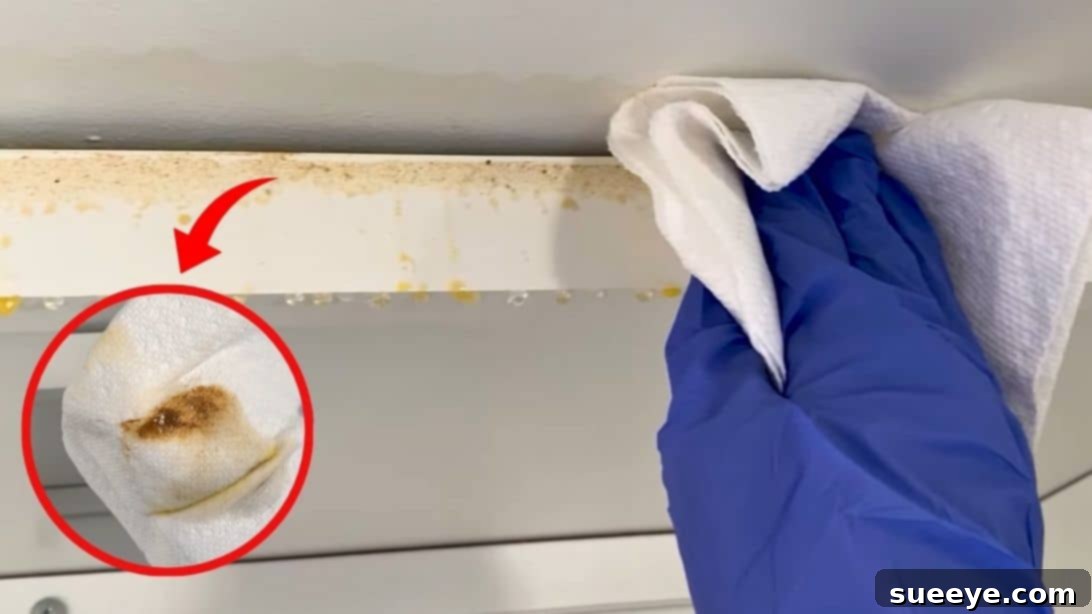
Ultimate Guide to Deep Cleaning Greasy Kitchen Cabinets: Restore Their Shine
The kitchen, often considered the heart of the home, is a place for culinary creativity and shared meals. However, it’s also a battleground for grease and grime. Every time you cook, especially when frying, sautéing, or boiling, tiny particles of oil, fat, and food debris become airborne. These microscopic droplets settle on nearly every surface, from your countertops and stovetop to the backsplash and, most notoriously, your kitchen cabinets. Over time, this invisible film accumulates, transforming into a sticky, unsightly layer that traps dust and dirt, making your once beautiful cabinets appear dull, discolored, and unhygienic. This persistent buildup not only detracts from your kitchen’s aesthetics but can also create an environment conducive to bacteria growth, especially on frequently touched surfaces like cabinet handles.
Neglecting this oily buildup for too long can make the cleaning process feel daunting. Stubborn grease, particularly around oven hoods, cabinet handles, and above the cooking range, can seem impossible to remove without harsh chemicals or excessive scrubbing. However, with the right approach, a little patience, and some effective cleaning hacks, you can restore your kitchen cabinets to their pristine condition, enhancing the overall cleanliness and appeal of your entire kitchen. This comprehensive guide will walk you through a simple, yet highly effective method for banishing even the most tenacious grease, making your cleaning routine easier and faster. Get ready to transform your kitchen into a sparkling, inviting space once more!
RELATED: The Best Way to Dispose of Cooking Grease Safely and Responsibly
For a visual demonstration of these effective cleaning techniques, we recommend checking out the insights shared by The Clean Loft on YouTube. Their practical advice can further enhance your cleaning success.
Here’s another useful tip you might want to try for immediate hand cleaning: How To Clean Grease from Hands Instantly without Soap
Essential Tools and Supplies for Effective Cabinet Degreasing
Before you embark on your cabinet cleaning mission, gathering all necessary supplies beforehand will streamline the process and ensure you have everything you need at your fingertips. Selecting the right tools and products is crucial for tackling grease efficiently without damaging your cabinet finishes. Here’s a comprehensive list of what you’ll need, along with a brief explanation of why each item is important:
- Powerful Degreaser: A high-quality cleaner specifically designed to cut through grease and grime, such as Krud Kutter (a popular cleaner/degreaser/stain remover). The effectiveness of your cleaner is paramount in breaking down oil and fat deposits. Always ensure your chosen degreaser is safe for your specific cabinet material (e.g., wood, laminate, painted, metal).
- Microfiber Towels (at least 2): These are indispensable for their superior absorption and ability to trap dirt and grease without scratching surfaces. You’ll need one for applying water and rinsing, and another for drying. Their lint-free nature helps prevent streaks.
- Paper Towels: Useful for initially wiping away extremely thick grease deposits or for quick clean-ups, protecting your microfiber towels from becoming overly saturated with heavy grease.
- Old Toothbrush: Perfect for reaching into tight corners, intricate carvings, and the small crevices around cabinet hardware where grease loves to hide and accumulate. Its small bristles can dislodge stubborn grime without being too abrasive.
- Small Cleaning Brush (e.g., detail brush or scrub brush): For larger grooves, raised paneling, or areas requiring a bit more scrubbing power than a toothbrush, a slightly larger detail brush with stiffer bristles can be very effective.
- Duster or Vacuum with Brush Attachment: Essential for removing loose dust and dry debris before applying any liquid cleaner. This prevents dirt from turning into muddy streaks once wet.
- Bucket: To hold warm water for rinsing your cleaning cloths. Having a dedicated bucket prevents you from repeatedly running to the sink and ensures you have a clean water supply.
- Warm Water: Warm water helps to emulsify grease, making it easier for the cleaner to break it down and for you to wipe it away.
- Butter Knife or Dinner Knife (Blunt Edge): A clever tool for wrapping with a microfiber towel to reach into very narrow gaps, such as the tops of cabinet doors or tight spaces between cabinet frames, allowing for precise cleaning.
- Rubber Gloves: Highly recommended for protecting your hands from harsh chemicals and the grease itself. They also provide a better grip on cleaning tools.
- Optional: Drop Cloths or Old Towels: To protect your countertops and flooring from drips and spills during the cleaning process, especially if you’re working on upper cabinets.
A Step-by-Step Guide to Deep Cleaning Greasy Kitchen Cabinets
Follow these detailed steps to systematically clean and degrease your kitchen cabinets, ensuring a thorough and sparkling finish. Remember to work in manageable sections to prevent the cleaner from drying on the surface.
Step 1: The All-Important Initial Dusting
Before introducing any moisture, begin by thoroughly dusting all cabinet surfaces. This crucial first step removes loose debris, cobwebs, and dry dirt that have adhered to the greasy film. If you skip this, the dust will simply mix with your cleaning solution, creating muddy streaks and making your job harder. Use a duster, a dry microfiber cloth, or even a vacuum cleaner with a soft brush attachment for this task. Pay special attention to the tops of cabinets, crown molding, and the areas around handles, where dust often settles heavily. This pre-cleaning sets the stage for the degreasing product to work directly on the grease, not on layers of dust.
Step 2: Applying Your Degreaser with Precision
Once dusted, it’s time to apply your chosen degreaser. For optimal results, spray your cleaning product directly onto the greasy areas of a small section of your cabinet. Avoid overspraying or letting the product sit too long, especially on sensitive finishes like wood. Allow the product to dwell for 1 to 2 minutes, as directed by the manufacturer, to give it time to break down the grease effectively. The active ingredients in the degreaser work to emulsify the oils, making them easier to lift away. Working in small sections, such as one cabinet door or a small panel at a time, is vital. This prevents the cleaner from drying out before you can wipe it, which can leave streaks or even damage certain finishes. Always test the product in an inconspicuous area first to ensure it doesn’t cause discoloration or damage to your cabinet material.
Step 3: Wiping, Scrubbing, and Rinsing Away the Grime
After the degreaser has had a moment to work, begin the wiping process. If you encounter exceptionally thick or caked-on grease, use a paper towel to gently scrape and wipe away the excess before using your microfiber cloth. This prevents your valuable microfiber towels from becoming overly soiled too quickly. Next, fill your bucket with warm water. Take one microfiber towel, dampen it with the warm water, and wring it out thoroughly so it’s not dripping. Start cleaning from the top of the cabinet and work your way down. This ensures that any loosened grime falls onto areas yet to be cleaned. For the narrow top edge of cabinet doors or tight spaces between decorative molding, wrap the damp microfiber towel around the blunt edge of a butter knife or dinner knife. This allows you to reach and clean those hard-to-access areas effectively. Pay close attention to cabinet crevices, grooves, and raised panels – these are common grease traps. A small cleaning brush or an old toothbrush will be invaluable here for gently scrubbing away embedded grime. As your microfiber towel becomes dirty with grease and residue, rinse it thoroughly in the warm water, wring it out, and continue cleaning. Remember to clean not just the cabinet fronts, but also the handles and the inside edges of the cabinet doors and frames, as grease can accumulate there too.
Step 4: The Critical Rinse for a Streak-Free Finish
Once you’ve thoroughly cleaned all the greasy areas, it’s time for a final rinse. Discard the dirty water in your bucket and refill it with clean, fresh warm water. Take the same microfiber towel (or a fresh one if the first is too soiled), rinse it thoroughly, and dampen it again with the clean water. Wring it out well. Now, carefully wipe down all the cabinet surfaces you just cleaned, effectively rinsing away any remaining degreaser residue. This step is crucial for preventing streaks, dullness, or a sticky film that can attract dirt again. Ensure you don’t leave any soapy residue behind.
Step 5: Drying for Protection and Shine
Immediately after rinsing, grab your second clean, dry microfiber towel. Use this towel to thoroughly dry all the cabinet surfaces and handles. Drying immediately prevents water spots, streaks, and potential water damage, especially on wood cabinets. A dry microfiber towel will also buff the surface, leaving your cabinets sparkling clean and restored to their original luster. Ensure every part, including crevices and handles, is completely dry before concluding your cleaning session. This final step not only perfects the finish but also helps protect your cabinets from future moisture damage.
Advanced Hacks & Expert Tips for Keeping Kitchen Cabinets Grease-Free
Beyond the fundamental cleaning steps, there are numerous strategies and clever hacks you can employ to make the task of degreasing your kitchen cabinets even more effective, especially for stubborn stains, or to simply maintain their cleanliness over time. Here are some advanced tips to elevate your cabinet cleaning game:
Natural Cleaning Solutions for Lighter Grease
While commercial degreasers are powerful, for lighter grease buildup or for those who prefer eco-friendly options, several natural solutions can be very effective:
- Vinegar and Water Solution: Mix equal parts white vinegar and warm water in a spray bottle. Spray on surfaces, let sit for a few minutes, then wipe with a damp cloth. Vinegar is acidic and helps cut through grease, though its smell can be strong initially. It’s generally safe for most cabinet finishes but avoid on natural stone countertops nearby as it can etch them.
- Baking Soda Paste: For more stubborn, localized grease spots, create a paste using baking soda and a small amount of water. Apply the paste directly to the greasy area, let it sit for 5-10 minutes, then gently scrub with a soft brush or cloth. Baking soda is a mild abrasive that can lift grease without scratching. Rinse thoroughly.
- Dish Soap and Warm Water: Believe it or not, ordinary dish soap is a fantastic degreaser! Mix a few drops of liquid dish soap (like Dawn) into a bowl of warm water. Dip a microfiber cloth into the solution, wring it out well, and wipe down greasy cabinets. The soap helps break down the grease, and warm water assists in loosening it. Rinse with a clean, damp cloth afterwards.
- Lemon Juice: The citric acid in lemon juice can also help cut through grease. Mix fresh lemon juice with water or baking soda for a natural, pleasant-smelling cleaner, particularly effective for sticky residue.
Always test any new cleaning solution, whether commercial or natural, on an inconspicuous area of your cabinets first to ensure it doesn’t cause discoloration or damage.
Preventative Measures: The Best Defense Against Grease Buildup
The easiest way to deal with grease is to prevent its excessive buildup in the first place. Incorporating these habits into your kitchen routine can significantly reduce the frequency and intensity of deep cleaning:
- Use Your Range Hood: Always turn on your range hood or exhaust fan when cooking, especially when frying or boiling. This helps to capture airborne grease particles and steam before they settle on your cabinets.
- Wipe Spills Immediately: Don’t let fresh splatters sit. Wiping down cooking spills and splatters immediately with a damp cloth can prevent them from baking onto surfaces and turning into stubborn grease.
- Regular Light Cleaning: Incorporate a quick wipe-down of cabinet fronts, especially those closest to the stove, into your weekly or bi-weekly cleaning routine. A simple wipe with a damp microfiber cloth or a dilute dish soap solution can prevent major buildup.
- Line Cabinet Tops: For cabinets that don’t reach the ceiling, the flat tops can become notorious dust and grease collectors. Line them with wax paper, parchment paper, or even newspaper. When it gets greasy, simply replace the liner – a much easier task than scrubbing!
- Consider Splash Guards: If you have an open concept kitchen or specific areas prone to excessive splatter, consider temporary splash guards when cooking especially messy dishes.
Tackling Different Cabinet Materials
Not all cabinets are created equal, and some materials require a gentler touch:
- Wood Cabinets: Be cautious with harsh chemicals or excessive moisture, as these can strip finishes or cause swelling. Always wipe dry immediately. For wood, often a warm water and dish soap solution is best, followed by a wood conditioner if desired.
- Laminate or Thermofoil Cabinets: These are generally more durable and less porous than wood, making them easier to clean. Most degreasers are safe, but avoid abrasive scrubbers that can scratch the surface.
- Painted Cabinets: Painted surfaces can be delicate. Use non-abrasive cleaners and soft cloths. Harsh scrubbing or strong solvents can chip or dull the paint. Always test in an inconspicuous area.
- Metal or Stainless Steel Cabinets: These are quite resilient. A good degreaser followed by a stainless steel cleaner or polish will work wonders. Always wipe in the direction of the grain to prevent streaks.
Safety First: Important Considerations
When dealing with cleaning products and grease, always prioritize safety:
- Ventilation: Ensure good ventilation in your kitchen by opening windows or running an exhaust fan, especially when using commercial chemical degreasers.
- Gloves: Always wear rubber gloves to protect your hands from chemicals and the unsanitary grease.
- Read Labels: Carefully read the instructions and warnings on all cleaning product labels.
- Proper Storage: Store all cleaning products safely out of reach of children and pets.
By implementing these detailed steps, advanced hacks, and preventative measures, you’ll be well-equipped to keep your kitchen cabinets sparkling clean and grease-free, ensuring your kitchen remains a truly inviting and hygienic space.