
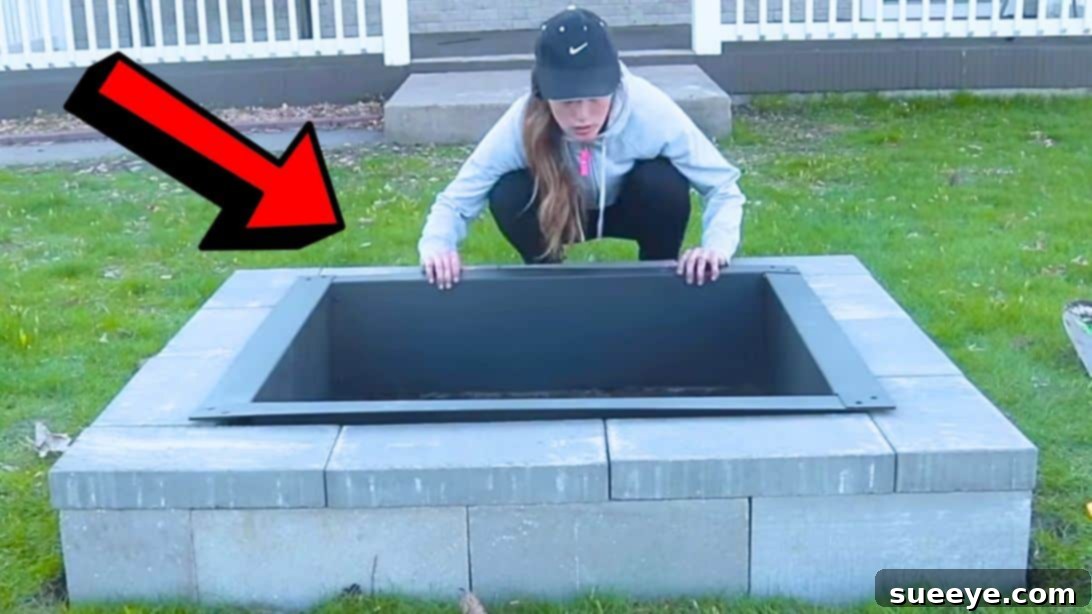
As the crisp air of autumn settles in, there’s nothing quite like gathering around a warm, crackling fire. A backyard fire pit transforms any outdoor space into a cozy haven, perfect for sharing stories, roasting marshmallows, or simply enjoying the peaceful glow of flames. While countless options exist for purchasing a fire pit, building your own offers a deeply satisfying experience, allowing for customization, significant cost savings, and the pride of a handcrafted addition to your home. This comprehensive guide will walk you through creating a simple yet striking modern fire pit using readily available materials, inspired by the brilliant idea from Welcome to the Woods on YouTube.
This DIY fire pit project is designed for simplicity, making it accessible even for beginner builders. You won’t need specialized tools or extensive construction experience. Instead, with a few basic materials and a commitment to safety, you can construct a durable and aesthetically pleasing fire pit that will serve as the centerpiece of countless memorable outdoor evenings. The modern design, achieved through clean lines and common building materials like cinder blocks and patio pavers, ensures it complements a wide range of backyard aesthetics, from contemporary to rustic.
Build Your Own Simple & Modern DIY Square Fire Pit
Why a DIY Fire Pit is the Perfect Project
Opting for a DIY fire pit over a pre-fabricated model comes with numerous advantages. Firstly, it’s often significantly more budget-friendly. By sourcing materials yourself and investing a bit of your time, you can achieve a high-quality fire pit for a fraction of the retail cost. Secondly, building it yourself offers the freedom to customize. You can adjust the dimensions to perfectly fit your space, choose materials that match your existing landscape, and even incorporate personal touches to make it uniquely yours. Finally, there’s immense satisfaction in creating something with your own hands. Every time you light a fire, you’ll be reminded of your effort and skill in enhancing your outdoor living area.
Designing for Modern Simplicity
The beauty of this particular fire pit design lies in its modern simplicity. It eschews ornate details for clean, functional lines. Using cinder blocks as the foundational structure provides strength and stability, while patio pavers serve as a sleek cap, unifying the design and offering a smooth, finished edge. This combination of materials creates a robust structure that looks intentional and stylish, effortlessly blending with minimalist or contemporary outdoor decor. The square shape is inherently modern, providing a strong visual anchor in your yard, and is easier to construct than circular alternatives.
Essential Materials for Your Fire Pit Project
Before you begin, gathering all your materials is crucial. This ensures a smooth and uninterrupted building process. You’ll likely find most of these items at your local home improvement store. Here’s what you’ll need:
- Fire Pit Liner: This is a non-negotiable component. A sturdy metal fire pit liner is essential for containing the fire, protecting the surrounding masonry from intense heat, and extending the lifespan of your fire pit. Choose a liner size that dictates the overall dimensions of your fire pit.
- Cinder or Concrete Blocks: These form the structural base of your fire pit. The quantity will depend on the desired height and circumference of your pit. Standard 8x8x16 inch blocks are commonly used for their stability and ease of stacking.
- Patio Pavers: These will cap the top layer of your cinder blocks, creating a finished look and providing a stable edge. Choose pavers that complement your aesthetic and are robust enough to withstand outdoor elements.
- Shovel: For digging and leveling the ground.
- Measuring Tape: Accuracy is key for a well-proportioned fire pit.
- Spirit Level: To ensure your base and block layers are perfectly level, preventing wobbles and promoting safety.
- Rubber Mallet: Useful for gently tapping blocks and pavers into place.
- Work Gloves: Protect your hands during construction.
- Safety Glasses: Always recommended when working with tools and materials.
- Optional: Landscape fabric, gravel or sand for a stable base, and construction adhesive for a more permanent structure.
Step-by-Step Directions for Building Your Fire Pit
With your materials ready, let’s begin the construction process. Remember to work carefully and deliberately to ensure a safe and beautiful final product.
- Assemble the Fire Pit Liner: If your chosen fire pit liner comes in multiple pieces, assemble it according to the manufacturer’s instructions. This step is crucial for understanding its final dimensions and how it will sit within your block structure.
- Choose and Prepare Your Location: Selecting the right spot is paramount for safety and enjoyment. Choose a flat, open area in your yard, away from any overhanging trees, fences, structures (like your house or shed), and low-hanging branches. A general rule of thumb is to maintain at least 10-20 feet clearance from anything combustible. Check local fire codes or HOA regulations regarding outdoor fires in your area. Once the spot is chosen, use your assembled fire pit liner as a guide. Measure out the total space the fire pit will occupy, including the exterior dimensions of the blocks and pavers. Mark this area clearly on the ground using spray paint or stakes and string.
- Excavate the Base: Using your shovel, begin digging out the marked area. You’ll want to create a trench or a shallow pit for the first layer of cinder blocks. The depth should be enough so that the first course of blocks is partially or fully submerged, creating a stable, level foundation. Aim for a depth of about 4-6 inches. Ensure the base is as level as possible by regularly checking with your spirit level. For enhanced stability and drainage, you can lay down a layer of landscape fabric at the bottom of the pit, followed by 2-3 inches of compacted gravel or sand before placing your blocks.
- Lay the First Course of Blocks: Carefully place your cinder or concrete blocks around the perimeter of your excavated area. Arrange them to form the square shape, ensuring the interior dimensions comfortably accommodate your fire pit liner. Butt the blocks tightly against each other. Use your spirit level to confirm each block is perfectly level, both individually and in relation to the adjacent blocks. A rubber mallet can be useful for gentle adjustments. This first layer is critical, as it sets the stage for the entire structure.
- Build Subsequent Block Layers (if desired): Depending on the desired height of your fire pit, you may add one or more additional layers of cinder blocks. For a robust structure, stagger the blocks (like brickwork) so that the vertical joints of one layer do not align with the layer below. This technique, known as “running bond,” significantly increases structural integrity. Continue to check for levelness with each new layer. For a more permanent build, you can apply construction adhesive between the block layers.
- Place the Patio Pavers: Once your block structure has reached the desired height, it’s time to add the finishing touch – the patio pavers. Carefully place these pavers on top of the uppermost layer of cinder blocks. The pavers should extend slightly over the inner and outer edges of the blocks, creating an attractive and functional cap. Ensure they are evenly spaced and perfectly level. These pavers not only enhance the aesthetic but also cover the cavities of the cinder blocks, providing a smooth, finished surface that can serve as a ledge for drinks or small plates.
- Position the Fire Pit Liner: Now, gently lower your assembled fire pit liner into the center of the structure. It should fit snugly but not be forced. The liner’s rim should ideally sit flush with or slightly below the top of your patio pavers, ensuring a clean and integrated look.
- Final Checks and First Fire: Take a moment to inspect your finished fire pit. Check for any wobbly blocks or pavers and make adjustments. Ensure the area immediately surrounding the pit is clear of any flammable materials. With all safety precautions in place, you’re ready for your inaugural fire! Place dry wood pieces inside the fire pit liner, use appropriate kindling, and light it up. Enjoy the warmth and ambiance of your newly constructed outdoor haven.
Safety Considerations for Your Backyard Fire Pit
Building and enjoying a fire pit is wonderful, but safety must always be your top priority. Never leave a fire unattended. Keep a bucket of water, a hose, or a fire extinguisher nearby at all times. Be mindful of wind conditions; strong winds can carry embers and ignite nearby dry vegetation. Only burn untreated wood; avoid burning trash, leaves, or anything that could release toxic fumes or excessive sparks. Always ensure the fire is completely extinguished before leaving the area, especially before going to bed. Teach children and pets to maintain a safe distance from the flames.
Enhancing Your Fire Pit Experience
Once your modern DIY fire pit is complete, consider ways to enhance your outdoor experience. Comfortable seating, such as Adirondack chairs or a stone bench, will encourage longer, more relaxed gatherings. Outdoor string lights or solar-powered lanterns can add to the ambiance without needing additional power outlets. Keep a supply of dry firewood stacked neatly nearby, perhaps in a decorative log holder. For those who love s’mores, having skewers readily available will ensure impromptu dessert sessions are always on the menu. Remember, this fire pit isn’t just a structure; it’s a hub for connection and relaxation.
Maintenance Tips for Longevity
To ensure your fire pit remains a beautiful and functional feature for years to come, regular maintenance is key. After each use, allow the ashes to cool completely before scooping them out. This prevents ash buildup, which can hinder airflow and make lighting future fires more difficult. Consider purchasing a durable cover for your fire pit to protect it from rain, snow, and debris when not in use. Periodically check the blocks and pavers for any signs of shifting or damage and make repairs as needed. With proper care, your DIY fire pit will continue to provide warmth and joy for many seasons.
Congratulations on building your very own modern DIY fire pit! This simple project not only adds significant value and appeal to your outdoor space but also creates a focal point for countless cherished moments with family and friends. We extend our sincere gratitude to Welcome to the Woods via YouTube for the inspiring idea and images that made this guide possible. If you enjoyed this DIY project, be sure to visit their channel for more creative and helpful video tutorials!