
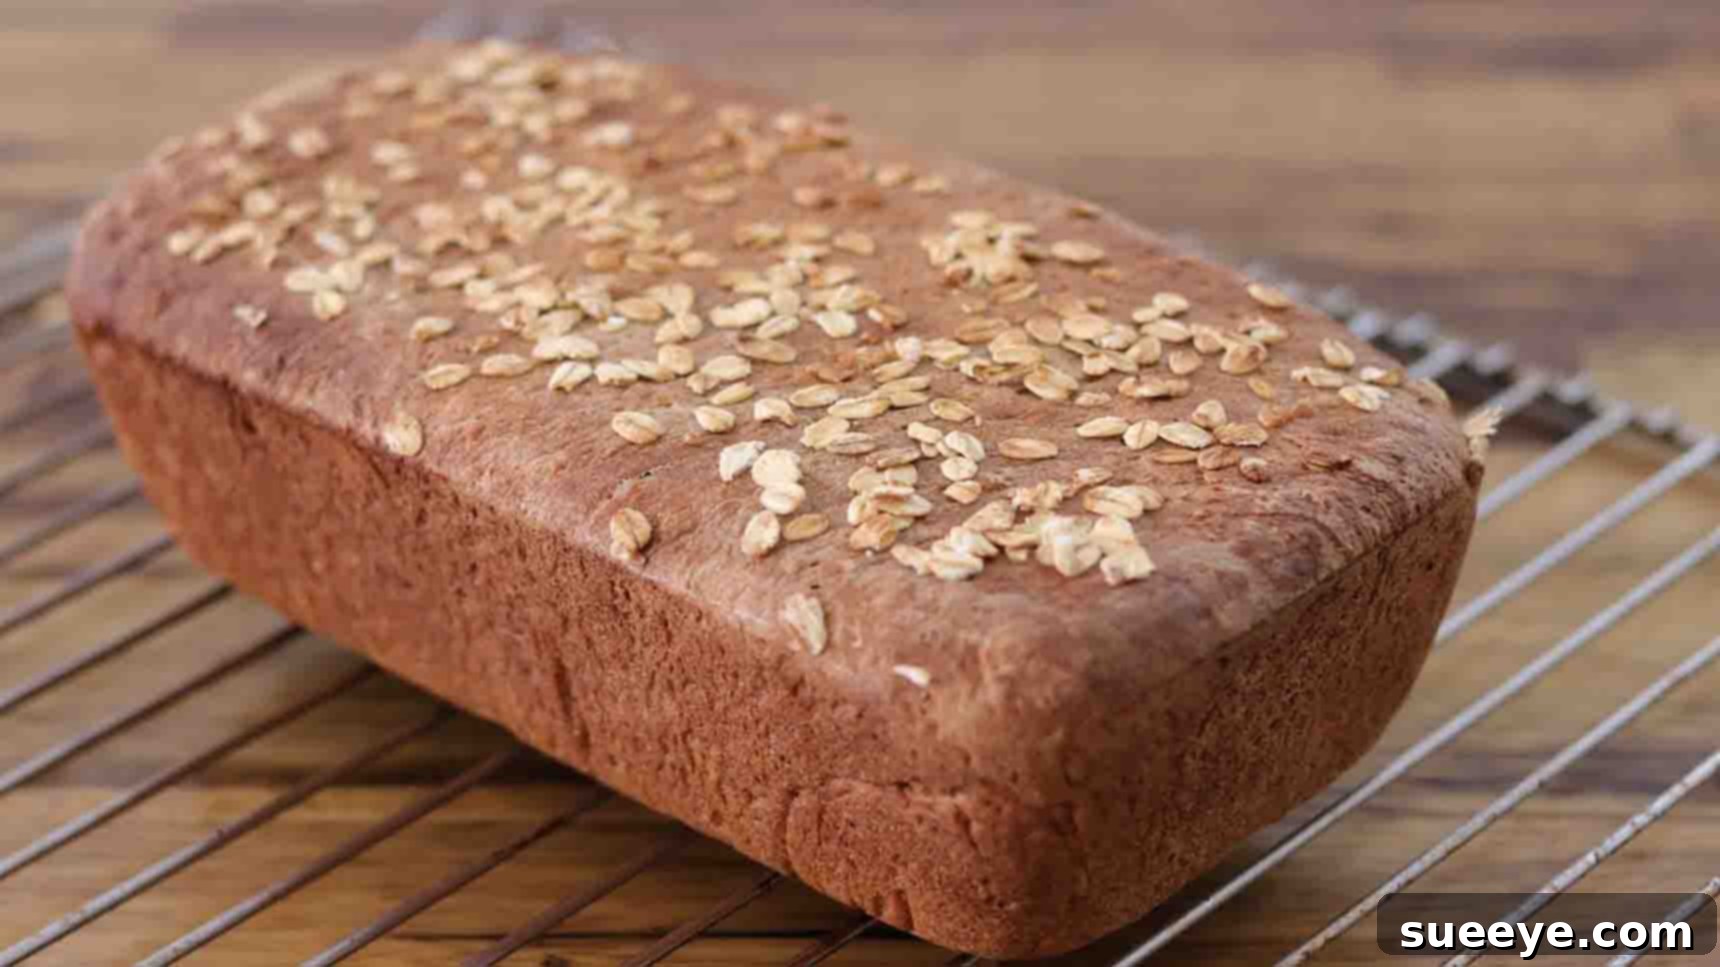
Homemade Honey Oatmeal Bread: A Beginner-Friendly Recipe for Delicious Baking
There’s nothing quite like the irresistible aroma of freshly baked bread filling your home. It’s a scent that promises warmth, comfort, and unparalleled deliciousness. While the art of baking bread might seem daunting to some, this incredible Honey Oatmeal Bread recipe from The Cooking Foodie on YouTube is specifically designed to be approachable and incredibly rewarding for bakers of all skill levels. Get ready to create a culinary masterpiece that boasts a delightfully crusty exterior and an irresistibly soft, fluffy interior – a true testament to the simple joys of homemade goodness.
This isn’t just a recipe; it’s an invitation to experience the profound satisfaction of crafting something truly special from scratch. Once you taste this wholesome loaf, packed with the natural sweetness of honey and the hearty texture of oats, it’s bound to become a cherished staple in your kitchen. Forget about bland, store-bought loaves often laden with preservatives and artificial ingredients. Our detailed journey into baking this easy honey oatmeal bread will guide you through each step with exceptional clarity and simplicity. Whether you’re an absolute novice who has never kneaded dough before or a seasoned baker seeking a new favorite to add to your repertoire, this recipe is meticulously crafted to ensure your success. So, tie on your apron, gather your essential ingredients, and prepare to embark on a delightful baking adventure that culminates in a loaf of bread so good, you’ll wonder why you ever considered buying it from a store. This comprehensive guide will empower you to master every nuance, from the initial mixing to achieving that perfect golden-brown crust.
Why Honey Oatmeal Bread? A Perfect Blend of Flavor and Nutrition
Beyond its incredible taste and wonderfully satisfying texture, honey oatmeal bread offers a multitude of benefits that make it a standout and wholesome choice for you and your family. This particular recipe expertly leverages the nourishing power of rolled oats and whole wheat flour, positioning it as a significantly more nutritious alternative to many commercially available white bread varieties. Rolled oats are highly regarded for their rich fiber content, which plays a crucial role in aiding digestion, helping to maintain healthy cholesterol levels, and providing a sustained release of energy throughout the day, ensuring you feel full and energized through your morning.
The thoughtful inclusion of whole wheat flour further elevates the nutritional profile of this bread. It supplies essential vitamins, vital minerals, and additional dietary fiber that are often absent in highly refined flours. Concurrently, honey, a natural and ancient sweetener, not only imparts a unique, nuanced depth of flavor and contributes to a beautiful golden hue on the crust but also brings its own array of beneficial antioxidants and compounds. The harmonious combination of these ingredients results in a bread that is not merely a delightful treat for your taste buds, but also a smart and conscious choice for embracing a healthier lifestyle. It’s perfectly suited for a wholesome breakfast, a satisfying afternoon snack, or as a hearty and complementary accompaniment to virtually any meal.
Essential Ingredients for Your Homemade Honey Oatmeal Bread
The inherent beauty of this recipe lies in its simplicity and the high quality of its core components. Each carefully selected ingredient plays a critical role in achieving that perfect, harmonious balance of flavor, texture, and rise that makes this bread truly exceptional. Here’s a detailed breakdown of what you’ll need to gather to create your magnificent loaf of honey oatmeal bread, ensuring you have everything ready before you begin:
- 1 cup Rolled Oats: These robust oats are crucial for providing a wonderful, chewy texture and significantly contributing to the bread’s wholesome, rustic character. It is important to use rolled oats, not instant or quick-cooking oats, as they absorb liquid differently and can alter the final texture of the bread.
- 3 cups Whole Wheat Flour: This forms the hearty and nutritious foundation of our loaf. Whole wheat flour is packed with more fiber, essential vitamins, and minerals compared to all-purpose flour, lending the bread a richer, more complex, and truly satisfying taste.
- 1/4 cup Honey: As our primary natural sweetener, honey not only adds a lovely, nuanced sweetness but also plays a vital role in enhancing the browning of the crust, giving it that appealing golden finish, and significantly contributing to the bread’s moistness and tender crumb.
- 1 & 1/2 cups Boiling Water: This hot water is essential for two key purposes: blooming the rolled oats, which helps them soften and release their starches, and creating the initial slurry for the dough, ensuring a smooth start to the mixing process.
- 1 & 1/4 tsp Instant Dry Yeast: This is the crucial leavening agent that performs the magic of making your bread rise beautifully and achieving that desirable airy texture. Instant yeast is incredibly convenient as it can be added directly to the dry ingredients without needing to be proofed separately, simplifying your baking process.
- 1 & 1/2 tsp Salt: Often underestimated, salt is a critically important ingredient. It not only significantly enhances the overall flavor of the bread but also helps to regulate the activity of the yeast and strengthens the gluten structure of the dough, which is essential for a well-formed crumb.
- 2 tbsp Melted Butter: The addition of melted butter provides a wonderful richness and tenderness to the bread. It imbues the loaf with a pleasant, subtle flavor and plays a key role in achieving that desirable soft and moist interior.
- For Brushing (1 tbsp Boiling Water + 1 tbsp Honey): This simple yet effective mixture is applied to the top of the dough just before baking. It creates a beautiful, glossy, and slightly sticky crust, which is perfect for adhering additional rolled oats and adds an extra layer of subtle sweetness and a professional finish to your loaf.
Step-by-Step Directions: Baking Your Perfect Loaf
Follow these meticulously detailed instructions carefully, paying close attention to each step, and you will undoubtedly be rewarded with a delicious, homemade honey oatmeal bread that’s sure to impress everyone who tastes it.
Step 1: Preparing the Dough and Initiating the First Rise
Begin your baking journey by ensuring all your ingredients are meticulously measured and readily available. In a large, spacious mixing bowl, combine 1 cup of rolled oats, 1 & 1/2 cups of boiling water, 1/4 cup of honey, 2 tablespoons of melted butter, and 1 & 1/2 teaspoons of salt. Using a sturdy spoon or a reliable spatula, mix these ingredients thoroughly until they are completely combined and homogenous. The boiling water will immediately begin to soften the oats and perfectly melt the honey, creating a fragrant and warm base for your dough. Now, it is crucial to allow this mixture to cool down for several minutes. The temperature is paramount here; it must no longer be too hot, as excessive heat can unfortunately kill the active yeast we’ll be incorporating next. The mixture should feel comfortably warm to the touch, akin to the temperature of a pleasant bath.
Once the mixture has cooled sufficiently, proceed to add 3 cups of whole-wheat flour, followed immediately by 1 & 1/4 teaspoons of instant dry yeast. Gently incorporate these new dry ingredients by carefully folding them into the wet mixture. Continue this folding and stirring process until a shaggy, yet cohesive, dough mass begins to form within the bowl. At this preliminary stage, the dough might still appear a bit sticky and somewhat unformed, which is an entirely normal and expected part of the process. Carefully transfer this dough onto a lightly floured, clean working surface, such as a sturdy countertop or a large wooden board. Sprinkle a little extra flour over the dough to prevent any sticking, and then begin the essential kneading process.
Knead the dough with consistent motion for approximately seven to eight minutes. The primary goal of kneading is to thoroughly develop the gluten strands present in the flour, which are responsible for giving the bread its fundamental structure, elasticity, and desired chewiness. As you diligently knead, you will observe the dough undergoing a remarkable transformation: it will evolve from a shaggy, somewhat rough mass into a smooth, elastic, and beautifully pliable ball. It should feel significantly less sticky and notably more resilient. After the kneading is complete, lightly grease a separate, clean large bowl with a tiny amount of oil or melted butter. Carefully place the kneaded dough into this greased bowl, turning it once to ensure the entire surface is coated with the grease. This crucial step prevents the dough from sticking to the bowl as it rises. Cover the bowl tightly with plastic wrap or a clean, damp kitchen towel. Allow the dough to rise in a warm, draft-free place for about an hour, or until it has visibly doubled in size. This initial rise, scientifically known as bulk fermentation, is absolutely vital for optimal flavor development and achieving a desirable, open crumb structure in your finished bread.
Step 2: Expert Shaping, Crucial Second Rise, and Baking to Perfection
Once your dough has successfully completed its first rise and has gloriously doubled in size, gently punch it down firmly but carefully to release the trapped gases that have formed. Transfer the dough once more to your lightly floured working surface. Now, it’s time for the art of shaping your loaf. Gently flatten the dough into a rectangular shape, then carefully and tightly roll it up from one end to the other, meticulously forming a neat and uniform log shape. Ensure you pinch the seam closed securely at the bottom to guarantee that it holds its elegant form throughout the entire baking process. This careful and precise shaping technique is key to achieving an even rise and a beautifully symmetrical loaf.
Prepare your loaf pan by lightly greasing its interior or, if preferred, lining it meticulously with parchment paper. Carefully and gently place the freshly shaped dough log into the prepared loaf pan. Cover the pan again, either with plastic wrap or a clean, damp kitchen towel. Allow the dough to rise for a second time, for approximately another hour, or until it has almost doubled in size again and appears delightfully puffy and airy. This second proofing stage, also known as the final proof, is absolutely crucial for achieving that exquisitely light, fluffy, and tender texture in the finished bread.
While your dough is undergoing its final, vital rise, preheat your oven to precisely 350 degrees F (175 degrees C). In a small, clean bowl, combine 1 tablespoon of honey and 1 tablespoon of boiling water. Mix these two ingredients thoroughly until the honey is fully dissolved and the mixture achieves a smooth, consistent texture. Once the dough has proudly finished its second rise, gently brush the entire top surface of the loaf with this honey-water mixture. Exercise extreme care not to deflate the delicate dough during this process. This honey wash will impart a magnificent golden crust to your bread and add a touch of extra, subtle sweetness. For an added visual appeal and a delightful textural crunch, generously sprinkle some rolled oats over the top of the brushed dough, adhering them beautifully to the sticky surface.
Carefully place the loaf pan into the preheated oven. Bake for an initial period of 20 to 25 minutes. After this initial baking time, the top of the bread will likely have developed a beautiful golden-brown hue. To prevent the crust from becoming too dark or potentially burning while the interior continues to cook thoroughly, gently cover the loaf pan with aluminum foil. Continue baking for an additional 20 to 25 minutes, or until the internal temperature of the bread reaches between 200-210 degrees F (93-99 degrees C) when accurately measured with an instant-read thermometer. The total baking time will typically range between 40 to 45 minutes, depending on your oven.
Once your honey oatmeal bread is baked to absolute perfection, carefully remove the loaf pan from the hot oven. Allow the bread to cool undisturbed in the loaf pan for about ten minutes. This crucial cooling period allows the internal structure of the bread to properly set and firm up, making it significantly easier to remove from the pan without causing any damage to its beautiful shape. After ten minutes, carefully transfer the bread from the pan to a wire cooling rack. It is paramount to allow it to cool completely on the rack before attempting to slice it. Slicing hot bread can often result in a gummy or dense texture due to the steam still trapped within. Your patience at this stage will be richly rewarded with the best possible texture and flavor profiles in your homemade bread.
Expert Tips for Perfect Honey Oatmeal Bread Every Time
Achieving a consistently perfect loaf of homemade bread requires a little extra attention to detail and understanding of the baking process. Here are some invaluable expert tips to help you succeed with your honey oatmeal bread, ensuring delicious results every time:
- Verify Your Yeast Activity: Always ensure your instant dry yeast is fresh and active. If you are unsure, you can perform a quick “proof” test: mix a small amount of yeast with a quarter cup of warm water (ensure it’s not boiling hot, around 105-115°F or 40-46°C) and a pinch of sugar. If the mixture foams within 5-10 minutes, your yeast is healthy and ready to use.
- Temperature Control is Paramount: Dough rises most effectively in a warm, consistent, and draft-free environment. If your kitchen happens to be cool, consider placing the covered bowl in a slightly warmed (but turned off) oven, or near a sunny window, or even on top of a warm appliance like a refrigerator.
- Achieve Proper Kneading: It’s crucial to neither under-knead nor over-knead your dough. Under-kneading will result in a dense bread with a poor, tight crumb structure, while over-kneading can ironically lead to a tough and chewy loaf. Aim for a dough that feels smooth, elastic, and passes the “windowpane test” – where you can gently stretch a small piece thin enough to see light through it without it tearing.
- Precise Ingredient Measurements: Remember, baking is essentially a science. Therefore, use measuring cups and spoons with utmost precision, especially for critical ingredients like flour and yeast. For the most accurate and consistent results, we highly recommend measuring flour by weight using a digital kitchen scale.
- Understand Your Oven’s Calibration: Ovens can vary significantly in their actual temperature compared to what the dial indicates. If you notice your bread is browning too quickly or too slowly, consider investing in an inexpensive oven thermometer to accurately monitor and adjust your oven’s true temperature.
- Allow for Proper Cooling: Resist the tempting urge to slice into your warm bread too soon! Cooling completely on a wire rack is a critical step. This allows the internal moisture to redistribute evenly throughout the loaf and permits the crumb structure to fully set, which ultimately results in a much better, more uniform texture and superior flavor. Patience here will be generously rewarded!
Delightful Variations and Versatile Serving Suggestions
While this honey oatmeal bread is absolutely delicious and satisfying on its own, its versatile nature means there are many creative ways to customize it and enjoy it in various forms. Feel free to experiment and make it your own:
- Exciting Add-ins: For an extra layer of texture and a burst of complementary flavor, consider incorporating a handful of finely chopped walnuts, pecans, or sunflower seeds into the dough during the final stages of the kneading phase. A subtle pinch of ground cinnamon or nutmeg could also wonderfully complement the natural sweetness of honey and the earthiness of oats.
- Sweetness Adjustment: If you happen to prefer a bread that is less sweet, you can slightly reduce the amount of honey used in the main dough. However, do be mindful that honey also contributes to the bread’s browning, so adjust cautiously. For those with a sweet tooth, you can safely increase the honey by a tablespoon or two.
- Exploring Different Flours: While whole wheat flour offers significant nutritional benefits and a hearty texture, you can certainly experiment with a blend of flours. For instance, try using 2 cups of whole wheat flour combined with 1 cup of bread flour for a slightly lighter and softer texture, though this will subtly alter the nutritional profile.
- Perfectly Toasted: Slices of this homemade bread are utterly fantastic when lightly toasted. Serve them spread generously with creamy butter, your favorite fruit jam or preserves, rich peanut butter, or tangy cream cheese for a delightful breakfast or snack.
- Hearty Sandwiches: Its robust and satisfying texture makes this bread an excellent and sturdy base for a wide variety of savory sandwiches. It also holds up beautifully as open-faced toasts with various toppings.
- Wholesome Breakfast Treat: Elevate your breakfast by serving warm slices of this honey oatmeal bread alongside perfectly cooked eggs, crispy bacon, or a vibrant bowl of fresh fruit for a truly wholesome and filling start to your day.
Conclusion: Your New Favorite Homemade Bread Awaits!
Congratulations! You have successfully embarked on a delightful journey and just discovered a simple, yet incredibly satisfying and wholesome recipe for homemade Honey Oatmeal Bread. This loaf is poised to delight your senses and nourish your body with every single bite. From its robust, wholesome ingredients to its inviting, warm aroma that fills your kitchen, and its perfect balance of a delightfully crusty outside with an irresistibly fluffy inside, this bread is a true triumph of home baking. It stands as a wonderful testament to how easy and incredibly rewarding the process of baking can be, even for those who are brand new to the craft of bread making.
We wholeheartedly encourage you to try this fantastic recipe, meticulously follow the clear and helpful steps provided by The Cooking Foodie, and truly savor the unique experience of creating something so wonderfully delicious and comforting entirely from scratch. Share your baking success and the warm, fresh loaf with your cherished family and friends, or simply indulge and enjoy a slice (or perhaps two!) all by yourself. There is an unparalleled and unique joy that comes with pulling a warm, golden, and fragrant loaf from your oven, and with this accessible recipe, that profound joy is now well within your reach. Happy baking, and enjoy every wholesome bite!