
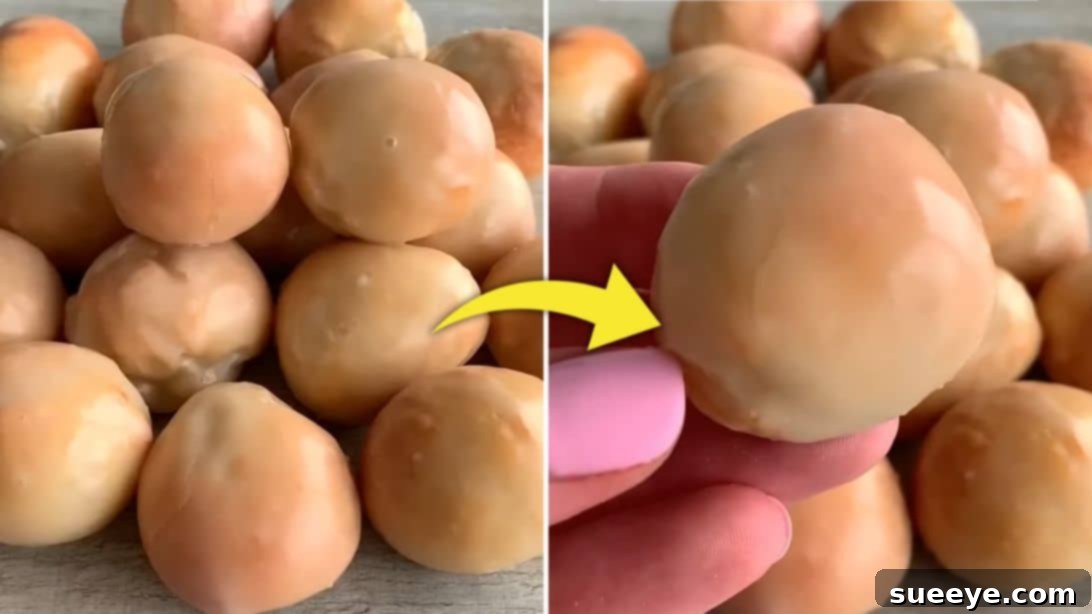
Imagine biting into a warm, fluffy, perfectly glazed donut hole that practically melts in your mouth. Now imagine making those delightful treats with an incredibly simple recipe requiring just four common ingredients. Sound too good to be true? It’s not! This ingenious method, inspired by the likes of Fitwaffle Kitchen, transforms basic pantry staples into an irresistible dessert that will amaze your family and friends.
Easy 4-Ingredient Glazed Donut Holes: Your New Go-To Quick Dessert
Whether you’re looking for a last-minute party treat, a fun baking project with kids, or simply craving something sweet and comforting, these glazed donut holes are the perfect solution. They are incredibly quick to prepare, requiring minimal effort and delivering maximum deliciousness. Forget complicated doughs and deep-frying; this recipe focuses on simplicity without compromising on taste or texture. Prepare to be amazed by how incredibly satisfying these homemade donut holes turn out.
This recipe is a testament to the fact that you don’t need a pantry full of exotic ingredients or hours in the kitchen to create something truly special. With just Greek yogurt and self-raising flour forming the base for the soft, airy dough, and a quick glaze made from icing sugar and milk, you’re mere minutes away from a batch of warm, sweet bliss. It’s an ideal choice for busy individuals, novice bakers, or anyone who appreciates a shortcut to a fantastic dessert.
RELATED RECIPES YOU MIGHT LOVE:
- 10-Minute Donut Holes Recipe
- Krispy Kreme Donut Pie Recipe
Unlocking the Magic: The 4 Essential Ingredients
The beauty of this recipe lies in its minimalist approach to ingredients. Each component plays a crucial role in achieving the desired flavor and texture, proving that sometimes, less truly is more. Let’s break down what you’ll need and why these ingredients are so effective.
- Greek Yogurt: This is the secret ingredient that gives the donut holes their incredible tenderness and a slight tangy note. Greek yogurt not only adds moisture but also acts as an acid, reacting with the leavening agents in the self-raising flour to create a wonderfully soft and airy crumb. It contributes to a dough that’s easy to work with and results in a lighter texture compared to traditional yeast-based donuts. For best results, use plain, full-fat Greek yogurt, but low-fat varieties can also work.
- Self-Raising Flour: The powerhouse of convenience! Self-raising flour is a pre-mixed blend of all-purpose flour, baking powder, and a touch of salt. This eliminates the need to measure out separate leavening agents, simplifying the process significantly. It ensures your donut holes rise beautifully and achieve that delightful fluffy texture without any fuss.
- Icing Sugar (Confectioners’ Sugar): This finely milled sugar is essential for creating a smooth, quick-setting glaze. Its powdery consistency dissolves easily with liquid, resulting in a velvety coating that adheres perfectly to the warm donut holes. It delivers that classic sweet, sugary finish that makes glazed donuts so irresistible.
- Milk: The liquid component for our simple glaze. Milk helps to thin the icing sugar into a pourable consistency, creating a smooth and glossy finish. You can use any type of milk you have on hand – whole milk, skim milk, or even a non-dairy alternative like almond or oat milk will work perfectly, allowing for dietary flexibility.
A Note on Self-Raising Flour Substitutions:
Don’t have self-raising flour in your pantry? No problem! You can easily create your own substitute using all-purpose flour, baking powder, and salt. For this recipe, which calls for 3/4 cup and 3 tablespoons of self-raising flour, you would use the same amount of all-purpose flour and then add approximately 1.5 teaspoons of baking powder and 1/4 teaspoon of fine salt. Thoroughly whisk these dry ingredients together before combining them with the Greek yogurt to ensure even distribution and proper rise. This simple trick means you’re always just a few steps away from these delicious treats, even if your specific flour isn’t on hand.
Easy Glazed Donut Holes: Ingredients & Equipment
Before you dive into the fun of making these donut holes, ensure you have all your ingredients measured out and your simple kitchen tools ready. Preparation is key to a smooth and enjoyable baking experience.
Ingredients:
- 2/3 cup (approximately 160g) Greek yogurt (plain, full-fat recommended)
- 3/4 cup + 3 tablespoons (approximately 100g) self-raising flour (or substitute with all-purpose flour + 1.5 tsp baking powder + 1/4 tsp salt)
- 1/2 cup + 3 tablespoons (approximately 100g) icing sugar (confectioners’ sugar)
- 2 tablespoons (approximately 30ml) milk (any type)
Essential Equipment:
- Large mixing bowl
- Spatula or wooden spoon
- Measuring cups and spoons
- Baking sheet
- Parchment paper or silicone baking mat
- Small bowl for glaze
- Whisk or spoon for glaze
- Wire rack for cooling and glazing
- Oven
How to Make Glazed Donut Holes: Step-by-Step Guide
Follow these simple steps to create your own batch of delightful, fluffy, and perfectly glazed donut holes. The process is incredibly straightforward, making it an ideal recipe for bakers of all skill levels.
Step 1: Prepare the Dough
In a large mixing bowl, combine the 2/3 cup of Greek yogurt with the 3/4 cup and 3 tablespoons of self-raising flour (or your prepared all-purpose flour mixture). Mix thoroughly with a spatula or your hands until a cohesive dough forms. The dough should be soft but not overly sticky. Avoid overmixing; just combine until the flour is fully incorporated. The magic of this two-ingredient dough is its simplicity and excellent texture.
Step 2: Shape the Donut Holes
Lightly flour a clean work surface. Turn the dough out onto the floured surface and gently flatten it into a disc, about 1/2 to 3/4 inch thick. Using a sharp knife or a dough scraper, cut the dough into roughly 1-inch cubes. Precision isn’t strictly necessary here, but aiming for similar sizes will help them bake evenly. Once cut, take each small cube and roll it between your palms to form a smooth, uniform ball. This creates that classic donut hole shape. Arrange these dough balls onto a baking sheet lined with parchment paper or a silicone baking mat, ensuring they are spaced evenly to allow for proper airflow and baking.
Step 3: Bake to Golden Perfection
Preheat your oven to 374°F (190°C), or 338°F (170°C) if your oven has a fan/convection setting. Place the baking sheet with your donut holes into the preheated oven and bake for approximately 7 to 8 minutes. Keep a close eye on them during the last few minutes. You’re looking for a beautiful light golden brown color on the outside. It’s crucial not to overbake these treats, as doing so can make them chewy rather than delightfully soft and fluffy. They should be just firm to the touch when gently squeezed.
Step 4: Prepare the Glaze
While your donut holes are baking or cooling slightly, it’s time to whip up the simple glaze. In a small bowl, add the 1/2 cup and 3 tablespoons of icing sugar (confectioners’ sugar) and the 2 tablespoons of milk. Whisk or stir vigorously until the mixture is completely smooth and free of any lumps. The consistency should be thick enough to coat a spoon but still pourable. If it’s too thick, add a tiny bit more milk (half a teaspoon at a time). If it’s too thin, sift in a little more icing sugar until the desired consistency is achieved.
Step 5: Glaze and Set
Once the donut holes are baked and still warm (this helps the glaze adhere beautifully), it’s time for the best part! Dip each donut hole into the prepared glaze, turning it gently to ensure it’s fully coated. Lift the donut hole out and allow any excess glaze to drip back into the bowl. Place the glazed donut holes onto a wire rack, ideally placed over a sheet of parchment paper or a baking tray, to catch any further drips. This also allows air to circulate around them, helping the glaze to set.
Step 6: Serve and Enjoy
These glazed donut holes are best served warm, shortly after the glaze has set. The warm, fluffy interior combined with the sweet, slightly firm glaze is an unbeatable combination. Arrange them on a platter and watch them disappear! They make a fantastic breakfast treat, a delightful afternoon snack, or a perfect quick dessert after any meal. Enjoy every last bite!
Tips for Perfect Glazed Donut Holes Every Time
To ensure your 4-ingredient glazed donut holes are nothing short of spectacular, keep these handy tips in mind:
- Don’t Overmix the Dough: Overmixing can develop the gluten too much, leading to tough donut holes. Mix just until the ingredients are combined and a soft dough forms.
- Even Sizing Matters: Try to make your donut holes as uniform in size as possible. This ensures they bake evenly, preventing some from being undercooked while others are overbaked.
- Monitor Baking Closely: Oven temperatures can vary. Start checking your donut holes a minute or two before the suggested baking time. They should be lightly golden, not dark brown.
- Glaze While Warm: Dipping the donut holes in the glaze while they are still warm helps the glaze adhere better and create a smoother, more even coating.
- Adjust Glaze Consistency: The perfect glaze consistency is crucial. It should be thick enough to coat but thin enough to drip off excess. Adjust with tiny amounts of milk or icing sugar as needed.
- Storage: These donut holes are best enjoyed fresh, but if you have leftovers, store them in an airtight container at room temperature for up to 1-2 days. Reheating briefly in the microwave can restore some of their warmth and softness.
Variations to Elevate Your Donut Holes
While the classic glazed donut hole is undeniably delicious, feel free to get creative and experiment with these simple variations:
- Vanilla Boost: Add 1/2 teaspoon of vanilla extract to the dough mixture for an extra layer of flavor. You can also add a tiny dash to the glaze.
- Cinnamon Sugar: Instead of a glaze, toss the warm donut holes in a mixture of granulated sugar and cinnamon for a comforting, spiced treat.
- Chocolate Drizzle: After the plain glaze sets, melt some chocolate chips and drizzle them over the donut holes for a decadent finish.
- Sprinkle Fun: Immediately after glazing, sprinkle with your favorite colorful sprinkles for a festive touch, especially perfect for birthdays or celebrations.
- Citrus Zest: Add a teaspoon of lemon or orange zest to the dough for a bright, refreshing flavor profile.
Why These Glazed Donut Holes Are a Must-Try
This recipe for 4-ingredient glazed donut holes isn’t just a recipe; it’s a game-changer for anyone who loves quick, easy, and satisfying desserts. It demystifies baking and proves that gourmet-level treats can be achieved with minimal fuss. The combination of simple ingredients, straightforward steps, and incredible results makes this a standout recipe.
Whether you’re a seasoned baker or just starting your culinary journey, these homemade donut holes will undoubtedly become a staple in your repertoire. They’re perfect for impromptu gatherings, a special weekend breakfast, or simply to satisfy that sweet craving without a trip to the bakery. So, gather your four ingredients, preheat your oven, and prepare to delight your taste buds with these unbelievably easy and utterly delicious glazed donut holes!