
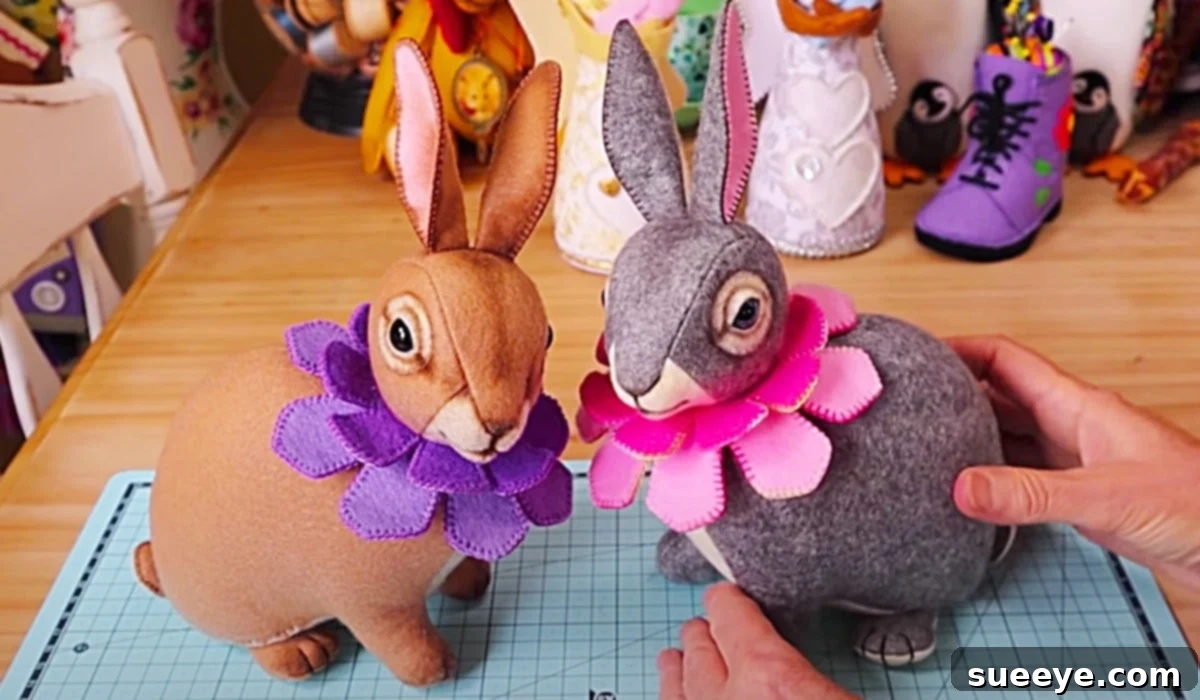
There’s an undeniable magic in creating something with your own hands, especially when it comes to celebrating joyous occasions like Easter. The warmth and personal touch of a handmade gift resonate far more deeply than any store-bought item. If you’re searching for an incredibly cute, surprisingly simple, and wonderfully affordable craft project, then look no further! We’ve discovered an absolutely delightful DIY Easter Bunny video tutorial by Pay It Forward on YouTube that promises to bring a smile to anyone’s face.
This charming project immediately captured our attention with its adorable design and the promise of a straightforward crafting experience. What makes it even better? It comes with a completely free pattern download that is incredibly easy to follow, making it accessible even for beginner crafters. With minimal materials required, this DIY Easter bunny stands out as a perfectly affordable and heartfelt gift idea for friends, family, or even as a treasured decoration for your own home. Get ready to dive into the world of handmade charm and create an Easter keepsake that will be cherished for years to come!
How to Sew an Adorable DIY Easter Bunny with a Free Pattern
Embarking on a craft project that culminates in a unique, handmade item is always a rewarding experience. This tutorial guides you through creating a festive Easter bunny, perfect for gifting or adorning your festive spaces. Each step is designed to be clear and manageable, ensuring a fun and successful crafting journey. Let’s gather our supplies and begin bringing our cute bunny to life.
Essential Materials For Your DIY Easter Bunny:
One of the beauties of this project lies in its simplicity and the modest number of materials required. Most items you might already have around your home, or they can be easily purchased without breaking the bank. Choosing your materials carefully can add a lot to the character and longevity of your finished bunny. Here’s a detailed look at what you’ll need:
- Free Pattern Download: This is your crucial first step! The downloadable pattern provided by Pay It Forward is meticulously designed and will guide you in cutting out all the necessary fabric pieces accurately. Ensure you print it at 100% scale to maintain the correct dimensions for your bunny.
- Fabric (or Felt): The choice of fabric can dramatically alter the look and feel of your bunny.
- Felt: An excellent choice for beginners, as felt doesn’t fray, making it very forgiving to work with. It’s available in a vast array of colors, allowing for vibrant or pastel bunnies.
- Cotton Fabric: For a softer, more traditional plush toy feel, cotton fabrics are ideal. Consider charming prints like florals, polka dots, or subtle stripes. Ensure the fabric is medium-weight and not too stretchy, as this can make stuffing difficult.
- Upcycled Fabric: For an eco-friendly approach, repurpose old clothes, blankets, or even scraps from previous projects. This adds a unique, sentimental touch to your bunny.
- Quantity: You won’t need a large amount, typically a fat quarter or less, depending on the size of the pattern and your fabric width.
- A Pair of Sharp Scissors: Good quality fabric shears are essential for clean, precise cuts. Dull scissors can lead to frayed edges and inaccurate shapes, which can affect the final assembly of your bunny. Having a small pair of embroidery scissors can also be helpful for snipping threads or making tiny cuts.
- Buttons (for Eyes): Buttons serve as the charming eyes for your bunny.
- Size & Color: Choose buttons that are proportionate to your bunny’s head. Black, brown, or even colored buttons can add personality.
- Safety: If the bunny is intended for a small child, consider embroidered eyes or safety eyes (which are securely fastened from the inside) rather than loose buttons that could pose a choking hazard.
- Quantity: You’ll need two buttons for the eyes.
- Thread: All-purpose polyester thread is recommended for its strength and durability.
- Color Matching: Select thread that closely matches your chosen fabric color to ensure seams are discreet.
- Embroidery Floss: You will also need embroidery floss (typically in pink, black, or brown) to stitch the bunny’s nose and mouth, giving it a sweet expression. A standard 6-strand floss works perfectly.
- Stuffing/Fiberfill: Polyester fiberfill is the standard for plush toys. It’s soft, washable, and holds its shape well. Ensure you have enough to make your bunny plump and cuddly.
- Basic Sewing Kit: Needles (hand-sewing), pins, a seam ripper (just in case!), and possibly a fabric marker or chalk for tracing.
Step-by-Step Directions: Crafting Your Adorable Easter Bunny
Creating this cute Easter bunny is a joyful journey broken down into manageable steps. The video tutorial by Pay It Forward on YouTube provides excellent visual guidance, but here’s a detailed breakdown of each phase, ensuring you create a beautiful, lasting piece.
Step 1: Preparation – Download, Cut, and Organize
Your crafting adventure begins with meticulous preparation. First, navigate to the provided link and download the free pattern. It’s crucial to print this pattern at 100% scale to ensure your bunny turns out to the intended size. Once printed, carefully cut out all the paper pattern pieces.
Next, lay your chosen fabric flat and smooth out any wrinkles. Pin the paper pattern pieces securely to your fabric, ensuring you’re cutting on the correct grain if using woven fabric. Use your sharp fabric scissors to cut out all the fabric components for your bunny. Precision here is key to a well-aligned and neat final product. Take your time, cut smoothly, and double-check you have all the required pieces before moving on. Typically, this will include pieces for the head, body, ears, and possibly arms and legs, depending on the pattern design.
Step 2: Constructing the Head and Ears
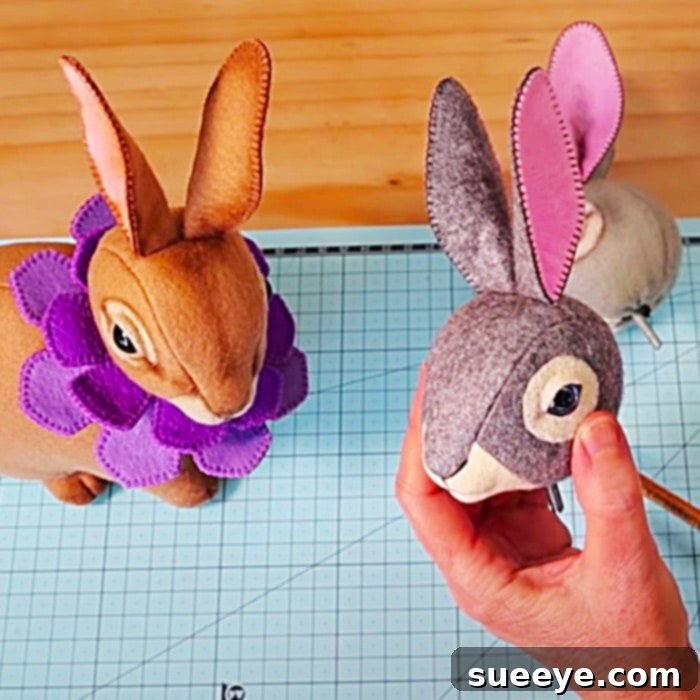
Now that your pieces are cut, the first component to tackle is the bunny’s head. Take the head pieces (usually two mirror images) and place them right sides together. Pin around the edges, leaving a small opening at the bottom or back, as indicated by the pattern, for turning and stuffing. Sew along the pinned edge, remembering to backstitch at the beginning and end of your seam for added security.
Clip any curves to allow the fabric to lay smoothly when turned, then carefully turn the head right side out through the opening. Begin to gently stuff the head with your polyester fiberfill, ensuring it’s firm and evenly shaped, avoiding any lumps or bumps. Once adequately stuffed, use a ladder stitch or whipstitch to neatly close the opening, making the seam almost invisible.
Next, prepare the ears. These are usually two pieces per ear, sewn right sides together, turned, and then attached to the head. You might want to add a touch of fiberfill to the ears for shape, or leave them flat for a floppy look. Position them symmetrically on the head and hand-sew them securely in place.
Step 3: Bringing the Body to Life
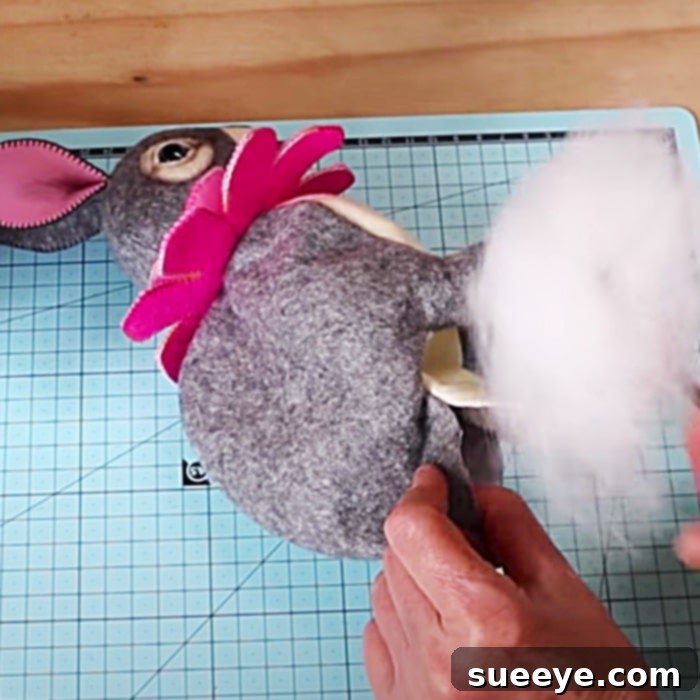
With the head and ears complete, it’s time to move on to the main body of your bunny. Similar to the head, place the body pieces right sides together, pin them, and sew along the seams, leaving an opening for stuffing. This opening is typically on one of the straight edges, such as the bottom or side, to make closing easier.
Carefully turn the body right side out. Now comes the satisfying part: stuffing! Fill the body firmly but evenly with fiberfill, ensuring all limbs (if separate) are also well-stuffed. A chopstick or blunt pencil can help you push stuffing into smaller areas like the arms and legs. Once the body is plump and holds its shape, use the same neat ladder stitch to close the opening securely.
Step 4: Assembling Your Bunny and Adding Facial Features
Now, it’s time to bring all the pieces together. Carefully position the head onto the body, ensuring it’s centered and upright. Use strong thread to securely hand-sew the head to the body with small, almost invisible stitches. Go around the neck several times to make sure it’s firmly attached and can withstand cuddles.
Next, add the charming facial features. Attach the two buttons for the eyes. Position them evenly and sew them on very securely with strong thread. If making for a baby or toddler, consider embroidering the eyes with black embroidery floss instead. Then, take your embroidery floss (usually pink or black) and stitch a small inverted triangle for the nose, using a satin stitch to fill it in. From the bottom of the nose, create a ‘Y’ shape with simple backstitches for the mouth, giving your bunny a sweet, expressive face.
Step 5: The Finishing Touches and Customization
The final step is where your bunny truly comes to life with personal touches.
- Accessorize: Tie a small ribbon or a pre-made bow around your bunny’s neck. You can choose colors that complement the fabric or add a pop of contrasting color.
- Rosy Cheeks: For an extra touch of cuteness, lightly dab a little blush (cosmetic blush or fabric paint blush) onto your bunny’s cheeks using a cotton swab.
- Embroidered Details: Consider adding small embroidered details like a tiny heart, initials, or even small paw prints on the feet.
- Weighted Bottom: For a bunny that sits nicely, you can add a small bag of poly pellets or rice (sealed in a separate fabric pouch) inside the bottom of the body before stuffing fully.
- Scented Fill: For a calming effect, a sachet of dried lavender or other herbs can be tucked into the stuffing.
Care for Your Handmade Bunny:
To ensure your beloved handmade bunny stays looking its best for years to come, gentle care is recommended. For minor spots, use a damp cloth and mild soap to spot clean. If a more thorough cleaning is needed, hand wash gently in cool water with a delicate detergent and allow it to air dry completely. Avoid machine washing or harsh scrubbing, especially if your bunny has delicate embellishments or embroidered features.
This Easter bunny idea is not only incredibly cute but also makes a truly wonderful and memorable holiday gift for loved ones. The effort and thought put into a handmade item convey a depth of affection that is truly special. Imagine the joy on a child’s face receiving a cuddly bunny made just for them, or the appreciation from an adult who recognizes the artistry and care in such a unique present. Whether you choose vibrant patterns or soft pastels, a felt finish or a plush fabric, your handmade Easter bunny will be a cherished symbol of love and creativity.
So, gather your materials, follow the detailed guidance provided by Pay It Forward’s excellent tutorial, and get ready to create an adorable Easter bunny that’s brimming with personality and handmade charm. Happy crafting!