
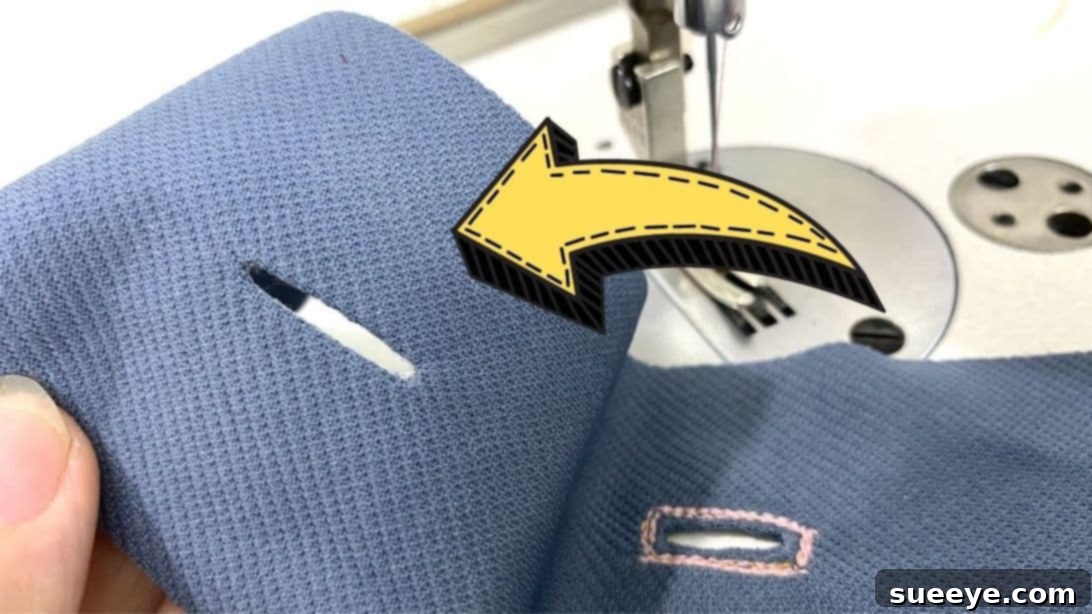
Welcome to the essential guide for mastering buttonholes, a crucial skill that can elevate any sewing project from homemade to professionally crafted. For many new to the world of sewing, creating neat and durable buttonholes can seem like a daunting task. Yet, with the right techniques, you can achieve results that rival store-bought garments, adding a polished and refined touch to your handmade creations. This comprehensive tutorial, inspired by the expert insights of Trefa Craft on YouTube, will walk you through three distinct methods for crafting perfect buttonholes. Each method offers a unique approach to achieving an effective and impeccably neat finish, empowering you to choose the best technique for your specific fabric and project needs. Get ready to transform your sewing experience and create flawless buttonholes with confidence and ease.
Essential Materials and Preparation for Flawless Buttonholes
Before diving into the techniques, gathering the right tools and preparing your workspace is key to success. Having your materials organized will ensure a smooth and efficient sewing process.
- Fabric Piece: Always start with a scrap piece of fabric that closely matches the weight, type, and color of your main project fabric. This is crucial for practicing and testing your buttonholes to ensure perfect results without risking your final garment.
- Sharp Scissors: A small, sharp pair of scissors or a buttonhole cutter is essential for making clean, precise cuts without fraying your fabric or damaging your stitches.
- Sewing Machine: A reliable sewing machine is indispensable. While many modern machines have automatic buttonhole features, these methods focus on manual techniques applicable to most machines.
- Marking Pen or Chalk: Precision is paramount. A fabric marking pen that disappears with water or heat, or tailor’s chalk, will allow you to accurately mark the placement and size of your buttonholes without leaving permanent traces.
- Fusible Interfacing Fabric (Small Piece): Interfacing adds stability to your fabric, preventing stretching and ensuring crisp, well-formed buttonholes. A lightweight fusible interfacing is often ideal.
- Iron and Ironing Board: An iron is vital for setting interfacing and pressing your fabric for accurate marking and a professional finish.
- Ruler or Measuring Tape: For precise measurements and marking parallel lines.
- Appropriate Thread: Choose a good quality thread that matches or complements your fabric, suitable for machine sewing.
- Seam Ripper (Optional but Recommended): For carefully correcting any minor mistakes.
Preparation Tip: Always press your fabric thoroughly before marking and sewing. This removes any wrinkles that could distort your measurements and ensures a smoother working surface. If using fusible interfacing, adhere it to the wrong side of your practice fabric (or project fabric) before marking, as this will affect how the fabric behaves during sewing.
Three Professional Buttonhole Methods: Step-by-Step Guide
Each of these methods offers a pathway to professional-looking buttonholes. We’ll explore their unique advantages and detailed steps.
Method #1: The Classic Stitched Rectangle for Versatility
This method is a foundational technique, widely used for its simplicity and effective results. It creates a robust, clean buttonhole that works well for a variety of fabrics and garments. It’s an excellent starting point for beginners to understand the basic mechanics of buttonhole construction.
- Accurate Marking is Key: Begin by grabbing your ruler and fabric marking tool. On your practice fabric, draw two parallel lines. These lines should be approximately one inch (2.5 cm) tall and about 1/8 inch (3mm) apart. The exact height will depend on the size of your button. Connect these two vertical lines at the top and bottom with short horizontal lines to form a small, neat vertical rectangle. This rectangle represents the final dimensions of your buttonhole opening. Ensure your marks are clear but not too heavy.
- Precision Stitching: Using your sewing machine, carefully sew over the marked lines. Start by sewing along one of the vertical lines, ensuring your stitches are even and close together. When you reach the end, pivot your fabric and sew across the horizontal connecting line. Then, sew down the second vertical line. Finish by pivoting and sewing across the final horizontal line. The critical step here is to go back and forth (reverse stitch) several times at the beginning and end of each line, especially the horizontal bars, before pivoting to the next segment. This technique helps to secure and lock your stitches firmly in place, preventing unraveling and adding durability to the buttonhole. Repeat this entire process (sewing around the rectangle) at least two or three times to create a dense, well-defined border.
- Careful Cutting: Fold the stitched rectangle in half lengthwise, ensuring the two vertical stitch lines meet perfectly. Carefully snip into the very center of the stitched area with your sharp scissors, creating a small opening. Be extremely cautious not to cut through any of your stitched threads.
- Refining the Opening: Open up the fabric from the fold. Now, fold it again in half, but this time widthwise, exposing the slightly uneven cut you just made. Using your sharp scissors, carefully trim the raw edges of the opening so that they are even and tidy. This creates a clean, uniform slit within your stitched rectangle. Your buttonhole should now have crisp, stitched edges and a clean, open center.
This method results in a sturdy buttonhole where the raw edges are neatly encased by the dense stitching, providing a clean finish on both the front and back of your fabric. It’s an excellent choice for shirts, blouses, and most everyday garments.
Method #2: The Hidden Seam Buttonhole for a Smoother Appearance
If you desire buttonhole edges that appear exceptionally smooth and feature neatly hidden seam allowances, this method is an excellent choice. It’s often preferred for garments where the inside finish is as important as the outside, such as unlined jackets or high-quality blouses.
- Layering for Invisibility: Take your main fabric and place a small piece of matching scrap fabric directly on top of it, ensuring their right sides are facing each other. Pin them together securely to prevent shifting. This overlay fabric will eventually form the clean, hidden edges of your buttonhole.
- Stitching the Buttonhole Outline: On the top layer (which is the right side of your overlay fabric), draw a small vertical rectangle using your marking pen or chalk, similar to Method #1. The size should correspond to your button. Stitch along these marked lines several times, just as you did in Method #1, to create a strong, dense rectangle of stitching. Remember to secure your stitches at the beginning and end of each segment.
- Creating the Opening and Turning: Carefully fold the stitched rectangle in half lengthwise. Snip precisely down the center of the stitched area, ensuring you do not cut beyond the horizontal bar tacks. Now, gently push the small piece of overlay fabric through this snipped opening to the wrong side of the main fabric. This action will “frame” the opening with the main fabric, while the raw edges of the overlay fabric will be tucked neatly inside.
- Pressing and Topstitching for Definition: Once the overlay fabric is pushed through, gently pull it taut from the wrong side to ensure the main fabric creates a crisp rectangle around the opening. Press the buttonhole flat with your iron. To further define the buttonhole and secure the hidden edges, topstitch carefully around the entire buttonhole opening from the right side of your main fabric. This line of topstitching should be close to the edge of the opening, adding a professional, finished look.
- Finishing the Back: Turn your work to the wrong side. Carefully trim off any excess overlay fabric on the back, leaving a small seam allowance that lies flat against the main fabric. Ensure you don’t cut too close to your topstitching. Press again for a perfectly flat and smooth finish.
This method yields a beautifully clean buttonhole with no visible raw edges, making it ideal for delicate fabrics or projects where a high-end finish is desired on both sides of the garment.
Method #3: The Interfaced Buttonhole for Superior Back Finish
Building upon the principles of Method #2, this technique takes the professional finish a step further by incorporating fusible interfacing for an even smoother and more stable result on the back of the buttonhole. This is particularly beneficial for fabrics that might otherwise fray easily or for projects where a very clean interior is paramount.
- Initial Steps (Same as Method #2): Begin by following steps 1 through 3 of Method #2. This means placing a small piece of matching fabric on top of your main fabric (right sides together), drawing and stitching your vertical rectangle several times, then carefully snipping the center and pushing the overlay fabric through to the wrong side. Ensure the main fabric frames the opening neatly.
- Skipping the Topstitch: The key difference in this method is that you will skip the topstitching process from Method #2. Instead of topstitching around the buttonhole from the right side, you will rely on the interfacing for stability and a clean finish. Gently press the buttonhole flat from the right side after pushing the fabric through, ensuring the opening is crisp.
- Preparing the Fusible Interfacing: Take a small piece of fusible interfacing fabric. It should be slightly larger than your buttonhole opening. Carefully snip a rectangular opening in the center of this interfacing piece, about an inch (2.5 cm) tall, or precisely the same size as your finished buttonhole opening. Ensure your cut is clean and straight.
- Trimming Excess Fabric: Turn your main fabric to the wrong side. Carefully trim off the excess overlay fabric around the buttonhole opening, leaving a very minimal allowance that lies flat. The goal is to make the opening on the wrong side as clean as possible.
- Applying the Interfacing: Position the prepared fusible interfacing piece (with its own opening) directly over the back of your buttonhole, aligning the interfacing’s opening perfectly with the fabric’s buttonhole opening. The fusible side of the interfacing should be facing down, against your fabric.
- Fusing for a Seamless Finish: With your iron, carefully press the fusible interfacing into place according to the manufacturer’s instructions (usually medium heat with steam for a few seconds). The heat will bond the interfacing to the wrong side of your fabric, creating a wonderfully smooth, stable, and incredibly neat finish on the back of the buttonhole. This completely conceals any raw edges and adds significant durability, preventing stretching or fraying.
This interfaced method provides the most polished and durable buttonhole, especially on the garment’s interior. It’s perfect for projects requiring superior craftsmanship and longevity, giving your handmade items a truly high-end appeal.
General Tips for Buttonhole Mastery
Beyond the specific methods, a few universal tips can enhance your buttonhole-making journey:
- Practice Makes Perfect: Never attempt a buttonhole on your final garment without practicing on scrap fabric first. This allows you to fine-tune your machine settings, tension, and technique.
- Test on Representative Fabric: Always practice on a scrap piece that is the exact same type, weight, and number of layers as your project. A buttonhole will behave differently on a single layer of cotton versus a double layer of linen with interfacing.
- Stabilize Your Fabric: Regardless of the method, adding a layer of fusible interfacing (even if not explicitly part of Method #3’s finishing) behind the buttonhole area on your main fabric can dramatically improve stability and prevent distortion, especially on stretchy or lightweight fabrics.
- Measure Your Buttons Accurately: The length of your buttonhole should always be slightly longer than the diameter of your button. A good rule of thumb is button diameter + button thickness (or about 1/8 to 1/4 inch more than the button’s diameter).
- Use the Right Needle and Thread: A sharp, new needle appropriate for your fabric type will prevent skipped stitches and snags. Good quality polyester or cotton thread is usually suitable.
- Go Slow: Especially when cutting, take your time. A rushed cut can ruin an otherwise perfect buttonhole.
- Consider a Buttonhole Foot: If your sewing machine has a specific buttonhole foot, experiment with it. Even for manual methods, some feet can aid in stitching straight lines or provide better visibility.
Why Mastering Buttonholes is Essential for Every Sewist
Learning to create beautiful buttonholes is more than just adding a closure; it’s a testament to your growing skill and attention to detail. Flawless buttonholes elevate the quality of your handmade garments, giving them a high-end, store-bought finish that truly stands out. They ensure durability, preventing wear and tear at crucial stress points, and contribute significantly to the overall professional appearance and longevity of your projects. By conquering this seemingly challenging technique, you gain immense confidence in tackling more complex sewing tasks, opening up a world of creative possibilities for custom clothing and accessories. It’s a fundamental skill that every dedicated sewist should strive to perfect.
Conclusion
Mastering the art of buttonholes is a rewarding journey that significantly enhances your sewing capabilities. Whether you choose the versatile classic stitched rectangle, the hidden seam method for a smooth appearance, or the interfaced technique for superior back finish, each approach empowers you to create durable and aesthetically pleasing closures. Remember that practice is paramount, and patience will lead to perfection. We extend our sincere gratitude to Trefa Craft via YouTube for sharing these invaluable techniques and inspiring countless sewists. If you found this tutorial helpful, be sure to visit her channel for more exceptional sewing insights and tutorials. Happy sewing, and may your buttonholes always be flawless!