
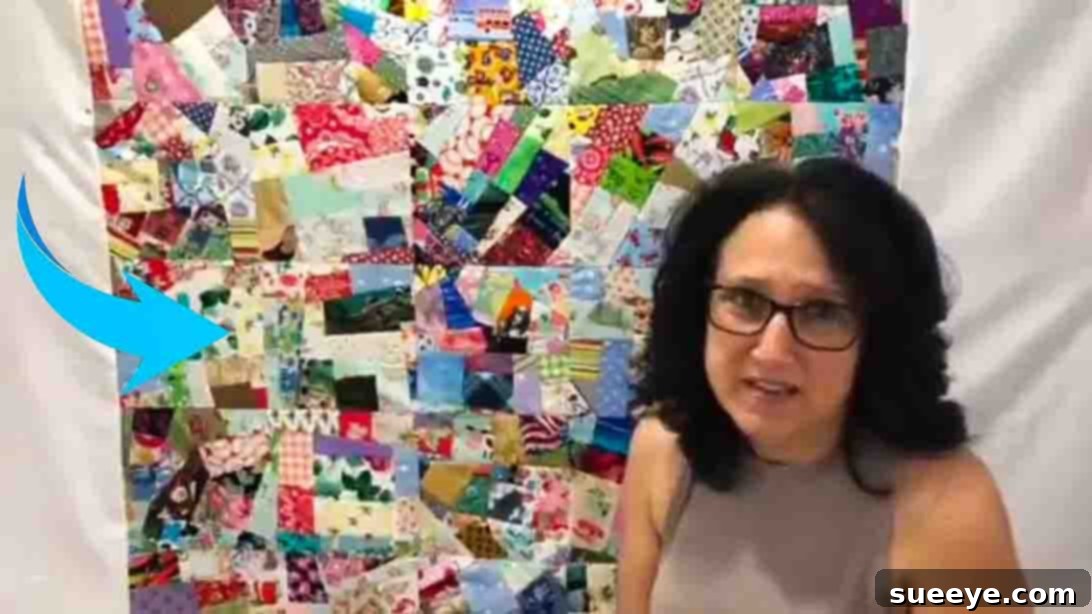
In the vibrant world of quilting, where creativity knows no bounds, the “scrappy crumb quilt” stands out as a true testament to ingenuity and resourcefulness. It’s a delightful method that transforms even the smallest fabric remnants into a cohesive and visually stunning masterpiece. If you’ve been collecting fabric scraps, wondering how to give them new life, then this comprehensive guide to creating a beautiful scrappy crumb quilt is precisely what you need. Inspired by the captivating tutorial from The Sewing Channel on YouTube, we’ll dive deep into the process, ensuring you can craft a version that’s uniquely yours.
For quilters, whether seasoned or just starting, the charm of a scrappy quilt is undeniable. It’s an opportunity to revisit cherished fabrics, combine various patterns, and create a narrative through textiles. This crumb quilt takes that concept to a new level, embracing true randomness while still achieving a remarkably harmonious design. It’s not just a project; it’s a scrap-busting adventure, a creative expression, and a sustainable way to make something truly beautiful. By following our detailed step-by-step instructions, complete with essential tips and insights, you’ll be well on your way to assembling a gorgeous and unique quilt top, whatever the size of your fabric stash.
Mastering the Scrappy Crumb Quilt: Your Ultimate Guide to Beautiful Fabric Remnants
Why Embrace the Scrappy Crumb Quilting Technique?
Crumb quilting isn’t just a trend; it’s a sustainable and deeply satisfying approach to quilt making. It champions the idea that no fabric scrap is too small or insignificant. Every tiny piece, every forgotten snippet, finds its purpose, contributing to a larger, more intricate whole. This method allows quilters to use up those odd-shaped, seemingly unusable bits that accumulate in their sewing rooms, turning potential waste into wonderful works of art. Beyond its eco-friendly aspect, crumb quilting offers immense creative freedom. There’s no rigid pattern to follow, no perfect alignment required, which makes it incredibly forgiving and perfect for all skill levels. The magic lies in the unexpected combinations and the organic flow of colors and patterns that emerge. It’s a celebration of serendipity, resulting in a quilt that truly tells a story.
Essential Materials for Your Crumb Quilt Journey
Before embarking on this exciting quilting project, gather your tools and materials. Having everything ready will ensure a smooth and enjoyable crafting experience.
- Fabric Scraps: This is the heart of your crumb quilt! Collect all your small fabric pieces, ranging from tiny slivers to larger strips. A diverse collection of colors, patterns, and fabric types (like cottons, flannels, etc.) will add rich texture and visual interest to your finished quilt. Ensure they are clean and pre-washed if possible.
- A Reliable Rotary Cutter: Essential for precise and efficient cutting. A good quality rotary cutter with a sharp blade will make quick work of trimming your fabric pieces and squaring up your blocks.
- A Self-Healing Cutting Mat: To protect your work surface and prolong the life of your rotary cutter blade. Mats come in various sizes; a medium to large size is ideal for quilting projects.
- Clear Quilting Ruler: Indispensable for accurate measurements and straight cuts. A ruler with clear markings, especially for a 1/4-inch seam allowance, will be incredibly helpful, particularly for trimming your blocks to their final size of 7 1/2 inches.
- Iron and Ironing Board: Crucial for pressing seams open or to the side at every stage of the process. Proper pressing makes a significant difference in the flatness and professional appearance of your quilt blocks and finished quilt top.
- Sewing Machine: Any basic sewing machine capable of sewing a straight stitch will suffice. Ensure it’s in good working order and you have a fresh needle.
- Quality Thread: A neutral-colored thread (like grey or beige) that blends with most fabrics is often a good choice for piecing. Alternatively, you can choose a thread that complements your dominant fabric colors.
Step-by-Step Directions: Crafting Your Scrappy Crumb Quilt
Step 1: Preparing Your Scraps and Building Two- and Four-Patches
The foundation of a beautiful crumb quilt begins with meticulous preparation and the creation of basic units. Start by pressing all your fabric scraps. This step is critical; it smooths out wrinkles, makes fabrics easier to handle, and ensures more accurate cuts and seams. A well-pressed scrap is a cooperative scrap!
Next, select a regular strip of fabric – this will serve as your base. Now, take smaller, individual fabric crumbs and lay them along one edge of this base strip. These crumbs don’t need to be perfectly straight or uniformly sized; their irregular nature is part of the charm. Sew them onto the strip using a consistent 1/4-inch seam allowance. This measurement is standard in quilting and helps ensure your blocks will fit together later. After sewing, carefully cut them up to the slit, separating the individual units. You will now have a collection of “two-patches” – a small crumb sewn to a strip. Press these two-patches to the side, ensuring the seam is flat and neat. For a “four-patch,” you will simply sew two of these newly created two-patches together, again using a 1/4-inch seam allowance. Remember, perfection isn’t the goal here; the beauty of a scrappy quilt lies in its varied and spontaneous nature. Embrace the unique character each piece brings!
Step 2: Expanding Your Fabric Crumbs and Trimming Blocks
Once you have the hang of creating two-patches and four-patches, continue this process, building up a substantial collection. Don’t be afraid to experiment with different fabric combinations and sizes. To add even more visual interest and “spice” to your crumb blocks, consider adding some fabric pieces diagonally. This technique can create dynamic lines and break up the uniformity, adding a contemporary touch. When working with diagonal pieces or adding multiple layers of fabric, it’s crucial to trim off any excess seam allowance from the back. Less bulk means flatter seams, which ultimately results in a smoother, more professional-looking quilt top.
The next critical step is trimming your crumb blocks to their final, consistent size. For this project, the target size is 7 1/2 inches square. A clear quilting ruler is your best friend here. Align the ruler carefully, using the lines to ensure a perfect square. This precision in trimming is vital because even though the initial piecing is scrappy, having uniform block sizes will make assembling your quilt top much easier and more accurate. Aim to create 25 identical 7 1/2-inch blocks. While the internal composition of each block will be unique, their external dimensions must be consistent for a harmonious layout.
Step 3: Assembling Your Scrappy Quilt Top
With all 25 of your beautifully scrappy, uniformly sized blocks ready, it’s time for the exciting part: laying them out and assembling your quilt top. Start by arranging your blocks on a large flat surface – your design wall, floor, or a large table works perfectly. Lay them out in a 5×5 grid. Take your time with this step. Stand back and observe your layout. Move blocks around to achieve a balance of colors, patterns, and contrast. There’s no right or wrong way; it’s about what pleases your eye and creates a dynamic flow across the quilt. This stage is crucial for ensuring your finished quilt has a cohesive and pleasing aesthetic.
Once you are satisfied with your arrangement, it’s time to sew! Work row by row. Sew the five blocks in your first row together, remembering your consistent 1/4-inch seam allowance. Press the seams for the first row in one direction (e.g., to the left). For the second row, press the seams in the opposite direction (e.g., to the right). This technique, known as “nesting seams,” helps the seams interlock perfectly when you join the rows, reducing bulk and creating flatter intersections. Continue sewing each row and pressing the seams in alternating directions. Finally, sew these five rows together, carefully aligning your nested seams. Press the final horizontal seams open or to one side, whichever you prefer, to complete your stunning scrappy crumb quilt top.
Beyond the Quilt Top: Quilting and Finishing
While this guide focuses on the quilt top, a finished quilt requires a few more steps. After assembling your top, you’ll need to create a “quilt sandwich” by layering your quilt top, batting (the cozy middle layer), and backing fabric. This sandwich is then basted together (temporarily secured) to prevent shifting during the quilting process. You can quilt by hand or machine, using simple straight lines, meandering patterns, or more intricate designs. The quilting stitches hold all three layers together and add texture to your quilt. Finally, the edges are bound using a fabric strip, which protects the raw edges and provides a beautiful frame for your finished masterpiece. Each of these steps contributes to the durability and final beauty of your crumb quilt, transforming it from a collection of scraps into a cherished heirloom.
Pro Tips for a Gorgeous Scrappy Crumb Quilt
- Press, Press, Press: We can’t emphasize this enough. Pressing after every seam, and definitely before cutting, will elevate the quality of your finished blocks and quilt.
- Consistent Seam Allowance: While crumb quilting allows for creativity, maintaining a consistent 1/4-inch seam allowance is paramount for blocks to fit together accurately when assembled.
- Embrace the Chaos (and Control It): Part of the beauty is the randomness, but don’t be afraid to occasionally step back and trim larger “crumb” sections if they start to dominate. Balance is key.
- Color Play is Crucial: Even with random scraps, think about how colors interact. Distribute very light and very dark fabrics, or bright and subdued patterns, to create visual interest without overwhelming the eye.
- Use a “Design Wall” (or Floor!): Laying out your blocks before sewing them together allows you to visualize the final composition and make adjustments, ensuring a pleasing overall design.
- Don’t Fear the Trim: When squaring up your blocks, don’t be afraid to trim off small amounts to achieve that perfect 7 1/2-inch square. Precision here saves headaches later.
- Take Breaks: Quilting, especially with many small pieces, can be intricate. Step away when you feel frustrated; a fresh perspective often helps!
Your Beautiful Scrappy Crumb Quilt Awaits!
Creating a scrappy crumb quilt is a truly rewarding journey. From rescuing tiny fabric remnants to seeing them transform into a vibrant, unique quilt top, every stage is filled with creative satisfaction. This project isn’t just about making a quilt; it’s about making a statement – a statement of sustainability, creativity, and the belief that beauty can be found in every scrap. We hope this expanded guide, inspired by The Sewing Channel, empowers you to confidently dive into the world of crumb quilting. Gather your scraps, fire up your sewing machine, and prepare to create a stunning piece that will be cherished for years to come. Happy quilting!