
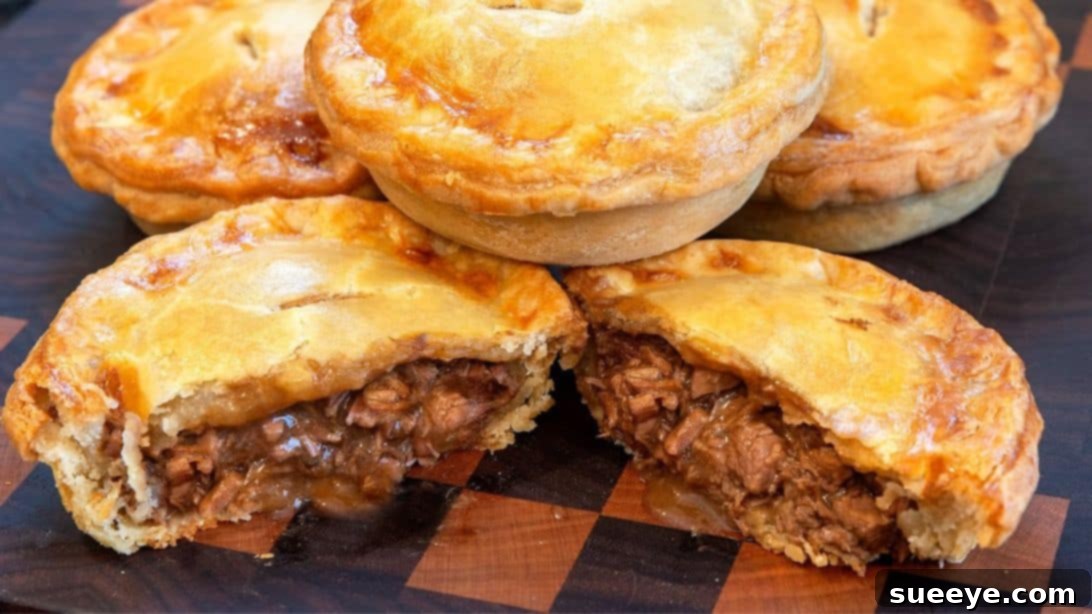
The Ultimate Homemade Steak Pie: A Culinary Masterpiece by John Kirkwood
There are few dishes as comforting and satisfying as a perfectly crafted steak pie. Imagine sinking your teeth into a golden, flaky pastry crust, revealing a succulent filling of tender beef bathed in a rich, savory gravy. If you’ve been searching for the definitive recipe to achieve this culinary dream, look no further. This ultimate steak pie, inspired by the renowned chef John Kirkwood, promises to amaze even the most discerning palates. It’s a dish that elevates simple ingredients into an extraordinary experience, guaranteed to become a cherished family favorite.
What sets this recipe apart is its meticulous attention to detail, resulting in beef that is phenomenally flavorful with a melt-in-your-mouth consistency, perfectly complemented by a truly outstanding homemade pastry. Despite its impressive outcome, the process is surprisingly straightforward, making it an excellent choice for both experienced home cooks and enthusiastic beginners. Whether you’re planning a cozy family dinner, a hearty lunch, or preparing a special meal for guests, this steak pie delivers on all fronts – taste, texture, and pure comfort. Prepare to impress everyone with this classic British staple that perfectly balances rustic charm with gourmet appeal.
Ingredients for an Exceptional Steak Pie
Crafting the perfect steak pie begins with selecting high-quality ingredients. This recipe divides its components into two main sections: the glorious homemade pastry and the deeply flavorful beef filling. Each element plays a crucial role in the final harmony of taste and texture.
For the perfectly flaky pastry:
- 14 oz (approximately 400g) of plain or all-purpose flour: The foundation of our crust, ensuring structure and a tender crumb.
- 2/3 cup (approximately 160ml) of hot water: Essential for achieving the right consistency in a hot water crust pastry, contributing to its unique flakiness.
- 3 1/4 oz (approximately 90g) of unsalted butter: Adds rich flavor and helps create layers within the pastry.
- 3 1/2 oz (approximately 100g) of lard or shortening: The secret to an incredibly tender and impossibly flaky pastry, providing superior texture.
- 1 teaspoon of fine sea salt: Balances the flavors and enhances the pastry’s overall taste.
- 1 egg, whisked with a dash of milk (for egg wash): Provides that beautiful golden-brown sheen and acts as a sealant.
For the rich and tender filling:
- 18 oz (approximately 500g) of lean stewing or braising beef (such as chuck or round steak): These cuts are ideal for slow cooking, becoming incredibly tender and flavorful.
- 1 pint (approximately 570ml) of high-quality beef stock: Forms the savory base for our gravy, infusing the beef with deep flavor.
- 1 1/2 tablespoons of gravy granules: A quick and effective way to thicken the sauce and enhance its richness, ensuring a luscious gravy. Alternatively, you can use cornstarch or a roux.
- 2 small bay leaves (optional, but highly recommended): Infuse the stewing liquid with a subtle, aromatic depth, elevating the overall flavor profile.
Step-by-Step Guide to Crafting Your Ultimate Steak Pie
Embark on your journey to create an unforgettable steak pie. Follow these detailed steps carefully to achieve a dish that is both a feast for the eyes and a delight for the palate.
Step 1: Prepare the Beef Stock Base
Begin by preparing the rich base for your steak pie filling. Select a large, heavy-bottomed pot or Dutch oven, ideal for even heat distribution. Carefully pour in one full pint (approximately 570ml) of high-quality beef stock. Position the pot over a medium heat setting. The goal here is to gently bring the stock to a simmering point, where small bubbles just begin to break the surface. A gentle simmer ensures the flavors develop gradually and the liquid doesn’t reduce too quickly, setting the stage for tender beef.
Step 2: Dice the Beef
While your beef stock is gently heating, turn your attention to the beef. Take your 18 oz of lean stewing or braising beef and place it on a clean cutting board. Using a sharp knife, first cut the beef into manageable strips, going against the grain where possible. Then, cut these strips into uniform, bite-sized cubes, roughly 1 to 1.5 inches (2.5 to 3.8 cm) in size. Uniform pieces ensure even cooking and tenderness, making for a consistent and delightful texture in every bite.
Step 3: Begin Slow Simmering the Beef
Once your beef stock has reached a gentle simmer, carefully add the cubed beef to the pot. Immediately follow with the two small bay leaves, if using, which will impart a subtle, aromatic depth to the meat as it cooks. Stir gently to ensure all the beef is submerged. Place the lid securely on the pot, reducing the heat to low, and allow the beef to simmer for an extended period, typically one and a half to two hours. This slow cooking process is crucial for breaking down tough fibers, rendering the beef incredibly tender and infusing it with the rich flavor of the stock. Check occasionally to ensure it’s not boiling dry.
Step 4: Prepare Water for Pastry
While the beef is tenderizing, it’s time to start on the magnificent hot water crust pastry. In a separate, small saucepan, measure out 2/3 cup of water. Place this pan over medium heat and bring the water to a gentle simmer. This hot water is fundamental to the pastry’s unique texture and workability, distinguishing it from other pastry types.
Step 5: Combine Dry Pastry Ingredients
In a large mixing bowl, combine the 14 oz of plain or all-purpose flour with 1 teaspoon of fine sea salt. Use a whisk or a spoon to thoroughly mix these dry ingredients together, ensuring the salt is evenly distributed throughout the flour. This preparatory step is vital for a well-seasoned and balanced pastry.
Step 6: Melt Fats into Hot Water
Once the water in your small saucepan is simmering, add the 3 1/4 oz of butter and 3 1/2 oz of lard (or shortening) to the hot water. Stir continuously over low heat until both fats are completely melted and fully incorporated into the water, forming a smooth, warm liquid. The heat from this mixture will be key to developing the pastry’s structure.
Step 7: Form the Pastry Dough
Create a well in the center of your flour and salt mixture in the large bowl. Carefully pour the hot liquid mixture (hot water, melted butter, and lard) directly into this well. Using a sturdy wooden spoon, begin mixing from the center outwards, gradually incorporating the flour into the hot liquid. Continue mixing until all the flour is hydrated and a cohesive dough forms. Scrape down the sides of the bowl to ensure every bit is incorporated. The dough will be soft and pliable at this stage, characteristic of a hot water crust.
Step 8: Knead, Divide, and Chill the Pastry
Lightly dust a clean work surface with a small amount of flour. Transfer the warm dough from the bowl onto your floured surface. Gently fold and knead the dough a few times, just until it forms a smooth, cohesive ball. Be careful not to over-mix, as this can lead to a tough pastry. Divide the dough into two pieces: a larger piece (approximately 2/3 of the dough) for the pie base and a smaller piece (the remaining 1/3) for the pie tops. Wrap each piece tightly in cling film or a plastic food bag to prevent it from drying out, and place them in the refrigerator for a minimum of 2 hours. Chilling is essential for the dough to firm up, making it easier to roll and ensuring a flaky crust.
Step 9: Thicken the Beef Gravy
After the beef has simmered for 1.5 to 2 hours and is wonderfully tender, remove the bay leaves from the pot and discard them. Carefully ladle about half of the beef stock liquid into a separate jug. You’ll reserve this for later use if needed, or for serving alongside. The remaining stock should just cover the meat. Now, add the 1 1/2 tablespoons of gravy granules to the stock remaining in the pot with the beef. Stir well to ensure the granules dissolve completely and the sauce thickens to a rich, luscious consistency. If you prefer, or if the gravy isn’t thick enough, you can mix a teaspoon of cornstarch with a tablespoon of cold water to create a slurry, then stir it into the simmering gravy until it reaches your desired thickness. Once thickened, cover the pot and allow the entire beef mixture to cool completely. Cooling is paramount before filling the pies, as hot filling can make the pastry soggy.
Step 10: Prepare the Pie Molds
While the beef filling and pastry dough are chilling, prepare your pie molds. You can use individual pie tins, a large pie dish, or specialized metal pie molds. Using a small amount of butter or a suitable cooking spray, thoroughly grease the inside of each mold. This crucial step prevents the pastry from sticking and ensures your pies will release cleanly after baking, preserving their perfect shape.
Step 11: Roll Out the Pastry Bases and Lids
Retrieve the chilled pastry dough from the refrigerator. Lightly flour your work surface once more. Take the larger portion of dough (for the bases) and, using a rolling pin, roll it out evenly to a thickness of about 1/8 inch (3mm). Use a round cutter or the base of your pie mold to cut out circles that will fit perfectly into the bottom and up the sides of your tins. Repeat this process with the smaller portion of dough for the lids, ensuring they are slightly larger than the tops of your molds to allow for crimping. Set all the cut pastry pieces aside, keeping them cool.
Step 12: Line the Pie Molds
Carefully place each pastry base into the center of its respective greased pie tin. Gently press the pastry down, working it into all the bottom corners and up the sides of the tin. Take your time to ensure there are no air pockets trapped beneath the pastry. Smooth out any wrinkles and ensure the pastry sits snugly against the mold. This creates a sturdy foundation for your pie and prevents a soggy bottom.
Step 13: Fill the Pastry Cases
Now for the star of the show! Once the beef filling is completely cool, spoon it generously into the pastry-lined cases. Gently compact the meat and gravy with the back of a spoon, ensuring there are absolutely no air gaps within the filling. A well-compacted filling helps the pie hold its shape and prevents it from collapsing after baking. Fill them to just below the rim of the pastry base.
Step 14: Prepare the Egg Wash
In a small container or bowl, crack one small egg. Add a dash of milk (about a tablespoon). Using a fork or a small whisk, beat the egg and milk together until they are well combined and smooth. This egg wash will give your pie its beautiful golden-brown, glossy finish and help seal the lid to the base.
Step 15: Seal and Decorate the Pies
Preheat your oven to 340°F (170°C). Lightly brush the rim of the pastry base in each pie with the prepared egg wash. Be very careful not to let any egg wash drip between the pastry and the sides of the tins, as this can make it difficult to remove the pie later. Carefully place a pastry lid over each filled pie, aligning it evenly. Gently press the edges of the lid down all the way around, sealing it to the base. Then, use your fingers or a fork to crimp the edges, creating a decorative and secure seal. Finally, using a small, sharp knife, cut two small vent holes in the center of each pie lid. These vents allow steam to escape during baking, preventing the pastry from becoming soggy. Brush the entire surface of each pie lid with the remaining egg wash for that perfect golden crust.
Step 16: Bake to Golden Perfection
Carefully transfer your prepared pies to a baking sheet. Place the baking sheet in the preheated oven, ideally on the bottom rack with the bottom heating element turned on (if your oven has this setting). This helps ensure the base cooks thoroughly and prevents a soggy bottom. Bake for approximately 45 minutes, or until the pastry is deeply golden brown and puffed up. Keep an eye on them to ensure they don’t brown too quickly; if they do, you can loosely tent them with foil. Once baked, carefully remove the pies from the oven and transfer them to a wire rack to cool completely before serving. Cooling allows the filling to set and the flavors to meld beautifully, making for a perfect slice.
Tips for a Truly Ultimate Steak Pie
Achieving steak pie perfection is a gratifying endeavor. Here are some extra tips to ensure your pie is nothing short of magnificent:
- Quality Beef Matters: While stewing cuts are economical, investing in good quality, well-marbled chuck or round steak makes a noticeable difference in tenderness and flavor.
- Don’t Rush the Simmer: The long, slow simmer for the beef is non-negotiable. It’s what transforms tough cuts into succulent, fall-apart tender morsels. Patience here is key to the ultimate texture.
- Chilling the Pastry: Ensure your pastry is adequately chilled, ideally for the full 2 hours. This helps the fats solidify, creating those desirable flaky layers and making the dough much easier to handle without becoming sticky.
- Preventing a Soggy Bottom: Several factors contribute to a crisp base: ensuring the filling is completely cool before assembly, thoroughly greasing your tins, and baking on a lower rack with bottom heat if available.
- Seasoning: Taste your gravy before filling the pies. Adjust salt and pepper as needed. A well-seasoned filling is the heart of a great pie.
- Ventilation: Don’t skip the vent holes! They are crucial for releasing steam and preventing the top crust from puffing up excessively or becoming soggy.
Serving Suggestions for Your Masterpiece
This ultimate steak pie is a complete meal in itself, but it truly shines when paired with complementary sides that enhance its rich flavors. Consider serving your magnificent creation with:
- Creamy Mashed Potatoes: A classic pairing, perfect for soaking up any extra gravy.
- Steamed Green Vegetables: Fresh green beans, broccoli, or asparagus add a vibrant color and a healthy contrast to the richness of the pie.
- Glazed Carrots: Sweet and tender, they offer a lovely balance.
- A Simple Side Salad: A light, crisp salad with a vinaigrette dressing can cut through the richness and cleanse the palate.
- Extra Gravy: Always have a small jug of extra gravy on hand for those who desire more lusciousness.
Storage and Reheating
This steak pie is fantastic freshly baked, but it also stores and reheats beautifully, making it perfect for meal prep or enjoying leftovers:
- Refrigeration: Once completely cooled, individual pies can be stored in an airtight container in the refrigerator for up to 3-4 days.
- Freezing: For longer storage, wrap individual baked and cooled pies tightly in cling film, then foil, and freeze for up to 3 months.
- Reheating from Refrigerated: Preheat your oven to 350°F (175°C). Place the pie on a baking sheet and heat for 20-30 minutes, or until heated through and the pastry is crisp again.
- Reheating from Frozen: Do not thaw. Preheat oven to 350°F (175°C). Place frozen pie on a baking sheet and bake for 45-60 minutes, or until piping hot in the center. Cover loosely with foil if the pastry starts to brown too much.
Why John Kirkwood’s Recipe Stands Out
John Kirkwood’s approach to the steak pie isn’t just about following steps; it’s about understanding the synergy between simple ingredients and traditional techniques. His recipe truly delivers on its promise of an “ultimate” experience because it:
- Emphasizes the Hot Water Crust: This classic pastry method is often overlooked but guarantees a robust yet tender crust that perfectly holds the rich filling without becoming soggy, a common pitfall in other recipes.
- Prioritizes Slow Cooking: The extended simmering time for the beef ensures every piece is fall-apart tender and deeply infused with flavor, a testament to proper stewing techniques.
- Simplifies the Gravy: Using gravy granules makes achieving a rich, thick sauce effortlessly, without compromising on taste, making this recipe accessible to all skill levels.
- Focuses on Texture: From the flaky pastry to the perfectly tender beef and luscious gravy, every element of this pie has a purpose, creating a harmonious textural experience.
This recipe is a masterclass in traditional British comfort food, proving that with a little care and the right guidance, anyone can create a steak pie that tastes like it came from a gourmet kitchen.
Your Journey to the Ultimate Steak Pie Awaits
You now have all the knowledge and steps required to create a truly magnificent steak pie. This recipe, championed by John Kirkwood, is more than just a list of ingredients and instructions; it’s an invitation to experience the profound satisfaction of traditional home cooking at its finest. From the initial simmer of the beef to the final golden glow of the pastry, every stage contributes to a final product that is rich in flavor, comforting in its essence, and utterly irresistible. Whether it’s a cold winter’s night or a celebratory family gathering, this ultimate steak pie is guaranteed to bring smiles and warmth to your table. Don’t hesitate – gather your ingredients, follow these detailed steps, and prepare to embark on a culinary adventure that culminates in one of the most beloved and delicious comfort foods known to man. Enjoy every single, savory bite!