
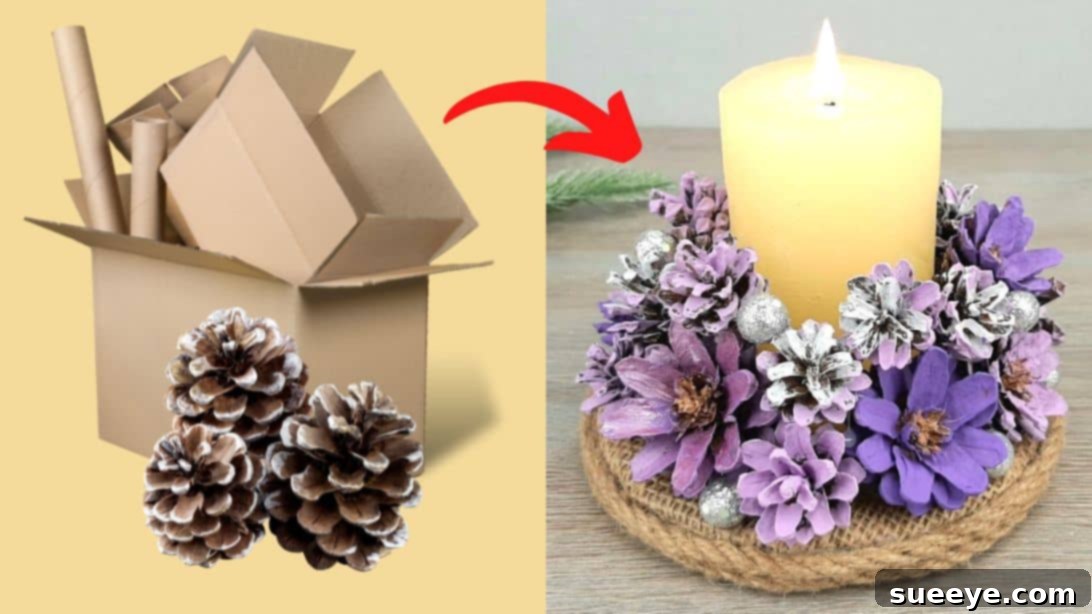
Craft Your Own Enchanting Pine Cone Christmas Candlestick Holder
As autumn leaves give way to the crisp embrace of winter, nature offers a bounty of decorative elements perfect for holiday crafting. Among these, the humble pine cone stands out, readily available and incredibly versatile. Instead of letting these natural treasures go unnoticed, imagine transforming them into a captivating piece of DIY Christmas candlestick decor, adding a rustic yet elegant touch to your festive home. This creative project, inspired by the innovative minds at Super Idea on Youtube, not only provides a wonderful opportunity for upcycling but also offers a chance to infuse your holiday decorations with a unique, handmade charm.
Crafting a beautiful Christmas candlestick holder from pine cones is a delightful activity suitable for all ages, making it a perfect project to share with children. It’s an excellent way to introduce them to the joy of making and the beauty of natural materials. Beyond personal enjoyment, these charming candle holders make thoughtful, personalized gifts for friends and loved ones, showcasing your effort and creativity. With just a few basic materials like cardboard scraps, sackcloth, and jute cord, along with a collection of pine cones, you can embark on this rewarding journey of creating a truly special holiday decoration. Let’s gather our supplies and dive into the simple steps to bring this lovely vision to life.
Essential Materials for Your Pine Cone Candlestick
Before beginning your creative endeavor, ensure you have all the necessary components. Gathering your materials beforehand streamlines the crafting process and allows for an uninterrupted flow of creativity. Here’s a comprehensive list of what you’ll need, along with a few tips on selection:
- Cardboard: Look for sturdy, flat pieces. Recycled packaging from household items works perfectly. This will form the stable base of your candlestick.
- Sackcloth (Burlap): A natural, textured fabric that adds a rustic aesthetic. Small offcuts or remnants are ideal.
- Jute Cord: This natural fiber rope will be used to neatly finish the edges of your base, complementing the organic feel of the pine cones.
- Candle: Choose a candle appropriate for a decorative holder. A pillar candle or a wider tea light is recommended for stability and safety. Consider battery-operated LED candles for a worry-free glow.
- Pine Cones: A variety of sizes—both small and large—will add depth and visual interest to your design. Collect clean, dry cones.
- Acrylic Paints: Select two complementary shades of a primary color (e.g., forest green, deep red, or icy blue) and a contrasting white. Metallic or glitter paints can also add extra festive sparkle.
- Silver Decorative Foam Balls: These small, shimmering embellishments will provide a touch of sparkle and contrast against the natural textures.
- Hot Glue Gun and Glue Sticks: Essential for secure and quick bonding. Always exercise caution when using a hot glue gun.
- Saucer or Compass: For drawing perfect circles on your cardboard and sackcloth.
- Pliers: A small pair of pliers will be invaluable for carefully modifying the pine cones.
- Scissors or Craft Knife: For cutting cardboard and fabric precisely.
- Paint Brushes: Various sizes for detailed work and broader coverage.
- Newspaper or Drop Cloth: To protect your work surface from paint and glue.
Having these items ready will set you up for a smooth and enjoyable crafting experience. Remember, many of these materials can be found around your home or sourced inexpensively, making this an accessible and budget-friendly holiday project.
Step-by-Step Instructions: Crafting Your Pine Cone Candlestick
Step 1: Constructing the Sturdy Base
The foundation of your candlestick holder is crucial for stability and aesthetics. Begin by taking your cardboard. Place a saucer or use a compass to draw two identical, perfectly circular shapes. These circles will form the core of your base. Once drawn, carefully cut out both cardboard circles using sharp scissors or a craft knife, ensuring clean edges for a professional finish.
Next, move to your sackcloth. Using the same saucer or compass, draw two slightly larger circles on the sackcloth. These circles should be approximately 0.5 to 1 inch larger in diameter than your cardboard circles. This extra allowance will be used to wrap around the cardboard edges. Carefully cut out these larger sackcloth circles. Apply a thin, even layer of hot glue to one side of each cardboard circle, then center and firmly press a sackcloth circle onto each, smoothing out any wrinkles. Fold the excess sackcloth fabric over the edge of the cardboard and secure it to the back with hot glue, creating a neat, covered edge. Once both cardboard pieces are covered, carefully glue them together, sackcloth-covered sides facing outwards, to create a double-thickness base. This doubles the stability and creates a finished look. To further enhance the base, wrap jute cord neatly around the side edge where the two cardboard pieces meet, securing it with hot glue. This not only adds a decorative touch but also conceals any raw edges, giving your base a refined, natural finish.
Step 2: Preparing Your Pine Cones for a Floral Effect
This step is where the pine cones truly begin their transformation. First, select a handful of your smallest pine cones and set them aside; these will be used later for a second, upper layer of decoration. For the remaining cones, you’ll be giving them a more “flower-like” appearance. Using a pair of pliers, carefully and gently remove approximately half of the lower prickles (scales) from each cone. Work your way around the cone, snapping off the lower scales until the cone starts to resemble an open flower bloom, revealing the inner structure. Be patient and gentle to avoid damaging the cone’s core. This technique adds an intricate, organic texture to your finished candlestick, making it look more refined and artistic.
Step 3: Infusing Color into Your Cones
Now it’s time to bring vibrant color to your natural elements. Take the pine cones you’ve just transformed into “flowers” in Step 2. Using your chosen acrylic paints, carefully paint these cones in your preferred main color. For a sophisticated look, use two different shades of the same color – perhaps a darker hue for the base of the scales and a lighter one brushed over the tips to create dimension. Ensure even coverage but avoid overloading the brush to prevent paint from clumping. Next, take the small, whole pine cones you set aside earlier and paint them entirely with white acrylic paint. This contrasting color will make them stand out as a delicate accent. Once all cones are painted, arrange them on newspaper or a protected surface and allow them to dry completely. This might take a few hours, depending on the paint thickness and humidity, so resist the urge to handle them too soon to prevent smudges.
Step 4: Assembling Your Festive Masterpiece
With your base and painted cones ready, it’s time for the exciting assembly phase. Place your chosen candle securely in the absolute center of the cardboard base you crafted in Step 1. Ensure it sits firmly and upright. Now, begin attaching your painted, “flower-like” pine cones around the base of the candle. Use hot glue sparingly but firmly on the bottom of each cone, pressing it against the base. Alternate between larger and smaller cones as you work your way around the candle, creating a rich, full, and visually appealing arrangement. The key here is to build volume and texture. Make sure to leave space at the very top for the smaller, white cones.
Once the main layer of cones is securely glued, take the small, white-painted pine cones you prepared. Carefully hot glue these smaller cones on top of the first layer, filling any gaps and creating a beautiful second tier of texture and color. This layering effect adds depth and makes the candlestick appear more lush and elaborate. Finally, for an extra touch of holiday sparkle, strategically glue the silver decorative foam balls among the pine cones. These metallic accents will catch the light, adding a magical shimmer to your finished Christmas candlestick. Allow all the glue to dry completely before moving or displaying your beautiful creation.
Tips for Enhancing Your Pine Cone Candlestick
To ensure your DIY Christmas candlestick is not only beautiful but also lasting and safe, consider these additional tips:
- Pine Cone Preparation: Before crafting, clean any dirt or debris from your collected pine cones. For fresh cones, you might want to bake them on a low temperature (around 200°F or 90°C) for 30-60 minutes to open them up fully and kill any potential bugs. Let them cool completely before use.
- Safety First: When using a hot glue gun, always be cautious to avoid burns. If working with children, supervise them closely or handle the hot glue yourself. If using a real flame candle, never leave it unattended and ensure the pine cones are not too close to the flame. For maximum safety, consider using battery-operated LED candles, which offer a realistic flicker without the fire hazard.
- Customization is Key: Don’t limit yourself to the suggested colors. Experiment with metallics like gold or copper, or vibrant blues and silvers for a winter wonderland theme. You can also add other natural elements like dried berries, small sprigs of faux greenery, cinnamon sticks, or even tiny bells for sound.
- Adding Scent: For an extra sensory experience, spray your finished candlestick with a holiday-scented spray, such as pine, cinnamon, or spiced apple. This will make your decor even more inviting.
- Glitter and Flocking: For an even more festive look, lightly spray your finished cones with an adhesive spray and then sprinkle fine glitter over them. Alternatively, use artificial snow flocking spray to give them a frosty, snow-dusted appearance.
- Gift Giving: If giving as a gift, consider wrapping your candlestick in clear cellophane and tying it with a beautiful ribbon. Include a tag with care instructions or a personalized message.
Why Choose DIY for Your Christmas Decor?
Embracing DIY projects for your holiday decorations offers numerous benefits. It’s an incredibly rewarding experience that allows you to infuse your home with unique pieces that reflect your personal style and creativity. Handmade items often carry a sentimentality that store-bought decorations simply cannot match. Moreover, crafting can be a wonderful stress-reliever and a fantastic way to spend quality time with family, creating cherished memories. It’s also an eco-friendly option, as you often utilize natural or recycled materials, reducing waste and promoting sustainability during the festive season. Each DIY piece tells a story, making your holiday decor truly special and meaningful.
Conclusion: Illuminate Your Home with Handmade Charm
There’s an undeniable magic that handmade decorations bring to the Christmas season. This DIY pine cone candlestick holder is more than just a decor piece; it’s a testament to your creativity, resourcefulness, and the joy of crafting. By transforming simple pine cones into an elegant and festive centerpiece, you not only beautify your home but also create a conversation starter and a unique expression of holiday spirit.
We hope this detailed guide inspires you to gather your materials and embark on this wonderful project. Whether adorning your dining table, gracing a mantelpiece, or offered as a heartfelt gift, your pine cone candlestick is sure to bring warmth and a personalized touch to the festive season. So, embrace the natural beauty of the holidays, unleash your inner crafter, and illuminate your home with the enchanting glow of your very own handmade Christmas candlestick. Happy crafting and merry decorating!