
Crafting Thoughtful Gifts: Your Ultimate Guide to DIY Wooden Signs
The joy of giving a truly thoughtful gift is unmatched, especially during the festive season. While store-bought items offer convenience, there’s a unique warmth and personal touch that comes with a handmade present. This year, many are rediscovering the art of crafting gifts, transforming simple materials into cherished keepsakes. Imagine presenting a loved one with something you’ve poured your creativity and effort into – a gift that speaks volumes about your care and appreciation. Among the myriad of DIY gift ideas, crafting personalized wooden signs stands out as a wonderfully versatile and impactful choice. These aren’t just decorative pieces; they are reflections of sentiment, style, and thoughtfulness, perfect for enhancing any home decor. Whether you’re planning ahead for Christmas in July or seeking a unique present for any occasion, embarking on a DIY wooden sign project promises a deeply rewarding experience for both the maker and the recipient.
Why DIY Wooden Signs Make Perfect Gifts
DIY wooden signs have surged in popularity, becoming a staple in various home decor styles, from rustic farmhouse to modern minimalist. Their broad appeal lies in their incredible adaptability and the unique character they bring to a space. Unlike mass-produced items, a handmade wooden sign carries an inherent authenticity and a story. You have complete control over its size, shape, color palette, typography, and most importantly, its message. This level of personalization makes them ideal gifts for any occasion – be it a housewarming, a birthday, an anniversary, or indeed, Christmas. For those looking to infuse their gift-giving with a touch of personal flair and enduring charm, a custom-made wooden sign offers an unparalleled opportunity to create something truly special and memorable. They are not only decorative but also serve as lasting reminders of cherished moments, inside jokes, or inspirational quotes, making them incredibly meaningful for friends and family alike.
The Versatility of Wood Signs in Home Decor
From a welcoming message in the entryway to a humorous quote in the kitchen, or a serene saying in the bedroom, wooden signs seamlessly integrate into almost any room. Their natural texture and customizable finishes mean they can complement existing decor or serve as a striking focal point. Rustic signs made from reclaimed wood evoke a sense of history and warmth, while sleek, painted signs can offer a more contemporary vibe. They can be hung on walls, leaned against shelves, or even incorporated into gallery walls, adding depth and personality. This adaptability ensures that your handmade gift will not only be appreciated but also easily find its place within the recipient’s home, making it a truly practical and beautiful present.
Essential Materials and Tools for Your Wood Sign Project
Embarking on a DIY wooden sign project begins with selecting the right materials. The foundation, naturally, is the wood itself. You have several excellent options, each offering a distinct aesthetic and level of convenience. Reclaimed wood, such as discarded pallets or old fence planks, is a popular choice for achieving that coveted rustic or farmhouse look. These pieces often come with natural imperfections, unique grain patterns, and a history that adds character. If you opt for reclaimed wood, remember to clean and sand it thoroughly to remove splinters, sharp edges, or contaminants before use. For a cleaner, more contemporary finish, new pine boards or plywood sheets from a hardware store work perfectly. Craft stores also offer pre-cut wood plaques in various shapes and sizes, ideal for smaller projects or if you prefer to skip the cutting process entirely.
Beyond the wood, you’ll need a selection of paints, stains, or sealants. Acrylic paints are versatile, widely available in a spectrum of colors, and excellent for intricate designs and lettering. Wood stains, on the other hand, enhance the natural beauty of the wood grain while adding a rich hue, perfect for a more understated look. Don’t forget brushes of various sizes, sponges for blending, stencils for crisp lettering, and sandpaper of different grits to achieve a smooth or distressed finish. Depending on your wood source, you might also need a saw (hand saw or miter saw) if you’re working with raw lumber, and clamps to hold pieces securely. For adding textural elements, consider incorporating materials like jute or cotton rope – a fantastic choice for creating dimensional, tactile lettering or decorative borders, lending an immediate and undeniable rustic charm to your piece.
Unleashing Creativity: Design Inspiration for Your Wooden Signs
The true magic of DIY wooden signs lies in the endless possibilities for design. Before you even pick up a brush, take time to brainstorm and conceptualize the perfect message and aesthetic for your recipient. Pinterest, Instagram, and home decor blogs are treasure troves of inspiration for discovering various styles, fonts, and layouts. Consider the recipient’s personal style, their hobbies, family inside jokes, significant dates, or their favorite quotes. A sign that resonates deeply with their personality will always be more cherished.
Popular Themes and Sayings for Personalized Wood Signs:
- Family-Focused: Messages like ‘Welcome to Our Chaos,’ ‘The [Family Name] Est. [Year],’ ‘Home Sweet Home,’ ‘Gather Here with Grateful Hearts,’ or ‘Family is Everything’ celebrate togetherness and warmth.
- Inspirational & Motivational: Quotes such as ‘Live Laugh Love,’ ‘Be Brave,’ ‘Dream Big,’ ‘Choose Joy,’ ‘You Are Enough,’ or ‘Simply Blessed’ offer daily encouragement and positivity.
- Humorous & Witty: Personalized inside jokes or lighthearted sayings can bring a smile, often tailored to the recipient’s unique sense of humor, making the gift even more special.
- Seasonal & Holiday: Designs specific to Christmas (‘Merry Christmas,’ ‘Believe’), Halloween, or spring can be interchangeable throughout the year, allowing for seasonal decor changes.
- Location-Specific: Signs like ‘Lake House,’ ‘Beach Bum,’ ‘Mountain Retreat,’ ‘Cabin Sweet Cabin,’ or signs indicating directions within a home (‘Laundry Room,’ ‘Pantry,’ ‘Coffee Bar’) add character and functionality.
- Minimalist & Abstract: Simple geometric patterns, elegant line art, or a single impactful word in sophisticated typography can offer a modern, understated aesthetic.
When planning your design, think carefully about font choices – script, bold block letters, distressed fonts, or a creative combination. The layout is also crucial; sketch out your ideas on paper first to ensure balance, readability, and visual appeal. You can freehand designs if you have a steady hand, use stencils for precision and consistency, or transfer printed designs using carbon paper, graphite pencil method, or even projector-based tracing. The addition of three-dimensional elements like rope, small metal accents, artificial foliage, or even a small painted illustration can elevate a simple sign into a true work of art, giving it depth, unique character, and an undeniable rustic charm.
Step-by-Step Guide to Creating Your DIY Wooden Sign
Once your design is finalized and materials are gathered, the exciting crafting process can begin. While specific tutorials might vary slightly based on your chosen design and materials, a general sequence of steps will guide you through creating a beautiful and professional-looking DIY wooden sign:
1. Prepare the Wood
If using raw wood, start by cutting it to your desired dimensions. This is where precision tools like a miter saw come in handy for clean, straight cuts. Next, sand all surfaces thoroughly until smooth, paying special attention to edges to remove splinters and create a clean canvas for your design. Start with a coarser grit (e.g., 80-100) to remove imperfections, then move to a finer grit (e.g., 180-220) for a silky smooth finish. If you’re going for a distressed look, you might intentionally add marks with a hammer, chain, or even just skip the super-fine sanding to retain some rough texture.
2. Apply Base Coat (Optional)
Apply a base coat of paint or stain. If you want the natural wood grain to show through, opt for a wood stain, wiping off excess with a clean cloth. For a solid color background, use acrylic or latex paint. Allow it to dry completely according to manufacturer instructions, and apply a second coat if necessary for even, opaque coverage. Ensure the surface is dry to the touch before moving to the next step.
3. Transfer Your Design
This is where your planning comes to life. If using stencils, position them carefully and secure them with painter’s tape to prevent bleeding. For transferring printed designs, rub graphite generously on the back of your printout, place it graphite-side down on your wood, and trace the lines firmly with a pen or pencil. This will transfer a light outline to your wood. Alternatively, if you’re confident with freehand, lightly sketch your design with a pencil directly onto the prepared wood surface.
4. Paint or Apply Design Details
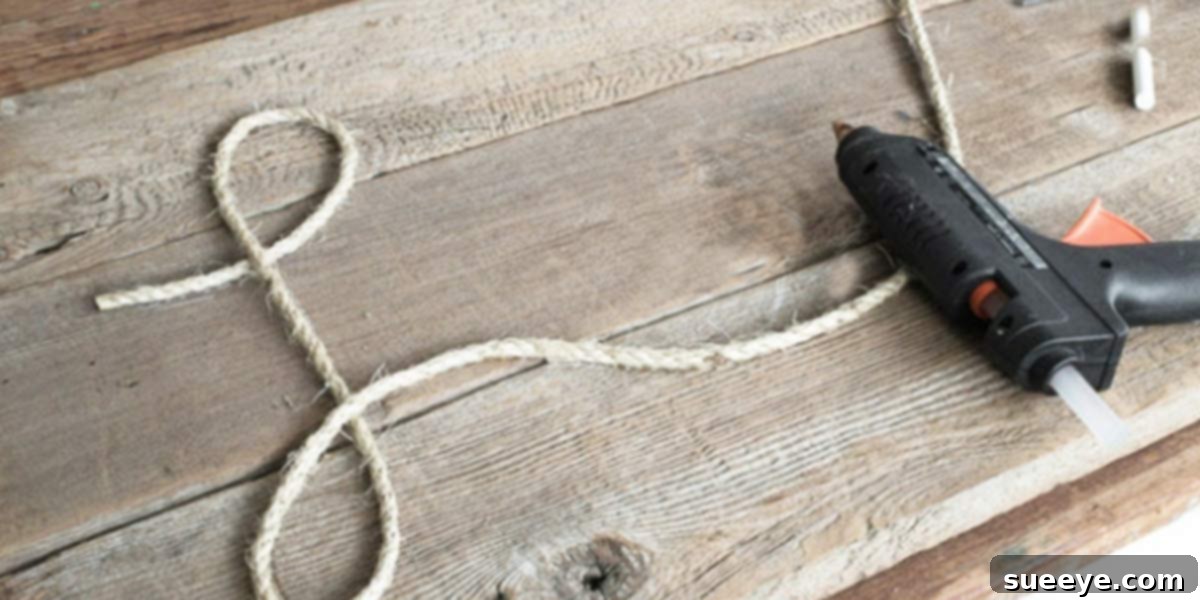
Using appropriate brushes or paint pens, carefully paint your letters and imagery. Take your time, working in thin, even coats to prevent paint from bleeding under stencils. Remove stencils while the paint is still slightly damp for cleaner lines. For rope lettering, apply a strong wood glue (or a hot glue gun for faster drying) along your sketched lines and carefully press the rope into place, trimming excess as needed. This adds a fantastic three-dimensional, rustic element that is both visually interesting and tactile. For multiple colors, ensure each color layer is dry before applying the next to prevent smudging.
5. Distress and Embellish (Optional)
If you desire a vintage or worn look, lightly sand certain areas of your painted sign after the paint has thoroughly dried. Focus on edges and areas that would naturally show wear. You can also dry-brush a contrasting color, or apply a dark wax or glaze to create an aged, antique effect, wiping back the excess to highlight textures. This step allows for immense creative expression, truly making each sign unique.
6. Seal and Protect Your Creation
Once all paint, glue, and embellishments are completely dry, apply a protective sealant. A clear matte or satin polyurethane spray or brush-on sealer will protect your sign from moisture, UV damage, and general wear, ensuring its longevity and vibrancy, especially if it’s destined for outdoor display. Apply several thin coats for optimal protection, allowing each coat to dry fully in between. This step is crucial for preserving the beauty and durability of your handmade wooden sign.
7. Add Hanging Hardware
Finally, attach appropriate hanging hardware to the back of your sign. Options include sawtooth hangers (easy to install), D-rings (for heavier signs), or for a more rustic look, drill holes in the top corners and thread natural jute twine or a metal chain through them. Ensure the hardware is securely fastened and can support the weight of your sign.
The Enduring Joy of Creating and Giving
Beyond the practical steps, remember that the process of creating a DIY wooden sign is as rewarding as the final product. It’s a chance to unwind, express your creativity, and immerse yourself in a satisfying craft. When you embark on such a project, whether it’s for Christmas gifts planned in July, a thoughtful housewarming present, or any other special occasion throughout the year, you’re not just making an object; you’re crafting a piece of your heart. The recipient will undoubtedly feel the warmth of your effort, the personal touch infused into every brushstroke, and the careful placement of each piece of rope or stencil. This tangible expression of care often becomes a cherished heirloom, holding sentimental value far beyond its material worth.
Handmade gifts, particularly those as charming and customizable as wooden signs, offer a refreshing and meaningful alternative to commercialism. They are often more budget-friendly, allowing you to create multiple personalized presents without breaking the bank. More importantly, they foster a deeper connection, turning simple wood and paint into a treasured memento that speaks volumes about your love and thoughtfulness. So, gather your supplies, let your imagination soar, and get ready to create stunning DIY wooden signs that will be admired, cherished, and bring joy for years to come. This holiday season, or for any occasion, give the gift of thoughtful, handmade artistry – a true testament to the spirit of giving and the power of personal connection.