
Boost Your Smartphone’s Audio: The Ultimate DIY Wooden Amplifier Tutorial
Do you ever find yourself struggling to hear your phone conversations clearly, especially when on speakerphone? Whether you’re multitasking during dinner, applying makeup, or simply need to step away from your device while chatting, the common issue of muffled or distant audio can be incredibly frustrating. We’ve all been there – trying to catch every word, often asking “Can you repeat that?” more times than we’d like. The good news is, there’s a brilliantly simple, aesthetically pleasing, and highly effective solution that you can build yourself: a DIY wooden phone amplifier.
This ingenious project isn’t just a practical tool; it’s a statement piece, a conversation starter, and a genuinely rewarding woodworking endeavor. Forget about bulky electronic speakers that require charging or Bluetooth connections. This passive amplifier harnesses the natural acoustic properties of wood to enhance your phone’s sound, providing a richer, clearer, and louder audio experience without any power source. Imagine hands-free calls where every word is crisp, or enjoying your favorite podcasts and music with surprisingly robust sound, all from a beautifully crafted piece of wood.
Why Choose a DIY Wooden Amplifier? The Unplugged Advantage
In a world saturated with electronic gadgets, the simplicity and elegance of a passive wooden amplifier stand out. But why should you invest your time and effort into building one? The benefits extend far beyond mere novelty:
- No Power Required: This is perhaps the biggest advantage. No batteries to charge, no power outlets needed. It works purely on the principles of acoustics, making it incredibly eco-friendly and always ready when you are.
- Superior Aesthetics: Unlike many generic plastic speakers, a wooden amplifier brings a touch of natural beauty and craftsmanship to your home or office. You can choose your wood, finish, and design to perfectly match your personal style.
- Enhanced Sound Quality: Wood is an excellent material for sound resonance. By carefully carving a sound channel, the amplifier redirects and magnifies your phone’s audio, leading to a warmer, fuller, and significantly louder output.
- Cost-Effective: Compared to purchasing high-end Bluetooth speakers, the materials for a DIY wooden amplifier are remarkably affordable, especially if you have some wood scraps lying around.
- The Joy of Creation: There’s immense satisfaction in building something with your own hands. This project is accessible to woodworkers of varying skill levels and provides a tangible, useful outcome.
Addressing Common Audio Frustrations
Think about those everyday scenarios where your phone’s speaker just doesn’t cut it. You’re trying to follow a recipe video in the kitchen, but the sound gets lost over the bubbling pot. You’re on a conference call, but need to move to another room briefly, and suddenly the conversation becomes a distant whisper. Or, like many, you have loved ones, perhaps elderly parents, who struggle with hearing and rely heavily on speakerphone, yet still ask you to repeat yourself constantly.
This DIY wooden amplifier is the perfect solution for all these predicaments. For the multitasker, it ensures your calls are audible no matter where you are in the immediate vicinity. For those with hearing challenges, it offers a dramatic improvement in clarity and volume, making conversations less strenuous and more enjoyable. It transforms your phone from a personal listening device into a room-filling sound source, making everyday interactions smoother and more pleasant.
Understanding the Acoustics: How Passive Amplification Works
At its core, a passive amplifier works by manipulating sound waves. When sound emanates from your phone’s tiny speaker, it travels outwards in all directions. A passive amplifier captures these sound waves and, through a cleverly designed internal channel, funnels and concentrates them towards the listener. The shape of the internal chamber and the material (wood, in this case) play crucial roles. Wood’s natural resonance helps to enrich the sound, adding warmth and depth that plastic enclosures often lack.
The design typically involves a slot for your phone, positioned directly over an entrance to a carved internal cavity. This cavity then expands and directs the sound out through an opening, much like a megaphone. The magic lies in the precise curves and dimensions that maximize sound capture and projection, all without a single watt of electricity.
Materials and Tools You’ll Need for Your Project
Embarking on this DIY journey requires a few essential items. The beauty of this project is its adaptability – you can use specialized woodworking tools for precision, or get creative with more common household tools.
Wood Choices:
- Solid Hardwood Block: A piece of hardwood like oak, maple, walnut, or cherry (approx. 8″ L x 3″ W x 2″ H, but customizable). Hardwoods are dense and resonate well, producing excellent sound.
- Reclaimed Wood: Old beams, cutting boards, or sturdy wood scraps can be repurposed, adding character and sustainability to your project.
Tools:
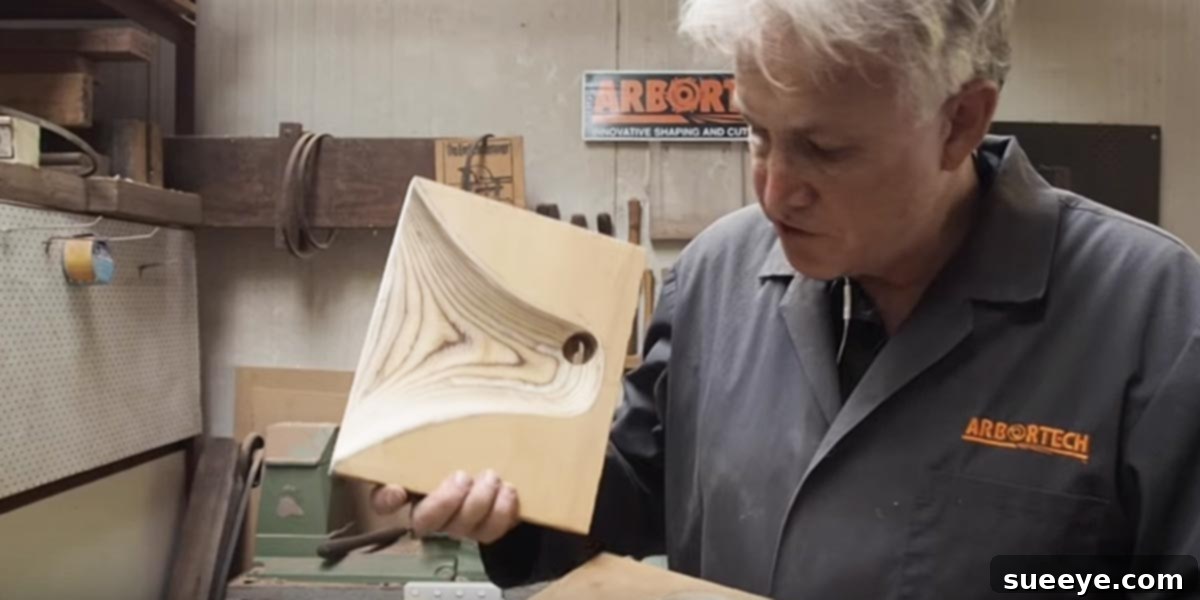
While the original inspiration for this project involved specialized wood sculpting tools from brands like Arbortech, don’t let that deter you! You can achieve fantastic results with more accessible alternatives:
- For the Phone Slot:
- Router with a straight bit (ideal for clean, precise slots)
- Dremel tool with a routing attachment
- Chisel and mallet (requires more patience and skill)
- For the Internal Sound Channel (the “horn”):
- Wood carving gouges and chisels
- Specialized wood sculpting tools (e.g., Arbortech Angle Grinder attachments)
- Rotary tool with carving bits (Dremel)
- Drill with various sized spade bits or Forstner bits (for initial material removal)
- For Shaping and Finishing:
- Orbital sander (for large flat surfaces)
- Detail sander (for intricate curves and corners)
- Hand sanding blocks and sandpaper (various grits: 80, 120, 220, 320, 400)
- Clamps to secure your workpiece
- Pencil and ruler for marking
- Safety glasses and dust mask (ALWAYS prioritize safety!)
Supplies:
- Wood glue (if assembling multiple pieces)
- Wood finish (e.g., Danish oil, tung oil, polyurethane, wax)
- Clean rags or brushes for applying finish
Step-by-Step Guide to Crafting Your Wooden Amplifier
Ready to get started? Here’s a detailed breakdown of the construction process. Remember, precision and patience are key.
Step 1: Design and Planning
First, measure your smartphone. You’ll need the dimensions for the slot where your phone will sit. Consider the placement of your phone’s speaker (usually at the bottom edge). Sketch out your design on paper, including the phone slot, the internal sound channel (often an expanding horn shape), and the external sound opening. A good starting point is a block roughly 8 inches long, 3 inches wide, and 2 inches tall, allowing ample space for carving the channel.
Step 2: Cutting the Wood to Size
If you’re starting with a larger piece of wood, carefully cut it to your desired dimensions using a miter saw or handsaw. Ensure all sides are square for stability and a clean aesthetic. This initial cut provides the foundation for your amplifier.
Step 3: Creating the Phone Slot
This is where your phone will rest. Mark the exact dimensions of your phone’s width and thickness, ensuring the slot is deep enough for a snug fit, but not so deep that it covers the screen or controls. Position the slot directly above where your internal sound channel will begin. Using a router with a straight bit is ideal for a clean, uniform slot. Alternatively, you can carefully chisel out the slot, making multiple passes for accuracy.
Step 4: Sculpting the Sound Channel (The Horn)
This is the most critical part of the amplifier. Mark the entry point directly beneath your phone’s speaker. Then, sketch out the expanding horn shape on the sides of your wood block, visualizing how the sound will travel. Begin by drilling pilot holes or using a Forstner bit to remove bulk material. Then, switch to carving gouges, chisels, or a Dremel tool with carving bits to meticulously shape the internal channel. The channel should gradually widen and deepen as it moves away from the phone slot, culminating in the external sound opening. Aim for smooth, flowing curves to optimize sound redirection. If using an angle grinder with specialized attachments, work slowly and deliberately, removing material in layers.
Step 5: Sanding and Finishing
Once the carving is complete, it’s time to refine your creation. Start with a coarser grit sandpaper (e.g., 80 or 120) to remove any tool marks and rough edges. Gradually move to finer grits (220, 320, 400) for a silky-smooth finish. Pay extra attention to the internal sound channel and the phone slot. After sanding, wipe the wood clean of dust with a damp cloth. Finally, apply your chosen wood finish. Danish oil or tung oil will bring out the natural grain of the wood and provide a protective layer, while polyurethane offers a more durable, glossy finish. Apply according to product instructions, allowing ample drying time between coats.
Step 6: Testing Your Amplifier
Once the finish is dry, insert your phone and play some music or make a speakerphone call. Listen to the difference! You should notice a significant boost in volume and clarity. Don’t be afraid to experiment with different phone positions within the slot to find the optimal sound projection.
Tips for Success and Customization
- Safety First: Always wear safety glasses and a dust mask when cutting and sanding wood. If using power tools, ensure you understand their operation and use appropriate guards.
- Patience is a Virtue: Woodworking, especially carving, requires patience. Don’t rush the process; take your time to ensure accuracy and a quality finish.
- Listen to the Wood: Pay attention to the grain. Carving with the grain is generally easier and less prone to tear-out than carving against it.
- Customization is Key: Feel free to personalize your amplifier! You could add a small stand, engrave initials, paint it, or even incorporate different wood types. Imagine a sleek, minimalist design or a rustic, organic shape.
- Consider Different Phone Models: If you plan to make these as gifts, remember that phone dimensions vary. You might need to create different slot sizes or a more universal design.
Beyond Amplification: A Thoughtful Gift
This project is not only incredibly useful for yourself, but it also makes for an incredibly thoughtful and unique gift. The personal touch of a handmade item, especially one that solves a common problem, speaks volumes. For a hard-of-hearing loved one, like the mother mentioned in the initial inspiration for this project, such a device can genuinely improve their quality of life by making conversations and entertainment more accessible and enjoyable. It’s a gift that says, “I care about your comfort and well-being.”
Conclusion: Experience Enhanced Audio Today
It’s easy to overlook the simple solutions in our technologically advanced world. This DIY wooden phone amplifier is a testament to the power of thoughtful design and natural materials. It offers a practical, elegant, and sustainable way to enhance your smartphone’s audio without any electronic components.
Once you experience the clearer, richer sound, you’ll wonder how you ever managed without it. It’s truly one of those “why didn’t I think of this sooner?” moments. So gather your tools, choose your wood, and embark on this rewarding project. Elevate your everyday phone experience and perhaps even create a cherished gift for someone special. The satisfaction of hearing crystal-clear calls and vibrant audio from your own handmade creation is truly unparalleled.
Ready to transform your audio? Share your woodworking journey and the amazing results!