
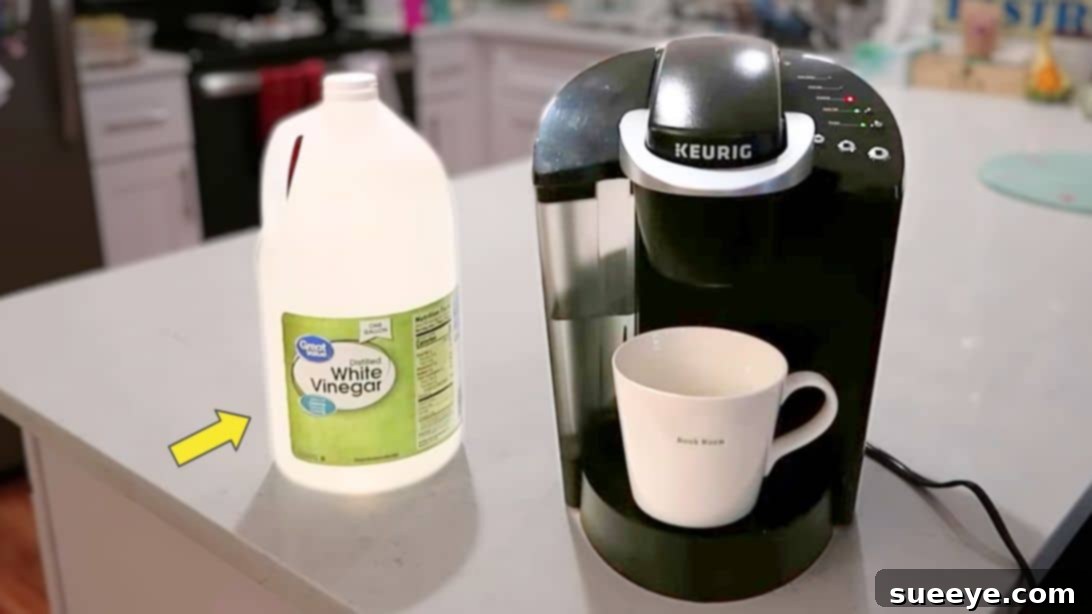
Do you cherish your daily cup of coffee from your Keurig machine? If your Keurig coffee maker is a constant companion in your kitchen, you might be surprised to learn that its internal cleanliness can significantly impact your brewing experience. While the exterior may appear spotless, a hidden problem could be brewing beneath the surface: the build-up of calcium deposits and mineral scale. Over time, these invisible invaders can not only diminish the rich flavor of your coffee but also impede your machine’s performance, potentially leading to malfunctions or even premature failure.
RELATED: Master the Art of Delicious Instant Coffee
Ensuring the longevity and optimal performance of your beloved coffee machine is simpler than you might think. A regular descaling routine, ideally performed every 3 to 6 months, is key to maintaining your Keurig in prime condition. This comprehensive guide, inspired by the practical insights of Colleen Salpini, will walk you through the incredibly easy process of descaling your Keurig using a common household item: white vinegar. Prepare to rediscover the pure, unadulterated taste of your favorite brews and extend the life of your machine with minimal effort.
Here’s another useful tip you might want to explore for a complete coffee care routine: Effortlessly Remove Stubborn Coffee Stains From Mugs
Why Descaling Your Keurig is Essential for Optimal Coffee and Machine Health
Many Keurig owners overlook the critical importance of regular descaling, often assuming their machine is self-cleaning or that mere water flushes are sufficient. However, the water we use, especially hard water, contains dissolved minerals like calcium and magnesium. When this water is heated, these minerals can crystallize and adhere to the internal components of your coffee maker, forming what is known as “scale” or “calcium deposits.” Understanding why this is a problem will highlight the necessity of this cleaning ritual for both your coffee quality and your machine’s well-being.
Enhanced Coffee Flavor and Aroma
One of the most immediate and noticeable benefits of a descaled Keurig is a dramatic improvement in coffee taste. Mineral buildup can impart a bitter, sour, or even metallic taste to your coffee, masking its true flavor profile. Scale can also hinder the proper extraction of coffee solubles, resulting in a weaker or less aromatic brew. By removing these deposits, you allow your machine to brew coffee as intended, ensuring every cup is rich, flavorful, and true to its origin. A clean machine guarantees that only the nuanced notes of your chosen coffee bean come through.
Extended Lifespan of Your Keurig Machine
Scale acts as an insulating layer, forcing your Keurig’s heating element to work harder and longer to reach the desired brewing temperature. This increased strain can lead to overheating, reduced efficiency, and ultimately, premature wear and tear on vital internal parts. Components like the heating element, pump, and water lines are particularly vulnerable to scale damage. Regular descaling prevents this undue stress, safeguarding your appliance and significantly extending its overall lifespan, thus preventing costly repairs or the need for an early replacement.
Consistent Brewing Performance
Mineral deposits can also clog the intricate internal pathways and nozzles through which water flows, leading to slower brewing times, uneven water distribution, and inconsistent cup sizes. If you’ve noticed your Keurig taking longer to brew a cup, struggling to pump water, or producing less coffee than usual, scale is likely the culprit. Descaling restores proper water flow and temperature regulation, ensuring your Keurig operates at peak efficiency, delivering consistent, perfectly brewed coffee every single time you press the button.
Preventing Unwanted Bacteria and Mold Growth
While scale itself isn’t a breeding ground for bacteria, the rough, porous surfaces it creates can trap moisture and coffee residues. This moist environment provides ideal conditions for mold and bacteria to flourish, particularly in the dark corners of the water reservoir and internal tubing. These contaminants can not only pose potential health risks but also contribute to unpleasant odors and off-flavors in your coffee. A thorough descaling, followed by meticulous flushing, helps to create a cleaner, more sterile internal environment, reducing the risk of microbial growth and promoting a more hygienic brewing experience.
How Often Should You Descale Your Keurig?
The general recommendation for Keurig descaling is every 3 to 6 months. However, this frequency isn’t one-size-fits-all. Several factors can influence how often your specific machine requires this essential deep cleaning:
- Water Hardness: This is arguably the most significant factor. If you live in an area with hard water (high mineral content), you’ll accumulate scale much faster. In such cases, you might need to descale every 1-3 months. Conversely, if you use naturally soft water or regularly use filtered/purified water, you might be able to extend the interval closer to 6 months or even slightly longer.
- Usage Frequency: A Keurig machine that brews multiple cups daily will obviously accumulate scale faster than one used only occasionally. High-usage machines in busy households or offices will significantly benefit from more frequent descaling to maintain peak performance.
- Signs from Your Machine: Always pay attention to your Keurig’s operational cues. If you notice any of the following symptoms, it’s a strong indicator that descaling is overdue, regardless of your last cleaning date:
- Slower brewing cycles or a noticeably sluggish water flow.
- Reduced coffee temperature, leading to lukewarm brews.
- Odd, gurgling, or sputtering noises during operation that weren’t present before.
- Visible white or grey flakes or sediment in your brewed coffee or within the water reservoir.
- The “descale” light illuminated (on Keurig models that feature this convenient indicator).
It’s always better to descale proactively rather than waiting for obvious performance issues to arise. Regular, scheduled maintenance will save you headaches, prevent potential damage, and ensure a consistently great cup of coffee every time you brew.
What You Need To Descale Your Keurig
Gathering your minimal supplies before you begin makes the Keurig descaling process smooth and efficient. You’ll only need two basic, readily available household items:
- Distilled White Vinegar: This is your primary descaling agent. Its acetic acid content is highly effective at dissolving stubborn mineral deposits. It’s crucial to use *distilled white vinegar* and avoid alternatives like apple cider vinegar or other types, as they may contain sugars, dyes, or other impurities that could damage your machine, leave a sticky residue, or impart unwanted flavors.
- Fresh Water: Essential for both diluting the vinegar solution (for some models/preferences) and, most importantly, for thoroughly rinsing out the vinegar and flushing the system clean after the descaling process.
Additionally, you’ll need a large ceramic mug or a spacious catch basin to collect the dispensed water/vinegar mixture during the cleaning cycles, and convenient access to a sink for easy and safe disposal of the hot liquids. Having these items ready will streamline your cleaning process.
How to Descale Keurig Coffee Machine Using Vinegar: A Detailed Step-by-Step Guide
Follow these steps carefully to ensure a thorough and effective descaling of your Keurig coffee maker. This process typically takes about 45 minutes to an hour, including the crucial soak time and multiple rinsing cycles, but the rewards are well worth the effort for a clean machine and delicious coffee.
Step 1: Prepare Your Keurig for Descaling
Before introducing any cleaning solutions, it’s crucial to prepare your machine thoroughly. First, ensure your Keurig is powered off and, for maximum safety, unplugged from the electrical outlet. Locate the K-Cup compartment and carefully remove any K-Cup, reusable coffee filter, or adapter currently inside. Dispose of it or set it aside in a safe place. Next, remove and empty the drip tray, giving it a quick rinse under running water to clear any coffee splashes. Finally, remove the main water reservoir and completely empty any remaining water. Starting with a clean, empty machine is the best foundation for an effective descaling process.
Step 2: Perform an Initial Water Flush (Optional, but Recommended)
To clear out any loose coffee grounds, lingering oils, or residual water from your previous brews, it’s a highly recommended practice to perform a quick water flush. Fill the water reservoir with fresh, clean water up to the maximum fill line. Place a large, heat-safe mug (or your catch basin) on the drip tray. Plug in your Keurig and power it on. Run a brew cycle using the largest cup size setting available on your machine, ensuring no K-Cup is inserted. Once complete, carefully discard the hot water in the mug into a sink. Repeat this once more to ensure all coffee remnants are thoroughly flushed out of the internal pathways. This pre-rinse sets the stage for the vinegar solution to work more effectively on mineral deposits, without interference from old coffee residues.
Step 3: Prepare and Add the Descaling Solution
Now, it’s time to create your powerful descaling solution. Begin by completely emptying any remaining water from the reservoir that might have been left from the initial flush. For most Keurig models, a mixture of 2 cups of distilled white vinegar and 1 cup of fresh water is ideal. This approximately 2:1 ratio provides enough acidity to effectively tackle scale without being overly aggressive on your machine’s components. Carefully pour this precisely measured mixture into the empty water reservoir. Ensure the reservoir is properly seated and securely locked back into the machine. This step is critical as this specific solution is what will actively work to dissolve and break down the stubborn mineral buildup inside your Keurig.
Step 4: Execute the Descaling Cycles and Crucial Soak
Place a large, heat-resistant mug or your spacious catch basin under the brew spout. Initiate the first descaling cycle by selecting the largest coffee cup size setting available on your Keurig. This ensures a significant amount of the vinegar solution is drawn through the internal components, beginning the descaling action. Once this cycle is complete and the mug is full, carefully discard the hot vinegar solution safely into a sink. This initial run helps to loosen the outermost layer of scale and circulate the cleaning agent.
Now comes a crucial, often overlooked, part of the descaling process: the soak. After the first brew, turn off your Keurig (though keep it plugged in to maintain minimal power). Allow the machine to sit undisturbed for at least 15 to 20 minutes. During this vital period, the hot vinegar and water mixture that has been pulled into the Keurig’s internal parts—specifically the heating element, pump, and water lines that you cannot physically access and clean—will actively work to dissolve and break down stubborn calcium and mineral deposits. This soak time is absolutely essential for effective descaling, giving the acid time to chemically react with the scale.
After the soak, place your mug back under the spout. Power your Keurig back on and continue running multiple brew cycles with the largest cup setting until the entire water reservoir, filled with the vinegar solution, is completely empty. Remember to empty your mug after each cycle and safely discard the hot, often murky, solution. This repeated flushing ensures the vinegar solution reaches every part of the system and effectively flushes out the loosened scale and dissolved minerals.
Step 5: Rinse the Water Reservoir Thoroughly
Once the vinegar solution has been completely cycled through and the reservoir is empty, carefully remove the water reservoir from your Keurig. Take it to your sink and rinse it meticulously under cool, running water. Pay close attention to the bottom, sides, and any crevices, ensuring no lingering vinegar residue or mineral flakes remain. You might even want to use a soft sponge or cloth (specifically designated for cleaning, not for dishwashing) to wipe the interior if accessible, but avoid harsh detergents or abrasive scrubbers. This step is vital to prevent any vinegar taste from transferring to your future coffee brews and ensures the reservoir itself is pristine.
Step 6: Perform Multiple Fresh Water Flush Cycles
After thoroughly rinsing the reservoir in the previous step, fill it completely with fresh, clean water up to the maximum fill line. Reattach it securely to your Keurig. Now, place a clean, large mug or catch basin under the brew spout. Power on your Keurig. You must now run a full tank (or even two full tanks) of fresh water through your machine by repeatedly selecting the largest coffee cup setting. The primary goal here is to thoroughly flush out any remaining vinegar smell or taste from all the internal components that the descaling solution touched. It’s not uncommon to need to run 8-10 cycles, or even a full two reservoirs of fresh water, to achieve complete neutrality. Discard the water after each cycle.
To confirm success, taste the water from one of the final cycles. If you can still detect even a faint hint of vinegar, *do not* brew coffee. Instead, repeat the entire fresh water flush process with another full tank of water. This step is absolutely crucial for ensuring your next cup of coffee tastes purely of coffee, not vinegar. Continue flushing until the dispensed water is completely clear, tasteless, and odorless. This meticulous rinsing ensures no unwanted flavors compromise your morning brew.
Step 7: Final Wipe Down and Maintenance
Once you are absolutely confident that all vinegar residue has been flushed out of your Keurig’s internal system, power off and unplug your machine. Take a clean, damp cloth (preferably microfiber) and gently wipe down the entire exterior of the machine. This includes the brew head, the body, the drip tray area, and the K-cup holder. This step not only removes any external splashes or watermarks that might have occurred during the cleaning process but also contributes to the overall cleanliness and aesthetic appeal of your coffee maker. Reassemble any parts you might have temporarily removed, such as the drip tray. Your Keurig is now sparkling clean, inside and out, fully descaled, and ready to brew delicious, pure-tasting coffee once again!
Tips for Ongoing Keurig Maintenance and Troubleshooting
To keep your Keurig running smoothly between descaling cycles and to address any minor issues that might arise, consider incorporating these additional maintenance tips into your routine:
- Use Filtered Water Whenever Possible: If you live in an area with hard tap water, using filtered, purified, or distilled water in your Keurig can significantly reduce the mineral content entering your machine. This dramatically slows down scale buildup and can extend the time needed between comprehensive descaling treatments.
- Regular Exterior Cleaning: Don’t forget the visible parts of your machine! Make it a habit to wipe down the exterior of your Keurig regularly with a clean, damp cloth. This removes dust, accidental coffee spills, and fingerprints, keeping your appliance looking pristine.
- Clean the Drip Tray and K-Cup Holder Frequently: These components are prone to accumulating coffee residue and can be easily removed. Wash them with warm, soapy water after every few uses or whenever you notice significant buildup. A clean drip tray prevents overflows and keeps your counter tidy.
- Troubleshooting Persistent Vinegar Taste: If, after multiple thorough fresh water flush cycles, you still detect a faint vinegar taste or smell, don’t despair. Try filling the reservoir with fresh water and adding just a tablespoon of lemon juice. Run a few brew cycles with this diluted lemon water, then follow up with several more plain water flushes. Lemon juice can sometimes help neutralize stubborn vinegar odors.
- Addressing Slow Brews Post-Descaling: If your machine continues to brew slowly even after a complete descaling process, it’s possible some exceptionally stubborn scale remains, or there might be another internal issue. You could try a second, slightly shorter descaling cycle (perhaps one part vinegar to three parts water) followed by another round of thorough flushing. If performance problems persist, consult your Keurig user manual for specific troubleshooting steps or contact Keurig customer support for further assistance.
Frequently Asked Questions About Descaling Your Keurig
Can I use descaling solutions other than vinegar?
Yes, while specialized Keurig descaling solutions are readily available and highly effective, white distilled vinegar is a safe, natural, and highly effective alternative for most Keurig models. It’s a common misconception that you *must* use branded solutions. However, avoid using harsh chemical cleaners, bleach, or abrasive substances, as these can severely damage your machine’s internal components or leave harmful residues that are dangerous to ingest.
What if my Keurig has a “descale” light?
Many newer Keurig models feature a “descale” indicator light that illuminates when the machine detects mineral buildup and requires cleaning. When this light appears, it’s a clear signal that descaling is overdue. After successfully completing the descaling process using vinegar (or a commercial solution), you will likely need to reset this light manually. Refer to your specific Keurig user manual for detailed instructions on how to reset the descaling indicator for your model, as this often involves a particular button combination or sequence unique to each machine.
Is it safe to drink coffee after descaling with vinegar?
Absolutely, it is completely safe to drink coffee after descaling with vinegar, *provided* you follow Step 6 meticulously and perform enough fresh water flush cycles until no trace of vinegar smell or taste remains. White distilled vinegar is a food-grade product and is non-toxic. The thorough flushing ensures that any residual vinegar is completely removed from the internal system, leaving your machine clean, odorless, and safe for brewing your favorite beverages without any lingering flavors.
How long does the entire descaling process take?
The active time for running the vinegar cycles and flushing cycles is relatively short, perhaps 15-20 minutes in total. However, the crucial 15-20 minute soak time, during which the vinegar works on the scale, and the multiple fresh water flush cycles afterward to eliminate residual vinegar, mean the entire process from start to finish can take anywhere from 45 minutes to an hour. In cases of significant scale buildup or if extensive flushing is required, it might take slightly longer.
Conclusion: Enjoy a Cleaner Keurig and Superior Coffee
Regular descaling is not just a tedious chore; it’s a vital investment in both the quality of your daily coffee and the long-term health and lifespan of your Keurig coffee maker. By consistently following this simple, vinegar-based descaling guide every 3 to 6 months, you can effectively eliminate mineral buildup, restore your machine’s peak performance, and ensure that every single cup of coffee brewed is as delicious, pure, and robust as intended. Make descaling a routine and non-negotiable part of your coffee care regimen, and savor the remarkable difference a truly clean machine makes to your brewing experience. Your taste buds, and your Keurig, will undoubtedly thank you for the consistent care and attention!