
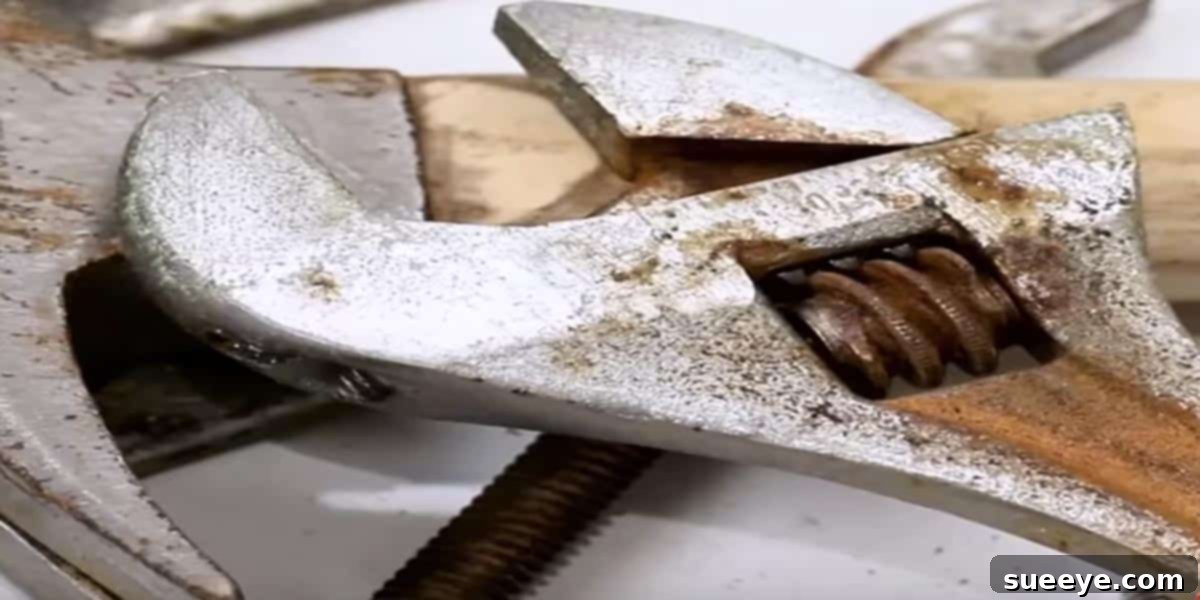
Restore Your Rusty Tools: The Ultimate Guide to Cleaning and Maintenance
There’s nothing quite as disheartening as reaching for your trusted screwdriver or trowel, only to find it covered in rust and emanating a peculiar, stale odor. This common problem affects both workshop essentials and outdoor garden tools, often signaling neglect and promising reduced performance. While it might not be the most glamorous DIY project on your list, learning how to properly clean and maintain your tools is an absolutely essential skill for any homeowner, hobbyist, or professional. It’s an investment in the longevity of your equipment, ensuring they perform optimally for years to come.
Many of us are guilty of overlooking tool maintenance, allowing them to fall victim to the elements. Whether it’s the humid air in your garage, the leftover soil on your spade, or simply the passage of time, rust is an inevitable adversary. But the good news is, bringing your tools back to life, making them look and function like new, is surprisingly simple. This comprehensive guide will walk you through a proven, cost-effective method to tackle rust, eliminate odors, and implement preventative measures that will keep your tools in pristine condition.
Why Tool Maintenance is Crucial for Every Enthusiast
The importance of clean, well-maintained tools extends far beyond mere aesthetics. While shiny tools certainly look more appealing, their upkeep significantly impacts their performance, safety, and overall lifespan. Here’s why you should prioritize tool care:
- Enhanced Performance: Rusty or dirty tools are inefficient. Rust creates friction, making cutting, gripping, and turning tasks harder and requiring more effort. A clean, smooth surface allows tools to operate as intended, making your work easier and more precise.
- Increased Safety: Rust compromises the structural integrity of tools, making them brittle and more prone to breaking during use. Additionally, a rusty surface can lead to slips, scrapes, or even deeper cuts if the tool isn’t handled correctly. Sharp, clean edges on cutting tools reduce the risk of accidents compared to dull, corroded ones that might slip.
- Extended Lifespan and Cost Savings: Tools are an investment. Rust is a corrosive process that literally eats away at metal, degrading your tools over time. Regular cleaning and protection halt this process, dramatically extending their usable life. This means you won’t have to frequently replace expensive items, saving you money in the long run.
- Eliminate Unpleasant Odors: The funky, metallic smell often associated with neglected toolboxes is a direct byproduct of oxidation – the chemical reaction that causes rust. By removing rust, you eliminate the source of this pervasive odor, making your workshop or shed a much more pleasant place to be.
- Pride in Your Craft: Working with clean, well-maintained tools fosters a sense of professionalism and pride in your work. It shows respect for your craft and your equipment, creating a more enjoyable and efficient work environment.
Understanding Rust: The Enemy of Metal Tools
Before diving into the cleaning process, a brief understanding of rust (iron oxide) can help emphasize the importance of preventative measures. Rust forms when iron or its alloys, like steel, are exposed to oxygen and moisture for a prolonged period. This chemical reaction, known as oxidation, causes the metal to slowly degrade, forming the familiar reddish-brown flaky substance. High humidity, direct contact with water, or even lingering moisture from sweat can initiate and accelerate this process, making tool care essential, especially in certain climates or storage conditions.
The Simple Solution: DIY Tool Restoration with Household Items
You don’t need expensive, specialized chemicals to bring your rusty tools back from the brink. In fact, some of the most effective rust-removal agents are likely already in your pantry. This method leverages common household items like vinegar and baking soda to safely and efficiently restore your tools. We’ll guide you through the process, step by step.
Materials You’ll Need:
- White Vinegar: An excellent natural acid that dissolves rust.
- Baking Soda: A mild abrasive and an effective acid neutralizer.
- Water: For rinsing and mixing.
- Stiff-bristled Brush or Steel Wool: For scrubbing away stubborn rust. Old toothbrushes also work for smaller tools.
- Bucket or Container: Large enough to fully submerge your tools.
- Clean Rags or Towels: For drying.
- Optional: Coconut Oil, Mineral Oil, or Camellia Oil: For protective coating.
- Safety Gloves and Eye Protection: Always recommended when working with acids and scrubbing.
Step-by-Step Guide to Cleaning Rusty Tools:
1. Initial Assessment and Preparation
Begin by inspecting your tools. If there’s any loose dirt, grime, or excessive debris, give them a preliminary wipe-down or light brushing. For tools with wooden handles, consider protecting the wood from prolonged soaking, as it can cause swelling or cracking. If possible, disassemble tools with multiple parts to ensure thorough cleaning.
2. The Vinegar Soak: Dissolving the Rust
Pour enough white vinegar into your bucket or container to fully submerge the rusty parts of your tools. White vinegar is preferred due to its acetic acid content, which chemically reacts with the rust, breaking it down. Carefully place your tools into the vinegar, ensuring they are completely covered. The soaking time will depend on the severity of the rust:
- Light Rust: 1-3 hours
- Moderate Rust: 6-12 hours
- Heavy Rust: Up to 24 hours, or even longer for extremely corroded items.
Periodically check on your tools. You might notice bubbles forming, which is a sign the vinegar is actively working. For heavily rusted items, you can gently scrub them with your brush or steel wool while they are still in the vinegar or after a few hours of soaking. This helps dislodge loosened rust particles and exposes fresh rust to the acid. Ensure good ventilation when working with vinegar, and always wear gloves to protect your skin.
3. The Baking Soda Solution: Neutralizing and Scrubbing
Once the vinegar has done its job, carefully remove the tools from the bucket. You’ll likely see a significant improvement, with much of the rust either gone or softened. Now, it’s time to neutralize the acid and tackle any remaining rust. In a separate bowl, create a paste or solution using one part baking soda and two parts water. This mixture is crucial for several reasons:
- Neutralization: Baking soda is alkaline, and it will neutralize any residual acetic acid from the vinegar, preventing further etching of the metal. This step is vital to stop the corrosive process completely.
- Abrasive Action: The fine颗粒 of baking soda provide a gentle abrasive action that helps scrub away stubborn rust patches that the vinegar may have softened but not fully removed.
Generously apply the baking soda solution or paste to your tools. Let them soak in this solution for approximately 5 minutes. During this time, use your stiff-bristled brush or steel wool to vigorously scrub every surface. Pay close attention to crevices, joints, and any areas where rust stubbornly clings. The combination of baking soda and mechanical scrubbing will work wonders in dislodging the remaining corrosion and leaving the metal clean.
4. Thorough Rinsing and Immediate Drying
After scrubbing with the baking soda solution, it’s time for a crucial step: rinsing. Rinse your tools thoroughly under clean running water. Ensure all traces of vinegar, baking soda, and rust particles are completely washed away. Any residue can lead to future issues. However, the most critical part of this step is immediate and complete drying. Metal, once cleaned and exposed to air, is highly susceptible to “flash rust” – a quick formation of surface rust that can occur within minutes if moisture is present.
Use clean, dry rags or towels to meticulously dry every inch of your tools. For tools with intricate parts or hard-to-reach areas, you can use compressed air or even a hairdryer on a cool setting to ensure all moisture is gone. Do not let your tools air dry, as this almost guarantees new rust will form.
5. Optional: Applying a Protective Coating
With your tools now sparkling clean and dry, the final, optional but highly recommended step is to apply a protective coating. This acts as a barrier against moisture and oxygen, significantly delaying or preventing future rust formation. A thin layer is all you need:
- Coconut Oil: A natural, non-toxic, and readily available option. Apply a small amount to a clean cloth and wipe down all metal surfaces. It provides a good moisture barrier and leaves a pleasant scent.
- Mineral Oil: Another excellent choice, particularly for tools that might come into contact with food (though always check suitability). It’s non-drying and provides a robust protective film.
- Camellia Oil: Traditionally used for protecting Japanese tools, it’s very effective and leaves a light, non-sticky finish.
- Wax (e.g., paste wax, car wax): Can also provide a durable protective layer, especially on flat surfaces.
This protective layer is your first line of defense against the elements, extending the pristine condition of your newly restored tools.
Beyond the Workshop: Garden Tool Care
The principles of tool maintenance apply equally, if not more, to garden tools. We’re all guilty of leaving our spades, shovels, pruners, and hoes outside or hastily throwing them into the shed after a long day of gardening. After a season of digging, pruning, and cultivating, these tools often bear the brunt of soil, sap, moisture, and neglect. When spring arrives, many of our favorite garden companions emerge from storage encrusted with dirt and riddled with rust.
The method described above is perfectly adaptable for garden tools. The stubborn mud and plant sap might require a more rigorous initial scrubbing before the vinegar soak, but the core process remains the same. Cleaning garden tools isn’t just about aesthetics; it ensures cleaner cuts with pruners (reducing disease transmission in plants), easier digging with shovels and trowels, and prevents frustrating breakages mid-task. Make it a habit to clean your garden tools not just at the end of the season, but after every significant use. A quick rinse and wipe-down after each gardening session can dramatically reduce the need for intensive rust removal later on.
Preventative Measures for Long-Term Tool Health
While rust removal is a valuable skill, prevention is always better than cure. By adopting a few simple habits, you can significantly reduce the likelihood of your tools ever needing extensive restoration:
- Proper Storage: This is arguably the most critical preventative measure. Store your tools in a dry environment. A climate-controlled garage or shed is ideal. If that’s not possible, consider investing in airtight toolboxes, tool chests with desiccant packs (to absorb moisture), or hanging tools on pegboards to keep them off damp floors.
- Clean After Every Use: Develop the habit of giving your tools a quick wipe-down after each use. For garden tools, brush off soil and sap immediately. For workshop tools, wipe away grease, sweat, and sawdust. This simple step prevents residues from attracting moisture and initiating rust.
- Regular Oiling/Waxing: Even without a full rust-removal process, regularly applying a thin layer of oil (like mineral oil, camellia oil, or even light machine oil) or wax to your tools can create a protective barrier against moisture. This is especially important for tools used infrequently or stored in fluctuating humidity.
- Use Desiccant Packs: For enclosed toolboxes or cabinets, small desiccant packets (like silica gel) can absorb ambient moisture, creating a drier microclimate around your tools.
- Avoid Direct Contact with Concrete: Concrete can wick moisture, and storing tools directly on a concrete floor can accelerate rust formation. Always keep them elevated or in a toolbox.
The Enduring Benefits of Clean and Maintained Tools
Ultimately, taking care of your tools isn’t just a chore; it’s an investment that pays dividends. You’ll no longer have to contend with that unpleasant, stinky metallic smell clinging to your hands after using rusty equipment. Instead, you’ll experience the satisfaction of working with tools that feel sharp, operate smoothly, and look pristine. You’ll gain peace of mind knowing your investments are protected, performing at their peak, and ready for whatever project comes next. Clean tools are safe tools, efficient tools, and tools that truly enhance your DIY and crafting experience.
Don’t let rust diminish the lifespan or performance of your valuable equipment. Embrace these simple, effective techniques, and transform your dusty, corroded tools into sparkling, reliable companions. Begin your tool restoration journey today and discover the immense satisfaction of working with equipment that looks and feels brand new!