
Ultimate Guide to Deep Cleaning Hardwood Floors: Restore Their Natural Radiance
Hardwood floors add timeless elegance and warmth to any home. However, even the most cherished floors can accumulate stubborn dirt, grime, and unsightly marks over time. These imperfections often resist conventional cleaning methods, leaving homeowners frustrated and worried about potential damage from aggressive scrubbing or harsh chemicals. If you’ve been struggling with embedded dirt that just won’t budge, or if you’re hesitant to use abrasive tools for fear of scratching your beautiful wooden surfaces, then you’ve landed in the right place.
This comprehensive guide introduces an ingenious, highly effective, and surprisingly simple cleaning hack inspired by the experts at House Keeper on YouTube. This method is specifically designed to tackle those challenging spots with remarkable ease and efficiency, requiring minimal effort on your part. What makes this solution even better is its budget-friendly nature: you’ll primarily be using common household supplies that are likely already in your pantry or cleaning cabinet. Best of all, you can put your worries about scratching to rest, as this gentle approach prioritizes the integrity and beauty of your hardwood.
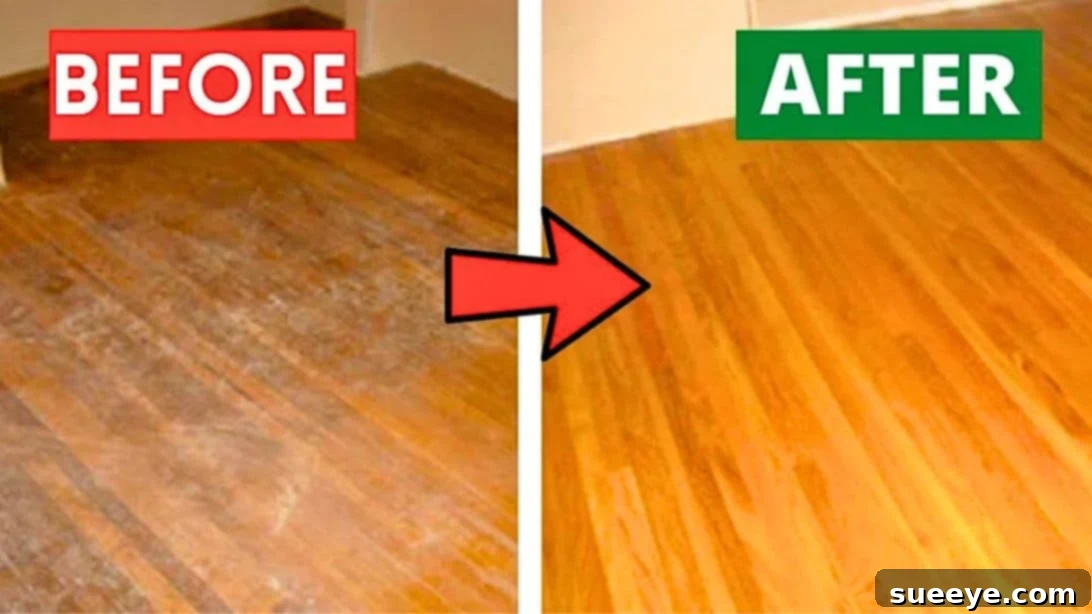
Prepare to transform your floors from dull to dazzling! By following our detailed instructions, your hardwood will not only be free of stubborn grime but will also gleam with a renewed, showroom-quality shine. We’re confident that this cleaning hack will become your go-to solution for maintaining pristine hardwood floors, just as it has for countless others. Let’s dive into how you can achieve spotless, radiant hardwood floors without breaking the bank or compromising their delicate finish.
The Challenge of Stubborn Hardwood Floor Dirt
Hardwood floors are durable, but their intricate grain and porous nature can trap dirt, grease, and grime deep within the surface. Foot traffic, spills, pet activity, and even dust can contribute to this buildup, creating areas that look dull, discolored, or perpetually dirty. Traditional mops often just push dirt around, and harsh chemical cleaners can strip the wood’s finish, leaving it vulnerable to damage or a streaky appearance. The dilemma for many homeowners is finding a method powerful enough to remove embedded grime, yet gentle enough to preserve the wood’s natural beauty and protective seal. This is where precision cleaning and the right combination of mild, effective ingredients become invaluable.
Materials You’ll Need for a Deep Clean:
Gathering the right supplies is the first step towards achieving a spotless floor. The beauty of this method lies in its reliance on readily available, inexpensive items. No specialized equipment or costly solutions are required!
- Dish Soap: A small amount of liquid dish soap is a powerful degreaser, excellent for breaking down oily residues and general grime without being overly aggressive.
- An Old Toothbrush: The secret weapon! Its soft, fine bristles are perfect for gently scrubbing tight spaces and stubborn spots without scratching the delicate surface of your hardwood. It allows for targeted cleaning that cloths simply cannot achieve.
- White Vinegar: A natural wonder, white vinegar is a mild acid that effectively cuts through soap scum, hard water stains, and lingering grime. It also acts as a natural disinfectant and deodorizer, leaving your floors hygienically clean and fresh.
- Warm Water: Essential for dissolving dirt, activating the cleaning agents, and rinsing away residues. Warm water aids in lifting and loosening embedded particles more effectively than cold water.
- Microfiber Cloths: Several clean, soft microfiber cloths are crucial for both applying water (for rinsing) and drying the floor thoroughly without leaving streaks or lint. Their highly absorbent nature makes them ideal for this task.
- Toothpaste (Optional, but recommended for specific stains): A small dab of regular white toothpaste (not gel) can act as a very mild abrasive and a gentle whitener. It’s surprisingly effective on certain scuff marks or minor discolorations, adding an extra layer of cleaning power when needed.
- Wood Polish (Optional, for added shine and protection): Once your floors are impeccably clean, a good quality wood polish can restore their luster, provide a protective barrier, and enhance their overall appearance. Choose a polish suitable for your specific hardwood finish.
Step-by-Step Directions to Achieve Sparkling Hardwood Floors:
Follow these instructions carefully to ensure the best results and protect your hardwood floors during the deep cleaning process.
Step 1: Prepare the Area
Before beginning the deep clean, ensure the area is free of loose dirt, dust, and debris. Use a soft-bristled broom or a vacuum cleaner with a hardwood floor attachment to remove any particles that could scratch the surface during scrubbing. This initial step is vital for preventing scratches and allowing the cleaning agents to work directly on the embedded grime.
Step 2: Apply Dish Soap to the Stubborn Spot
Locate the specific area of your hardwood floor with stuck-on dirt or grime. Drizzle a small amount of liquid dish soap directly onto the problematic spot. You don’t need much – a few drops are usually sufficient. The goal is to cover the immediate area of the stain without saturating a large section of the floor. The dish soap will begin to break down grease and lift the dirt from the wood’s surface.
Step 3: Initial Scrub with a Toothbrush
Take your old toothbrush and gently but firmly scrub the dish soap into the dirt. Use small, circular motions, focusing your effort directly on the stain. The fine bristles of the toothbrush are perfect for getting into the wood grain and dislodging embedded particles without being abrasive. Continue scrubbing for about 30 seconds to a minute, allowing the soap to penetrate the grime.
Step 4: Add a Touch of Toothpaste (If Necessary)
For particularly stubborn spots or scuff marks, apply a pea-sized amount of white toothpaste (ensure it’s not a gel variety) onto the same area. The mild abrasive in toothpaste can work wonders on certain types of stains. Continue scrubbing with your toothbrush, combining the action of the dish soap and toothpaste. You’ll often notice the grime beginning to lift and loosen at this stage.
Step 5: Introduce White Vinegar to Cut Through Grime
After the initial scrub with dish soap and toothpaste, carefully pour a small amount of white vinegar over the treated area. You might notice a slight fizzing reaction as the vinegar reacts with the soap and grime, which is a good sign that it’s actively breaking down the residue. The vinegar’s acidic properties are key to dissolving any remaining stubborn dirt and leaving the surface incredibly clean.
Step 6: Final Scrub and Dirt Removal
Resume scrubbing the area vigorously with your toothbrush. Continue this process until you see the dirt and grime completely disappear. The combination of dish soap, toothpaste, and vinegar creates a powerful yet safe cleaning solution that effectively lifts even long-standing buildup. Ensure the spot looks visibly clean before moving to the next step.
Step 7: Rinse Thoroughly with Warm Water
Dip a clean microfiber cloth into warm water, wring it out very well so it’s only damp, not dripping. Gently wipe down the cleaned area to remove all traces of the cleaning solution and lifted dirt. It’s crucial not to leave any soap or vinegar residue, as this can attract new dirt or leave streaks. Rinse and re-wring your cloth multiple times if necessary, ensuring a complete rinse.
Step 8: Dry Immediately and Completely
Using a separate, dry microfiber cloth, immediately wipe the cleaned area until it is completely dry. This step is vital for hardwood floors to prevent water damage, warping, or streaking. Ensure no moisture is left on the surface, making sure the floor is perfectly dry and ready for the final touch.
Step 9: Apply Wood Polish for a Radiant Shine (Optional)
Once the floor is thoroughly clean and dry, you can choose to apply a wood polish. Follow the manufacturer’s instructions for your specific polish, typically applying a small amount to a clean, dry microfiber cloth and buffing it gently into the wood. This step not only enhances the floor’s natural luster but also adds a layer of protection, making your hardwood shine like new and helping to repel future dirt and spills.
Pro Tips for Ongoing Hardwood Floor Maintenance:
While this deep cleaning hack is excellent for stubborn spots, regular maintenance is key to keeping your hardwood floors looking their best year-round.
- Regular Sweeping or Vacuuming: Daily or every-other-day sweeping with a soft-bristled broom or vacuuming with a hardwood floor attachment prevents dust, dirt, and grit from accumulating and scratching the surface.
- Wipe Spills Immediately: Liquids can penetrate wood and cause permanent damage or stains. Always wipe up spills as soon as they occur using a dry or slightly damp cloth.
- Use Floor Protectors: Place felt pads or furniture glides under the legs of all furniture to prevent scratches and dents when moving items.
- Area Rugs and Mats: Position area rugs in high-traffic areas, such as entryways, hallways, and under dining tables, to protect your floors from excessive wear and tear.
- Avoid Harsh Cleaners: Never use abrasive cleaners, ammonia-based products, or oil soaps on hardwood floors. These can strip the finish, leave residue, or dull the shine over time. Stick to pH-neutral or wood-specific cleaners, or your DIY vinegar solution.
- Control Humidity: Hardwood floors are sensitive to humidity changes. Maintain a consistent indoor humidity level (ideally between 35-55%) to prevent wood from expanding, contracting, or cracking.
- Trim Pet Nails: Keep your pets’ nails trimmed short to prevent scratches and scuff marks on your beautiful floors.
- Test in an Inconspicuous Area: Before applying any new cleaning solution or method to a visible area, always test it first in a hidden spot (like inside a closet or under a rug) to ensure it doesn’t cause discoloration or damage.
Why This Hardwood Floor Cleaning Hack Works So Well:
This simple yet powerful method combines the strengths of various common household products to deliver outstanding results:
- Targeted Action: The toothbrush allows for precise scrubbing directly on the problem area, rather than broadly applying chemicals to the entire floor.
- Gentle Abrasives: Dish soap and optionally toothpaste provide mild abrasive qualities that lift and emulsify grime without scratching the wood.
- Acidic Power: White vinegar acts as a natural solvent, breaking down mineral deposits, soap scum, and greasy residues, leaving surfaces sparkling and streak-free.
- Safety First: By avoiding harsh chemicals and using soft tools, this method protects your hardwood’s finish and extends its lifespan, ensuring you enjoy beautiful floors for years to come.
- Cost-Effective & Eco-Friendly: Utilizing readily available household items means you save money on expensive specialized cleaners and reduce your exposure to harsh chemicals.
How to Clean Hardwood Floors & Make Them Shine
Achieving impeccably clean and shiny hardwood floors doesn’t have to be a daunting task involving harsh chemicals or expensive professional services. With this simple yet highly effective DIY method, you can confidently tackle even the most stubborn dirt and grime, restoring your floors to their original glory. The combination of everyday household items—dish soap, an old toothbrush, white vinegar, and warm water—provides a powerful, scratch-safe solution that is both budget-friendly and gentle on your wood surfaces.
By following our detailed, step-by-step instructions, from the initial targeted scrubbing with dish soap and toothpaste to the final polish, you’ll discover how easy it is to achieve professional-level results right in your own home. Remember, consistent care and attention to spills, combined with this deep cleaning hack for those tough spots, will ensure your hardwood floors remain a stunning focal point of your home for many years. Say goodbye to dull, dirty floors and hello to a radiant, welcoming living space. Give this cleaning hack a try today, and prepare to be amazed by the brilliant shine of your hardwood floors!
*A special thank you to House Keeper via YouTube for sharing this invaluable cleaning hack and for all images used here. Their channel offers a wealth of practical tips for maintaining a beautiful home. If you found this guide helpful, we encourage you to visit their YouTube channel, explore their other fantastic videos, and consider subscribing for more expert advice!