
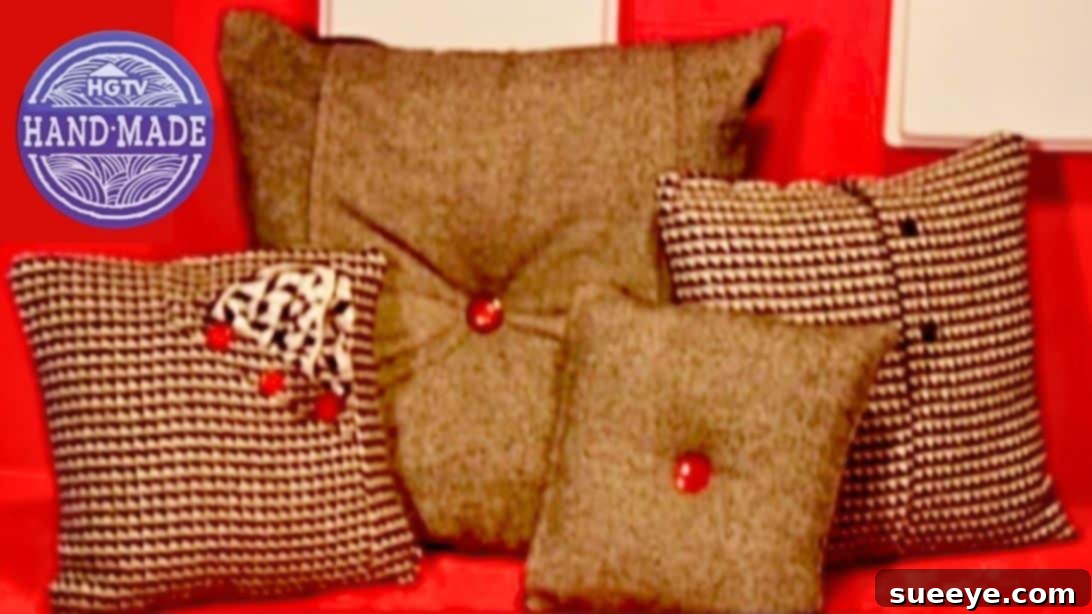
Do you have an old winter coat taking up space in your closet, too precious to discard but no longer serving its original purpose? Instead of letting it gather dust, why not give it a new life as a charming and comfortable throw pillow? This incredibly simple DIY project allows you to transform a cherished garment into a unique home decor accent in just three easy steps, no advanced sewing skills required.
Repurposing an old winter coat into a throw pillow is not only an eco-friendly way to upcycle textiles but also an excellent opportunity to inject personality and a touch of bespoke style into your living space. The beauty of this project lies in its versatility. You can choose any part of the coat that catches your eye – perhaps a unique button, a functional pocket, a distinctive collar, or even the elegant back slit – to become the focal point of your new pillow. The material and pattern of your chosen coat will dictate the final look, allowing for endless creative possibilities, from rustic wool to sophisticated tweed or cozy fleece.
RELATED: How to Sew a Pillow Case with a Flap
This project is designed for everyone, including those with minimal or no sewing experience. The instructions are straightforward and easy to follow, ensuring a rewarding crafting experience. If you’re a visual learner or prefer a more guided approach, a comprehensive video tutorial is also available to walk you through each stage. A huge thank you to HGTV Handmade on YouTube for inspiring us with this fantastic and accessible DIY idea!
Why Upcycle Your Winter Coat into a Throw Pillow?
Beyond decluttering your closet, repurposing offers a multitude of benefits:
- Sustainability: Give an item a second life, reducing waste and contributing to a more sustainable lifestyle.
- Cost-Effective Decor: Create unique, high-quality home decor without the expense of buying new.
- Personalized Style: Infuse your home with a piece that tells a story, reflecting your personal taste and history.
- Sentimental Value: Preserve memories associated with a favorite coat by transforming it into a functional keepsake.
- Beginner-Friendly: An excellent entry point into sewing and textile upcycling for crafting novices.
Essential Materials for Your DIY Winter Coat Throw Pillow Project:
Gathering your materials is the first step towards your creative journey. Most of these items are readily available around the house or at any craft store.
- An Old Winter Coat: The star of your project! Consider the fabric type (wool, tweed, faux fur, etc.), its color, pattern, and any interesting details like pockets or buttons that you might want to incorporate.
- Marking Pen, Pencil, or Tailor’s Chalk: For precisely outlining your cutting lines on the fabric. Chalk is often preferred for darker fabrics as it washes away easily.
- Ruler: Essential for accurate measurements and straight lines, ensuring your pillow has a neat finish.
- Fabric Scissors: Sharp, dedicated fabric scissors are crucial for clean, precise cuts. Avoid using them on paper to maintain their sharpness.
- Fabric Pins: To hold fabric layers together securely while cutting and stitching, preventing shifting.
- Needle and Thread: For hand-stitching the final closure. Choose a thread color that blends well with your coat fabric.
- Sewing Machine: While hand-stitching is possible, a sewing machine will make the main seams quicker and more durable.
- 18×18-inch Throw Pillow Insert: Or any size that suits your preference and the amount of fabric available from your coat. The pillow insert dictates the size of your final pillow cover.
How to Make a DIY Repurposed Winter Coat Throw Pillow: A Detailed Guide
Follow these steps carefully to ensure a beautiful and professional-looking finished product. Take your time with each stage, especially if you are new to sewing.
Step 1: Prepare Your Coat and Create a Template
The initial stage involves preparing your coat and mapping out the dimensions for your pillow cover. This is where you decide on the key aesthetic elements of your new throw pillow.
- Remove the Lining: Carefully take your fabric scissors and cut out the lining from your winter coat. Cut right at the edge where the lining meets the main coat fabric. This is often an internal seam. Once removed, set the lining aside as it will be used for the back of your pillow cover, or as a contrasting interior if desired.
- Identify Your Pillow Section: Now, examine your coat and decide which part you want to showcase on your pillow. Do you love the texture of the main body, the unique shape of a pocket, or the elegant detail of a cuff or collar? This creative choice will define the character of your finished pillow. For instance, incorporating a coat pocket can add a functional and stylish element to your pillow.
- Prepare Your Template: Remove your chosen throw pillow insert from its original packaging. The packaging itself, when flattened, makes an excellent, readily available template for your pillow cover. If you no longer have the packaging, you can use the pillow insert itself by adding a seam allowance around its perimeter (typically 1/2 inch to 1 inch, depending on your preference and the bulk of your fabric). Lay the flattened packaging (or your prepared template) onto the chosen section of your coat.
Step 2: Cut and Stitch the Pillow Pieces
Precision in cutting and careful stitching are key to a well-formed pillow. This step brings your fabric pieces together to form the basic pillow cover.
- Cut the Main Fabric: Securely pin the pillow template (the packaging or your custom template) onto the section of the coat fabric you’ve chosen. Ensure it is perfectly flat and positioned exactly where you want the design elements to appear. Using your sharp fabric scissors, carefully cut around the template. This will be the front piece of your throw pillow.
- Cut the Lining Fabric: Using the exact same template, cut a piece from the coat’s lining that you previously removed. This will serve as the back piece of your pillow cover. If the lining is too thin or damaged, you can opt for a new piece of coordinating fabric.
- Assemble and Pin the Fabrics: Lay the main coat fabric piece and the lining fabric piece together. Crucially, ensure their “right sides” (the side you want to be visible on the finished pillow) are facing each other. This is a standard sewing practice to ensure seams are hidden on the inside. Align all edges precisely.
- Secure with Pins: Pin the two fabric pieces together securely along all four sides. Place pins perpendicularly to the edge every few inches to prevent the fabric from shifting during sewing.
- Stitch the Sides: Using your sewing machine (or needle and thread for hand-stitching), stitch around the perimeter of the pinned fabric. Use a straight stitch with a consistent seam allowance (e.g., 1/2 inch or 1 cm). As you sew, make sure to leave a substantial gap, approximately 5 to 6 inches long, on one of the sides. This opening is vital for turning the pillowcase right side out and inserting the pillow insert later. Reinforce the stitches at the beginning and end of this gap with a backstitch to prevent unraveling.
Step 3: Finish and Stuff Your Pillow
The final step involves giving your pillow its shape and making it ready for display. This includes turning, stuffing, and closing the opening.
- Remove Pins and Trim Corners: Once you’ve finished stitching, carefully remove all the pins. To ensure crisp corners when you turn the pillowcase right side out, gently trim the excess fabric from the corners, cutting diagonally close to the seam line but being careful not to cut through the stitches.
- Turn Right Side Out: Reach into the opening you left and carefully pull the entire pillowcase through, turning it right side out. Use a blunt object, like a chopstick or a turning tool, to gently push out all four corners from the inside, ensuring they are as sharp and defined as possible.
- Insert the Pillow Insert: Now it’s time to bring your pillow to life! Gently squeeze and fold your throw pillow insert, then carefully push it into the newly formed pillowcase through the opening. Take your time to maneuver it into place, ensuring all corners of the insert are fully pushed into the corners of the pillowcase, creating a plump and even appearance.
- Close the Gap: With the pillow insert snugly in place, it’s time to close the opening. Fold the raw edges of the opening inwards, aligning them with the existing seam line. Pin these folded edges together. For a nearly invisible finish, use a hand-sewing technique called a ladder stitch (also known as an invisible stitch). Alternatively, you can machine stitch the opening closed, staying as close to the edge as possible for a neat finish.
- Final Touches: Once the gap is securely stitched closed, remove any remaining pins. Fluff your new throw pillow to distribute the stuffing evenly, and admire your handcrafted creation!
Tips and Tricks for Your Upcycled Pillow
- Fabric Choice Matters: Consider the weight and texture of your coat fabric. Heavier fabrics like wool or tweed will create a more structured pillow, while softer fabrics like cashmere or fleece will result in a cozier feel.
- Embellishments: Don’t shy away from adding extra embellishments! Buttons from the original coat, decorative stitching, or even a small embroidered detail can enhance the pillow’s charm.
- Varying Sizes: Experiment with different pillow insert sizes. A smaller coat might yield a lumbar pillow, while a larger one could create a bolster pillow.
- Care Instructions: Since your pillow is made from a repurposed coat, remember to follow the original garment’s care instructions for cleaning. Spot cleaning is often best for these unique pieces.
- Practice Makes Perfect: If you’re new to sewing, practice on scrap fabric before working on your coat to get comfortable with your machine and stitching techniques.
This simple yet satisfying project allows you to breathe new life into an old garment, transforming it into a functional and stylish piece of home decor. You’ll not only enjoy the process of creating something with your own hands but also the satisfaction of knowing you’ve contributed to a more sustainable lifestyle. Each repurposed coat pillow becomes a unique statement piece, telling its own story within your home.
*All these images are credited to HGTV Handmade via YouTube. We highly recommend visiting their channel and subscribing for more inspiring and creative DIY project ideas!
Start Your Repurposing Journey Today!
Don’t let that old winter coat sit unused any longer. Grab your sewing machine and transform it into a cozy, stylish throw pillow that adds character and warmth to any room. This project is a testament to how easy and rewarding textile upcycling can be. Happy crafting!