
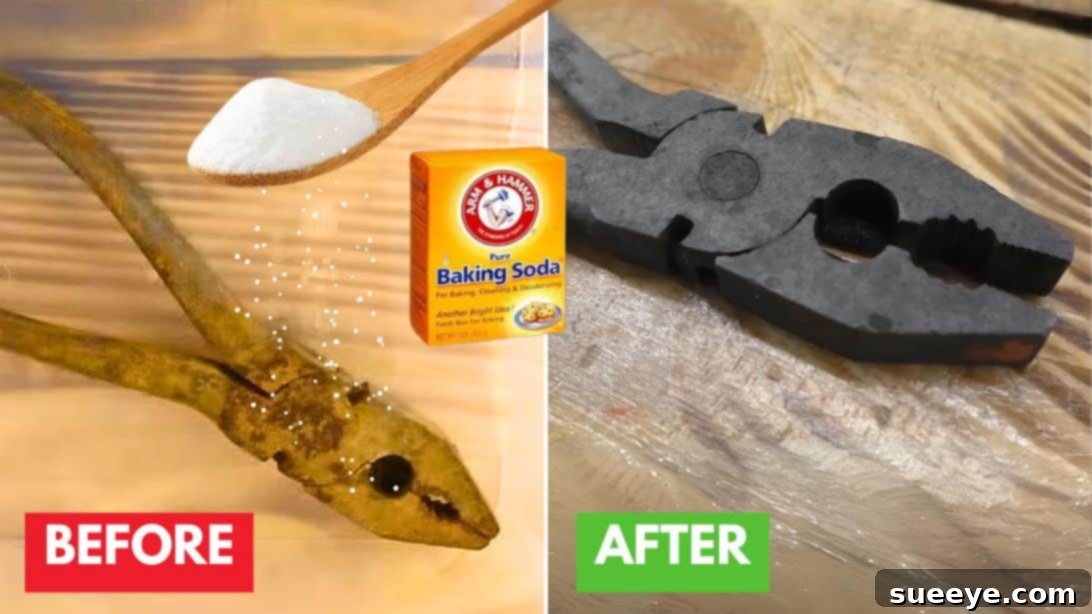
Are your beloved tools showing signs of wear, particularly that unsightly, damaging orange-red hue of rust? It’s a common problem for any DIY enthusiast, homeowner, or professional, but it doesn’t have to spell the end for your valuable equipment. Rust not only compromises the appearance of your tools but also severely impairs their functionality and significantly shortens their lifespan. Fortunately, restoring your rusty tools to their former glory is often simpler than you might imagine.
This comprehensive guide delves into effective strategies for removing rust, featuring four popular and proven methods. You’ll learn how to harness the power of readily available household items like vinegar and baking soda, alongside the efficiency of citric acid and specialized commercial rust removers. Whether you’re tackling light surface rust or confronting heavy corrosion, we’ll provide step-by-step instructions to revitalize your hand tools, gardening equipment, and more. Beyond removal, we’ll also equip you with crucial insights into preventing rust, ensuring your tools remain in pristine condition for years to come.
Ready to bring your tools back from the brink of corrosion? Let’s dive into the ultimate guide for rust removal and prevention, transforming rusty relics into reliable assets once again. For a visual demonstration, check out this helpful video tutorial by Easy Cleaning Hacks, showcasing some of these techniques in action.
RELATED: How to Remove Rust Spots on Appliances
The Importance of Proper Tool Care: Preventing Rust is Key
While removing rust is crucial, the best approach to tool longevity is proactive prevention. Rust, or iron oxide, forms when iron or its alloys (like steel) are exposed to oxygen and moisture for prolonged periods. This electrochemical reaction can quickly degrade your tools, leading to brittle spots, dull edges, and stiff moving parts. By adopting simple yet effective storage and maintenance habits, you can drastically reduce the occurrence of rust and extend the life of your valuable investments.
The primary culprit behind rust is moisture. Therefore, storing tools in a clean, dry environment is paramount. Avoid damp basements, garages with fluctuating humidity, or outdoor sheds without adequate climate control. Instead, opt for designated toolboxes, cabinets, or wall-mounted storage systems in a consistently dry area. For added protection, consider these tips:
- Clean After Every Use: Before putting your tools away, take a moment to wipe off any dirt, grime, sap, or moisture. A simple cloth can make a huge difference. For stubborn residues, use a mild cleaner and ensure the tool is thoroughly dried afterwards.
- Apply a Protective Coating: After cleaning, especially for metal tools, apply a thin layer of protective oil (such as mineral oil, WD-40, 3-in-1 oil, or specialized tool oil). This creates a barrier against moisture and air. For wooden handles, a coat of linseed oil or paste wax can prevent drying and cracking, and also offer some moisture resistance.
- Utilize Desiccants: In enclosed toolboxes or cabinets, consider placing silica gel packets or other desiccant materials. These absorb excess moisture from the air, creating a drier microclimate around your tools.
- Rust-Inhibiting Liners: Some toolboxes come with rust-inhibiting liners or mats. These often contain volatile corrosion inhibitors (VCIs) that release a protective vapor, preventing rust formation. You can also purchase VCI chips or emitters separately.
- Regular Inspection: Periodically check your tools for any early signs of rust. Catching it early makes removal much easier and prevents it from spreading.
By integrating these practices into your routine, you’ll not only save time and effort on rust removal but also ensure your tools are always ready for action, maintaining their optimal performance and value.
Here’s another tip you might want to try: Secret Features of Tools You Use Every Day
Method 1: Harnessing the Power of Vinegar for Rust Removal
White vinegar is a remarkably effective and eco-friendly rust remover, thanks to its acetic acid content. This mild acid reacts with the iron oxide (rust), dissolving it and making it easier to clean away. It’s a fantastic option for small to medium-sized tools and those with moderate rust build-up.
Step 1: Prepare the Vinegar Soak
Find a non-reactive container large enough to fully submerge your rusty tool. Glass, plastic, or ceramic containers work best; avoid metal containers as they might react with the vinegar. Carefully place the rusty tool into the container. Pour enough plain white vinegar over the tool to completely cover all rusted areas. For heavily rusted items, you might consider using heated vinegar (warm, not boiling) as it can accelerate the reaction, but ensure proper ventilation. Allow the tool to soak for several hours, or for heavily rusted tools, leave it overnight (8-12 hours). The longer it soaks, the more the rust will loosen.
Step 2: Scrub Away the Rust
After the soaking period, carefully remove the tool from the vinegar. You should notice that the rust has softened and may even appear bubbly. Using a stiff brush, steel wool, a wire brush, or even an old toothbrush for intricate areas, begin scrubbing the rusted surfaces. The loosened rust should come off relatively easily. For stubborn spots, apply more pressure or re-soak the tool for a short period. Be thorough, ensuring you reach all crevices and textured areas where rust can hide.
Step 3: Rinse, Dry, and Protect
Once you’ve scrubbed off all visible rust, rinse the tool thoroughly under clean, running water. This is crucial to remove any remaining vinegar and rust particles, preventing further reactions or new rust formation. Immediately after rinsing, dry the tool completely. Use a clean cloth, paper towels, or even a hairdryer to ensure no moisture remains, as any lingering dampness can quickly lead to flash rust. Finally, apply a thin layer of protective oil to the cleaned metal surfaces to prevent future rust. Store the tool in a dry place.
Method 2: Removing Rust with Citric Acid Powder
Citric acid, commonly found in citrus fruits and available as a white crystalline powder, is another excellent and food-safe rust remover. It acts as a chelating agent, binding to metal ions and effectively dissolving rust without being overly aggressive on the underlying metal. This makes it ideal for a wide range of tools, from delicate components to larger items.
Step 1: Prepare the Citric Acid Solution
Begin by placing your rusty tool into a suitable non-metallic container, ensuring it can be fully submerged. Sprinkle citric acid powder generously over the rusted areas. The amount depends on the severity of the rust and the size of the tool; a general guideline is 2-3 tablespoons per liter of water. Next, pour warm water over the citric acid until the tool is completely covered. Warm water helps the citric acid dissolve faster and accelerates the rust removal process. Allow the tool to soak for approximately 2 hours. For very heavy rust, an overnight soak might be necessary. You’ll observe the solution changing color as the rust dissolves.
Step 2: Rinse and Dry Thoroughly
Once the soaking period is complete and the rust appears to be gone or significantly loosened, remove the tool from the citric acid solution. Rinse the tool thoroughly under clean, running water to wash away any remaining citric acid and rust residue. Just as with the vinegar method, immediate and thorough drying is paramount to prevent flash rust. Use a clean cloth, paper towels, or even forced air to ensure the tool is bone dry. As a final step, apply a thin layer of protective oil to all metal surfaces to safeguard against future corrosion and store the tool in a dry, low-humidity environment.
Method 3: Gentle Rust Removal with Baking Soda
Baking soda (sodium bicarbonate) offers a gentler, yet effective, abrasive method for removing light to moderate rust. Its mild alkalinity and fine crystalline structure allow it to tackle rust without damaging the underlying metal, making it perfect for tools with more delicate finishes or minor rust spots. It works particularly well as a paste, allowing for targeted application.
Step 1: Create a Thick Baking Soda Paste
In a small bowl, mix baking soda with just enough water to form a thick, spreadable paste. The consistency should be similar to toothpaste – not too watery, or it won’t cling to the rusted areas, and not too dry, or it will be hard to apply. Start with a few tablespoons of baking soda and add water slowly, stirring until you achieve the desired consistency. For an extra boost, you can add a few drops of dish soap or lemon juice to the mixture.
Step 2: Apply and Let the Paste Work
Generously spread the baking soda paste onto all the rusty areas of your tool. Ensure a thick, even coat that completely covers the rust. You can use an old toothbrush, a spatula, or even your fingers (wearing gloves is recommended) to apply the paste. Once applied, let the paste sit on the tool for at least an hour. For heavier rust, extending this time to several hours or even overnight will allow the baking soda more time to penetrate and loosen the corrosion.
Step 3: Scrub and Rinse Clean
After the paste has had time to work, take a stiff brush, steel wool, or a scrubbing pad and begin to scrub the treated areas. The baking soda, combined with the abrasive action, will help lift the rust away. For intricate parts, an old toothbrush or a brass brush can be very effective. Once the rust is sufficiently removed, rinse the tool thoroughly under running water to wash off all the baking soda paste and rust particles. Again, immediately dry the tool completely with a clean cloth or towel, then apply a protective oil and store it in a dry place to prevent new rust from forming.
Method 4: Commercial Rust Removers for Stubborn Corrosion
For tools with heavy, entrenched rust, or when you need a faster solution, commercial rust removers can be incredibly effective. These products typically contain stronger chemicals designed to dissolve rust without requiring extensive scrubbing. It’s crucial to understand that these are chemical solutions and require careful handling according to manufacturer instructions.
Application and Safety Considerations
Commercial rust removers come in various forms: liquid dips, spray-on gels, or brush-on solutions. The application method will depend on the product and the size/shape of your tool. Generally, the process involves simply submerging the rusty tools in a rust remover bath, or applying the product directly to the rusted areas, for a specified period, typically ranging from 1 to 2 hours. Many modern rust removers are formulated to dissolve rust on contact, minimizing or eliminating the need for scrubbing.
Key Considerations:
- Read Instructions Carefully: Always follow the manufacturer’s guidelines for application, soaking time, and disposal.
- Safety First: Wear appropriate personal protective equipment (PPE) such as chemical-resistant gloves and eye protection. Work in a well-ventilated area to avoid inhaling fumes.
- Compatibility: Check if the rust remover is safe for the specific type of metal your tool is made from. Some solutions might be too aggressive for certain alloys or finishes.
- Rinsing and Drying: After the recommended soaking time, remove the tool and rinse it thoroughly with clean water. Drying immediately and completely is essential to prevent flash rust.
- Protection: Always apply a rust-inhibiting oil or wax after using a commercial rust remover to provide long-term protection.
While commercial removers can be highly effective, their chemical nature means they should be used with caution and are generally recommended for more severe rust issues where household remedies might fall short.
Choosing the Best Approach for Heavy Rust
When faced with very heavy rust, a single method might not suffice, or you might need a more aggressive strategy. The “best” way often involves a combination of techniques, starting with mechanical removal and progressing to chemical treatments, followed by meticulous post-treatment care. Here’s how to tackle serious corrosion:
- Mechanical Pre-Treatment: For extremely thick, flaky rust, start by mechanically removing as much as possible. Use a wire brush (manual or attached to a drill), sandpaper (coarse grit first, then finer), or a bench grinder with a wire wheel. This will reduce the amount of rust the chemical treatment needs to dissolve and expose more surface area for the solution to work on. Always wear eye protection and gloves during this step.
- Combined Chemical Approach:
- Vinegar/Citric Acid for Soaking: For tools that can be submerged, a long soak (12-24 hours) in white vinegar or a strong citric acid solution can penetrate and loosen deep rust effectively.
- Commercial Rust Removers for Targeted Action: If the rust is exceptionally heavy or localized, a powerful commercial rust remover might be the most efficient choice after initial mechanical removal. Follow product instructions carefully.
- Repeat and Refine: For very severe cases, you might need to repeat the chemical soaking and scrubbing process multiple times. After the initial treatment, use finer abrasive tools (like steel wool or fine-grit sandpaper) to remove remaining surface imperfections and achieve a smoother finish.
- Electrolysis (Advanced Method): For exceptionally valuable or heavily rusted large items, electrolysis is a highly effective method. This involves using a small electrical current to reverse the rusting process. It requires more setup (a battery charger, electrolyte solution, and sacrificial anode) and technical understanding, but it can remove rust without physical scrubbing and is gentle on the tool’s surface.
Regardless of the method chosen, patience is key. Heavy rust didn’t form overnight, and its removal may take time and repeated effort. The goal is to restore functionality and appearance, paving the way for proper prevention to keep your tools rust-free in the future.
Beyond Rust Removal: Essential Post-Restoration Care
Once you’ve successfully removed the rust, the job isn’t quite finished. Proper post-restoration care is crucial to prevent immediate re-rusting (flash rust) and ensure the long-term protection and functionality of your tools. This stage often gets overlooked but is as important as the removal process itself.
- Thorough Cleaning: After removing rust, make sure to thoroughly rinse the tool to eliminate any lingering rust particles or chemical residues. Any residue can continue to react or attract moisture, leading to new rust.
- Immediate Drying: As emphasized in each method, immediate and complete drying is non-negotiable. Metal surfaces, once exposed, are highly susceptible to “flash rust” within minutes if left wet. Use clean rags, paper towels, or even a low-heat hairdryer or compressed air for intricate parts.
- Lubrication and Protection: This is arguably the most critical step. Once dry, apply a generous, even coating of protective oil to all metal surfaces. Options include:
- Mineral Oil: A food-safe option, great for kitchen tools.
- 3-in-1 Oil / Household Oil: General-purpose lubrication and protection.
- WD-40 (or similar multi-purpose lubricant): Excellent for displacing water and light protection.
- Specialized Tool Oil: Formulated for long-term rust prevention and lubrication, especially for moving parts.
- Automotive Wax/Paste Wax: For flat surfaces, a thin layer of car wax or paste wax can create a durable barrier.
Work the oil into hinges, pivots, and threaded areas. Wipe off any excess, leaving a thin film.
- Sharpening and Conditioning: For cutting tools (knives, chisels, saws), rust dulls the edge. After rust removal, take the opportunity to sharpen and hone them. For tools with wooden handles, condition them with linseed oil or beeswax to prevent drying and cracking.
- Proper Storage: Finally, return your restored tools to a clean, dry storage environment. Consider using desiccant packets or rust-inhibiting liners in your toolbox as an added layer of defense.
By diligently following these post-restoration steps, you’re not just removing rust; you’re investing in the longevity and optimal performance of your tools, ensuring they’re ready for your next project.
Frequently Asked Questions About Tool Rust Removal
Q1: How long does it typically take to remove rust with vinegar or citric acid?
A1: For light rust, you might see results in just a few hours (2-4 hours). For moderate to heavy rust, it’s often recommended to soak tools overnight (8-12 hours) or even up to 24 hours. The exact time depends on the severity of the rust and the concentration of the solution. Always check periodically and scrub as needed.
Q2: Can I reuse the vinegar or citric acid solution?
A2: While you can reuse the solution a few times for very lightly rusted items, its effectiveness diminishes with each use as it becomes saturated with dissolved rust particles. For optimal results, it’s best to use fresh solution, especially for heavily rusted tools. Dispose of spent solutions responsibly.
Q3: Are these methods safe for all types of metal tools?
A3: Vinegar and citric acid are generally safe for steel and iron tools. However, prolonged exposure can potentially etch or discolor softer metals like aluminum or brass. Exercise caution with plated tools, as the acids can strip the plating. Always test on an inconspicuous area first if you’re unsure. Commercial rust removers should always be checked for metal compatibility.
Q4: My tool looks clean after rust removal, but now it’s a dull gray. Is this normal?
A4: Yes, this can be normal. The rust removal process strips away the oxidized layer, exposing the raw metal underneath. This raw metal can sometimes appear dull or slightly discolored compared to its original polished state. Applying a protective oil will often restore some luster and prevent immediate flash rust. For a shinier finish, you may need to polish the tool with fine-grit sandpaper or a buffing compound.
Q5: What’s the best way to prevent rust on tools after cleaning them?
A5: The best prevention involves a three-pronged approach: thorough cleaning to remove dirt and moisture after every use, complete and immediate drying, and applying a protective oil or wax coating. Additionally, always store tools in a dry, low-humidity environment, preferably in a toolbox or cabinet with desiccant packets or rust-inhibiting liners.