
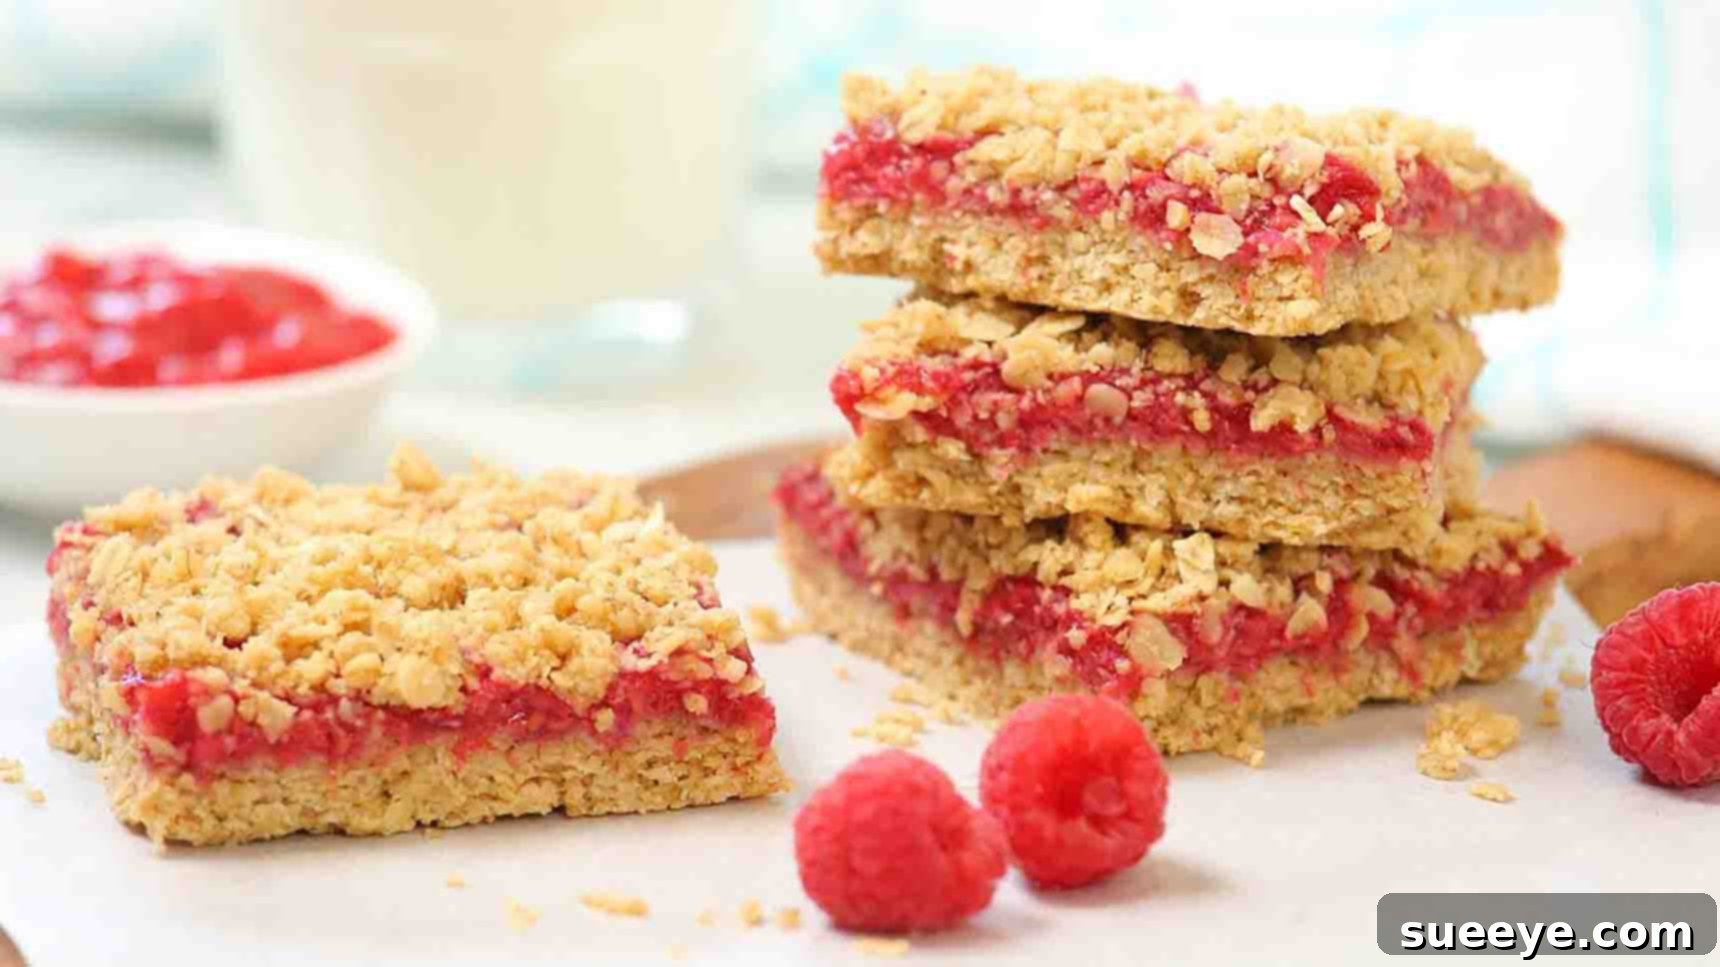
Indulge in the irresistible charm of homemade Raspberry Oat Crumble Bars, a delightful treat that perfectly balances fruity sweetness with a satisfyingly chewy oat texture. Inspired by the wonderful creations of The Domestic Geek on Youtube, this recipe brings you a dessert or snack that is incredibly easy to make yet offers an explosion of flavor. Whether you’re seeking a wholesome breakfast option, a quick afternoon pick-me-up, or a comforting dessert after dinner, these versatile crumble bars are an ideal choice for any time of day. Their vibrant raspberry filling, nestled between a buttery, golden oat crust and a crumbly topping, creates a symphony of taste and texture that will surely captivate your family and friends. Forget about overly complicated baking projects; these raspberry oat bars are designed for simplicity without compromising on deliciousness. Get ready to embark on a delightful baking journey and discover how to create these sensational crumble bars today.
The beauty of these Raspberry Oat Crumble Bars lies in their straightforward preparation and the use of readily available ingredients. They offer a comforting, rustic appeal combined with a sophisticated flavor profile. Each bite delivers the bright tang of fresh raspberries, harmoniously blended with the hearty goodness of oats and the subtle sweetness of brown sugar. Perfect for meal prep, these bars can be stored and enjoyed throughout the week, making them a convenient option for busy households. They also make a fantastic addition to potlucks, brunches, or simply as a special homemade gift. Let’s gather our ingredients and dive into crafting these delectable and easy-to-make raspberry treats that are bound to become a staple in your kitchen.
Essential Ingredients for Raspberry Oat Crumble Bars:
Creating the perfect batch of raspberry oat crumble bars begins with selecting high-quality ingredients. Each component plays a crucial role in achieving the desired flavor and texture, from the wholesome oats that form the crust to the juicy raspberries that make up the vibrant filling. Here’s a detailed look at what you’ll need to bring these delicious bars to life:
- 1 ½ cups Oat Flour: This finely ground oat flour provides a tender, cake-like consistency to the base and topping, helping to bind the ingredients together while contributing to the wholesome oat flavor. If you don’t have oat flour, you can easily make your own by blending quick-cooking or rolled oats in a food processor until a fine flour forms.
- 1 ½ cups Quick-Cooking Oats: These oats are essential for the signature chewy texture of the crumble. They add substance and a rustic feel to both the bottom crust and the crunchy topping, ensuring a satisfying bite with every piece.
- ½ cup Brown Sugar: Brown sugar adds a deep, caramel-like sweetness and moisture to the oat mixture. Its molasses content gives the bars a richer flavor profile compared to white sugar and helps to create a soft, yet firm, crust.
- 1 teaspoon Baking Powder: A small amount of baking powder helps to give a slight lift and tenderness to the oat base, preventing it from becoming too dense and ensuring a delicate crumble.
- ½ teaspoon Salt: Salt is a critical flavor enhancer. It balances the sweetness of the sugar and brightens the flavors of both the oats and the raspberries, ensuring the bars are not overly sweet.
- ½ cup Butter, Melted: Melted butter is the binding agent for the oat mixture. It coats the dry ingredients, allowing them to come together into a pressable crust and a crumbly topping. Using unsalted butter gives you control over the overall saltiness.
- 2 cups Raspberries: The star of the show! Fresh raspberries offer a bright, tart, and juicy burst of flavor that beautifully cuts through the sweetness of the oats. If fresh aren’t available, frozen raspberries can be used; just thaw them slightly and drain any excess liquid before cooking.
- 2 tablespoons Sugar (for filling): A small amount of granulated sugar is added to the raspberries to sweeten them slightly and balance their natural tartness, creating a perfectly balanced fruit filling.
- 1 tablespoon Cornstarch: Cornstarch is a crucial thickening agent for the raspberry filling. It ensures that the fruit mixture sets into a beautiful, jam-like consistency that won’t run when the bars are cut, providing structure and stability.
- 1 teaspoon Vanilla Extract: Vanilla extract adds a warm, aromatic depth to the raspberry filling, enhancing the overall flavor profile and complementing the fruit beautifully. Always opt for pure vanilla extract for the best taste.
- ½ Lemon Juice: Freshly squeezed lemon juice brightens the raspberry filling, adding a zesty tang that elevates the fruit’s natural flavor and prevents the filling from tasting too sweet. It also helps to bring out the vibrant color of the raspberries.
Having these ingredients ready and measured before you begin will make the baking process smooth and enjoyable, leading to perfectly crafted raspberry oat crumble bars every time.
Step-by-Step Directions for Perfect Raspberry Oat Crumble Bars:
Follow these detailed instructions to create a batch of irresistibly delicious raspberry oat crumble bars. Each step is designed to ensure success, from forming the perfect crust to achieving a luscious fruit filling and a golden, crumbly topping.
Step 1: Preparing the Oat Crumble Base and Topping
Begin by preheating your oven to 350 degrees F (175 degrees C). This ensures the oven is at the correct temperature when your bars are ready to bake, promoting even cooking. Next, prepare an 8×8 or 9×9 inch baking dish by lining it with parchment paper, leaving an overhang on the sides. This thoughtful step is essential for easy removal of the baked bars later, preventing sticking and ensuring clean, neat squares.
In a large mixing bowl, combine the dry ingredients for your crumble: 1 ½ cups of quick-cooking oats, 1 ½ cups of oat flour, ½ cup of brown sugar, 1 teaspoon of baking powder, and ½ teaspoon of salt. Use a whisk or a spoon to mix these ingredients thoroughly until they are uniformly combined. Even distribution of the leavening agent (baking powder) and salt is vital for consistent texture and flavor throughout the bars.
Once the dry ingredients are well-mixed, gradually pour in ½ cup of melted butter. Continue mixing with a spoon or your hands until the butter is fully incorporated and the mixture resembles wet sand or coarse crumbs. The butter binds all the dry ingredients, creating the perfect texture for both the base and the crumble topping. It’s important to mix until no dry streaks remain, but avoid overmixing.
Now, take approximately two-thirds of this oat mixture and transfer it to your prepared baking dish. Using the back of a spoon or your clean hands, firmly press the mixture into an even, compact layer at the bottom of the dish. This forms the sturdy and delicious base of your raspberry oat crumble bars. Pressing it down well is key to preventing the bars from falling apart once baked and cooled. Set aside the remaining one-third of the oat mixture; this will be used for the crumble topping later.
Step 2: Crafting the Luscious Raspberry Filling and Final Assembly
With your base firmly in place, it’s time to create the vibrant raspberry filling. In a small saucepan, combine 2 cups of fresh or slightly thawed frozen raspberries, 2 tablespoons of sugar, 1 tablespoon of cornstarch, 1 teaspoon of vanilla extract, and ½ lemon juice. Place the saucepan over medium heat.
Cook the mixture gently, stirring frequently, for about six to eight minutes. As it cooks, the raspberries will break down, release their juices, and the cornstarch will begin to thicken the mixture, transforming it into a beautiful, jam-like consistency. Watch for the mixture to bubble gently and thicken enough to coat the back of a spoon. The vibrant color and enticing aroma will tell you it’s almost ready. This process ensures the filling is perfectly set and bursting with flavor.
Once the raspberry filling has thickened to your satisfaction, carefully spoon it directly over the pressed oat base in your baking dish. Use the back of your spoon or an offset spatula to gently spread the filling into a nice, even layer, ensuring it covers the entire base. This creates a beautiful, uninterrupted layer of fruity goodness.
Finally, evenly sprinkle the remaining one-third of the oat crumble mixture over the raspberry filling. Try to distribute it as evenly as possible to ensure every bite of the finished bar has that delightful crunchy-chewy topping. There’s no need to press this layer down; leave it loose and crumbly for the signature texture.
Place the baking dish into your preheated oven at 350 degrees F (175 degrees C) and bake for 25 to 30 minutes. Keep an eye on the bars; they are done when the crumble topping is beautifully golden brown and the raspberry filling is bubbling around the edges. The golden color of the oats indicates a perfect toast, enhancing their nutty flavor.
After baking, remove the dish from the oven and, here’s the most crucial step for perfect bars: **let it cool completely** on a wire rack before attempting to cut into squares. This cooling period is absolutely essential. As the bars cool, the butter in the crumble and the cornstarch in the filling will set, allowing you to cut neat, sturdy squares without them crumbling apart or the filling oozing out. Rushing this step will result in messy, unformed bars. Patience is a virtue here, and it will be well rewarded with perfectly structured, delicious raspberry oat crumble bars!
More Tips for Success and Variations for Your Raspberry Oat Crumble Bars:
To truly master these raspberry oat crumble bars and make them your own, consider these additional tips and variations:
Perfecting the Texture:
- Don’t Overmix the Crumble: While you want the butter to be incorporated, overmixing can develop the gluten in the flour, leading to tougher bars. Mix just until combined and crumbly.
- Even Pressure for the Base: A firm, even base is critical for holding the bars together. Use the bottom of a glass or a flat measuring cup to help press down uniformly.
Ingredient Swaps and Enhancements:
- Alternative Berries: Feel free to experiment with other fruits! Blueberries, blackberries, or a mixed berry blend would work wonderfully. Adjust sugar content based on the sweetness of the fruit.
- Add Zest: For an extra burst of citrus flavor in the filling, finely grate some lemon zest into the raspberry mixture along with the lemon juice.
- Spices for Warmth: A pinch of cinnamon or nutmeg in the oat crumble mixture can add a lovely warmth and depth of flavor, especially appealing during cooler months.
- Nutty Crunch: For added texture and flavor, consider adding a handful of chopped nuts (like almonds, walnuts, or pecans) to your oat crumble mixture.
- Gluten-Free Option: Ensure your quick-cooking oats and oat flour are certified gluten-free if you are catering to dietary restrictions. This recipe is naturally very adaptable for gluten-free diets.
Storage and Serving Suggestions:
- Storage: Once completely cooled, store the raspberry oat crumble bars in an airtight container at room temperature for up to 3-4 days. For longer storage, you can refrigerate them for up to a week, or freeze them for up to 2-3 months. If freezing, separate layers with parchment paper.
- Serving: These bars are delicious on their own, but they also pair wonderfully with a scoop of vanilla ice cream, a dollop of whipped cream, or a drizzle of crème anglaise for a more decadent dessert. They are equally delightful with your morning coffee or tea.
Common Troubleshooting:
- Bars are too crumbly: Ensure your butter was fully incorporated and you pressed the base firmly enough. Over-baking can also dry them out.
- Filling is too runny: Make sure you cooked the raspberry mixture long enough for the cornstarch to activate and thicken it. If using frozen berries, thaw and drain them well to avoid excess moisture.
By following these comprehensive directions and tips, you are well on your way to creating a truly memorable batch of Raspberry Oat Crumble Bars. This recipe is not just about baking; it’s about creating joyful moments and delicious memories that your family will cherish. Enjoy the process, and savor every delightful bite!