
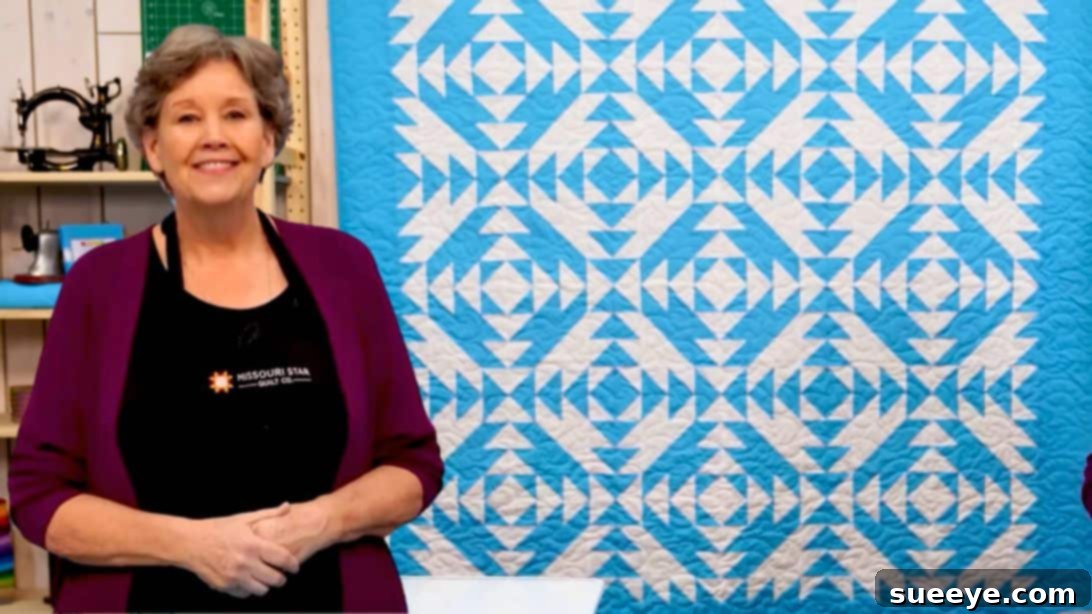
Mastering the Lady of the Lake Quilt: A Comprehensive Guide to Half-Square Triangles
Are you a passionate quilter looking for your next exciting project, or perhaps a beginner eager to dive into the beautiful world of quilting? The Lady of the Lake quilt pattern is a timeless classic that offers both stunning visual appeal and a rewarding crafting experience. If your stash is overflowing with half-square triangles (HSTs), or if you’re keen to learn an incredibly efficient method to create them, then you’ve found the perfect tutorial. This guide will walk you through creating a magnificent Lady of the Lake quilt, featuring an innovative technique demonstrated by the renowned Jenny Doan of Missouri Star Quilt Co., allowing you to produce 16 HSTs at once!
The Lady of the Lake quilt pattern is celebrated for its dynamic design, creating an illusion of movement and depth. It’s a fantastic way to showcase your fabric choices, making it a favorite among quilters of all skill levels. While the pattern traditionally requires a significant number of half-square triangles, which might seem daunting at first, this method streamlines the process dramatically. Forget the days of painstakingly crafting HSTs one by one; we’re about to unlock a technique that will transform your quilting efficiency.
The Enduring Charm of the Lady of the Lake Quilt Pattern
The Lady of the Lake quilt block is a true icon in the quilting community. Its intricate appearance belies a relatively simple construction, relying heavily on the versatile half-square triangle. When multiple blocks are arranged, they create mesmerizing secondary patterns, resembling waves, stars, or, indeed, ripples on a lake. This makes it an ideal pattern for those who appreciate both traditional aesthetics and a project that keeps their interest piqued from start to finish. It’s a design that has graced beds and walls for generations, and with good reason – it’s timeless, elegant, and deeply satisfying to create.
One of the beauties of this pattern is its adaptability. It can look completely different depending on your fabric choices. Use high-contrast fabrics for a dramatic, crisp look, or opt for a more subtle, harmonious palette for a softer, more traditional feel. No matter your style, the Lady of the Lake offers a canvas for your creativity, and with this tutorial, it’s more accessible than ever before.
Mastering Half-Square Triangles: The Foundation of Your Quilt
Half-square triangles, or HSTs, are arguably one of the most fundamental and versatile units in quilting. They are created by sewing two squares together and then cutting them diagonally to yield two triangles, which, when pressed open, form a square composed of two different colored triangles. These simple units can be combined in countless ways to create an endless array of quilt blocks and patterns, making them an essential skill for any quilter to master.
Accuracy is paramount when making HSTs. Precise cutting and careful sewing ensure that your finished units are exactly the right size, which in turn leads to perfectly matching seams and a professional-looking quilt. While traditional methods involve cutting individual triangles, or using techniques like the “magic 8” which yields eight HSTs at a time, this particular project requires a substantial quantity of HSTs. Fortunately, we have an even more efficient method to share, ensuring you spend less time cutting and more time sewing your beautiful quilt blocks together.
Unlocking Efficiency: The 16-at-a-Time HST Method
For projects like the Lady of the Lake quilt, which demands many half-square triangles (with each quadrant alone comprising 13 HSTs), efficiency is key. While the “magic 8” method is excellent for producing eight HSTs from two squares, Jenny Doan’s technique takes it a step further, enabling you to create a remarkable 16 HSTs from two larger squares in a single process. This method dramatically speeds up your piecing, making even large quilts feel approachable and enjoyable.
This innovative approach not only saves time but also helps maintain consistency in your HSTs, which is crucial for intricate patterns. By combining strategic sewing and cutting, you’ll find yourself with a pile of perfectly sized HSTs ready for assembly in no time. This is particularly beneficial for beginners, as it reduces the potential for error and allows for more consistent results without the need for advanced techniques.
RELATED: 2 Ways To Make Half-Square Triangles (While the tutorial focuses on 16 at a time, exploring other methods can broaden your quilting toolkit.)
Your Essential Supply List for the Lady of the Lake Quilt
Before we dive into the fun of sewing, let’s gather all the necessary materials. Having everything prepared beforehand ensures a smooth and enjoyable quilting process. For this project, a curated selection of fabrics will bring your Lady of the Lake quilt to life. Consider choosing fabrics with good contrast for your solid and background squares to make the intricate pattern truly pop. Jenny Doan’s method often uses pre-cut 10-inch squares (layer cakes), which are fantastic for saving cutting time.
- 1 3/4 yards of border fabric: Choose a fabric that complements your main squares and provides a lovely frame for your quilt. This will help define the edges and add a polished finish.
- 4 1/2 yards of backing fabric: This will be the back of your quilt. It’s an opportunity to use a fun print or a coordinating solid that will make your quilt beautiful from every angle.
- 1 pack of 10″ solid squares: These will form one half of your half-square triangles. Solid fabrics allow the design of the quilt to be the star, but subtle tone-on-tone prints can also work beautifully.
- 1 pack of 10″ background squares: These will form the other half of your half-square triangles. Often, a neutral color like white, cream, or a light gray is chosen to provide contrast to the solid squares, making the design stand out.
- Basic quilting supplies: Rotary cutter, cutting mat, quilting ruler, sewing machine, thread, fabric scissors, iron, and pressing mat.
Here are other blocks you can make with HSTs, showcasing their incredible versatility: Four Patch Stars Quilt, Calico Star Quilt, Hourglass Wreath Quilt.
Step-by-Step Guide: Crafting Your Lady of the Lake Quilt
Now, let’s get down to the exciting part – bringing your Lady of the Lake quilt to life! Follow these detailed steps carefully for the best results. Remember to maintain a consistent 1/4-inch seam allowance throughout your sewing.
Step 1: Preparing Your First Set of Half-Square Triangles (5 1/2″ Finished)
This initial step creates larger HSTs that will be integrated into your blocks. Precision here will pay off in the final assembly. These HSTs are part of the surrounding design elements of the Lady of the Lake block.
- Take one 10″ solid square and one 10″ background square. Place them right sides together, ensuring all edges align perfectly.
- Sew all the way around the outer edge of the squares with a 1/4-inch seam allowance. This creates a fabric ‘sandwich’ with stitching on all four sides.
- Carefully cut the sewn square in half diagonally in both directions. You will make two cuts, forming an “X” across the square. This will yield four triangular units.
- Press each unit open. For best results, press the seam allowance towards the darker fabric, or press them open to reduce bulk.
- Square up each of these four HSTs to 5 1/2″. This is a crucial step for accuracy. Use a square-up ruler and trim any excess fabric to ensure they are perfectly square.
Step 2: The 16-at-a-Time Half-Square Triangle Method (3″ Finished)
This is where the magic happens! This ingenious method will quickly generate a large number of smaller HSTs needed for the intricate central part of your Lady of the Lake blocks. These 3″ finished HSTs form the core design.
- Get another 10″ solid square and another 10″ background square. Place them on top of each other, right sides together, aligning edges.
- On the wrong side of one of the squares (typically the lighter one), draw a line directly down the middle, vertically and horizontally. This creates a grid of four smaller squares.
- Sew all the way around the outside edge of the layered squares, just as you did in Step 1, using a 1/4-inch seam allowance.
- Next, sew a line on both sides of the drawn vertical line, and then a line on both sides of the drawn horizontal line. These sewing lines should be approximately 1/4 inch away from the drawn lines.
- Now, cut directly on top of the original drawn vertical and horizontal lines. This will give you four smaller, sewn squares.
- Take each of these four smaller squares and cut them in half diagonally in both directions, just like you did in Step 1.
- You will now have a total of 16 half-square triangles from these two initial 10-inch squares!
- Press these 16 HSTs open and square them up to 3″. Again, this squaring-up step is vital for precision in your quilt.
Step 3: Assembling the Lady of the Lake Block
With your HSTs prepared, it’s time to assemble them into the distinct Lady of the Lake block. Each block is a mini masterpiece in itself.
- Refer to the photo below for the precise arrangement of your 5 1/2″ and 3″ HSTs. You will be combining several 3″ HSTs to form a central design, surrounded by the larger 5 1/2″ HSTs. Pay close attention to the direction of the triangles to create the iconic “wind turbine” or “wave” effect.
- Arrange the squares in rows and columns on a design board or flat surface. This helps visualize the pattern before sewing.
- Sew the squares together, row by row, using a 1/4-inch seam allowance.
- Press your seams after each row is sewn. You can press seams open or to one side, alternating directions for adjoining rows to help with nesting seams and reducing bulk.
- Once all rows are sewn, join the rows together to complete one Lady of the Lake block.
Step 4: Constructing the Quilt Top
With your individual blocks complete, the next step is to arrange and sew them together to form the full quilt top. This is where your quilt truly starts to take shape.
- Gather four of your completed Lady of the Lake blocks.
- Arrange these four blocks according to the photo below. The direction of each block is crucial for the overall secondary pattern of the quilt. Experiment with different orientations if you wish, but for the classic Lady of the Lake effect, follow the image closely.
- Sew these four blocks together to create a larger quadrant or a central panel of your quilt.
- Continue making more blocks and assembling them in groups of four, or into rows, until your desired quilt top size is achieved. Remember to press seams as you go for a flat and professional finish.
Tips for a Flawless Finish
Creating a beautiful quilt is a journey, and a few key tips can make all the difference in achieving a professional and satisfying result:
- Accurate Cutting: Use a sharp rotary cutter, a non-slip ruler, and a self-healing mat. Measure twice, cut once!
- Consistent Seam Allowance: A perfect 1/4-inch seam allowance is the cornerstone of successful quilting. Practice on scraps if needed to ensure your seams are consistent.
- Pressing Matters: Don’t underestimate the power of a good press. Pressing seams either open or to one side (consistently!) helps blocks lie flat and match up precisely. Avoid ironing, which can stretch fabric; instead, lift and press.
- Squaring Up: This step cannot be emphasized enough. Even slightly off-kilter HSTs can cause major headaches down the line. Take your time to square up every single unit.
- Chain Piecing: To save time and thread, sew your units in a continuous chain without cutting the thread between them. Then snip them apart when all are sewn.
Beyond the Block: Finishing Your Quilt
Once your quilt top is complete, the journey continues to turn it into a cozy, finished quilt. This involves three main layers: the quilt top, batting, and backing.
- Layering: Lay your backing fabric wrong side up, then your batting, and finally your quilt top right side up. Smooth out any wrinkles.
- Basting: Secure these three layers together. You can use safety pins, basting spray, or long hand stitches. This prevents shifting during the quilting process.
- Quilting: This is where you stitch through all three layers, adding texture and holding them together. You can choose simple straight lines, a meandering free-motion design, or a more intricate custom quilting pattern.
- Binding: The final step is to finish the edges of your quilt with binding. This not only protects the raw edges but also adds a decorative frame to your finished project.
Customizing Your Lady of the Lake Quilt
One of the joys of quilting is the ability to personalize your creations. The Lady of the Lake pattern is incredibly versatile, allowing for endless customization:
- Fabric Choices: Experiment with different color schemes and fabric collections. A patriotic theme, a seasonal palette, or even scraps from previous projects can all create unique looks. Consider using a variety of prints and solids for added visual interest.
- Size Variations: Adjust the number of blocks you make to create a quilt of any size, from a small wall hanging or baby quilt to a large bedspread. Simply multiply the number of blocks needed for a larger finished product.
- Border Designs: While this tutorial includes a border, consider adding multiple borders of varying widths or even pieced borders to further enhance your quilt’s design.
- Quilting Patterns: The quilting itself offers another layer of customization. Simple grid quilting will emphasize the piecing, while swirling free-motion designs can add softness and movement.
Lady of the Lake Quilt with Jenny Doan: Your Go-To Resource
This written guide provides a detailed roadmap, but there’s nothing quite like seeing the techniques in action. Jenny Doan’s clear and encouraging teaching style in the Missouri Star tutorial is an invaluable resource. She breaks down complex steps into simple, manageable actions, making it easy for even beginners to follow along and succeed. Her visual demonstrations of the 16-at-a-time HST method and the block assembly are particularly helpful for understanding the spatial arrangement and precise cutting required.
Watching the video in conjunction with this detailed written guide will give you the confidence and clarity needed to tackle this beautiful quilt. So, gather your fabrics, set up your sewing machine, and get ready to create a stunning heirloom piece that you’ll cherish for years to come.
Making a quilt, especially one as captivating as the Lady of the Lake, is more than just a craft; it’s a journey of creativity, patience, and skill-building. With the efficient 16-at-a-time HST method and Jenny Doan’s expert guidance, you’re well on your way to completing a truly remarkable project. Enjoy every stitch, embrace the process, and soon you’ll have a gorgeous Lady of the Lake quilt to admire and perhaps even gift to a loved one. Happy quilting!