
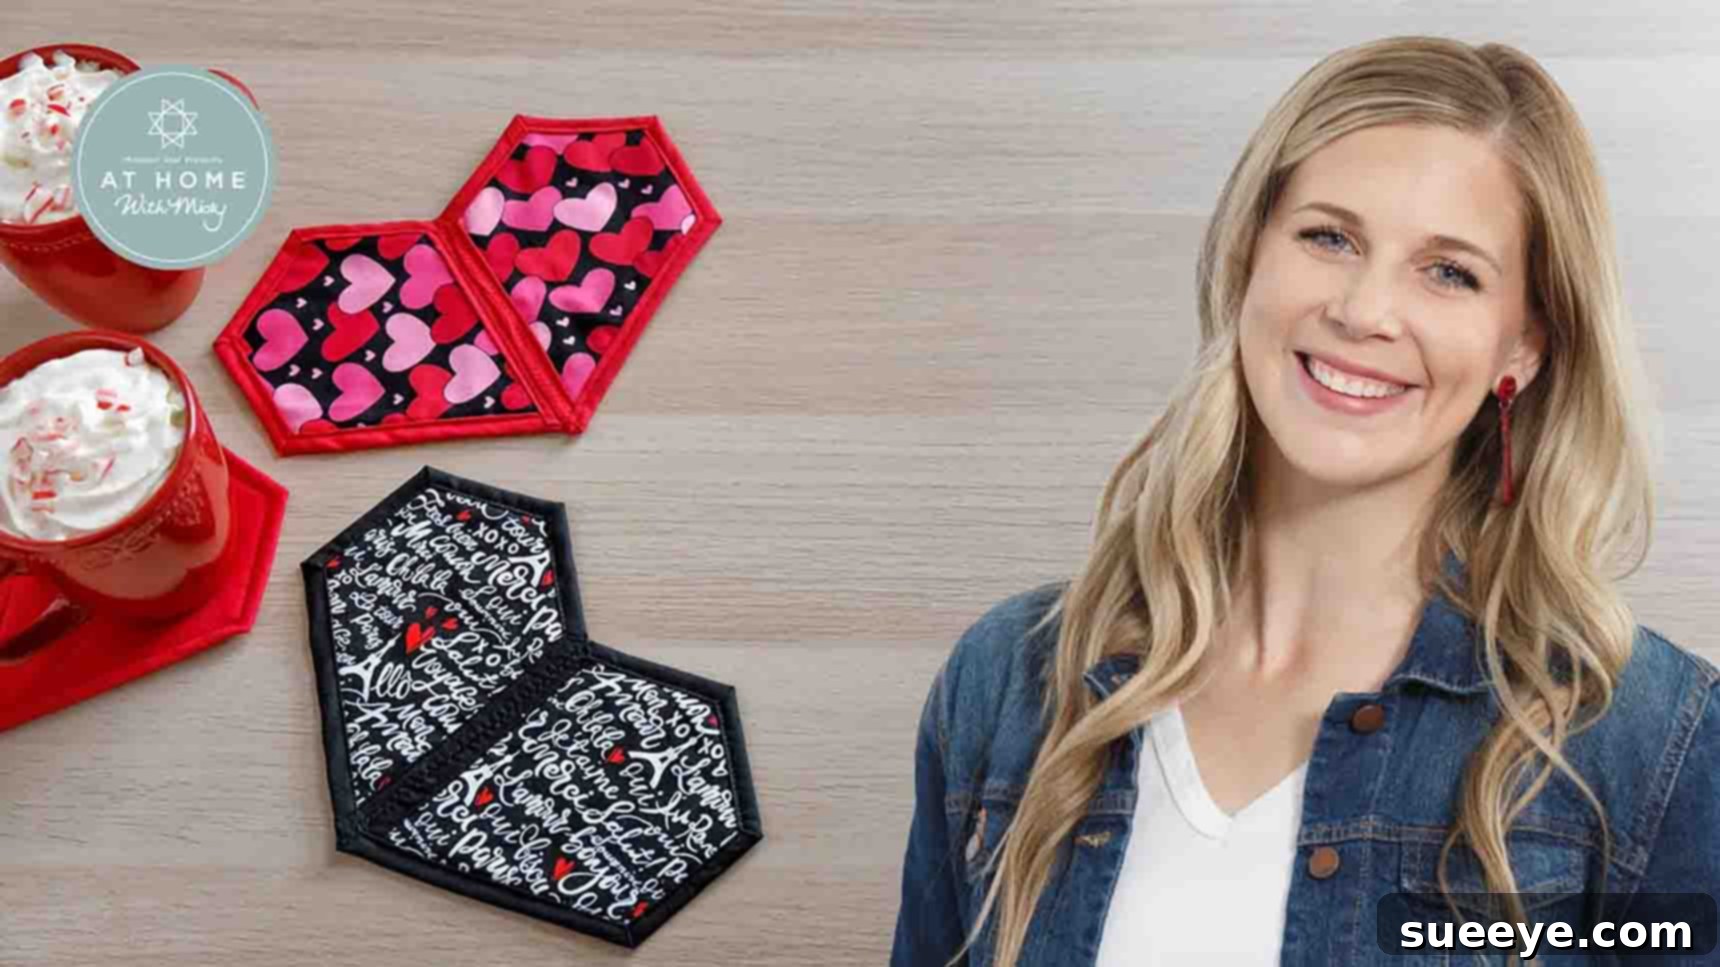
Craft a Heartfelt Gift: Easy DIY Heart Mug Rug Quilt Tutorial
As special occasions like Valentine’s Day approach, the thought of finding the perfect gift for loved ones often comes to mind. While store-bought items are always an option, there’s something truly unique and cherished about a handmade present. It speaks volumes of the effort, love, and personal touch invested. This year, why not create a charming and practical gift that’s sure to warm hearts and hands? We’re talking about a personalized heart mug rug quilt!
This delightful project, inspired by the talented creators at Missouri Star, is not only incredibly cute but also surprisingly simple to make. Even if you’re a complete beginner to quilting or sewing, you’ll find the process straightforward and enjoyable. Imagine crafting a beautiful, heart-shaped coaster in under an hour, perfect for keeping drinks warm and protecting surfaces. This tutorial will guide you through each step, ensuring a successful and rewarding crafting experience.
Why Choose a Heart Mug Rug Quilt?
Mug rugs are more than just fancy coasters; they’re miniature quilts designed to hold your favorite mug and a small snack, adding a touch of cozy elegance to any space. The heart shape, in particular, makes it an ideal gift for anniversaries, birthdays, or simply to show someone you care. Here’s why this project is a fantastic choice:
- Personal Touch: Handmade gifts carry an unmatched sentiment. Your loved ones will appreciate the time and effort you put into creating something unique just for them.
- Beginner-Friendly: With clear instructions and simple techniques, this project is perfect for those new to quilting. It’s a great way to learn basic sewing machine operation and quilting fundamentals without feeling overwhelmed.
- Quick to Make: Unlike larger quilting projects that can take weeks or months, a mug rug can be completed in a single crafting session, making it ideal for last-minute gifts or a quick creative escape.
- Practical and Versatile: A mug rug protects furniture from heat and spills, but it can also serve as a decorative placemat, a small mat for keys or jewelry, or simply a charming accent piece.
- Customizable: With a wide array of fabrics available, you can easily customize each mug rug to suit the recipient’s taste and decor, making every piece truly unique.
Essential Materials for Your Heart Mug Rug Quilt
Before diving into the creation process, gathering all your materials is crucial. Having everything on hand will ensure a smooth and uninterrupted crafting session. Here’s what you’ll need:
- 2 x 10″ Fabric Squares (per each mug rug): Choose two coordinating or contrasting cotton fabrics. One will be for the front of your heart, and the other for the backing. High-quality quilting cotton is recommended as it’s easy to work with and durable. Consider festive prints for holidays or patterns that reflect the recipient’s personality.
- 1 pack x Quilt-as-you-go 2 & 1/2″ Jewel Precut Batting Shapes: These pre-cut batting shapes are a game-changer for this project, especially for beginners. They eliminate the need for precise cutting of the batting and provide the perfect amount of loft and structure for your mug rug. If you can’t find these exact shapes, you can adapt by cutting your own batting to match the heart template.
- 1 x Quilt-as-you-go 2 & 1/2″ Jewel Template: This template is essential for accurately cutting your heart shapes. It simplifies the process, ensuring consistent and symmetrical results. If you don’t have this specific template, you can create your own heart template by folding paper and cutting a half-heart shape, or by finding a printable template online.
- 1 x Quilting Clips (pack of 12 or more): These clips are incredibly useful for holding fabric layers together, especially when dealing with multiple layers or thicker materials where pins might be difficult to use or leave marks. They provide a strong, even hold without distorting the fabric.
- 1 x Pack of Regular Patchwork Pins: Essential for temporarily securing fabric pieces before sewing. Look for fine, sharp pins to avoid damaging your fabric. They are particularly helpful for holding the batting in place.
- Basic Sewing Supplies: Don’t forget your sewing machine (threaded with matching or contrasting thread), a rotary cutter and cutting mat (optional but highly recommended for precision), an iron and ironing board, and fabric scissors.
Step-by-Step Guide: Crafting Your Heart Mug Rug Quilt
Step 1: Preparing Your Fabric and Batting
The foundation of a beautiful mug rug lies in precise cutting and careful layering. This first step ensures all your components are ready for assembly.
- Cut the Heart Front Piece: Take one of your 10-inch fabric squares. Place your jewel template on the fabric. To get the perfect heart shape, use the *inside* curve of the template. Position the long, straight edge of the template close to the fabric’s fold (if you’ve folded your fabric in half, which is recommended for symmetry). Carefully cut out the heart shape. This will be the decorative front of one half of your mug rug.
- Cut the Heart Backing Piece: For the backing, choose your solid or coordinating fabric. This time, use the *outside* of the jewel template. Lay it on top of your backing fabric and cut. Ensure you have two identical heart shapes – one for the front and one for the back. Remember, your heart mug rug will be made of two halves that are later joined, so you’ll repeat this for the second half.
- Position the Batting: Take your pre-cut batting shapes. These are designed to fit perfectly within your fabric hearts. “Float” a batting shape onto the wrong side of your backing fabric piece, centering it carefully. The batting should sit snugly, providing softness and structure.
- Layer the Front Fabric: Now, place your decorative front fabric piece right side up on top of the batting-backed piece. The batting should be sandwiched between the front and backing fabrics.
- Secure with Pins: To prevent any shifting during the initial sewing, use your regular patchwork pins to secure all three layers (front fabric, batting, and backing fabric) together. Place pins strategically around the edges of the heart shape, ensuring they hold all layers firmly in place. Repeat these steps for the second half of your heart mug rug.
Step 2: Securing the Backing and Initial Stitching
This step focuses on neatly securing the edges of each heart half and preparing them for the quilting process.
- Prepare the Backing Edge: On the backing side of each heart piece (where the solid fabric is visible), fold the fabric edge under twice. This creates a clean, finished edge. Use your quilting clips to secure this fold as you work your way around the curved edges. The clips are particularly helpful here for maintaining the curve without puckering.
- Sew the Outer Portion: Take both heart halves to your sewing machine. Using a straight stitch, sew right along the edge of the folded backing. This stitch will hold down the outer portion of the backing, creating a neat, enclosed edge for each half of the heart. Ensure your stitches are even and close to the fold for a professional finish.
- Joining the Two Halves: Once both halves have their outer edges stitched, it’s time to bring them together to form the complete heart. Place the two finished halves side-by-side, aligning their straight inner edges. These are the edges that will form the “joint” in the center of the heart.
- Zigzag Stitch the Joint: Using your sewing machine, sew a zigzag stitch right along this central joint. The zigzag stitch is excellent for securely joining two fabric pieces while allowing for some flexibility and minimizing bulk. Ensure your zigzag stitches are consistent in width and length for a clean seam. This step is crucial for giving your mug rug its complete heart shape and stability.
Step 3: Quilting and Adding Definition
Now that your heart is assembled, it’s time to add the “quilt” part to your mug rug. This step involves stitching through all layers to create texture and hold the batting in place.
- Choosing Your Quilting Design: For a simple and quick project like this, straight-line quilting or echo quilting (following the outline of the heart shape) are excellent choices. You can also opt for a simple grid pattern or free-motion quilting if you’re feeling more adventurous.
- Stitching Through Layers: Using your sewing machine, begin to quilt your mug rug. If you’re doing straight lines, ensure they are evenly spaced. For echo quilting, sew parallel lines about a quarter-inch to a half-inch from the previous line, following the contour of the heart. This stitching not only secures the layers but also adds beautiful texture and dimension to your mug rug.
- Backtacking/Securing Stitches: At the beginning and end of each quilting line, remember to backtack (sew a few stitches backward and then forward) to secure your threads and prevent unraveling.
Step 4: Finishing Touches and Edging
The final step brings your mug rug to completion, ensuring it’s durable and aesthetically pleasing.
- Trim Excess Threads: Once all your quilting stitches are done, carefully trim any loose threads on both the front and back of your mug rug. A clean finish makes a big difference.
- Final Pressing: Give your completed heart mug rug a good press with a warm iron. This will flatten out any wrinkles, set your stitches, and give it a crisp, professional appearance.
Tips for a Perfect Heart Mug Rug Quilt
Even though this is a beginner-friendly project, a few tips can elevate your results:
- Fabric Choice Matters: Stick to 100% quilting cotton for ease of use. Pre-wash your fabrics if you’re concerned about shrinkage or dye bleeding, especially if combining dark and light colors.
- Accurate Cutting: Precision in cutting your fabric pieces is key to a well-aligned heart. Take your time, use a sharp rotary cutter (if you have one), and ensure your template is held firmly.
- Needle Selection: Use a sharp, new needle in your sewing machine. A fresh needle prevents skipped stitches and ensures smooth sewing through multiple layers of fabric and batting.
- Thread Color: Consider using a neutral thread color like white or cream for quilting if you want the fabric pattern to stand out. Alternatively, choose a contrasting color for a more visible quilting design.
- Practice Stitches: If you’re new to your sewing machine, practice your straight and zigzag stitches on scrap fabric before working on your mug rug. This helps build confidence and ensures even stitching.
- Ironing is Your Friend: Pressing your fabric after each major step (like folding the backing or after quilting) helps to keep seams flat and your project neat.
Personalize Your Mug Rug: Creative Ideas
While a simple heart mug rug is charming, there are many ways to add your unique flair:
- Appliqué: Before quilting, add a small fabric appliqué in the center – perhaps an initial, a smaller heart, or a simple flower.
- Embroidery: Hand or machine embroider a special message, a name, or a small design onto the mug rug’s front fabric.
- Decorative Stitches: Instead of simple straight-line quilting, use some of the decorative stitches available on your sewing machine to create interesting patterns.
- Scrappy Look: Use different small fabric scraps for the front heart piece, piecing them together before cutting the final heart shape for a truly unique look.
- Embellishments: Add small buttons, beads, or fabric-safe charms after the quilting is complete for extra sparkle.
- Different Shapes: Once you master the heart, experiment with other shapes for different occasions – a star for patriotic holidays, a snowflake for winter, or a simple square for everyday use.
Your Handmade Heart Mug Rug: A Gift from the Heart
Congratulations! You’ve successfully crafted a beautiful and heartfelt mug rug quilt. This handmade item is not just a practical accessory; it’s a tangible expression of your care and creativity. Whether you’re gifting it to a loved one or keeping it for yourself, it’s sure to bring a touch of warmth and joy.
The beauty of this project lies in its simplicity and the profound impact of a handmade gift. It’s an excellent stepping stone into the wonderful world of quilting, demonstrating that even complex-looking projects can be broken down into manageable, enjoyable steps. So, gather your materials, fire up your sewing machine, and get ready to spread some love, one stitch at a time!
Learn More with Misty Doan’s Tutorial
For a visual guide and additional insights, be sure to watch the full video tutorial from Missouri Star. Misty Doan walks you through each step with her signature clear and encouraging style, making the process even clearer and more enjoyable. Watching her demonstrate the techniques can be incredibly helpful for visual learners and anyone new to sewing.