
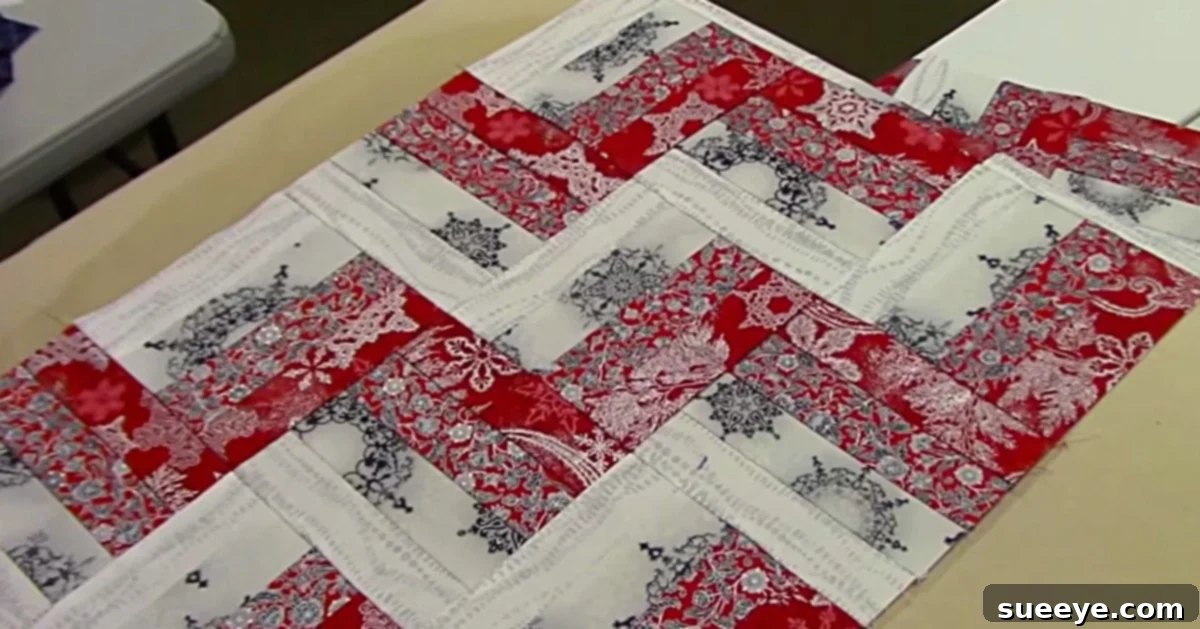
Create a Stunning Rail Fence Quilted Table Runner: Your Perfect Spring Project
There’s an undeniable charm that comes with handmade home decor, especially when it celebrates a new season. As the days lengthen and nature bursts into life, bringing the vibrant energy of Spring into our homes feels incredibly rewarding. For many quilters, this season, particularly leading up to Easter, is a wonderful time to infuse spaces with bright colors and cozy textures through DIY projects. Nothing captures this spirit quite like a beautifully quilted table runner, acting as a focal point for family gatherings and daily enjoyment.
The “Rail Fence” quilting pattern is a classic for a reason: its elegant simplicity makes it accessible for quilters of all skill levels, while its versatility allows for endless creative expression. Whether you’re a seasoned pro looking for a quick and satisfying project or a beginner eager to dive into the world of quilting, the Rail Fence design offers a fantastic foundation. This particular project, a charming table runner, promises to add a touch of handcrafted warmth and seasonal flair to your dining area or any surface needing a decorative lift.
My own journey to this delightful project began with a desire to utilize some gorgeous spring-themed fabric jelly rolls and remnants I’d acquired on sale. These vibrant strips, brimming with potential, were just waiting for the right inspiration. It wasn’t long before a wonderful video tutorial by the renowned Quilting Aficionado, Donna Jordan, caught my eye. Her clear instructions and inspiring designs always spark my creativity, and this particular Rail Fence table runner instantly clicked. I knew it was the perfect way to transform my stash of fabrics into something both beautiful and functional. The appeal of the Rail Fence pattern lies in its optical illusion, created by sewing strips of fabric together and then cutting and re-orienting them to form a dynamic, linear design that resembles a fence. This project is not only satisfying to make but also incredibly rewarding once completed, bringing a unique, handmade touch to your home decor. Let’s gather our supplies and get ready to create something truly special!
Gathering Your Quilting Essentials
Before embarking on any quilting adventure, ensuring you have all the necessary tools and materials is crucial. This not only makes the process smoother but also allows you to focus on the joy of creation rather than scrambling for supplies. For our Rail Fence table runner, here’s a detailed look at what you’ll need:
- A Jelly Roll (or fabric strips cut 2 x 5″): A jelly roll is a curated collection of 2.5-inch wide fabric strips, typically 40-42 strips, each 42 inches long, making them perfect for this project. If you don’t have a jelly roll, you can easily cut your own fabric strips from yardage. For a table runner, consider a mix of complementary colors and patterns. For a spring or Easter theme, look for pastels, florals, and bright, cheerful prints. You’ll need enough fabric to create numerous 2×5 inch pieces.
- Sharp Scissors or a Rotary Cutter with a Cutting Mat: Precision is key in quilting. While scissors can work, a rotary cutter combined with a self-healing cutting mat and a clear quilting ruler will ensure much more accurate and efficient strip cutting, which is vital for perfectly aligned blocks.
- High-Quality Thread: Choose a thread that is strong and matches or blends with your fabrics. A good quality 100% cotton thread is often recommended for quilting, as it is durable and comes in a wide array of colors.
- A Reliable Sewing Machine: Any basic sewing machine capable of a straight stitch will work. Ensure your machine is clean, oiled, and has a fresh needle suitable for quilting (a universal or quilting needle in size 80/12 or 90/14 is usually a good choice).
- Quilting Batting: Batting is the middle layer of your quilt, providing warmth and dimension. You’ll need a piece slightly larger than your desired table runner size. Options include cotton, polyester, wool, or blends, each offering different characteristics in terms of drape, warmth, and washability. For a table runner, cotton or a cotton blend is usually ideal as it’s easy to work with and provides a nice flat finish.
- An Iron and Ironing Board/Pressing Mat: Proper pressing is as important as accurate sewing in quilting. An iron helps flatten seams, resulting in a neater and more professional-looking finished product. A good steam iron is invaluable.
- A Backing Fabric: This will be the bottom layer of your table runner. Choose a fabric that complements your quilt top in terms of color and style. You’ll need a piece slightly larger than your quilt top and batting. Often, quilters use a single piece of fabric for the backing, but pieced backings are also common for larger projects.
- Optional Tools for Convenience: Wonder clips or pins for holding fabric layers, a seam ripper (just in case!), a walking foot for your sewing machine (highly recommended for quilting through multiple layers), and a fabric marking tool.
Step-by-Step Guide: Crafting Your Rail Fence Table Runner
With all your materials at hand, let’s dive into the creative process. The Rail Fence pattern, despite its striking appearance, is remarkably straightforward, built upon a foundation of simple strip piecing. Follow these detailed instructions to bring your beautiful table runner to life.
First, prepare your fabric strips.
The foundation of your Rail Fence table runner lies in precisely cut fabric strips. This project is wonderfully forgiving in terms of complex pattern pieces, as everything starts with simple rectangles. Begin by taking your chosen jelly roll strips or your yardage fabrics. If using yardage, carefully cut your fabrics into 2-inch wide strips. Once you have these 2-inch wide strips, cut them down into 5-inch long segments. This will give you numerous 2 x 5-inch rectangular pieces. The consistency in these measurements is paramount for a cohesive final look. If you’re using a jelly roll, you’ll still need to cut the 2.5-inch wide strips into 5-inch segments. Ensure all selvage edges (the tightly woven edges of the fabric) are trimmed off before cutting, as they can cause puckering in your finished quilt. Use a rotary cutter, ruler, and mat for the cleanest, most accurate cuts. This precision will simplify all subsequent sewing steps.
Then, assemble your strip sets and blocks.
Now that you have all your 2 x 5-inch strips, it’s time to create the individual units that will form your Rail Fence blocks. Select three of your prepared 2×5 inch strips. You can choose contrasting colors for a dramatic effect or coordinating shades for a more subtle look. Lay two strips with right sides together and sew along one of the 5-inch edges using a consistent 1/4-inch seam allowance. This precise seam allowance is crucial for ensuring your blocks will be the correct size. Once sewn, press the seam open or to one side, depending on your preference (pressing open reduces bulk, pressing to the dark side can hide thread shadows). Next, take your third strip and sew it to the remaining raw edge of your two-strip unit, again with right sides together and a 1/4-inch seam. Press this seam as well. You now have a “strip set” – three strips sewn together, measuring approximately 5 inches wide by 5 inches long (allowing for seam allowances). Repeat this process to create multiple strip sets. The beauty of this pattern is that you can decide how many strips to use in each ‘rail’ of your fence. Three strips per block is common and creates a nice visual balance. The playful arrangement of these strips is where the true character of your table runner begins to emerge.
Next, arrange your blocks and sew the quilt top.
With your strip sets ready, the magic of the Rail Fence pattern truly comes to life. This step is all about visual layout and careful assembly. Take your strip sets and begin to arrange them on a flat surface, such as your design wall, a large table, or even the floor. The signature Rail Fence look is achieved by placing alternating blocks in different directions, typically rotating every other block by 90 degrees. For example, if your first block has its strips running horizontally, the next block would have its strips running vertically, and so on. Experiment with different arrangements until you achieve a pattern you love. There’s no right or wrong way; you can create a zig-zag, a checkerboard, or a more random design. Once you are satisfied with your layout, carefully sew the blocks together, row by row. First, sew the blocks within each row, always using that consistent 1/4-inch seam allowance. Press the seams for each row in opposite directions (e.g., all seams in Row 1 pressed to the left, all seams in Row 2 pressed to the right). This technique, known as “nesting seams,” helps the seams interlock perfectly when you join the rows, reducing bulk and improving alignment. Finally, sew your completed rows together to form your quilt top. Give the entire quilt top a final press to ensure all seams are flat and everything is crisp.
Quilting and Finishing Your Table Runner
Once your quilt top is complete, the next exciting phase is to “quilt” it – adding the batting and backing, and then stitching through all three layers to secure them. This process not only stabilizes the runner but also adds texture and dimension.
Creating the Quilt Sandwich:
Lay your backing fabric wrong side up on a clean, flat surface. Tape it down gently to prevent shifting. Next, place your batting smoothly on top of the backing, ensuring it’s centered and slightly larger than your quilt top. Finally, carefully place your quilt top right side up on top of the batting, making sure it’s also centered and free of wrinkles. Now you have your “quilt sandwich.” Baste these layers together using either safety pins (pin basting) or a temporary spray adhesive (spray basting). Ensure the layers are securely fastened every few inches across the entire surface to prevent shifting during quilting.
Stitching the Layers (Quilting):
With your layers basted, it’s time to quilt! For a Rail Fence pattern, simple straight-line quilting often looks fantastic. You can quilt “in the ditch” (along the seams where the blocks meet) or quilt parallel lines across the strips. Using a walking foot on your sewing machine is highly recommended for this step, as it helps feed all three layers evenly, preventing puckering and stretching. Choose a thread color that blends with your fabrics or a contrasting color for a more pronounced quilting design. Take your time, maintain a consistent stitch length, and enjoy watching your table runner come to life with texture.
Squaring Up and Binding:
After quilting, trim the excess backing and batting, carefully squaring up your table runner so all edges are straight and even. A large quilting ruler and rotary cutter are invaluable here. The final step is to add the binding, which finishes the raw edges and provides a professional look. Cut several 2.5-inch wide strips of fabric (enough to go around the entire perimeter of your table runner, plus about 10-12 inches for joining and overlap). Sew these strips together end-to-end to create one long binding strip. Fold the strip in half lengthwise and press. Attach the binding to the front of your table runner, aligning raw edges, and sew with a 1/4-inch seam. Miter the corners for a clean finish. Then, wrap the binding around to the back of the runner and either hand-stitch it down for a traditional finish or machine-stitch it for a quicker, durable edge. Once bound, your Rail Fence quilted table runner is complete!
Customization and Care Tips for Your Quilted Masterpiece
The beauty of quilting lies in its endless possibilities for customization, and the Rail Fence pattern is an excellent canvas for personal expression. Here are some ideas to make your table runner truly unique, along with tips for keeping it looking its best.
Sizing and Scale Variations:
This tutorial focuses on a table runner, but the Rail Fence pattern can be adapted to almost any size project. Want a larger table runner for a grand dining table? Simply make more blocks or cut your initial strips wider and longer. For a smaller piece, like a placemat or a hot pad, reduce the number of strips in each block or decrease the dimensions of your initial 2×5-inch strips. The core principle of cutting and alternating strip sets remains the same, offering you complete control over the final dimensions and visual impact.
Exploring Fabric Play and Color Palettes:
While spring and Easter themes are delightful, don’t limit yourself! The Rail Fence pattern shines with any fabric combination. Consider:
- Seasonal Themes: Opt for rich reds and greens for Christmas, warm oranges and browns for autumn, or vibrant blues and whites for a summer beach theme.
- Scrap Buster: This pattern is perfect for using up smaller fabric remnants. Mix and match different prints and solids from your stash for a truly eclectic look.
- Monochromatic Schemes: Use varying shades of a single color for a sophisticated, subtle effect.
- Bold Contrasts: Pair light and dark fabrics, or complementary colors from the color wheel, to make the “rail” effect pop even more dramatically.
- Focus Fabrics: Incorporate a specific novelty print or a cherished fabric in one of the strips to draw the eye.
The choice of fabric will dramatically alter the runner’s personality, allowing you to create a piece that perfectly matches your home decor and personal style.
Washing and Care Instructions:
A handmade quilted item is meant to be used and enjoyed. Proper care will ensure its longevity and keep it looking fresh:
- Pre-Washing Fabrics: While optional, pre-washing your fabrics before cutting can prevent shrinkage and color bleeding, especially with darker, vibrant colors.
- Gentle Washing: When it’s time to clean your table runner, machine wash it on a delicate cycle with cold water and a mild detergent. Avoid harsh chemicals or bleach.
- Drying: Tumble dry on a low setting or, even better, lay flat to air dry. This helps prevent stretching and preserves the integrity of the quilting stitches.
- Ironing: If needed, iron on a low setting, taking care not to scorch the fabric or flatten the quilting too much.
Following these care tips will help maintain the beauty and structure of your Rail Fence table runner for years to come, allowing it to become a cherished part of your home decor and a testament to your crafting skills.
This tab;le runner looks amazing and was really simple to make as well. The journey from scattered fabric strips to a finished, beautiful table runner is one of immense satisfaction. The Rail Fence pattern, with its deceptive simplicity and striking visual appeal, makes for an incredibly rewarding project. Whether gracing your dining table for an Easter feast or adding a touch of handmade charm to your everyday decor, this quilted runner will undoubtedly be a conversation starter and a testament to your creative spirit. So, embrace the joy of quilting, experiment with colors, and proudly display your beautifully handcrafted Rail Fence table runner. Happy quilting!