
Effortless Elegance: The Ultimate 2-Ingredient No-Bake Cookie Pie Crust Recipe
Imagine creating the perfect foundation for your favorite pies and tarts with minimal effort, no oven required, and just two simple ingredients. Sounds like a dream? Well, it’s a delicious reality with this incredible no-bake cookie pie crust recipe! As someone who frequently bakes pies for family and friends, I can attest to the magic of a superb crust. This particular recipe, inspired by the culinary brilliance of Bigger Bolder Baking on YouTube, has become an absolute staple in my kitchen. It’s not only unbelievably easy to make but also promises a delightful flavor and texture that complements almost any filling.
What sets this recipe apart is its sheer simplicity and convenience. You literally need only two ingredients to transform ordinary cookies into a sturdy, flavorful base for your culinary creations. Plus, the “no-bake” aspect means you save energy, keep your kitchen cool, and spend less time fussing over a hot oven. This crust is also a fantastic make-ahead option, staying fresh and perfectly usable in the refrigerator for up to two days. Whether you’re whipping up a creamy cheesecake, a decadent chocolate pie, or a refreshing fruit tart, this versatile cookie crust provides an ideal canvas. Get ready to impress with minimal effort and maximum flavor!
Essential Ingredients for Your Perfect No-Bake Crust
Crafting this simple yet stunning pie crust requires just two core components. The quality and type of these ingredients will significantly influence the final taste and texture of your crust, offering a spectrum of possibilities for customization.
- 2 sleeves (approx. 9 ounces or 252 grams) of Graham crackers, or any cookie of your choice: Graham crackers are a classic choice, offering a subtly sweet and slightly nutty flavor that pairs wonderfully with a wide range of fillings. However, don’t limit yourself! Chocolate sandwich cookies (like Oreos), shortbread biscuits, digestive cookies, or even vanilla wafers can create unique and delicious variations. Ensure your chosen cookies are relatively dry and crumbly for the best texture.
- ½ cup (4 ounces or 115 grams) of unsalted butter, melted: Butter acts as the binding agent, holding the crushed cookie crumbs together to form a firm crust. Using unsalted butter allows you to control the overall saltiness, ensuring a balanced flavor. Melting the butter properly is crucial for even distribution and optimal binding.
Ingredient Spotlight: Choosing Your Cookies
While Graham crackers are the traditional go-to for many no-bake crusts, the beauty of this recipe lies in its flexibility. Consider these options to tailor your crust to your specific dessert:
- Classic Graham Crackers: Ideal for cheesecakes, key lime pies, and fruit tarts due to their mild sweetness and buttery notes.
- Chocolate Sandwich Cookies (e.g., Oreos): Perfect for chocolate cream pies, mint chocolate desserts, or even peanut butter pies. Remember to use the entire cookie, including the cream filling, for a richer crust.
- Shortbread Cookies: Offer a delicate, buttery richness that complements custards, lemon tarts, or fruit pies beautifully.
- Vanilla Wafers: Provide a subtle vanilla flavor and a light, crispy texture, great for banana puddings or coconut cream pies.
- Ginger Snaps: For a spiced, festive touch, particularly good with pumpkin or apple fillings during fall.
Experimentation is encouraged! Just ensure your chosen cookies are well-crushed to achieve an even consistency.
Step-by-Step Guide to Your Perfect No-Bake Pie Crust
Follow these straightforward steps to create a flawless, delicious, and incredibly easy pie crust that will elevate any dessert.
Step 1: Preparing Your Pan and Crushing Your Cookies
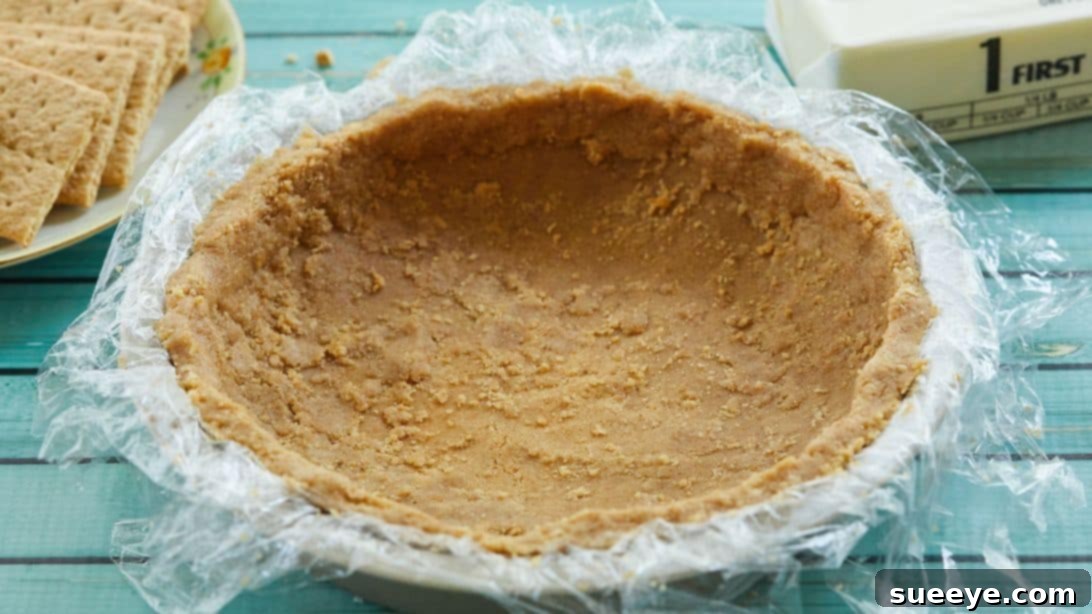
Begin by preparing your pie pan. Lightly grease a 9-inch pie pan with a small amount of butter, ensuring both the bottom and sides are coated. This helps prevent sticking and makes removal easier. For an even cleaner release, especially if you plan to remove the pie from the pan, line it with three layers of cling wrap, allowing excess wrap to hang over the edges. This creates “handles” for easy lifting once the crust is set. Set the prepared pan aside.
Next, it’s time to transform your cookies into fine crumbs. Place your chosen cookies or graham crackers into a food processor. Pulse them until they are finely crushed, resembling coarse sand. If you don’t have a food processor, you can use a sturdy Ziploc bag. Place the cookies inside, seal the bag, and use a rolling pin or a heavy object to crush them until you achieve fine crumbs. The finer the crumbs, the more cohesive and uniform your crust will be.
Transfer the finely crushed crumbs into a large mixing bowl. Pour the half cup of melted butter over the crumbs. Stir thoroughly with a spoon or spatula until the butter is completely incorporated and the mixture resembles wet sand. Every crumb should be coated in butter; this is essential for the crust to bind together properly and hold its shape.
Step 2: Forming the Crust and Chilling to Perfection
Carefully pour the buttery cookie crumb mixture into your prepared pie pan. Using your hands or the flat bottom of a glass, firmly press the mixture down onto the bottom and up the sides of the pan. It’s crucial to apply even pressure to ensure a uniform thickness throughout the crust. This not only creates a professional-looking finish but also guarantees that your crust will be sturdy enough to hold its filling without crumbling. Pay special attention to the edges and corners, making sure they are well-packed.
Once the crust is evenly pressed into the pan, place it in the refrigerator. Allow it to chill and set for at least 15 minutes. This chilling period is vital as it allows the butter to solidify, binding the crumbs together and creating a firm, stable crust. Without adequate chilling, your crust might be too fragile and fall apart when sliced.
After 15 minutes, your no-bake cookie pie crust is ready to be filled with your favorite pie or tart recipes. Whether you’re making a no-bake cheesecake, a rich chocolate mousse pie, or a vibrant fruit tart, this crust provides the perfect foundation. If you’re not using it immediately, this versatile pie crust can be stored in the refrigerator for up to 2 days, making it an excellent option for meal prep or entertaining.
Tips for a Flawless No-Bake Cookie Crust Every Time
- Achieve Fine Crumbs: The finer your cookie crumbs, the more cohesive and less crumbly your final crust will be. A food processor is ideal for this.
- Even Butter Distribution: Ensure every crumb is thoroughly coated in melted butter. This is key to a crust that holds its shape.
- Press Firmly and Evenly: Use the bottom of a glass or your knuckles to really compact the mixture into the pan. This prevents crumbling when serving.
- Don’t Skimp on Chilling Time: The refrigerator time allows the butter to solidify, setting the crust. Rushing this step will result in a soft, messy crust.
- Customization is Key: Don’t hesitate to experiment with different types of cookies to match the flavor profile of your filling.
- Add Flavor Enhancers: For an extra layer of flavor, consider adding a pinch of cinnamon, a tablespoon of sugar, or a teaspoon of vanilla extract to your cookie crumbs before mixing with butter.
Why Choose a No-Bake Pie Crust?
There are numerous advantages to opting for a no-bake pie crust, making it a favorite among home bakers and dessert enthusiasts alike:
- Effortless Preparation: Skip the fuss of traditional pastry making, which can be time-consuming and often intimidating for beginners.
- No Oven Required: Perfect for hot summer days when you want to avoid turning on the oven, or for occasions when oven space is limited.
- Quick & Easy: From start to finish, this crust can be ready in under 30 minutes, including chilling time.
- Versatile: Adapts beautifully to a myriad of fillings, from creamy custards and rich chocolate mousses to fresh fruit fillings.
- Consistent Results: Less prone to common baking pitfalls like undercooked or burnt edges.
- Delicious Flavor: The rich, buttery cookie base provides a delightful contrast and complementary flavor to almost any pie filling.
Serving Suggestions and Creative Fillings
This versatile no-bake cookie crust is an excellent base for a wide variety of desserts. Here are some ideas to get your creative juices flowing:
- Classic Cheesecakes: A simple no-bake cheesecake filling is heavenly with a graham cracker or even an Oreo crust.
- Cream Pies: Think chocolate cream, coconut cream, banana cream, or even a refreshing lemon meringue pie (for the filling, not the meringue itself).
- Mousse Pies: Light and airy chocolate, strawberry, or peanut butter mousses find a perfect home in this sturdy crust.
- Fruit Tarts: Fill with a layer of pastry cream and top with an array of fresh seasonal fruits for a vibrant and delicious dessert.
- Frozen Desserts: Ideal for ice cream cakes or frozen yogurt pies, as the crust holds up well to freezing.
The possibilities are truly endless once you master this simple crust. Let your imagination guide you!
Storage and Make-Ahead Tips
One of the best features of this no-bake pie crust is its suitability for making ahead, which can save you a significant amount of time when preparing for gatherings or just planning your weekly desserts.
- Refrigeration: An un-filled crust can be kept in the refrigerator, tightly covered with plastic wrap, for up to 2 days. This allows you to prepare the base well in advance of your filling.
- Freezing (Un-filled): For longer storage, you can freeze the un-filled crust. Once firmly set in the pan, wrap it tightly in several layers of plastic wrap, then an additional layer of aluminum foil, and freeze for up to 1 month. Thaw in the refrigerator before filling.
- Freezing (Filled Pies): Many no-bake pies with this crust can also be frozen, depending on the filling. Cheesecakes, ice cream pies, and some mousse pies freeze exceptionally well. Always cover tightly to prevent freezer burn.
Having a pre-made crust ready to go means you’re always just a few steps away from a delightful dessert.
This 2-ingredient no-bake cookie pie crust truly is a game-changer for anyone who loves delicious desserts without the hassle. It’s quick, customizable, and creates a perfectly sturdy and flavorful base every time. So, gather your cookies and butter, and get ready to create something wonderful. Happy baking (or rather, no-baking)!
*A special thank you to Bigger Bolder Baking via YouTube for the fantastic inspiration and for all images used here. If you’ve enjoyed this simple recipe, we highly recommend visiting her channel for more brilliant video tutorials and subscribe for endless culinary creativity!