
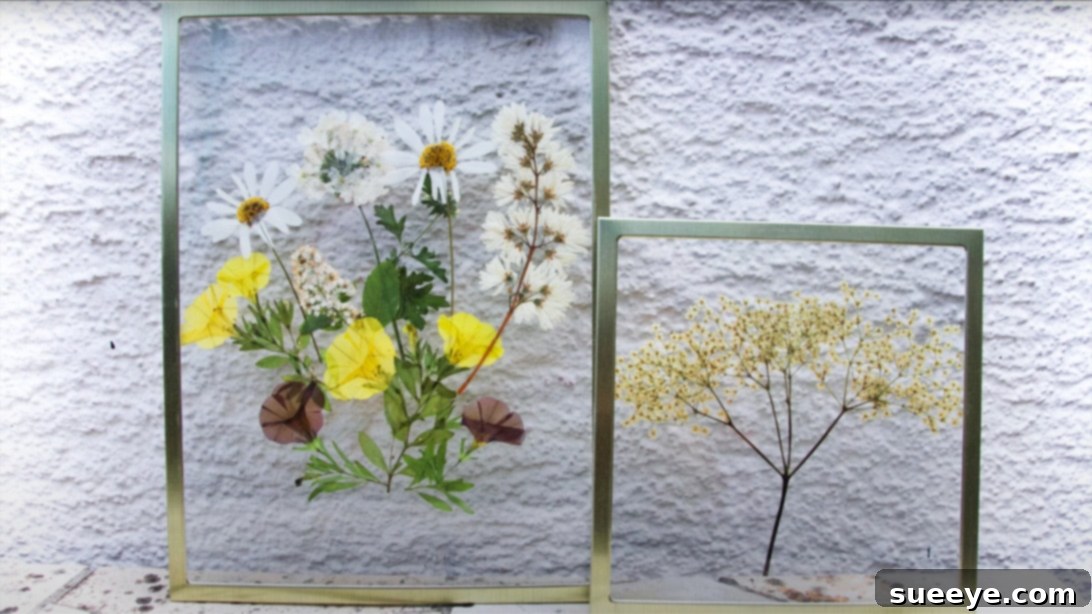
Timeless Botanical Art: DIY Framed Pressed Flowers for Exquisite Home Decor
In a world bustling with digital screens, there’s a unique serenity in connecting with nature. Even when a lush garden awaits outside, a desire often arises to bring a piece of that tranquility and beauty indoors. Flowers, in particular, hold a special place in our hearts – they are often imbued with memories, celebrating milestones, expressing love, or simply marking a beautiful moment in time. What if you could capture the ephemeral charm of these blossoms and transform them into lasting works of art? This time, consider the meditative and wonderfully rewarding project of creating your own framed pressed flowers. It’s a surprisingly straightforward process that yields breathtaking results, allowing you to immortalize your most cherished floral memories.
For a visual guide that walks you through the essentials, Tamuna Lortkipanidze offers a clear and concise tutorial on YouTube. While the steps may seem simple, the artistic potential is limitless. This guide will expand on that foundational knowledge, delving deeper into the nuances of flower pressing and framing to help you create truly spectacular pieces of botanical art for your home or as heartfelt gifts.
Why Embark on a Pressed Flower Project?
The appeal of pressed flowers goes far beyond mere decoration. It’s an intersection of art, memory, and mindfulness. Here’s why this craft resonates with so many:
- Preserving Precious Memories: From wedding bouquets and anniversary flowers to a simple bloom from a special garden, pressing flowers allows you to preserve tangible reminders of cherished moments. Each framed flower can tell a unique story.
- Unique Home Decor: Tired of mass-produced art? Framed pressed flowers offer an authentic, organic touch to any interior. They blend seamlessly with various decor styles, from rustic and bohemian to minimalist and contemporary, adding a sophisticated natural element.
- Mindful and Meditative Craft: The process of carefully selecting, pressing, and arranging flowers encourages patience, focus, and a deep appreciation for nature’s delicate beauty. It’s a wonderful way to de-stress and engage in a creative, screen-free activity.
- Sustainable and Eco-Friendly: By transforming natural elements into art, you’re engaging in a sustainable hobby that celebrates the beauty of the earth without contributing to waste.
- Personalized Gifting: A handcrafted framed pressed flower piece makes an incredibly thoughtful and personalized gift for birthdays, holidays, housewarmings, or just because.
A Glimpse into the History of Flower Pressing
The art of preserving botanical specimens is not new. It dates back centuries, with evidence suggesting ancient Egyptians pressed flowers for decorative and ceremonial purposes. The Japanese art of Oshibana, which involves creating intricate pictures from pressed flowers and leaves, has been practiced for over 600 years. However, flower pressing truly blossomed in popularity during the Victorian era. As botany became a fashionable pursuit, ladies would collect and press flowers to create elaborate albums, intricate cards, and framed art. These botanical collections served as both scientific records and beautiful mementos, intertwining art and nature in a delicate dance. Today, this timeless craft is experiencing a resurgence, with modern enthusiasts rediscovering its charm and therapeutic benefits.
Essential Materials for Your Pressed Flower Art
Before you begin, gather your tools. Having everything ready ensures a smooth and enjoyable crafting experience. You’ll need:
- Frames: Opt for floating frames with two panes of glass for a truly elegant display that showcases the delicate nature of pressed flowers. Various sizes and styles are available, so choose what best complements your decor.
- Fresh Flowers and Leaves: The stars of your project! We’ll discuss selection in more detail below.
- Absorbent Paper: White paper is ideal for pressing. Good options include blotting paper, plain printer paper, or even coffee filters. The key is absorbency to draw moisture out of the flowers. Avoid glossy papers.
- Heavy Books or Magazines: These act as your pressing mechanism. The heavier, the better! Old phone books, encyclopedias, or thick magazines work well.
- Binder Clips (Optional but Recommended): These can be used to add extra pressure to stacks of magazines or to secure floating frames.
- Utility Knife or Craft Knife: Essential for cleanly trimming stems and leaves. A cutting mat is also highly recommended to protect your work surface.
- Tweezers: Your most valuable tool for delicate handling. Pressed flowers are fragile, and tweezers allow for precise placement without damage.
The Art of Pressing Flowers: Step-by-Step
The secret to beautiful framed pressed flowers lies in the pressing process itself. Patience and attention to detail are key.
1. Selecting and Preparing Your Blooms
Choosing Your Flowers: Not all flowers press equally well. Opt for blossoms with relatively flat petals and low moisture content. Excellent choices include pansies, violas, small daisies, ferns, hydrangeas (individual florets), cosmos, and single-petal roses. Avoid very thick flowers like carnations or tulips, as they tend to mold or brown. Look for flowers that are fresh, fully open but not past their prime, and free of blemishes. For best color retention, pick flowers on a dry, sunny day after any morning dew has evaporated.
Initial Preparation: Gently remove any excess leaves or thick stems that might prevent the flower from pressing flat. For larger flowers, you might need to carefully separate individual petals or cut the flower in half lengthwise to achieve a flatter profile. Ensure your flowers are clean and dry before pressing.
2. Arranging for the Press
Take one of your heavy books or magazines and open it to a random page. Place a clean sheet of absorbent paper (your chosen white paper) on top of the page. This paper will draw out moisture from the flowers. Carefully place your selected flowers onto the white paper, arranging them so they lie as flat as possible. Think about the final composition – you can experiment with single blooms, clusters, or a mix of flowers and leaves. Ensure they are spaced apart and not overlapping, as this can lead to uneven pressing or mold.
For variety and visual interest, choose a range of colorful flowers. Vibrant hues can create a beautiful contrast against white or lighter blooms, adding depth and dynamic energy to your eventual arrangement. Remember, you are preserving the inherent beauty and memory of these flowers, so take your time to arrange them aesthetically.
3. Applying Pressure and Waiting
Once your flowers are arranged on the absorbent paper, place another sheet of white paper on top of them, ensuring they are fully covered. Gently press down on this top sheet to begin flattening the flowers. Close the magazine or book firmly. If using multiple books, repeat the process with other flowers, layering them within different magazines. Then, pile these magazines or books on top of each other. For extra pressure, you can place more heavy objects (like other books or bricks) on the very top of the stack. If using binder clips, you can clip the edges of the magazines to apply consistent pressure.
Now comes the hardest part: waiting. Leave the flowers undisturbed for at least **one to two weeks**. During this time, the pressure and absorbent paper will slowly draw all the moisture out of the flowers, preventing decay and preserving their form. For very thick flowers or humid environments, you might consider changing the absorbent paper after the first few days to further aid the drying process. This helps prevent mold and ensures better color retention.
4. Carefully Retrieving Your Pressed Flowers
After the waiting period (a minimum of one week is crucial, but two is often better), carefully open your magazines. The flowers should be papery-thin and dry. Using your tweezers, delicately remove the pressed flowers. They will be fragile, so handle them with extreme care. Place them gently onto three clean white sheets of paper for temporary storage and easier handling as you prepare your arrangement.
5. Preparing for Arrangement
Sometimes, pressed stems can be a bit thick or awkwardly shaped. On a protective cutting board or mat, use your utility knife or craft knife to carefully trim the stems of any pressed leaves or flowers as needed. This allows for cleaner lines and more flexible arrangement options. Now, you have your beautiful, flattened botanical elements ready for their grand display.
Crafting Your Floral Masterpiece: Arrangement and Framing
This is where your creativity truly shines! Designing the layout of your pressed flowers is an art form in itself.
1. Designing Your Layout
Before committing to the frame, practice your arrangement on a separate piece of white paper or cardstock that is the same size as your frame’s glass. Experiment with different compositions. Consider balance, focal points, and negative space. Do you want a symmetrical design, an asymmetrical flow, or a cluster of varied blooms? Play with color contrasts and textural differences between flowers and leaves. You can tell a story with your arrangement, perhaps by grouping flowers from a specific event or by creating a vibrant botanical collage. Tweezers are indispensable here for precise adjustments.
2. Preparing the Frame
Carefully remove the glass panes from your chosen frame. Clean both sides of each glass pane thoroughly with a glass cleaner and a lint-free cloth. Even a tiny speck of dust can be distracting once the frame is sealed. Set the cleaned glass panes aside in a safe, dust-free area.
3. Assembling Your Framed Art
Take one of the clean glass panes and place it on your work surface. This will be your base. Using your tweezers, meticulously transfer your beautifully arranged pressed flowers and leaves from your temporary paper layout directly onto this glass pane. The natural static can sometimes hold them in place, but for floating frames, you generally won’t need glue – the second pane of glass will secure them.
Once you are completely satisfied with your arrangement, carefully take the second clean glass pane and place it precisely on top of your arranged flowers. Ensure the flowers remain perfectly positioned as you lower the top glass. The two panes of glass, with your floral art sandwiched between, will now be placed back into the frame.
Gently insert the stacked glass panes into the frame, making sure they fit snugly and correctly. Secure the frame’s backing or clips as designed. If your frame is a floating style that uses binder clips to hold the panes together, carefully attach these clips to the edges of the frame to seal it, providing continuous pressure and stability to your artwork.
4. Repeating and Experimenting
Repeat this entire process for any remaining frames you have. This is truly the most exciting part, as each frame offers a new canvas for your imagination. Don’t be afraid to experiment with different flower combinations, symmetrical versus asymmetrical designs, or even creating abstract patterns. Each framed piece will be a unique expression of your creativity and a testament to nature’s enduring charm.
Tips for Success and Troubleshooting
To ensure your pressed flower journey is as rewarding as possible, keep these pointers in mind:
- Patience is a Virtue: Rushing the pressing process can lead to brittle or moldy flowers. Allow adequate drying time.
- Experiment with Variety: Try pressing different types of flowers and leaves to discover what works best and what aesthetic you prefer.
- Quality Paper Matters: Using truly absorbent paper will yield better results, preventing mold and improving color retention.
- Consistent Pressure: Ensure even and constant pressure during the pressing stage to get flat, well-preserved specimens.
- Protect from Sunlight: Once framed, display your pressed flower art away from direct sunlight, which can cause the colors to fade over time.
- Consider UV Protection: For extra longevity, especially with vibrant colors, you can lightly spray the finished arrangement with a UV-protective art sealant before adding the top glass pane (ensure it’s completely dry before sealing).
Troubleshooting Common Issues:
- Flowers turning brown or molding: This usually indicates too much moisture. Ensure flowers are dry before pressing, use absorbent paper, and consider changing the paper after a few days for very moist blooms.
- Loss of color: Some flowers naturally fade more than others. Picking them at their peak and pressing quickly can help. Displaying away from direct sunlight is crucial.
- Flowers sticking to paper: Use good quality, non-coated absorbent paper. Gently peel them with tweezers, working slowly.
- Flowers breaking during handling: This is common. Always use tweezers and handle them over a soft surface to minimize damage. Have extra pressed flowers on hand for replacements if needed.
Beyond the Frame: Other Uses for Pressed Flowers
While framing is a popular way to showcase pressed flowers, their versatility extends much further:
- Greeting Cards and Bookmarks: Adorn handmade cards or bookmarks for a personal touch.
- Resin Art: Embed pressed flowers in clear resin to create jewelry, coasters, or paperweights.
- Candle Decoration: Carefully apply pressed flowers to the exterior of candles for a natural, elegant look.
- Journals and Scrapbooks: Add a botanical element to your memory keeping.
- Table Decor: Use them as part of a tablescape under a glass surface or sprinkle them for a rustic charm.
Conclusion: Embrace the Beauty of Preserved Nature
Creating DIY framed pressed flowers is more than just a craft; it’s a journey into mindful creation, a celebration of nature’s fleeting beauty, and a way to infuse your living space with personal stories and timeless elegance. Each delicate petal and leaf you press becomes a whisper of a moment, a memory frozen in time, transformed into a piece of art that enriches your home. Whether you’re a seasoned crafter or a curious beginner, the satisfaction of turning a simple bloom into a lasting botanical masterpiece is truly unparalleled.
So, gather your materials, choose your favorite flowers, and embark on this delightful artistic adventure. Let your creativity bloom, and soon you’ll have exquisite, personalized floral art that brings the serene beauty of the garden right into your living room, captivating all who behold it.