
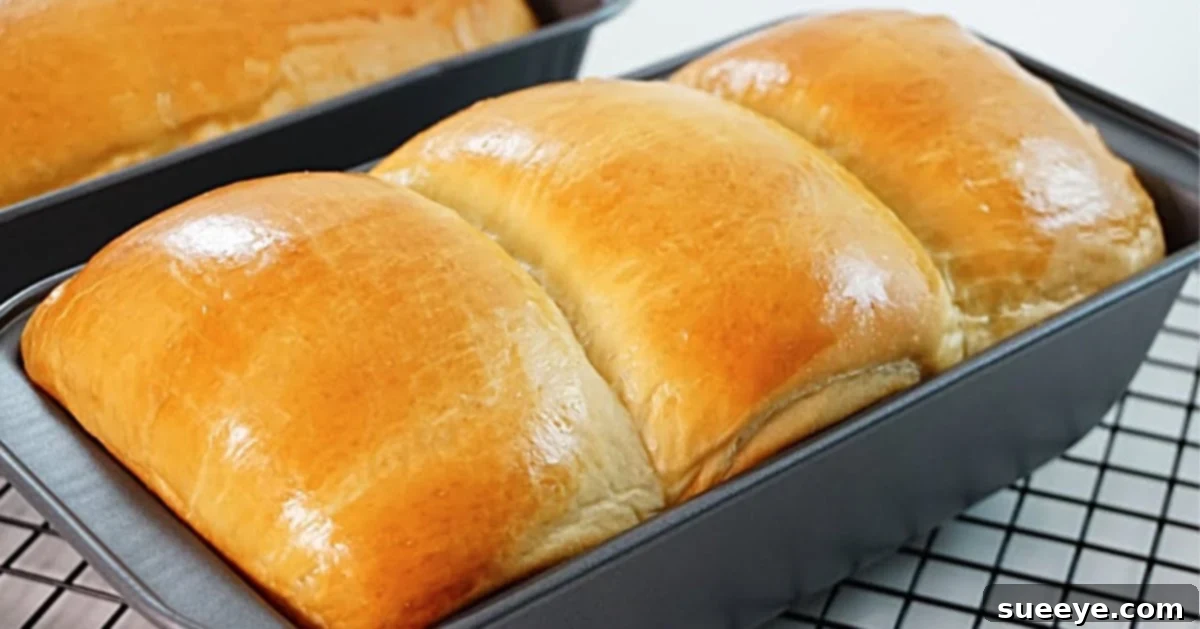
The Ultimate Guide to Baking Irresistibly Soft Homemade Milk Bread
There’s an undeniable magic in the aroma of freshly baked bread wafting through your home. It’s a scent that evokes comfort, warmth, and a touch of nostalgia. While many store-bought options exist, nothing quite compares to the pillowy texture and delicate flavor of homemade milk bread. Whether enjoyed on its own with a smear of butter, transformed into a gourmet sandwich, or served as a delightful accompaniment to a savory dinner, milk bread holds a special place in the hearts of bread lovers worldwide.
My journey to mastering this delightful bread began with a discovery on YouTube – an excellent tutorial by Savor Easy. The video showcased a recipe that looked incredibly straightforward and yielded a loaf so appealing, I knew instantly I had to try it. It reminded me of the wholesome, comforting bread my grandmother used to bake, a family favorite that always disappeared too quickly. Having always harbored a desire to bake my own bread, this clear and simple guide felt like the perfect opportunity to finally dive into the rewarding world of home baking. This comprehensive guide will walk you through creating your own perfect loaf of milk bread, ensuring a rewarding and delicious experience from start to finish.
Why Homemade Milk Bread is a Must-Try
Beyond the sheer satisfaction of creating something delicious from scratch, homemade milk bread offers distinct advantages. Firstly, you control every ingredient, ensuring a product free from preservatives, artificial flavors, and unnecessary additives. This makes it a healthier and more wholesome option for your family. Secondly, the freshness is unparalleled. Imagine slicing into a warm loaf, steam gently rising, and savoring that first bite – it’s an experience that store-bought bread simply cannot replicate.
What sets milk bread apart is its signature softness and subtly sweet flavor. The inclusion of milk in the dough not only enriches the taste but also contributes to an incredibly tender crumb, making it perfect for a wide range of uses. From classic toast to elegant dinner rolls, or even as a base for sweet treats, its versatility is truly remarkable. For beginner bakers, this recipe is particularly forgiving, making it an excellent entry point into the world of yeast-based baking. The process, while requiring patience, is broken down into manageable steps that build confidence with every successful rise.
Essential Ingredients for Your Milk Bread Loaf
Crafting the perfect milk bread starts with gathering high-quality ingredients. Each component plays a crucial role in achieving the desired texture, flavor, and rise. Here’s what you’ll need:
- 1 cup warm milk: Essential for activating the yeast. Ensure it’s warm (around 105-115°F or 40-46°C), not hot, to avoid killing the yeast.
- 1 tablespoon sugar (for yeast): Acts as food for the yeast, helping it to bloom and become active.
- 2 teaspoons dry active yeast: The leavening agent that makes your bread rise, giving it that wonderfully airy texture.
- 3 cups all-purpose flour (plus 1/3 to 1/2 cup for kneading): The foundation of your bread. The extra flour is vital for adjusting dough consistency during kneading.
- 1/4 cup sugar (for dough): Adds sweetness and contributes to the golden crust and tender crumb.
- 1 teaspoon salt: Balances the sweetness, enhances flavor, and controls yeast activity.
- 1 large egg: Adds richness, moisture, and helps create a soft, golden crust.
- 1/3 cup melted butter: Contributes to the luxurious texture and rich flavor of the milk bread.
- 2 tablespoons of oil (for your hands while kneading): Prevents the sticky dough from adhering to your hands, making kneading much easier.
- Egg wash (1 egg and 1 tablespoon of milk): Applied before baking, it gives the bread a beautiful golden-brown, glossy finish.
Step-by-Step Directions to Master Milk Bread
Making homemade milk bread is a journey of patience and precision, but the results are incredibly rewarding. Follow these detailed steps to create your own delicious loaves, supplementing with the visual guidance from the Savor Easy tutorial for an even clearer understanding.
1. Activating the Yeast: The Foundation of Your Loaf
Begin by preparing your yeast. In a small cup or bowl, combine the warm milk, 1 tablespoon of sugar, and the dry active yeast. Stir gently until the sugar dissolves and the yeast is fully submerged. Let this mixture sit undisturbed for about 10 minutes. During this time, the yeast will “bloom” – you’ll notice a foamy, frothy layer forming on the surface. This indicates that your yeast is active and ready to work its magic. If no foam appears, your yeast might be expired or the milk was too hot/cold, and you’ll need to start this step over.
2. Forming the Dough: Bringing Ingredients Together
While your yeast is blooming, in a large mixing bowl, whisk together the 3 cups of all-purpose flour, 1/4 cup of sugar, and 1 teaspoon of salt. Make a well in the center of the dry ingredients. Once your yeast mixture has bloomed, pour it into the well. Add the large egg and the 1/3 cup of melted butter. Using a spatula or wooden spoon, gradually mix the wet ingredients into the dry ingredients until a shaggy, cohesive dough begins to form. At this stage, it will likely be quite sticky, which is perfectly normal.
3. The Art of Kneading: Developing Gluten for Softness
Transfer the shaggy dough onto a lightly floured surface. This is where the real work begins, and it’s crucial for developing the gluten structure that gives milk bread its characteristic chew and softness. Knead the dough for at least 10-15 minutes. You can use the additional 1/3 to 1/2 cup of flour as needed, but try to use as little as possible to keep the dough soft. Alternatively, if the dough is too sticky, lightly oil your hands with the 2 tablespoons of oil to prevent sticking without adding too much extra flour. The goal is to achieve a smooth, elastic, and non-sticky dough. A good test is the “windowpane test”: gently stretch a small piece of dough; if you can stretch it thin enough to see light through it without tearing, your dough is perfectly kneaded.
4. First Proofing: Letting the Dough Rise
Lightly grease a clean large bowl with a little oil. Place the kneaded dough into the bowl, turning it once to coat all sides with oil. Cover the bowl tightly with plastic wrap or a clean kitchen towel. Place it in a warm, draft-free spot for 1 to 1.5 hours, or until the dough has doubled in size. A warm oven (turned off, with just the light on) or a sunny spot near a window works well. This first rise allows the yeast to ferment, creating air pockets and developing flavor.
5. Shaping Your Loaves: From Dough to Bread
Once the dough has doubled, gently punch it down to release the trapped air. Turn the dough out onto a lightly floured surface and divide it according to your desired loaf shape. The Savor Easy tutorial demonstrates two excellent ways to shape your milk bread:
- Single Long Loaf: This classic shape is ideal for slicing into sandwiches or toast. To achieve this, roll out the dough into a rectangle, then fold one-third of the dough towards the center, then the other third over it, like folding a letter. Seal the seams and gently roll it into a cylinder, placing it seam-side down into a greased loaf pan.
- Sectioned Loaf (Dinner Rolls/Sliders): For a more versatile option, divide the dough into smaller, equal-sized pieces (e.g., 6-8 pieces). Roll each piece into a smooth ball and arrange them in a greased loaf pan, leaving a small space between each ball. These are perfect for individual dinner rolls or mini slider buns.
6. Second Proofing: The Final Rise
After shaping, cover your loaf pan(s) loosely with plastic wrap or a kitchen towel. Allow the dough to proof for another 30-45 minutes in a warm, draft-free place, or until it has nearly doubled in size again. This second proofing is crucial for achieving that light, airy texture and ensures the bread will be soft and fluffy.
7. Baking to Golden Perfection
Preheat your oven to 375°F (190°C) about 15 minutes before the second proofing is complete. In a small bowl, whisk together the egg wash ingredients (1 egg and 1 tablespoon of milk) until well combined. Just before baking, gently brush the top of your risen dough with the egg wash. This will give your milk bread a beautiful golden, glossy crust. Bake for 25-30 minutes, or until the crust is deeply golden brown and the internal temperature reaches 190-200°F (88-93°C). If you tap the bottom of the loaf, it should sound hollow.
8. Cooling and Enjoying
Once baked, immediately remove the bread from the loaf pan and transfer it to a wire rack to cool completely. Allowing it to cool properly prevents the bottom from becoming soggy and helps set the crumb. While it’s tempting to cut into it right away, patience here will reward you with the best texture. Once cooled, slice and enjoy your magnificent homemade milk bread!
Serving Suggestions and Storage Tips
The versatility of homemade milk bread is one of its greatest assets. Serve it warm with a generous slather of butter or your favorite jam for a comforting breakfast. It makes exceptional sandwiches, elevating even the simplest fillings. Use it to create gourmet French toast, or serve it alongside hearty stews and soups to soak up every last drop of flavor. The sectioned loaves are perfect for mini-burgers, pulled pork sliders, or as delightful dinner rolls for any meal.
To maintain its freshness, store your milk bread in an airtight container or a bread bag at room temperature for up to 3-4 days. For longer storage, slices or whole loaves can be frozen for up to 2-3 months. Simply thaw at room temperature or gently warm in the oven for that “freshly baked” experience again.
Tips for a Flawless Loaf Every Time
- Accurate Measurements: Baking is a science. Use kitchen scales for flour if possible, or ensure you spoon flour into your measuring cup and level it off, rather than scooping directly.
- Yeast Vitality: Always check your yeast. If it doesn’t foam after 10 minutes, get fresh yeast.
- Temperature Control: Ensure your milk for yeast activation is warm, not hot. Too hot will kill the yeast; too cold will inhibit it.
- Knead Thoroughly: Don’t rush the kneading process. Proper gluten development is key to the bread’s texture.
- Patience with Proofing: Allow the dough to rise fully. Under-proofed bread will be dense, while over-proofed bread can collapse.
- Oven Calibration: Ovens can vary. Consider using an oven thermometer to ensure your oven is at the correct temperature.
- Don’t Overbake: Overbaking can dry out the bread. Keep an eye on the color and use a thermometer if unsure.

Experience the Joy of Baking Your Own Milk Bread
Baking homemade milk bread is more than just following a recipe; it’s an experience that fills your home with comforting aromas and your palate with unparalleled flavor. This guide, combined with the visual aid from the Savor Easy tutorial, provides all the tools you need to create a truly exceptional loaf. The satisfaction of pulling a golden, fragrant, and incredibly soft milk bread loaf from your oven is immense, making every effort worthwhile. Embrace the process, savor the creation, and delight in the reactions of your loved ones as they enjoy a slice of your homemade masterpiece. Happy baking!